Table of Contents
Advertisement
Advertisement
Table of Contents

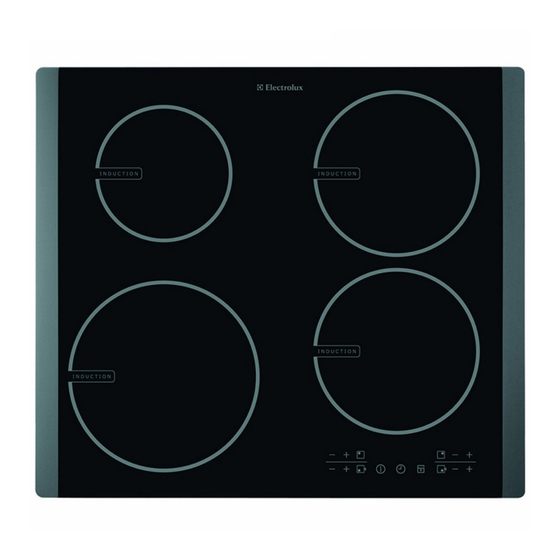
Summary of Contents for Electrolux EHET66CS
- Page 1 Ceramic glass hob EHET66CS, EHET96CS...
-
Page 2: Table Of Contents
2 electrolux Electrolux. Thinking of you. Share more of our thinking at www.electrolux.com Contents Safety instructions ........2 Technical data ........13 Description of the Appliance ....3 Disposal ..........13 Operating the appliance ......6 Installation Instructions ......13 Tips on cooking and frying .... -
Page 3: Description Of The Appliance
3 Warning! If the surface is cracked, • Cookware made of cast iron, cast switch off the appliance to avoid aluminium or with damaged bottoms can possibility of electric shock. scratch the glass ceramic if pushed across the surface. - Page 4 4 electrolux EHET 96CS 265 mm Single cooking zone 1200W Control panel Multi-purpose cooking zone Triple cooking zone 2300/1600/800W 2200/1400W Single cooking zone 1800W Control panel layout EHET 66CS On/Off with power indicator Cooking zone indicators Timer function Lock with pilot light...
- Page 5 5 EHET 96CS On/Off with power indicator Timer display Lock with pilot light Multipurpose cooking zone A triple ring cooking zone Timer Heat setting selection Zone selection indicator Display Stop+Go function Cooking zone indicators Timer function Touch Control sensor fields The appliance is operated using Touch Control sensor fields.
-
Page 6: Operating The Appliance
6 electrolux Display Description Residual heat Cooking zone is still hot Child safety device Lock/child safety device is activated Automatic switch off Switch off is active Residual heat indicator Warning! Risk of burns from residual heat. After being switched off, the cooking zones need some time to cool down. - Page 7 7 Multi-purpose zone Sensor field Pilot light To switch off outside ring goes out Touch for 1-2 seconds Switching the STOP+GO function on and off The STOP+GO function simultaneously switches all cooking zones that are switched on to the keep warm setting and then back to the heat setting that was previously set.
- Page 8 8 electrolux Heat setting Length of the automatic warm up [min:sec] 10:10 2:00 3:30 4:30 Using the child safety device The child safety device prevents unintentional use of the appliance. Switching on the child safety device Step Control panel Display/Signal Switch on appliance.
- Page 9 9 Function Condition Outcome after the time has elapsed Countdown timer cooking zones not in use acoustic signal and flashes Selecting a cooking zone Step Control panel Display Touch once Pilot light of the first cooking zone flashes Touch...
-
Page 10: Tips On Cooking And Frying
10 electrolux Displaying the time remaining for a cooking zone Step Control panel Indicator Pilot light of the cooking zone selected Touch for the cooking zone flashes faster. The time remaining is displayed After a few seconds the pilot light flashes more slowly. -
Page 11: Cleaning And Care
11 Bottom of pans and cooking zones should be the same size. Cleaning and Care Warning! Watch out! Risk of burns from residual heat. Warning! Sharp objects and abrasive cleaning materials will damage the appliance. Clean with water and washing up liquid. -
Page 12: What To Do If
12 electrolux What to do if ... Problem Possible cause Remedy The cooking zones will not More than 10 seconds have Switch the appliance on again. switch on or are not func- passed since the appliance was tioning. switched on... -
Page 13: Technical Data
13 Considerable danger to the user If the appliance has been wrongly may result from improper repairs. operated, the visit from the customer service technician or dealer may not take place free of charge, even during the warranty period. - Page 14 14 electrolux Important! Installation may only be carried AC240V~. Means for disconnection must be out by a qualified electrician. incorporated in the fixed wiring in accord- The minimum distances to other appliances ance with local wiring rules.The hob is to be and units are to be observed.
-
Page 15: Assembly
15 The cut-out section in the worktop into a shorter cut-out section with is illustrated in the drawing with the the dimensions 560 x 485 / 880 x 485 dimensions 560 x 490 / 880 x 490 mm. The appliance can also be built... -
Page 16: Warranty
Appliance for conditions of product warranties for commercial purposes, in Australia the Electrolux branded appliances. It is an period of 3 months and in New Zea- important document. Please keep it with land the period of 3 months, (if the... - Page 17 Electrolux is not liable in the of Electrolux (if any) arising out of or in following situations (which are not ex- relation to the Appliance or any services...
-
Page 18: Service
Electrolux and its Authorised Service Centres service booklet and the warranty terms and to exchange information in relation to you to conditions. enable Electrolux to meet its obligations un- der this warranty. FOR SERVICE SERVICE AUSTRALIA FOR SPARE PARTS... - Page 19 19...
- Page 20 892930001-B-032008-03...


Need help?
Do you have a question about the EHET66CS and is the answer not in the manual?
Questions and answers