Advertisement
30917
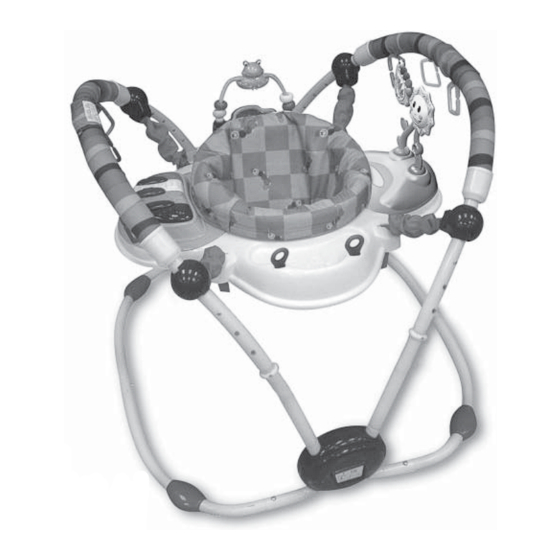
musical motion activity jumper
saltador musical de actividades
sauteur mobile musical
•
Congratulations on your purchase of a new Baby Einstein
instructions before assembly and use of the activity jumper.
•
¡Felicitaciones por haber comprado un nuevo producto de Baby Einstein
las instrucciones antes de armar este saltador de actividades.
•
Félicitations pour votre achat d'un nouveau produit Baby Einstein
instructions dans leur intégralité avant montage et utilisation de le sauteur fi xe.
ENGLISH • ESPAÑOL • FRANÇAIS
IMPORTANT! KEEP FOR FUTURE REFERENCE.
¡IMPORTANTE!
CONSÉRVELO PARA REFERENCIA FUTURA.
IMPORTANT !
À CONSERVER POUR CONSULTATION.
™
product! Please read all
™
! Veuillez lire les
www.kidsii.com
™
! Lea todas
Advertisement
Table of Contents

Subscribe to Our Youtube Channel
Related Manuals for Baby Einstein 30917


Summary of Contents for Baby Einstein 30917
- Page 1 ™ product! Please read all instructions before assembly and use of the activity jumper. ™ • ¡Felicitaciones por haber comprado un nuevo producto de Baby Einstein ! Lea todas las instrucciones antes de armar este saltador de actividades. ™ •...
- Page 2 WARNING • ADVERTENCIA • AVERTISSEMENT To Prevent Serious Injury or Death: • Use the activity jumper ONLY if the child meets ALL of the following conditions: ...is at least four (4) months of age ...can sit up by him or herself ...is less than 30”...
- Page 3 Pour éviter les risques d’accident grave ou de décès : • Utiliser le sauteur fi xe UNIQUEMENT si l’enfant remplit TOUTES les conditions suivantes : ... est âgé de moins de quatre (4) mois ... peut s’asseoir seul ... mesure moins de 76,2 cm ...
-
Page 4: Parts List
Assembly Instructions • Instrucciones para armarlo Instructions d’assemblage Drawing and Parts List • Dibujo y lista de partes • Dessin et liste de pièces – 4 –... -
Page 5: Base Frame Assembly
Part Qty. Parte Cant. Description Descripción Description Pièce Qté Base frame tube with spring- Tubo del armazón de la base con el Tube cadre de base avec bouton loaded button botón accionado por resorte à ressort Base frame tube with two Tubo del armazón de la base con dos Tube cadre de base avec deux bouton spring-loaded buttons... -
Page 6: Upper Frame Assembly
Upper Frame Assembly • Armado del armazón superior Montage du cadre supérieur × 2 × 2 Press button Presione botón Click • Clic • Clic Appuyer bouton × 2 Click • Clic • Clic Correct Incorrect Click • Clic • Clic Correcto Incorrecto Correct... - Page 7 Módulo del Piano requiere (3) baterías tamaño C/LR14 (1.5 V) (no incluidas). Use baterías alcalinas para un mejor funcionamiento. PRECAUCIÓN: Siga los lineamientos para las baterías en esta sección. De lo contrario, la vida de la batería podría reducirse o la batería podría tener una fuga o romperse. •...
-
Page 8: Toy Module Installation
Toy Module Installation • Instalación de Juguetea Módulos Installation des Modules de Jouet Separate these parts: Separe estas piezas: Séparer ces pièces: × 4 Click Clic Clic Press Presione Appuyer J/K/L × 2 Click Click Clic Clic Clic Clic Toy tray Bandeja para juguetes Plateau pour jouets J/K/L... -
Page 9: Play Surface Installation
Click Click Clic Clic Clic Clic Play Surface Installation • Instalación de superfi cie de juego Installation de surface de jeu × 4 Align the tray with a connector hub. For easier assembly, set all four knobs to the high position. Alinee la bandeja con un conjunto de centro conector. -
Page 10: Seat Assembly
Seat Assembly • Ensamblaje del asiento • Ensemble du siège × 6 Align the center of the safety label to the arrow P × 6 embossed on the seat carrier. Click • Clic • Clic Alinee el centro de la etiqueta de seguridad a la fl echa grabada en el soporte del asiento. - Page 11 Fun link Installation • Instalación de los Eslabones Divertidos Installation des Anneaux de Jeu R × 4 Operating Instructions • Instrucciones de funcionamiento • Mode d’emploi Guidelines for Activity Jumper Use Lineamientos para el uso del saltador de actividades Notice d’utilisation du sauteur fi xe •...
-
Page 12: Adjusting The Seat Height
Adjusting the Seat Height • Ajuste de la altura del asiento Réglage de la hauteur du siège • The goal of adjusting the seat height is to ensure the child is supported by both the seat and their legs. In this way, they can have assistance while learning how to transition from sitting to walking. - Page 13 Power/Mode Switch Volume Control Power/Mode Switch (Interruptor de Encendido/Modo) Control de volumen Commutateur Power/Mode (Alimentation/Mode) Contrôle du volume Low • Bajo • Bas Piano Mode Melody Mode Apagado Modo del piano Modo melodía High • Alto • Haut ARRÊT Mode piano Mode mélodie The Power/Mode Switch selects the operating mode for the piano.
- Page 14 ™ • Las versiones completas de estas y otras melodías están disponibles Play Time Music Box en los CD musicales para niños de la serie Baby Einstein ™ Music Box Orchestra • Ces mélodies et d’autres sont disponibles en version intégrale dans Baby Noah ™...
- Page 15 Fabric Seat – First, you must remove the seat carrier... To wash the fabric seat... Machine wash the fabric seat in cold water. Use a gentle wash cycle with no bleach. Tumble dry, using low heat. To reinstall the fabric seat and seat carrier, reverse the steps above or refer to the Seat Assembly Instructions, page 10. Plastic Parts –...
- Page 16 Servicing Replaceable Parts • Servicio para las partes reemplazables Entretien des pièces remplaçables Toy Modules – To replace either the piano module, bead chaser module, or stalk toy module... Remove the seat carrier from the play surface. Reach under the play surface to access the module’s two locking keys. Turn both locking keys 1/4 turn counter-clockwise (when viewed from below) so that they click into place.
- Page 17 Storage • Almacenamiento • Rangement × 4 × 2 Pull one end of the arch frame tube upward while pressing its release button on the hub. Jale un extremo del tubo del armazón del arco hacia arriba mientras mantiene presionado el botón de liberación en el centro. Tirer l’une des extrémités du tube du cadre de l’arche vers le haut tout en appuyant sur son bouton de déverrouillage sur le moyeu.
- Page 18 FCC Statement • Declaración de la FCC • Déclaration FCC This device complies with Part 15 of the FCC rules. Operation is subject to the following two conditions: this device may not cause harmful interference, and this device must accept any interference received, including interference that may cause undesired operation. WARNING: Changes or modifi...
- Page 19 Canada ICES-003 Statement • Declaración ICES-003 de Canadá Déclaration NMB-003 Canada This Class B digital apparatus complies with Industry Canada Standard ICES-003. Operation is subject to the following two conditions: this device may not cause harmful interference, and this device must accept any interference received, including interference that may cause undesired operation. Este dispositivos digitales de Clase B cumple con Norma ICES-003 de la Industria de Canadá.
- Page 20 © The Baby Einstein Company, LLC. All Rights Reserved. Baby Einstein, Baby Neptune, Baby Noah, and the Boy’s Head Logo are trademarks of The Baby Einstein Company, LLC.
Need help?
Do you have a question about the 30917 and is the answer not in the manual?
Questions and answers