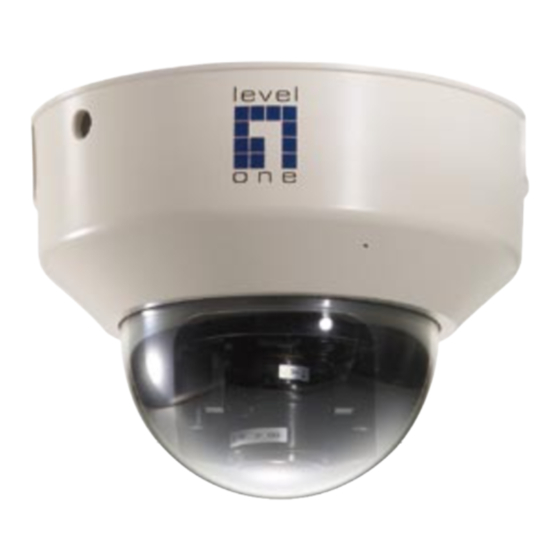
LevelOne FCS-3021 User Manual
Poe ip dome camera
Hide thumbs
Also See for FCS-3021:
- User manual (112 pages) ,
- Specifications (3 pages) ,
- Brochure (86 pages)
Table of Contents
Advertisement
Advertisement
Table of Contents

Related Manuals for LevelOne FCS-3021


Summary of Contents for LevelOne FCS-3021
- Page 1 LevelOne FCS-3021 PoE IP Dome Camera User Manual Ver 1.2.0 – 0809...
- Page 2 Before You Use This Product The use of surveillance devices may be prohibited by law in your country. The Network Camera is not only a high-performance web-ready camera but also can be part of a flexible surveillance system. It is the user’s responsibility to ensure that the operation of such devices is legal before installing this unit for its intended use.
-
Page 3: Table Of Contents
Table of Contents Package Content..................5 Installation....................6 Hardware installation................6 Software installation................7 How to Use Installation Wizard ............8 Using Installation Wizard..............10 Initial Access to the Network Camera ............29 Check Network Settings..............29 Add Password to prevent Unauthorized Access........29 How to Use ..................30 Authentication ................30 Installing plug-in .................31... - Page 4 Audio settings................54 Image Settings ................55 Privacy Mask ................56 Motion detection .................57 Application ..................59 Event..................60 Server..................61 Media ..................63 Recording..................65 System log..................67 Viewing system parameters..............68 Maintenance..................69 Appendix ....................70 A. Troubleshooting ................70 Status LED ..................70 Reset and restore ................70 B. URL commands of the Network Camera ..........93 Overview ..................93 Style convention................93 General CGI URL syntax and parameters..........94...
-
Page 5: Package Content
Package Content FCS-3021 Alignment Sticker Screw Kit and I/O Connector CD Manual/Utility Quick Installation Guide... -
Page 6: Installation
UTP Category 5 and not exceed 100 meters in length. Since FCS-3021 is a PoE IP camera, it could work without attaching to power outlet as long as it connects to PoE switch. Connect the power adapter jack to the Network Camera before plugging in to the power socket. -
Page 7: Software Installation
4: Ground Ext./Int. Switch “Internal” or “External” to set up the source of audio input Software installation At the end of the hardware installation, users can use Installation Wizard program included in the product CDROM to find the location of the Network Camera. There may be many Network Cameras in the local network. -
Page 8: How To Use Installation Wizard
How to Use Installation Wizard Installation The following are steps for the software installation. STEP 1: Put the Installation disk into the CD-ROM drive, and the installation should start automatically. If the installation does not start, click on “Start” on the lower left corner of your screen, open “My Computer”... - Page 9 STEP 3: Select the installation directory for this application software and click on “Install” button. You can also change the installation directory by clicking on “Browse…” button. After the proper directory chose, please click on the “Install” button to continue. Destination Location for Installation STEP 4: After clicking “Install”...
-
Page 10: Using Installation Wizard
Using Installation Wizard User Interface Once you run the Installation Wizard, after a short searching time, you will see the user interface as below. “Manual Setup” button, a “Refresh Devices” button and an arrow button on the left panel of your user interface. When you click on the arrow button, you will see more advanced functional buttons: “Firmware Upgrade”, “Restore Default”... - Page 11 User interface of Installation Wizard after clicking on the arrow button...
- Page 12 Action buttons Refresh devices Clicking on the “Refresh Devices” button will refresh the device list and search all devices on the LAN again. Refreshing the device list will take several seconds. If you want to link to your device, double-clicking it on your device list will lead you to the browser for operating your device.
- Page 13 Function buttons Function buttons Click on this button to modify the setting of the selected devices. For more detail, please refer to 0 Manual Setup. Click on this button to upgrade the firmware of the selected devices. For more detail, please refer to 0 Upgrade Click on this button to restore the selected device to factory default.
- Page 14 Manual Setup When you select one device in the selection list, the “Manual Setup” button will be enabled. Click on it to modify the settings of the selected device. After clicked on the “Manual Setup” button, Installation Wizard would try to connect to the selected device.
- Page 15 setting page as below. System setting page Click on this button to cancel the setup progress. Click on this button to keep the present setting and go to the next page. Change Host Name The “Hostname” is used for the homepage title of main page and is displayed as the title in the video window of the main page.
- Page 16 Adjust date and time Date/Time setup There are three ways to adjust system date and time: "Synchronize with computer time": The easiest way is to make device synchronized with your computer time. “Set date and time manually”: Set the date and time manually by entering new values.
- Page 17 Network Setting The Installation Wizard can help you to setup the network connection with LAN or PPPoE. After you clicked on the “Next” button on the System page, the Installation Wizard would lead you to the PPPoE setting page. If you want to connect your server to Internet via PPPoE, please click on “Yes”...
- Page 18 “PPPoE password” provided by your ISP, and then the server will be set to PPPoE mode rather than LAN mode when the setup is completed. If you don’t know the account information, please contact your ISP. After inputting the account information, please click on the “Next”...
- Page 19 LAN Setting If you click on “No” in the “Network Type” dialog window, you will be led to the Network setting page. In this page, you can change the server’s IP address, subnet mask, default gateway, primary DNS server, secondary DNS and DHCP server. Please refer to the below page.
- Page 20 Mobile Access After finished the DDNS setting and click on the Next button. If your device supports mobile viewer and you want to access the device by mobile phone, you can enable the “Mobile Access” by clicking on the Yes button. The Installation Wizard will do some setting for mobile viewing toward the device: 1.
- Page 21 Wireless Setting Basic Settings “SSID” (Service Set Identifier), it is a name which identified a wireless network. Access Points and wireless clients attempting to connect to a specific WLAN (Wireless Local Area Network) must use the same SSID. The default setting is default.
- Page 22 Data Encryption “Encrypt” You can choose the encryption type you want in the pull-down menu, there are three items: None, WEP and WPA-PSK. None If your wireless environment doesn’t need encryption, please choose “None”. If your encryption is WEP, please choose the “WEP” in the Encrypt pull-down menu, and you have to enter the following information.
- Page 23 “Key format”: Hexadecimal or ASCII. “HEX” digits consist of the numbers 0~9 and the letters A-F. “ASCII” is a code for representing English letters as numbers from 0-127 except “, <, > and space characters that are reserved. “Key”: Enter a key in either hexadecimal or ASCII format. When selecting different key length, acceptable input length is listed as following: 64 bits key length: 10 Hex digits or 5 characters.
- Page 24 Apply to selected device After configuring all the settings, the apply page will show up. Click on “Apply” button to apply the changes to the selected device or click on “Back” button to go back to the previous page and modify the setting again. Apply page When you click on the “Apply”, it will start to update your settings to server.
- Page 25 Upgrade When you select one device or multiple devices (of the same model), the “Firmware Upgrade” button will be enabled. Click on it to upgrade the firmware of the selected device(s). After click on the “Firmware Upgrade” button, Installation Wizard will try to connect the selected device(s) and lead you to the firmware upgrade page.
- Page 26 Device Information After connected to the selected device(s), it would display as below. If you select more than one device, then the device information will show all the selected devices. You can switch to the server info by click on the tab control. Device information Multiple devices information...
- Page 27 Firmware Information The selected firmware information will show the information about the file that you selected. Firmware version: The version number of the selected firmware. Select Firmware You can use the “Select firmware” button to browse the file that you want upgrade onto the selected device(s).
- Page 28 Firmware Information Warning message for unmatched firmware Start Upgrade Clicking on the “Start Upgrade” button to upgrade the firmware of the selected device(s), and it will be a pop-up dialog window to show the progress of the upgrading process. Usually, it will take about 5 to 10 minutes to finish the firmware upgrading.
-
Page 29: Initial Access To The Network Camera
Update progress After the upgrade process had been done, you could see the dialog window as below. Please click on the button “OK” to finish it. Upgrade Done Initial Access to the Network Camera Check Network Settings The Network Camera can be connected either before or immediately after software installation onto the Local Area Network. -
Page 30: How To Use
password. The Administrator should immediately implement a new password as a matter of prudent security practice. Once the Administrator’s password is saved, the Network Camera will ask for the user’s name and password before each access. The Administrator can set up a maximum of twenty (20) user accounts. -
Page 31: Installing Plug-In
Installing plug-in For the initial access to the Network Camera in Windows, the web browser may prompt for permission to install a new plug-in for the Network Camera on the Internet Explorer. Permission request depends on the Internet security settings of the user’s PC or notebook. If the highest security level is set, the computer may prohibit any installation and execution attempt. -
Page 32: Primary User's Capability
Primary user’s capability Main Screen with Camera View The main page layout has two parts: Configuration functions: The camera can be configured using these user interfaces. Camera View: What the camera sees. Click on the configuration link to the left of the image window to enter the configuration page. Here is the layout in IE when it is MPEG-4 streaming. - Page 33 The function in JPEG will be a little different when it is JPEG streaming. Only digital zoom and record button are supported. Here is the layout in Firefox when it is MPEG-4 streaming. It uses QuickTime to streaming.
-
Page 34: Digital Zoom
Here is the layout in Firefox when it is JPEG streaming. Digital Zoom Click on the magnifier icon under the camera view then the digital zoom control panel will be shown. Uncheck “Disable digital zoom” and use the slider control to change the zoom factors. -
Page 35: Mp4 Recording
MP4 Recording Click on the red circle button on the plugin to start MP4 recording. You can set the related options in client setting page. Snapshot Click on “Snapshot”, web browser will pop up a new window to show the snapshot. Users can point at the snapshot and click the right button of mouse to save it. -
Page 36: Client Settings
Client settings There are four settings for the client side in IE. 1. The first one is “Stream Options” for users to determine which stream to be streaming. This product supports dual-stream. Therefore, there are two streams to choose. 2. The second one is “MPEG-4 Media Options” for users to determine which media to be streaming under MPEG-4 mode. -
Page 37: Digital Output
protocol. The selected protocol will be recorded in the user's PC and will be used for the next connection. If the network environment is changed, or the user wants to let the web browser to detect again, manually select the UDP protocol, save, and return HOME to re-connect. The fourth one is “Save Options”. -
Page 38: Administrator's Capability
Administrator’s capability Fine-tuning for Best Performance Best performance generally equates to the fastest image refresh rate with the best video quality, and at the lowest network bandwidth as possible. The three factors, “Maximum frame rate”, “Constant bit rate”, and “Fixed quality” for MPEG-4 mode and “Maximum frame rate” and “Fixed quality”... - Page 39 transmission rate of greater than 20 image frames per second. If the broadband network is over 1 Mbps, set the “Constant bit rate” to 1000Kbps or 1200Kbps, or set “Fixed quality” at the highest quality. The maximum frame rate is 30. If your network bandwidth is more than 512Kbps, you can adjust the bit rate according to your bandwidth and set the maximum frame rate to 30 fps.
-
Page 40: Opening Accounts For New Use
Opening accounts for new use Protect Network Camera by passwords The Network Camera is shipped without any password by default. That means everyone can access the Network Camera including the configuration as long as the IP address is known. It is necessary to assign a password if the Network Camera is intended not to be accessed by others. -
Page 41: Build A Security Application
Check the server name set in Step 10 and select the media name set in Step 11. 13. Click on save to validate. Software revision upgrade Customers can obtain the up-to-date software from the web site of LevelOne. An easy-to-use Upgrade Wizard is provided to upgrade the Network Camera with just a few clicks. The upgrade... - Page 42 function is opened to the Administrator only. To upgrade the system, follow the procedures below. 1. Download the firmware file named “xxx.pkg” from the appropriate product folder. 2. Run the Installation Wizard and proceed following the prompts. Refer to the instructions of the Installation Wizard on CD-ROM for details.
-
Page 43: Definitions In Configuration
Definitions in Configuration Only the Administrator can access system configuration. Each category in the left column will be explained in the following pages. The bold texts are the specific phrases on the Option pages. The Administrator may type the URL below the figure to directly enter the frame page of configuration. If the Administrator also wants to set certain options through the URL, read the reference appendix for details. -
Page 44: System Parameters
System parameters "Host name" The text displays the title at the top of the main page. “Turn off the LED indicator” Check this option to shut off the LED on the rear. It can prevent the camera’s operation being noticed. "Time zone"... -
Page 45: Security Settings
Security settings “Root password” Change the Administrator’s password by typing in the new password identically in both text boxes. The typed entries will be displayed as asterisks for security purposes. After pressing , the web browser will ask the Administrator for the new password for access. - Page 46 <url> http://<Network Camera>/setup/security.html <Network Camera> is the domain name or original IP address of the Network Camera.
-
Page 47: Network Settings
Network settings Any changes made on the Network type section will restart the system in order to validate the changes. Make sure every field is entered correctly before clicking on Network type “LAN” & “PPPoE” The default type is LAN. Select PPPoE if using ADSL "Get IP address automatically"... -
Page 48: Http
HTTP “Authentication” It supports basic and digest modes. “HTTP port” This can be other than the default Port 80. Once the port is changed, the users must be notified the change for the connection to be successful. For instance, when the Administrator changes the HTTP port of the Network Camera whose IP address is 192.168.0.100 from 80 to 8888, the users must type in the web browser “http://192.168.0.100:8888”... - Page 49 “Always multicast” Select it to enable multicast always. “Multicast group address” It is used by sources and the receivers to send and receive content. “Multicast video port” The video channel port for multicast. It must be an even number. “Multicast RTCP video port” The video channel port for multicast RTCP. It must be the port number of multicast video port plus 1.
- Page 50 <url> http://<Network Camera>/setup/network.html <Network Camera> is the domain name or original IP address of the Network Camera.
-
Page 51: Ddns
DDNS “Enable DDNS” This option turns on the DDNS function. “Provider” The provider list contains seven hosts that provide DDNS services. Please connect to the service provider’s website to make sure the service charges. “Host Name” If the User wants to use DDNS service, this field must be filled. Please input the hostname that is registered in the DDNS server. -
Page 52: Access List
Access List The access list is to control the access permission of clients by checking the client IP address. There are two lists for permission control: Allow List and Deny List. Only those clients whose IP address is in the Allow List and not in the Deny List can connect to the Video Server or Network Camera for receiving the audio/video streaming. -
Page 53: Audio And Video
Audio and Video This product supports dual-stream. It provides two setting for video streams, but only one setting for audio. Video Settings “Video title” The text string can be displayed on video “Color” Select either for color or monochrome video display. “Power line frequency”... -
Page 54: Audio Settings
In JPEG mode, user can set “Maximum frame rate” and “Video quality” to adjust the video performance. Audio settings “Mute” Turn off audio. “Internal microphone input gain” Modify the gain of the internal audio input. “External microphone input” There are two gain options, 0db and 20db. “Audio type”... -
Page 55: Image Settings
Image Settings Click on this button to pop up another window to tune “Brightness”, “Contrast”, “Hue” and “Saturation” for video compensation. Each field has eleven levels ranging from -5 to +5. In “Brightness” and “Contrast” fields the value 0 indicates auto tuning. The user may press to fine-tune the image. -
Page 56: Privacy Mask
Privacy Mask Click on the button to pop up another window to set privacy mask window. All users can not view the block under privacy mask window. “Enable privacy mask” Check this option to turn on privacy mask. Click on this button to add a new window. At most five windows can exist simultaneously. Use the mouse to click, hold, and drag the window frame to resize or the title bar to move. -
Page 57: Motion Detection
Motion detection “Enable motion detection” Check this option to turn on motion detection. Click on this button to add a new window. At most three windows can exist simultaneously. Use the mouse to click, hold, and drag the window frame to resize or the title bar to move. Clicking on the ‘x’... - Page 58 sensitivity and small percentage will allow easier motion detection. The following figure shows the screen when is clicked. <url> http://<Network Camera>/setup/motion.htm <Network Camera> is the domain name or original IP address of the Network Camera.
-
Page 59: Application
Application There are three sections in application page. They are event, server and media. Click to pop a window to add a new item of event, server or media. Click to delete the selected item from event, server or media. Click on the item name to pop a window to edit it. There can be at most three events. -
Page 60: Event
<Network Camera> is the domain name or original IP address of the Network Camera. Event “Event name” The unique name for event “Enable this event” Check it to enable this event. “Priority” The event with higher priority will be executed first. “Delay second(s) before detecting next event”... -
Page 61: Server
Server “Server name” The unique name for server There are four kinds of servers supported. They are email server, FTP server, HTTP server and network storage. Here is setting for email server. “Sender email address” The email address of the sender “Recipient email address”... - Page 62 Here is setting for FTP server. “Server address” The domain name or IP address of the external FTP server. “Server port” This can be other than the default port 21. The user can change this value from 1025 to 65535. “User name”...
-
Page 63: Media
Media “Media name” The unique name for media There are three kinds of media. They are snapshot, video clip and system log. Here is setting for snapshot. “Source” The source of stream, stream1 or stream2. “Send pre-event images” The number of pre-event images “Send post-event images”... - Page 64 “File name prefix” The prefix name will be added on the file name of the video clip.
-
Page 65: Recording
Recording The Network camera supports recording on network storage. The operation of editing recording item is the same as the one in application page. User can know the recording name, status, weekly and time schedule, stream source and destination of recording. There can be at most two recording entries. - Page 66 “File Name Prefix” The prefix name will be added on the file name of the recording.
-
Page 67: System Log
System log The Network camera support log the system messages on remote server. The protocol is compliant to RFC 3164. If you have external Linux server with syslogd service, use “-r” option to turn on the facility for receiving log from remote machine. Or you can use some software on Windows which is compliant to RFC 3164. -
Page 68: Viewing System Parameters
Viewing system parameters Click on this link on the configuration page to view the entire system’s parameter set. <url> http://<Network Camera>/setup/parafile.htm <Network Camera> is the domain name or original IP address of the Network Camera. -
Page 69: Maintenance
Maintenance Five actions can be selected. “Reboot system” Click the reboot button to restart system. “Restore” Click it to restore all setting to factory default except setting in “Network type” in network page. “Factory default” Click on Factory default button on the configuration page to restore the factory default settings. -
Page 70: Appendix
Appendix A. Troubleshooting Status LED The following table lists the LED patterns in general. Condition LED color Loading system after power on Blink green and orange (twice) During booting procedure Non light Detecting and setting network Steady orange till IP address is confirmed After network is setup (system up) Blink orange and red During the upgrade firmware process... -
Page 71: Url Commands Of The Network Camera
B. URL commands of the Network Camera Overview For some customers who already have their own web site or web control application, Network Camera/Video server can be easily integrated through convenient URLs. This section specifies the external HTTP based application programming interface. The HTTP based camera interface provides the functionality to request a single image, to control camera functions (PTZ, output relay etc.) and to get and set internal parameter values. -
Page 72: General Cgi Url Syntax And Parameters
URL syntax examples are written with "Example:" in bold face followed by a short description and a light grey box with the example. Example: request a single snapshot image http://mywebserver/cgi-bin/viewer/video.jpg General CGI URL syntax and parameters CGI parameters are written in lower-case and as one word without any underscores or other separators. -
Page 73: Get Server Parameter Values
Get server parameter values Note: The access right depends on the URL directory. Method: GET/POST Syntax: http://<servername>/cgi-bin/anonymous/getparam.cgi?[<parameter>] [&<parameter>…] http://<servername>/cgi-bin/viewer/getparam.cgi?[<parameter>] [&<parameter>…] http://<servername>/cgi-bin/operator/getparam.cgi?[<parameter>] [&<parameter>…] http://<servername>/cgi-bin/admin/getparam.cgi?[<parameter>] [&<parameter>…] where the <parameter> should be <group>[_<name>] or <group>[.<name>] If you do not specify the any parameters, all the parameters on the server will be returned. If you specify only <group>, the parameters of related group will be returned. -
Page 74: Set Server Parameter Values
Request: http://192.168.0.123/cgi-bin/admin/getparam.cgi?network_ipaddress Response: HTTP/1.0 200 OK\r\n Content-Type: text/html\r\n Context-Length: 33\r\n \r\n network.ipaddress=192.168.0.123\r\n Set server parameter values Note: The access right depends on the URL directory. Method: GET/POST Syntax: http://<servername>/cgi-bin/anonymous/setparam.cgi? <parameter>=<value> [&<parameter>=<value>…][&update=<value>][&return=<return page>] http://<servername>/cgi-bin/viewer/setparam.cgi? <parameter>=<value> [&<parameter>=<value>…][&update=<value>] [&return=<return page>] http://<servername>/cgi-bin/operator/setparam.cgi? <parameter>=<value> [&<parameter>=<value>…][&update=<value>] [&return=<return page>] http://<servername>/cgi-bin/admin/setparam.cgi? <parameter>=<value>... -
Page 75: Available Parameters On The Server
HTML file(.htm, .html) or a LevelOne server script executable (.vspx) file. It can not be a CGI command. It can not have any extra parameters. This parameter must be put at end of parameter list) Return: HTTP/1.0 200 OK\r\n... - Page 76 positive integer Any number between 0 and (2 – 1) <m> ~ <n> Any number between ‘m’ and ‘n’ domain name[<n>] A string limited to contain a domain name shorter than ‘n’ characters (eg. www.ibm.com) email address [<n>] A string limited to contain a email address shorter than ‘n’ characters (eg.
- Page 77 <domain name>, NTP server <ip address>, <blank> timezoneindex Indicate timezone and area -489 ~ 529 -480: GMT-12:00 Eniwetok, Kwajalein -440: GMT-11:00 Midway Island, Samoa -400: GMT-10:00 Hawaii -360: GMT-09:00 Alaska -320: GMT-08:00 Vegas, San_Francisco, Vancouver -280: GMT-07:00 Mountain Time, Denver -281: GMT-07:00 Arizona -240: GMT-06:00 Central America, Central Time,...
- Page 78 Stockholm, Vienna, Madrid, Paris 41: GMT 01:00 Warsaw, Budapest, Bern 80: GMT 02:00 Athens, Helsinki, Istanbul, Riga 81: GMT 02:00 Cairo 82: GMT 02:00 Lebanon, Minsk 83: GMT 02:00 Israel 120: GMT 03:00 Baghdad, Kuwait, Riyadh, Moscow, St. Petersburg, Nairobi 121: GMT 03:00 Iraq 140: GMT 03:30 Tehran 160:...
- Page 79 400: 10:00 Brisbane, Canberra, Melbourne, Sydney, Guam, Vladivostok 440: 11:00 Magadan, Solomon Is., New Caledonia 480: 12:00 Aucklan, Wellington, Fiji, Kamchatka, Marshall Is. 520: GMT 13:00 Nuku'Alofa updateinterval Disable automatic time 3600, adjustment, otherwise, it means 86400, seconds between 604800, automatic update interval.
- Page 80 language_count number webpage language <integer> available on the server language_i<0~(count- string[16] Available language lists 1)> Group: status NAME VALUE SECURITY DESCRIPTION (get/set) di_i<0~(ndi-1)> <boolean> 0 => Inactive, normal 1 => Active, triggered do_i<0~ndi-1)> <boolean> 0 => Inactive, normal 1 => Active, triggered onlinenum_rtsp integer current RTSP connection numbers...
- Page 81 user_i0_privilege admin Root’s privilege user_i<1~20>_ viewer, User’s privilege. privilege operator, admin Group: network NAME VALUE SECURITY DESCRIPTION (get/set) type lan, Network connection type pppoe resetip <boolean> 1 => get ipaddress, subnet, router, dns1, dns2 from DHCP server at next reboot 0 =>...
- Page 82 s0_accessname string[32] Http server push access name for stream 1 s1_accessname string[32] Http server push access name for stream 2 Subgroup of network: rtsp NAME VALUE SECURITY DESCRIPTION (get/set) port 554, 1025 RTSP port 65535 authmode disable, RTSP authentication mode basic, digest s0_accessname...
- Page 83 Group: ipfilter NAME VALUE SECURITY DESCRIPTION (get/set) allow_i<0~9>_start 1.0.0.0 Allowed starting IP address for 255.255.255.25 RTSP connection allow_i<0~9>_end 1.0.0.0 Allowed ending IP address for 255.255.255.25 RTSP connection deny_i<0~9>_start 1.0.0.0 Denied starting IP address for 255.255.255.25 RTSP connection deny_i<0~9>_end 1.0.0.0 Denied ending IP address for 255.255.255.25 RTSP connection Group: videoin...
- Page 84 camera. 0(external), 1(build-in) Bit 2 => Support pan operation. 0(not support), 1(support) Bit 3 => Support tilt operation. 0(not support), 1(support) Bit 4 => Support zoom operation. 0(not support), 1(support) Bit 5 => Support focus operation. 0(not support), 1(support) text string[16] enclosed caption imprinttimestamp...
- Page 85 1200000, 1500000, 2000000, 3000000, 4000000 s<0~(m-1)>_maxfram 1, 2, 3, 5, 10, set maximum frame rate in fps 15, 20, 25, (only NTSC or 60Hz CMOS) s<0~(m-1)>_forcei Force I frame Group: audioin_c<0~(n-1)> for n channel products NAME VALUE SECURITY DESCRIPTION (get/set) mute 0, 1 Enable audio mute...
- Page 86 brightness -5 ~ 5 Adjust brightness image according to mode settings. saturation -5 ~ 5 Adjust saturation image according to mode settings. contrast -5 ~ 5 Adjust contrast of image according to mode settings. -5 ~ 5 Adjust hue of image according to mode settings.
- Page 87 CustomSafe100 => Custom server using safe100 method string[128] Your dynamic hostname. <provider>_hostna <provider>_usernam string[64] Your user or email to login ddns eemail service provider <provider>_passwor string[64] Your password or key to login ddns dkey service provider <provider>_serverna The server name for safe100. string[128] (This field only exists for provider is customsafe100)
- Page 88 importance of information. 0: LOG_EMERG 1: LOG_ALERT 2: LOG_CRIT 3: LOG_ERR 4: LOG_WARNING 5: LOG_NOTICE 6: LOG_INFO 7: LOG_DEBUG Group: privacymask_c<0~(n-1)> for n channel product NAME VALUE SECURITY DESCRIPTION (get/set) enable <boolean> Enable the privacy mask win_i<0~4>_enable <boolean> Enable the privacy mask window win_i<0~4>_name string[14] The name of privacy mask window...
- Page 89 integer> naudioin number of audio input <positive integer> naudioout number of audio output <positive integer> nvideoin <positive number of video input integer> nmediastream <positive number of media stream per integer> channel nvideosetting <positive number of video settings per integer> channel naudiosetting <positive number of audio settings per...
- Page 90 videoin_type 0, 1, 2 0 => Interlaced CCD 1 => Progressive CCD 2 => CMOS videoin_resolution <a list of the available resolutions list available resolution separates comma) <a list of the available codec list videoin_codec available codec types separaters comma) <a list of the available codec list videoout_codec...
- Page 91 camctrl_httptunnel <boolean> Indicate whether to support the http tunnel for camera control uart_httptunnel <boolean> Indicate whether to support the http tunnel for uart transfer Indicate what kind of transmission transmission_mode mode the machine used. TX: Both server, Rx: receiver box, Both: DVR?.
- Page 92 trigger boot, Indicate the trigger condition. “boot” indicates system boot. motion, “di” indicates digital input. seq, “motion” indicates video motion detection. “seq” indicates periodic condition. <integer> Indicate which di detected. This field is required when trigger condition is “di”. One bit represents one digital input. The LSB indicates DI 0.
- Page 93 action_do_i<0~(ndo-1) 1~999 The duration of digital output is triggered in >_duration seconds. action_server_i<0~4>_ 0, 1 To enable or disable this server action. enable The default value is 0. action_server_i<0~4>_ NULL, 0~4 The index of attached media. media Group: server_i<0~4> PARAMETER VALUE SECURITY DESCRIPTION...
- Page 94 ns_passwd string[64] The password of the user. ns_workgroup string[64] The workgroup for network storage. Group: media_i<0~4> PARAMETER VALUE SECURITY DESCRIPTION (get/set) name string[40] The identification of this entry type snapshot, The media type to send to the server or systemlog store by the server.
-
Page 95: Drive The Digital Output
priority 0, 1, 2 Indicate the priority of this recoding. “0” indicates low priority. “1” indicates normal priority. “2” indicates high priority. source <integer> Indicate the source of media stream. 0 means the first stream. 1 means the second stream and etc. weekday <interger>... -
Page 96: Query Status Of The Digital Input
Where state is 0, 1. “0” means inactive or normal state while “1” means active or triggered state. PARAMETER VALUE DESCRIPTION 0, 1 0 – inactive, normal state do<num> 1 – active, triggered state Redirect to the page <return page> after the parameter <return page>... -
Page 97: Query Status Of The Digital Output
Request: http://myserver/cgi-bin/dido/getdi.cgi?di1 Response: HTTP/1.0 200 OK\r\n Content-Type: text/plain\r\n Content-Length: 7\r\n \r\n di1=1\r\n Query status of the digital output Note: This request requires the privilege of viewer. Method: GET/POST Syntax: http://<servername>/cgi-bin/dido/getdo.cgi?[do0][&do1][&do2][&do3] If no parameter is specified, all the status of digital output will be returned. Return: HTTP/1.0 200 OK\r\n Content-Type: text/plain\r\n... -
Page 98: Capture Single Snapshot
Content-Type: text/plain\r\n Content-Length: 7\r\n \r\n do1=1\r\n Capture single snapshot Note: This request require normal user privilege Method: GET/POST Syntax: http://<servername>/cgi-bin/viewer/video.jpg?[channel=<value>][&resolution=<value>] [&quality=<value>] If the user requests the size larger than all stream setting on the server, this request will failed! PARAMETER VALUE DEFAULT DESCRIPTION 0~(n-1) -
Page 99: System Logs
Method: GET/POST Syntax: http://<servername>/cgi-bin/admin/editaccount.cgi? method=<value>&username=<name>[&userpass=<value>][&privilege=<value>] [&privilege=<value>][…][&return=<return page>] PARAMETER VALUE DESCRIPTION method Add an account to server. When using this method, “username” field is necessary. It will use default value of other fields if not specified. delete Remove an account from server. When using this method, “username”... -
Page 100: Upgrade Firmware
Syntax: http://<servername>/cgi-bin/admin/syslog.cgi Server will return the up-to-date system log. Return: HTTP/1.0 200 OK\r\n Content-Type: text/plain\r\n Content-Length: <syslog length>\r\n \r\n <system log information>\r\n Upgrade firmware Note: This request requires administrator privilege Method: POST Syntax: http://<servername>/cgi-bin/admin/upgrade.cgi Post data: fimage=<file name>[&return=<return page>]\r\n \r\n <multipart encoded form data>... -
Page 101: Rtsp Sdp
method=<value>&[start=<ipaddress>&end=<ipaddress>][&index=<value>] [&return=<return page>] PARAMETER VALUE DESCRIPTION Method addallow Add a set of allow IP address range to server. Start and end parameters must be specified. If the index parameter is specified, it will try to add starting from index position. adddeny Add a set of deny IP address range to server. - Page 102 Syntax: http://<servername>/viewer/<0~(n-1)>/<network_accessname_<0~(m-1)>> rtsp://<servername>/<0~(n-1)>/<network_accessname_<0~(m-1)>> “n” is the channel number and “m” is the stream number. You can get the SDP by HTTP or just describe by RTSP protocol directly. For detailed streaming protocol, please refer to “control signaling” and “data format” documents.
-
Page 103: Specifications
D. Specifications - System RAM: 64MB SDRAM ROM: 8MB FLASH ROM Networking Protocol TCP/IP, HTTP, SMTP, FTP, DDNS, UPnP, Telnet, NTP, DNS, DHCP and RTSP Physical 10 baseT or 100 baseT Fast Ethernet auto negotiation - Video Algorithm supported MPEG4(simple profile) for streaming video JPEG for still image Features Adjustable image size, quality and bit rate... -
Page 104: Operating Environment
- Dimension FCS-3021: 147mm(L) x 96mm(W) x 47mm(H) - Weight NET. 276g - Power Power adapter is not included with FCS-3021. POW-1201,12V/1.25A power adapter, is optional for the power supply. - Operating Environment Temperature: 0-50°C/32-122°F Humidity: 95%RH - EMI & Safety... -
Page 105: Technology License Notice
Technology License Notice MPEG-4 AAC Technology THIS PRODUCT IS LICENSED UNDER THE MPEG-4 AAC AUDIO PATENT LICENSE. THIS PRODUCT MAY NOT BE DECOMPILED, REVERSE-ENGINEERED OR COPIED, EXCEPT REGARD TO PC SOFTWARE, YOU MAY MAKE SINGLE COPIES FOR ARCHIVAL PURPOSES. MORE INFORMATION, PLEASE REFER... - Page 106 TIME BY LICENSORS AND A CURRENT VERSION OF WHICH IS AVAILABLE ON LICENSOR’S WEBSITE AT HTTP://WWW.VOICEAGE.COM.
- Page 107 LevelOne Inc. cannot be held responsible for any technical or typographical errors and reserves the right to make changes to the product and manuals without prior notice. LevelOne Inc. makes no warranty of any kind with regard to the material contained within this document, including, but not limited to, the implied warranties of merchantability and...
-
Page 108: Gnu General Public License
GNU GENERAL PUBLIC LICENSE Version 2, June 1991 Copyright (C) 1989, 1991 Free Software Foundation, Inc. 59 Temple Place, Suite 330, Boston, MA 02111-1307 USA Everyone is permitted to copy and distribute verbatim copies of this license document, but changing it is not allowed. Preamble The licenses for most software are designed to take away your freedom to share and change it. - Page 109 making the program proprietary. To prevent this, we have made it clear that any patent must be licensed for everyone's free use or not licensed at all. The precise terms and conditions for copying, distribution and modification follow. GNU GENERAL PUBLIC LICENSE Terms And Conditions For Copying, Distribution And Modification 0.
- Page 110 announcement including an appropriate copyright notice and a notice that there is no warranty (or else, saying that you provide a warranty) and that users may redistribute the program under these conditions, and telling the user how to view a copy of this License. (Exception: if the Program itself is interactive but does not normally print such an announcement, your work based on the Program is not required to print an announcement.) These requirements apply to the modified work as a whole.
- Page 111 binary form) with the major components (compiler, kernel, and so on) of the operating system on which the executable runs, unless that component itself accompanies the executable. If distribution of executable or object code is made by offering access to copy from a designated place, then offering equivalent access to copy the source code from the same place counts as distribution of the source code, even though third parties are not compelled to copy the source along with the object code.
- Page 112 practices. Many people have made generous contributions to the wide range of software distributed through that system in reliance on consis-tent application of that system; it is up to the author/donor to decide if he or she is willing to distribute software through any other system and a licensee cannot impose that choice.
- Page 113 If you would like a copy of the GPL or other open source code in this software on a physical CD medium, LevelOne (Digital Data Communications) offers to mail this CD to you upon request, for a price of US$9.99 plus the cost of shipping.
Need help?
Do you have a question about the FCS-3021 and is the answer not in the manual?
Questions and answers