Table of Contents
Advertisement
Advertisement
Chapters
Table of Contents

Related Manuals for Channel Master CM-7400


Summary of Contents for Channel Master CM-7400
- Page 1 User Guide CM-7400...
-
Page 2: Table Of Contents
The material in this document is for information only and is subject to change without notice. While reasonable efforts have been made in the preparation of this document to assure its accuracy, Channel Master assumes no liability resulting from the use of the information contained herein. -
Page 3: Welcome
1. Turn on your TV. ◘ Watch HDTV using an indoor or outdoor antenna for over-the-air 2. Power on the Channel Master TV device by either using the POWER button HD broadcasts. located on the front of the device or using the POWER on your remote. -
Page 4: Using The Remote Control
Control allowing you to control it. TV: Select to control TV (if programmed). DEVICE Additionally, it can be programmed STB: Controls the Channel Master TV device. CONTROL to control up to two (2) additional AUX: Controls a DVD or audio device (if programmed). -
Page 5: Setup Wizard
Step 2 of 5: Selecting your Display Settings This step will ensure you setup your Channel Master TV device to output properly to your TV. Please select the output format and aspect ratio that matches your TV. The recommended default values for your TV should be displayed at initial setup. - Page 6 7. Use the ARROW KEYS to select “COnTInUE” and press OK to proceed to the next step. If you plan to connect your Channel Master TV device to the Internet, this step will help you select the right network connection. The choices are “Wired” (Ethernet) and Wireless Network (Wi-Fi) “Wireless”...
- Page 7 Step 4 of 5: Selecting your TV Source and Program Guide Channel Master TV has built-in TV tuners that support antenna (ATSC) and Digital Cable TV (Clear QAM) connections. Digital Cable TV (Clear QAM) is basic unencrypted cable that may be...
- Page 8 3. Select the Program Guide option that you would like for your TV experience and press OK: “Basic Program Guide”: This is included with your Channel Master TV device and offers guide listing updates through your antenna or digital cable service. This guide option offers limited guide data and may vary depending on the local broadcaster.
- Page 9 TV Source. i. As channels are being scanned, you will notice the signal strength for each nOTE: You will need a Personal Computer (PC) to register your Channel Master TV device. respective channel. This applies to Antenna (ATSC) only.
-
Page 10: Navigating The Main Menu
Use the UP ARROW or press OK to view menu options within the chosen category. ● Press the BACK button on the Channel Master TV remote control to return to the previous menu screen. In a menu category, you can press the MEnU button at any time to return to the Main Menu screen. -
Page 11: Search
29) of this user guide. VUDU VUDU is an on-demand movie service available on your Channel Master TV device. Sign up for VUDU and bring the theatre-quality experience home. ● Search by Title: This is the default option for the SEARCH icon. It works by narrowing and highlighting programs based on title. -
Page 12: Music
● All: Displays all photos stored on the Channel Master TV device including media stored on any connected USB storage device. The Music icon allows you to store and play music directly on your Channel Master ● Dates: View photos according to the date they were taken. -
Page 13: Settings
Configure your Channel Master TV device, set parental controls, reset your device, and manage software updates. The Settings menu option allows you to completely Channel Master TV Program Guide provides a guide listing for your TV programs. customize and control your media experience. -
Page 14: Skipping Hours/Days
● In the Program Guide, select EXIT or GUIDE to exit. ● The InFO button displays program information about the chosen program, Channel Master TV makes watching high-definition Digital Cable TV simple with the whether live or recorded. ability to receive content from an antenna (ATSC) or digital cable (Clear QAM). -
Page 15: View Last Channel
Search for Programs ● Press SKIP to skip 30 seconds forward in the program up to the moment of live broadcast. ● Press PAUSE and then FF or REW once to activate slow motion. The Search icon in the Main Menu provides basic search of programs by title or ●... -
Page 16: Advanced Search
You can search by using keywords, genre, or people. Channel Master TV allows you to record programs currently playing or scheduled to air for up to 14 days in advance, depending on your Program Guide service. You can also schedule recordings, set recording options, record a series of episodes, and play back your recordings. -
Page 17: Search And Find Shows
Once a program is marked for deletion, it can no longer be played as the content 1. Press GUIDE on the remote to view the Channel Master TV Program Guide. becomes unavailable. If the "Show Deleted Programs" option is enabled, the deleted 2. -
Page 18: Schedule Two Recordings
6. Follow the previous instructions for recording an episode or series. Schedule two recordings simultaneously The Channel Master TV device comes with dual TV tuners which provides a variety of options for you to watch and record your favorite programs. You can schedule two recordings simultaneously while watching another pre-recorded show, all at the same time. -
Page 19: Watch A Recorded Program
2. When you try to schedule a recording and already have two prior recordings nOTE: Channel Master TV gives you the ability to play a program currently being recorded. scheduled at that time. In this case, you are shown a conflict screen and given the Your only limitation is you cannot skip or fast-forward past the point that is being option to eliminate one of the recordings. -
Page 20: Movies On Demand (Vudu)
Movies on Demand (Using VUDU) VUDU is an on-demand movie service available on your Channel Master TV device. Activating VUDU 1. Ensure your Channel Master TV device is connected to the Internet. 2. Navigate to the VUDU icon on the Main Menu or press the BLUE shortcut button on your Channel Master TV remote control to launch VUDU. -
Page 21: Exploring Vudu
nOTE: You must have access to this email address to activate VUDU. 7. Follow the on-screen instructions to activate a new account. Select “new Account” if you are new to VUDU. If you already have a VUDU account from 10. If you have entered a valid email address, you will receive the congratulations another device, then you can use “Log In”... -
Page 22: Browsing Vudu Catalog
● Top Picks: A selection of the most popular new releases. ● Type: Sorts by Movies or TV shows. ● Top Rentals: A list of the most popular releases for rent on VUDU. ● Sort: Sort options. ● new Trailers: A list of all the latest theatrical movie trailers currently in theatres ◘... -
Page 23: Collections
VUDU Parental Controls are independent to what you may have set for Parental ● Recommended Controls within Channel Master TV "SETTInGS" menu. ● Most Watched: See which movies were popular on VUDU last week. Filter this list to see just the movies you want. For more information on filtering, go to the “Browse”... - Page 24 VUDU Customer Care at 1-888-554-VUDU (8838). Account Info nOTE: VUDU Parental Controls are independent to what you may have set for Parental Controls within Channel Master TV "SETTInGS" menu. This screen displays your account balance and credit card info associated with your VUDU account.
- Page 25 1. Navigate to the VUDU icon on the Main Menu or press the BLUE button on your Channel Master TV remote control to launch VUDU. 2. The VUDU Apps main menu appears. Navigate to the left menu and select “InFO & SETTInGS”.
- Page 26 VUDU Player – Fast Forward / Rewind Navigation Screen Use Fast Forward / Rewind to find a specific point in the scene. ● Movie Poster and Title: Shows you what you are watching. ● Chapters: Click here to jump to a chapter within the movie, just like on a DVD. ●...
-
Page 27: Facebook
Flickr Flickr is a photo management and sharing application. The integrated Flickr application in Channel Master TV enables you to save a User ID set up with or Channel Master TV supports many types of Web-media directly from the VUDU without a password. -
Page 28: Pandora
With this saved profile, you are able to access any non-public items you may have ◘ Enter the email address for your Pandora account. uploaded to your Flickr profile. ◘ Select if you wish to login to Pandora with or without a password. nOTE: You are allowed two Flickr profiles, one with a password and one without. -
Page 29: Twitter
Twitter content. Entering a password enables access to non-public content. To remove a user, select the user options in the next screen. Twitter is an online social networking and micro blogging service using text-based posts to share information amongst other Twitter users (also known as “Tweets”). ●... -
Page 30: Manage Personal Media
Manage Personal Media Music The Channel Master TV device allows you store and play music. You can sort your music by albums, artists, genres, or create personal playlists. The convenient USB port allows you to import music to the device to be played or stored for future playback. -
Page 31: Videos
Videos The Channel Master TV device allows you store and play your personal video content. You can view all your videos, sort by date, by folders, and create video playlists. The convenient USB port allows you to import videos to the device to be played or stored for future playback. -
Page 32: Playlist
Playing Media from a Playlist 4. Repeat steps 3 and 4 to add as many media files as you want. 5. Press the BACK button to return to Music/Video Menu. Play Media from your Playlists 1. Use the ARROW KEYS to select “Playlists” and press OK. 2. -
Page 33: Settings
To load music on to your Channel Master TV device, you need a USB storage device. To view or change the device settings, from the Main Menu select “SETTInGS” and Copy Media to the Device press OK. - Page 34 Use the ARROW KEYS to select the desired audio and press OK and select your choice by placing a check mark. The Audio setting enables you to change your audio output for your Channel Master TV device. Dolby Digital gives you the capability to enjoy programs with surround sound.
- Page 35 Use ARROW KEYS to select “COnTInUE" and then press OK. 2. Use the ARROW KEYS to choose between Channel Master’s information and nOTE: Modifying the device time to an inaccurate value will not affect the Channel Master copyright information about VUDU. Press OK.
- Page 36 Web Media Applications on your Channel Master TV device. When connecting a coaxial connection to your TV for video output the RF output channel on your Channel Master TV device will need to be set to either channel 3 or 4 depending on channel outputting to your TV.
-
Page 37: Parental Controls
You must setup a personal identification number (PIN) The PIN defaults to 0000 the first time you access it. To register your Channel Master TV device, use your PC Web browser and go to www.channelmastertv.com/registration. Follow the on-screen instructions to register your device and purchase Advanced Services that enhance your Channel Master TV device. -
Page 38: Restart & Reset Device
● Application Settings: You can select applications requiring a PIN in order to hard drive. launch. The current applications on the Channel Master TV device are VUDU, 1. From the Main Menu select “SETTInGS”, “Restart & Reset”, then select “Delete music, photos, and videos. -
Page 39: Software Update
2. Press OK to continue. 3. You will be warned a final time that everything on your Channel Master device 1. On the Channel Master TV device, select “Update From USB”. hard drive will be deleted. Select “no” to exit, otherwise select “Yes” to continue. -
Page 40: Frequently Asked Questions
The VUDU Movie Service is a leading provider of on-demand HD video available directly on your Channel Master TV device. VUDU gives you access to over 30,000 This indicates your account has not been activated. To activate your account, go to movies and TV shows on-demand, including the world’s largest catalog of HD movies... -
Page 41: Safety Instructions
Safety Instructions ● How fast is your Internet connection? Watching movies on VUDU requires a broadband Internet connection of at least 1 Mbps. As the resolution of the movie increases, so does the bandwidth necessary Instructions are ineffective unless read. You are encouraged to save these to support it. -
Page 42: Return Policy & Warranty
Product. 2.5 If the problem reoccurs within the warranty period, CHannel master will, at its option: (a) re-perform the service; (b) replace the product pursuant to the terms of this warranty, (c) permit Customer to return the product and issue a refund pursuant to this warrant, or (d) refund the In Warranty / Out Of Warranty / CredIt PrOCedure effeCtIve ImmedIately amount the Customer paid for the services. - Page 43 Information contained in this document is provided on an as is basis. In no event will Channel Master be liable for damages arising directly or indirectly from any use of the information contained in this document. Contents subject...
- Page 44 Quick Start Guide CM-7400...
- Page 45 The material in this document is for information only and is subject to change without notice. While reasonable efforts have been made in the preparation of this document to assure its accuracy, Channel Master assumes no liability resulting from the use of the information contained herein.
-
Page 46: Important Safety Instructions
Important Safety Instructions WARNING: To prevent fire or shock hazard, do not expose this • To help prevent electric shock, plug the power cable into properly product to rain or moisture. grounded sources. Use only properly grounded extension cords and adapters, if they are needed. •... -
Page 47: Contents
Contents RF Coaxial Cable (For TV Sources) HDMI Cable (For HD Video) CM-7400 Unit Composite Audio/Video Cable (For SD Video and Stereo Audio) IR Universal Remote Control Quick Start Guide (2) AA Batteries User Guide AC Power Adapter... -
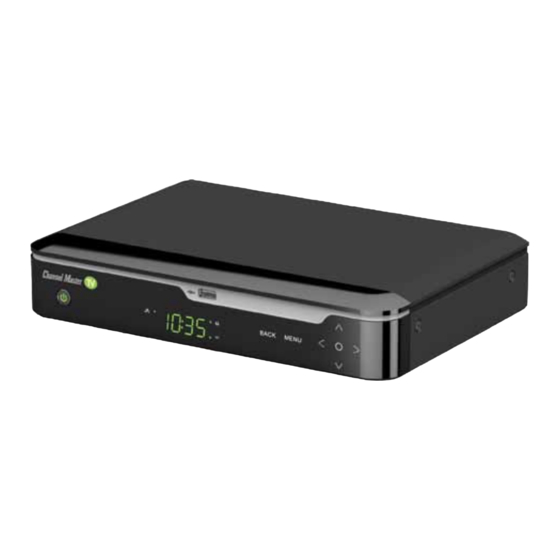
Page 48: Front Panel
Front Panel Back Panel Name Description Name Function Description External Serial ATA Connector (May support future Solid Green indicates the unit is on. POWER Button eSATA upgrades). Solid Red indicates the unit is in standby mode. Flashing Green light indicates the unit is starting up. Press button once to put unit in standby mode, CABLE/ANT IN For Clear QAM Cable TV Source and ATSC Antenna. -
Page 49: Remote Control
TV: Select to control TV (if programmed). STB: This button is pre-programmed to control your DEVICE CONTROL Channel Master TV. AUX: Select to control another device (if programmed). Controls video program for LIVE TV / DVR / VOD REPLAY: Go back a few seconds. - Page 50 Remote Control The “Vol +/-” and “MUTE” keys can be configured to • control both your Channel Master TV and TV while the remote control is in STB mode, please refer to Controlling Your TV and other the section “Toggle Power Key Punch-through A/V Devices Functionality”...
- Page 51 3. Do either of the following: 3. Press the “POWER” key once. a. Press “1” to control both your Channel Master TV and 4. Aim the remote control at the device. Press either TV, or the “CH UP” key or “CH DOWN” key to do device auto- b.
-
Page 52: Step 1 - Connecting Video
Component HDMI Cable Video Cable (For HD Video) HDTV HDTV *This connection handles both Video and Multi-Channel Audio. If you have CM-7400 Back CM-7400 Back selected HDMI for your Video, then proceed to page 15. - Page 53 Connect to Composite Video Connect to Coaxial Delivers good picture quality Delivers good picture quality (Composite Video cable included) (Coaxial cable included) Coaxial Cable SDTV SDTV Composite Video Cable (Please use Yellow Connector for Video Connection) CM-7400 Back CM-7400 Back...
-
Page 54: Step 2 - Connecting Tv Source
Connect to Clear QAM Cable TV Source using (ATSC Antenna) RF Coaxial Cable (Coaxial cable included) (Coaxial cable included) HD Indoor Antenna Clear QAM Cable TV Coaxial Cable Coaxial Cable (Outdoor or indoor antenna sold separately) CM-7400 Back CM-7400 Back... -
Page 55: Step 3 - Connecting Audio
Connect to A/V Receiver for Digital 5.1 Surround Sound* (Composite Video cable included) (*Digital Audio cable not included) A/V Receiver Digital Audio Cable HDTV Composite Video Cable (Use Red/White Connectors for Audio Connection if you've selected Component Video, or Composite Video) CM-7400 Back CM-7400 Back... -
Page 56: Step 4 - Connecting Network
Connect to Wired Network via DSL, Cable Modem or Connect to Wireless Network via Wireless Network Network Router* Router or Access Point (*Ethernet cable not included) Router* Wireless Router* (*Router not included) Ethernet (*Wireless Router not included) Cable CM-7400 Back CM-7400 Back... -
Page 57: Step 5 - Powering Up
1. Locate the AA batteries and remote in the accessory 1. Connect the power connector from adapter to box. "POWER" in on your Channel Master TV product. 2. Open battery cover by pressing down on battery 2. Connect AC adapter to power outlet. -
Page 58: Device Codes
Appendix - Device Codes Viewsonic 0021, 0085, Pioneer 0208 Bell & Howell 0223, 0014 0107, 0026, 0290, 0174, Plasmsync 0224 Benq 0079 0082, 0277, 0255, 0069, Sony 0289, 0086 Bradford 0182, 0097 0304 Toshiba 0224, 0120 Brockwood 0308 Your Universal Remote Control can control many brands and Vizio 0002 Zenith 0011 Broksonic 0097, 0288,... - Page 59 0014, 0295, 0097, 0288, JVC 0102, 0175, 0297, NetTV 0430 0266, 0138, 0157, 0242, Sylvania 0122, 0295, TV MONITOR 0062, 0032, 0162, 0308, 0259, 0096, 0121, 0334, Net-TV 0228 0023, 0308, 0005, 0262, 0024, 0315, 0308, 0276, Sony 0181 0276, 0061 0324, 0335, 0340, 0372, Nexus Electronics 0469 0245, 0087, 0407, 0396,...
- Page 60 JVC 0121 CyberHome 4107 Norcent 4243, 4083, 4073, Toshiba 4093, 4198, 4184, Polaroid 4069 Memorex 4093 LG 0308, 0040 Cytron 4116 4232 4071, 4088, 4024, 4173, Sony 4127 Panasonic 4200 Magnavox 0271 Daewoo 4035, 4067 Onkyo 4209, 4198, 4027, 4175, 4100 TV/DVD COMBO Philips 4208, 4247 Mintek 0271...
- Page 61 Thomas 3091 TV/DVD/VCR COMBO Pioneer 2070, 2031 Alienware 3053 Hush 3053 Philips Magnavox 3013 TMK 3052 Akai 3039 RCA 2010 American High 3021 iBUYPOWER 3053 Pilot 3043 Toshiba 3053, 3057, 3095, Diamond Vision 3058 Rotel 2011 Asha 3052 Insignia 3082 Pioneer 3002 3006, 3045, 3036 Emerson 3003...
-
Page 62: Declaration Of Conformity
Declaration of Conformity Nakamichi 2033 Denon 2016 Onkyo 2067, 2017, 2002, Emerson 2014 2057, 2100, 2065 Insignia 2038 Optimus 2070, 2054 JBL 2020 To ensure proper use of this product, please read this manual carefully and retain it for Panasonic 2008, 2088, JVC 2006, 2000, 2024 future reference. -
Page 63: Product Return Policy And Warranty
Customer will be based on standard labor and parts prices in effect at the time of the repair. CHANNEL MASTER will use its best efforts to ensure that the cost of such repair, exchange, refurbishing, or substitution will not exceed the original price of Product. - Page 64 HDMI Licensing LLC in the United States and other countries. All other trademarks remain the property of their respective owners. All product specifications, content and partners contained herein are subject to change without notice. Channel Master shall not be liable for technical or editorial errors or omissions contained herein. All product images and screenshots are for demonstration purposes only and are subject to change and may vary from actual experience or use.
Need help?
Do you have a question about the CM-7400 and is the answer not in the manual?
Questions and answers