Table of Contents
Advertisement
Advertisement
Table of Contents

Related Manuals for Signet QV-3020


Summary of Contents for Signet QV-3020
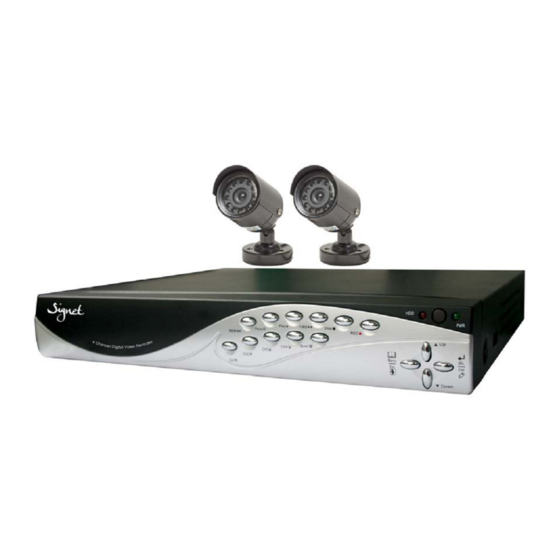
- Page 1 4 Channel Digital Video Recorder / Camera Kit Model No QV-3020 USER’S MANUAL...
-
Page 2: Important Note
Important Note: Please keep this manual in a safe location in case you need to refer to it at a later date. -
Page 3: Table Of Contents
INDEX CHAPTER 1: DVR FEATURES..........................1 CHAPTER 2: LAYOUT-2.1 FRONT PANEL ......................1 CHAPTER 2: LAYOUT - 2.2 REAR PANEL ......................2 CHAPTER 2: LAYOUT - 2.3 REMOTE CONTROL ....................2 CHAPTER 3: INSTALLATION - 3.1 HARD DRIVE INSTALLATION ..............3 CHAPTER 3: INSTALLATION - 3.2 CONNECTING CAMERA AND MONITOR .......... -
Page 4: Chapter 1: Dvr Features
Chapter 1: DVR Features Embedded Camera Power Supply. Simple Connection Method. Motion Detection. Scheduled / Motion Triggered Recording. PC Backup & Playback. Built in 320GB WD AV Surveillance Hard Drive. Remote Control. Chapter 2: Layout-2.1 Front Panel Select / Display Channel #1 Select / Display Channel #2 Select / Display Channel #3 Select / Display Channel #4... -
Page 5: Chapter 2: Layout - 2.2 Rear Panel
Chapter 2: Layout - 2.2 Rear Panel Camera Inputs Ground Terminal Power Supply Input Video output Note: The USB port is located on the right hand side of the case. Chapter 2: Layout - 2.3 Remote Control Select / Display Channel #1 Select / Display Channel #2 Select / Display Channel #3 Select / Display Channel #4... -
Page 6: Chapter 3: Installation - 3.1 Hard Drive Installation
Chapter 3: Installation - 3.1 Hard Drive Installation This unit has been factory fitted with a 320GB WD AV Surveillance Hard Disk; please return to the supplier for service or upgrades. Chapter 3: Installation - 3.2 Connecting Camera and Monitor There are 4 camera inputs and 1 video output (Refer to 2.2 Rear Panel). -
Page 7: Chapter 4: System Bootup - 4.2 Recovering File System Errors
Chapter 4: System Bootup - 4.2 Recovering File System Errors A power failure may cause errors in the file RECOVER HDD? 04811-101735 system. If errors are detected the DVR will (SELECT)YES/(MENU)NO give you the option to repair the errors. Chapter 4: System Boot - 4.3 Restore Recording Feature If a power failure occurs whilst the system is recording the DVR will... -
Page 8: Chapter 5: Dvr Setup - 5.1 Setup Menu
Chapter 5: DVR Setup - 5.1 Setup Menu Menu Directory CAMERA SELECT RECORD SELECT RESOLUTION MAIN RECORD FRAME MENU VIDEO QUALITY SCHEDULE SET AUTO RECORD PASSWORD MISCELLANEOUS MENU COLOR SET HARD DISK SET TIME SET MOTION SET VIDEO MODE FACTORY RESET MAIN MENU CAMERA SELECT 1 2 3 4... -
Page 9: Chapter 5: Dvr Setup - 5.2 Camera Select
Chapter 5: DVR Setup - 5.2 Camera Select The DVR can display 4 cameras in the one screen (Quad Mode). Each channel can be enabled / disabled in case one or more camera inputs are not being used. Press [ SEL] to modify this setting, or press [CH1] - [CH4] to view each channel separately. -
Page 10: Chapter 5: Dvr Setup - 5.5 Record Frame
Auto Switch Function: When the system is in live view or recording mode, press and hold the [QUAD] button for three (3) seconds to enable the auto switch function. In auto switch mode each screen / channel will be displayed for three (3) seconds, including the “Quad”... -
Page 11: Chapter 5: Dvr Setup - 5.7 Schedule Set
Chapter 5: DVR Setup - 5.7 Schedule Set In this option you can configure recording by Time or Motion Triggered Recording. “-” No Recording. SCHEDULE SET “T” Time (System Default). TTTMMMTTTTTTMMTTTTT--MMT │ │ │ │ │ │ │ │ │ “M”... -
Page 12: Chapter 5: Dvr Setup - 5.9 Miscellaneous Menu-Password Enable
Chapter 5: DVR Setup - 5.9 Miscellaneous Menu-Password Enable When this option is “ON”, you will be required to enter the password if you want to stop recording or enter the menu. System default password: Press [CH1] button six (6) times. Chapter 5: DVR Setup - 5.10 Miscellaneous Menu-Password Change All keys can be used for the PASSWORD : - - - - - -... -
Page 13: Chapter 5: Dvr Setup - 5.12 Miscellaneous Menu-Time Set
Chapter 5: DVR Setup - 5.12 Miscellaneous Menu-Time Set Configures the system date and time: [ Up] and [ Down]: Move the cursor. TIME SET [ SEL]: Modify the value. ∨ Menu]: Exit and save. 2008/08/08 20:08:08 (UP, DOWN) MOVE (SELECT) CHANGE PRESS (MENU) TO EXIT Chapter 5: DVR Setup - 5.13 Hard Drive Setup... -
Page 14: Chapter 5: Dvr Setup - 5.14 Motion Set
Chapter 5: DVR Setup - 5.14 Motion Set MOTION RECORD TIME: This adjusts how long recording continues MOTION SET after the DVR has last been triggered by MOTION RECORD TIME: motion. MOTION ALARM TIME: MOTION SET MOTION ALARM TIME: This adjusts how long the buzzer will sound after the DVR has been triggered (UP, DOWN) MOVE (SELECT) CHANGE by motion. -
Page 15: Chapter 5: Dvr Setup - 5.15 Video Mode
Chapter 5: DVR Setup - 5.15 Video Mode This option enables you to select between PAL and NTSC video formats. This unit comes packaged with PAL format cameras for use in your region; as such you should not change this setting. Chapter 5: DVR Setup - 5.16 Factory Reset Press the [ SEL] button to restore the unit to default, the DVR will reboot and all... -
Page 16: Chapter 6: Recording - 6.1 Start Recording
Chapter 6: Recording - 6.1 Start Recording Press [ REC] to start recording (as configured in 5.7 Schedule Set The DVR will display the following information on screen. 1. Hard Drive Usage. (Displayed as a percentage) 2. Recording Symbol. (Channel is currently recording) 3. -
Page 17: Chapter 6: Recording - 6.2 Stop Recording
Chapter 6: Recording - 6.2 Stop Recording Press the [ Stop] button to stop recording. If you have enabled password protection, you will need to enter the password. Chapter 6: Recording - 6.3 Recording Time on Hard Drive The estimated recording time is based on a 320GB Hard Drive with the unit in QUAD mode. -
Page 18: Chapter 7: Playback
Chapter 7: Playback Press the [ Play] button to play the latest recording. During playback, press the [ Menu] button to list all recorded video clips from the hard drive. The newest videos will be listed at the top. Press the [ Up] and [ Down] buttons to move the cursor and select an event, press the [ Play] button to start playback. -
Page 19: Chapter 8.1: Installing The Pc Viewer Program
Chapter 8.1: Installing the PC Viewer Program By connecting the DVR to your PC you can use the included “PC Viewer” software to backup and play back the recorded video using your PC. Insert the included application CD into your CD-ROM Drive. 1. -
Page 20: Chapter 8.3: Pc Backup
Item Remark 1. Capture picture Save an image of current frame 2. Save video clip Save the current video clip to PC 3. Directory Setting Change the capture directory on the PC 4. Time Search Search for recorded video by time 5. -
Page 21: Chapter 9.1: Dvr Specifications
Chapter 9.1: DVR Specifications ITEM DESCRIPTION NOTE Operating System Custom Vineyard ASIC Camera Inputs 4p mini-din socket Video Outputs BNC socket Display Frame Rate 100 frames/second 4 × 25 fps Recording Frame Rate (Quad) Max.25 fps Recording Frame Rate (Each) 25 fps ÷... -
Page 22: Chapter 10: Appendix -10.1 Connection Diagram
Chapter 10: Appendix - 10.1 Connection Diagram Chapter 10: Appendix - 10.2 DVR Accessories (included) Power Cord Remote Controller Power Adaptor User’s Manual Note: The plug will vary depending on target market. 15M Video and Power cable X 2 2 x IR Cameras USB Cable CD-ROM... - Page 24 Distributed by: Electus Distribution Pty Ltd 320 Victoria Rd Rydalmere NSW 2116 Australia www.electusdistribution.com.au...
Need help?
Do you have a question about the QV-3020 and is the answer not in the manual?
Questions and answers