Elmo Boxi MP-350 Instruction Manual
Box mobile projector
Hide thumbs
Also See for Boxi MP-350:
- Operation manual (56 pages) ,
- Quick start manual (12 pages) ,
- Instruction manual (4 pages)
Table of Contents
Advertisement
Quick Links
Download this manual
See also:
Operating Manual
Instruction Manual
Master Operation Guide
■ Read the separate"Instruction Manual -Network Operation Guide" and the separate
"IMPORTANT SAFEGUARD" carefully before using the projector.
■ Refer to the separate "Instruction Manual - Network Operation Guide" for the operations of
a Wireless LAN (WiFi)
■ Keep this guide in a safe place for future reference.
©2012 Copyright ELMO Co., Ltd. All rights reserved.
MP-350
English
Advertisement
Table of Contents

Related Manuals for Elmo Boxi MP-350


Summary of Contents for Elmo Boxi MP-350
- Page 1 “IMPORTANT SAFEGUARD” carefully before using the projector. ■ Refer to the separate “Instruction Manual - Network Operation Guide” for the operations of a Wireless LAN (WiFi) ■ Keep this guide in a safe place for future reference. ©2012 Copyright ELMO Co., Ltd. All rights reserved.
-
Page 2: Important Safeguards
IMPORTANT SAFEGUARDS ■ Read Instructions All the safety and operating instructions should be read before the appliance is operated. ■ Retain Instructions The safety and operating instructions should be retained for future reference. ■ Heed Warnings All warnings on the product and in the operating instructions should be adhered to. ■... - Page 3 ■ Power Sources This product should be operated only from the type of power source indicated on the marking label. If you are not sure of the type of power supply to your home consult your appliance dealer or local power company. For products intended to operate from battery power, or other sources, refer to the operating instructions.
- Page 4 ■ Damage Requiring Service Unplug this product from the wall outlet and refer servicing to qualified service personnel under the following conditions: • When the power-supply cord or plug is damaged. • If liquid has been spilled, or objects have fallen into the product. •...
- Page 5 CAUTION RISK OF ELECTRIC SHOCK DO NOT OPEN CAUTION: TO REDUCE THE RISK OF ELECTRIC SHOCK, DO NOT REMOVE COVER (OR BACK). NO USER-SERVICEABLE PARTS INSIDE. REFER SERVICING TO QUALIFIED SERVICE PERSONNEL. The lightning flash with arrowhead symbol, within an equilateral triangle, is intended to alert the user to the presence of uninsulated “dangerous voltage”...
-
Page 6: Before You Use
BEFORE YOU USE ■ The supplied power cord and AC adapter are designed for exclusive use with this product. Do not use them with other equipments. ■ Be sure to use the power cord applicable to your local power specifications. If the product was sold in Japan, use the AC adapter sold with the product with 100VAC and 50 or 60 ■... -
Page 7: Notes On The Use Of Wireless Lan(Wifi
■ Follow the guidelines below to prevent the product from dropping or overturning. • Use the product on a stable base, desk, or table. Do not place the product on an unstable base or slanted location. • Place or wire the product to prevent the AC adapter cord or video cable from pulling. ■... - Page 8 This device complies with Part 15 of the FCC Rules. Operation is subject to the following two conditions: (1) This device may not cause harmful interference, and (2) this device must accept any interference received, including interference that may cause undesired operation. FCC Caution: Any changes or modifications not expressly approved by the party responsible for compliance could void the user's authority to operate this equipment.
-
Page 9: Table Of Contents
CONTENTS IMPORTANT SAFEGUARDS ..................2 BEFORE YOU USE ....................6 Notes on the use of Wireless LAN(WiFi) ..............7 CONTENTS ........................ 9 1 GETTING STARTED .................... 12 CHECKING THE PACKAGE CONTENTS ............12 PART NAMES AND FUNCTIONS ................. 13 Projector ......................13 Control panel ..................... - Page 10 Turning up the volume ..................42 Turning down the volume .................. 42 TURNING OFF THE SOUND................43 HIDING THE IMAGE ..................... 43 3 USB VIEWER ......................44 SUPPORTED FILE FORMATS AND VERSIONS ..........44 DISPLAYING THE USB MENU ................44 PLAYING MOVIES - MOVIES -................
- Page 11 CLEANING THE LENS, THE CABINET AND THE REMOTE CONTROL ..... 82 Cleaning the lens ....................82 Cleaning the cabinet and the remote control ............. 82 CLEANING THE INSIDE OF THE PROJECTOR ..........83 6 TROUBLESHOOTING ................... 84 INDICATOR ICONS ....................84 LIST OF USB MENU ERROR MESSAGES ............
-
Page 12: Getting Started
1 GETTING STARTED CHECKING THE PACKAGE CONTENTS The items below are included with this product. If any item is missing, contact the dealer from whom you purchased this product. Projector AC adapter Power cord Remote control *Battery included IMPORTANT Protective cover WARRANTY CARD CD-ROM SAFEGUARD... -
Page 13: Part Names And Functions
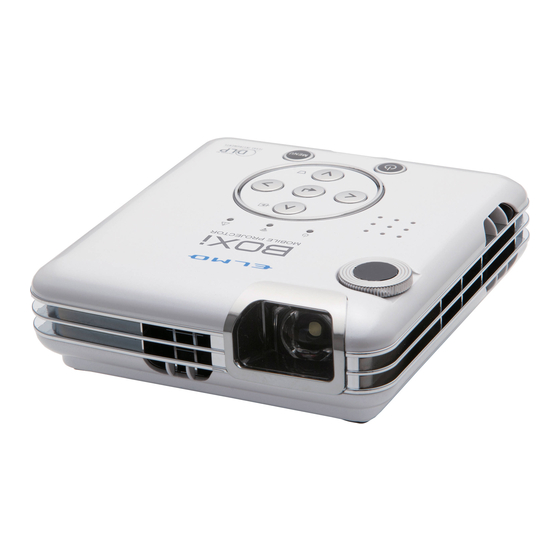
PART NAMES AND FUNCTIONS Projector TOP/FRONT TOP/BACK ⑦ ④ ① ⑤ ⑥ ③ ② ⑧ Related Number Name Function Page ① →P22 Lens To project an image. ② →P38 Focus dial To focus the projected image. ③ Speaker Built-in speaker. ④... -
Page 14: Control Panel
CAUTION ■ Do not look into the lens during the projection. The strong light emitted from the lens may cause damage to your eyes. Pay attention especially when you use the projector in an environment where there are children. ■ Do not touch around the exhaust vent during or immediately after the projection. - Page 15 Related Number Mark Name Function Page The red LED turns on or flashes Warning →P16,89 ③ when there is something wrong indicator with the projector. To move the selected item upward. The “Input source select” menu appears when the “Input source →P37 ④...
-
Page 16: List Of Led Indicators
List of LED indicators The 3 LED indicators on the top of the projector indicate the status of the projector by lighting up or flashing, in different colors and different flashing speeds. <Upper part of the Control panel> Power indicator Wireless LAN indicator Warning indicator If the warning indicator lights up or flashes, there is something wrong with the... -
Page 17: Terminal Panel
Terminal panel ① ⑤ ② ③ ④ Related Number Name Function Page Analog RGB input terminal. →P28 ① RGB IN To connect an analog RGB output device. HDMI input terminal. →P29 ② HDMI To connect an HDMI output device. To connect an USB flash drive to →P30 ③... -
Page 18: Remote Control
Remote control ② ① ③ ⑦ ⑤ ⑥ ⑧ ⑨ ④ ⑫ ⑩ ⑪ ⑬ ⑭ Related Number Mark Name Function Page →P32, 33 ① Power button To turn on/off the projector. To display/hide the menu. To return to the previous menu →P57 ②... -
Page 19: Preparing The Remote Control
Related Number Mark Name Function Page Keystone →P40 ⑩ To increase the projection angle. +button Keystone To decrease the projection angle. →P40 ⑪ -button To increase the volume of the ⑫ →P42 Volume+button + built-in speaker. To decrease the volume of the ⑬... - Page 20 N o t e ■ Use the button battery type CR2016 for the remote control. CAUTION ■ Improper use of the battery may lead to electrolyte leakage or bursting and may cause fire, injury or corrosion to the remote control. Observe the following precautions for safety use of the product.
-
Page 21: Operating Range For The Remote Control
Operating range for the remote control Aim the IR transmitter of the remote control at the IR receiver on the back of the projector to control the projector. Use the remote control within its operating range as described below. Operating range 42°... -
Page 22: Installing The Projector
INSTALLING THE PROJECTOR Throw distance and screen size Decide the position to place the projector. The distance between the projector and the screen should be between 48cm (screen size: 25 inch) and 133 cm (screen size: 68 inch). 高 スクリーンサイズ(型) Screen size (inch) さ... -
Page 23: Using The Protective Cover
Using the protective cover The followings are the instructions on how to install and use the supplied protective cover. The protective cover can be used as a projection stand as well as a protection cover for the projector. How to install the protective cover ①... - Page 24 CAUTION ■ Be sure to firmly hold the bottom of the projector and avoid applying an excessive vibration or impact when you carry the projector with the protective cover. The projector may slip out of the cover and drop to the ground, causing malfunction of the projector.
- Page 25 CAUTION ■ When using the protection cover as a projection stand, observer the following precautions for safety use of the projector. - Do not look into the lens while the projector is being used. Strong light is emitted from the projector's lens. If you look directly into this light, it can hurt and damage your eyes.
-
Page 26: Using A Tripod For A Camera
Using a tripod for a camera The projector is equipped with a tripod receptacle on the bottom of the projector. You can mount the projector on a tripod for a camera. ●Bottom of the projector ●When mounted on a tripod Tripod receptacle N o t e... -
Page 27: Connecting To The Devices
CONNECTING TO THE DEVICES Connecting the power (AC adapter and power cord) Connect the supplied AC adapter and the power cord, and then firmly connect to the DC IN 12V of the projector. Then insert the other plug of the power cord securely into the wall outlet. BACK AC adapter (Supplied) Power cord... -
Page 28: Connecting To Rgb In Terminal
Connecting to RGB IN terminal 1. Connect the projector to a device such as a computer using RGB cable. Connect the RGB output terminal (MiniD-sub 15p) of your device such as a computer to the RGB IN terminal of the projector using an RGB cable (sold separately) as shown in the below picture. -
Page 29: Connecting To Hdmi Terminal
Connecting to HDMI terminal 1. Connect the projector to a device such as a computer using HDMI cable. Connect the HDMI output terminal of your device such as a computer and HDTV to the HDMI terminal of the projector using an RGB cable (sold separately) as shown in the below picture. -
Page 30: Connecting A Usb Flash Drive
Connecting a USB flash drive Connect a USB flash drive to the USB terminal of the projector. BACK USB flash drive (Sold separately) N o t e ■ The projector does not recognize a USB flash drive when a USB hub is used. -
Page 31: Connecting Using Wireless Lan
Connecting using wireless LAN Benefit of the wireless LAN(WiFi) function You can project Office documents (Word, Excel, PowerPoint) or PDF files using the proprietary application software “BOXi Air” (a client software) installed in iOS devices. Supported devices iPhone / iPad iOS Version 4.0 or higher Smart phone/Tablet device N o t e... -
Page 32: Basic Operation
2 BASIC OPERATION TURNING THE POWER ON/OFF Powering on 1. Make sure that the power and all necessary cables are connected properly. 2. Press the button on the control panel or on the remote control. Control panel Remote control Power indicator will turn green. -
Page 33: Powering Off
Powering off 1. Press the button on the control panel or on the remote control. Control panel Remote control 2. A message will be displayed. Press the button again. Press the Power button on the control panel of Press Power button again to the projector or on the remote control while the turn off the projector. -
Page 34: Detecting The Input Source
DETECTING THE INPUT SOURCE Checking the current input source The current input source can be checked with the icons that are displayed at the top right of the “Input source standby” screen. On/Off of the “Auto The icon of the input detection”... -
Page 35: Selecting The Input Source With The Remote Control
Selecting the input source with the remote control 1. Turn on the device connected to the projector such as a computer and a Blu-ray player. If you use a video player such as a Blu-ray player, start the playback. 2. Press the button. - Page 36 N o t e ■ The “Input source select” menu will be automatically closed after 3 seconds of no operation. ■ In “AUTO”, the projector will search for the available input source and display it. The input source will change as follows: HDMI→RGB→HDMI…...
-
Page 37: Selecting The Input Source From The Control Panel
Selecting the input source from the control panel 1. Turn on the device connected to the projector such as a computer and a Blu-ray player. If you use a video player such as a Blu-ray player, start the playback. 2. Press the button. -
Page 38: Adjusting The Focus
N o t e ■ The “Input source select” menu will be automatically closed after 3 seconds of no operation. ■ In “AUTO”, the projector will search for the available input source and display it. The input source will change as follows: HDMI→RGB→HDMI…... - Page 39 ■ The focus adjustment can be performed when the throw distance is between 48cm and 133cm. ■ Refer to “Throw distance and screen size”(Page22) for details on the screen size. ■ Sometimes, you may notice fine streaks on projected images. This is due to interference with the screen surface.
-
Page 40: Correcting The Keystone Distortion
CORRECTING THE KEYSTONE DISTORTION Correcting the keystone distortion manually with the remote control 1. Press the “+” button or “-“ button near the mark. The following “Keystone correction” window will be displayed. Keystone correction window 2. Press the “+” button or “-“ button near the mark to correct the keystone distortion. - Page 41 2. Press the “ ” buttons on the control panel to correct the keystone distortion. Press the “ ” button. (Press when the projection angle is increased.) Press the “ ” button. (Press when the projection angle is decreased.) N o t e ■...
-
Page 42: Controlling The Volume
CONTROLLING THE VOLUME Turning up the volume 1. Press the “+” button near the mark on the remote control. The following “Volume control” window will be displayed and the volume will be turned up. Volume control window Turning down the volume 1. -
Page 43: Turning Off The Sound
TURNING OFF THE SOUND You can temporarily mute the sound from the built-in speaker. 1. Press the button to mute the sound. Press the button again to cancel the mute. When the “+” button near the mark on the remote control is pressed while in mute, the mute will be released and the volume will be increased by 1 level. -
Page 44: Usb Viewer
3 USB VIEWER With the USB viewer you can display or play the files (Office files, movie files or still picture files) stored in the USB flash drive. SUPPORTED FILE FORMATS AND VERSIONS The following files are supported: AVI, MOV, MP4 Video codec :H.264 Audio codec :MPEG Audio Layer3(MP3) ※Recommended bit rate :less than 3Mbps... - Page 45 2. Press the MENU button. Control panel Remote control Verify that the Wireless LAN indicator is lit in blue before moving to the next step. 3. Select the “Input source select” icon Main menu Select the “Input source select” icon in the “Main” menu with the buttons on the control panel or on the remote control.
- Page 46 Select the menu (Movies, Still pictures, Office files) with the buttons on the control panel or on the remote control. Then press the button to execute the selection. Icon Menu Function To play movie files stored in the USB flash drive. Refer to “PLAYING MOVIES -MOVIES”(Page48) Movies for details.“...
- Page 47 N o t e ■ If “Movies” or “Office files” is selected when the USB flash drive is not inserted, only the title will be displayed. Then if you insert the USB flash drive, the USB flash drive will be recognized by the projector and you will be able to use the Office viewer or play movie files.
-
Page 48: Playing Movies - Movies
PLAYING MOVIES - MOVIES - The following list of movies will be displayed when “Movies” is selected in the “USB” menu. List of movies List of movies Disk file Number Function ① The number of movies will be displayed. ② The directory path will be displayed. - Page 49 If the button is pressed after moving the marker to the folder, the files in the folder will be displayed. If you want to return to the previous screen, press the MENU button. 2. Press the button. The selected movie file will be played full screen. During movie playback, you can perform the following operations such as “Fast forward”, “Rewind”...
- Page 50 N o t e ■ The following movie files are supported: AVI, MOV, MP4 File format Video codec: H.264 Audio codec: MPEG Audio Layer 3(MP3) Bit rate Less than 3Mbps recommended Frame rate 30fps USB transfer speed 20MB/s recommended ■ Some files of supported formats may not be played correctly. We recommend you to do a test before playing the movie.
-
Page 51: Displaying Still Pictures - Still Pictures
DISPLAYING STILL PICTURES - STILL PICTURES - The following list of still pictures will be displayed when “Still pictures” is selected in the “USB” menu. List of still pictures Number Function ① The name of the selected file will be displayed. ②... - Page 52 ★How to move between pages (Remote control/ Control panel) Action Operation Press the button while any of the thumbnails in the bottom row is selected. Go to the next page. Press the button while the thumbnail in the bottom right is selected. Press the button while any of the thumbnails in the top row is selected.
-
Page 53: Displaying Office Files - Office Files
N o t e ■ The following still picture files are supported: File format JPEG, BMP JPEG:Max.16Mpixel Resolution BMP :Max. 9Mpixel ■ Some files of supported formats may not be displayed correctly. We recommend you to do a test before displaying the still picture. ■... - Page 54 Select an Office file to display. Marker Either Office files or folders are displayed List of Office files in the “list of Office files”. Disk file Move the marker to the file or folder that you want to display with the buttons on the control panel or on the remote control.
- Page 55 2. Press the button. The selected file will be displayed full screen. ★Available actions when an Office file is displayed (Remote control/ Control panel) Action Operation Press the button when the file is displayed Go to the next file. in normal size. Press the button when the file is displayed Go to the previous file.
- Page 56 N o t e ■ The following Office files are supported: Microsoft Word, Version: Windows 97, 2003, 2007, 2010 Excel, PowerPoint Adobe PDF:1.0~1.4 ■ Some files of supported formats may not be displayed correctly. We recommend you to do a test before displaying the files. ■...
-
Page 57: Menu Operation
4 MENU OPERATION Various configurations and adjustments to the projected image can be done from the menu. DISPLAYING THE MENU AND BASIC OPERATION Displaying the main menu Control panel Remote control Press the MENU button. Press the MENU button on the remote control or on the control panel. - Page 58 Button Function To configure the setting of the selected icon. button To move the selected item up. button To move the selected item down. button To move the selected item left. button To adjust the setting value of the adjustment bar*. To move the selected item right.
-
Page 59: Main Menu
MAIN MENU The following items can be configured from the main menu: Input source selection/ Keystone adjustment/ Display mode selection/ Brightness adjustment/ Contrast adjustment/ Volume adjustment/ Language/ Detail settings If you select the item, a sub menu will be displayed. Refer to “Displaying the main menu”(Page57) for details on displaying the main menu. - Page 60 Icon Name Options/ Description Adjustable range To adjust the contrast of the Contrast 1 ~ 100 image. adjustment The adjustment can be made in Default setting:50 →P66 increments of one unit. To adjust the volume of the Volume 1 ~ 10 image.
-
Page 61: Selecting The Input Source
SELECTING THE INPUT SOURCE Display the “Main” menu. Refer to “Displaying the main menu”(Page57). Press the MENU button on the remote control or on the control panel. The main menu will be displayed. Select the icon with the Main menu buttons on the remote control or on the control panel. - Page 62 Icon Name Description The data in the USB flash drive will be displayed. Refer to “USB VIEWER” (Page47). The image of the iOS devices connected via wireless LAN. WiFi Refer to the separate “Instruction Manual - Network Operation Guide”. N o t e ■...
-
Page 63: Adjusting Th Keystone Distortion
ADJUSTING TH KEYSTONE DISTORTION Display the “Main” menu. Refer to “Displaying the main menu”(Page57). Press the MENU button on the remote control or on the control panel. The main menu will be displayed. Select the icon with the Main menu buttons on the remote control or on the control panel. -
Page 64: Selecting The Display Mode
SELECTING THE DISPLAY MODE 1. Display the “Main” menu. Refer to “Displaying the main menu”(Page57). Press the MENU button on the remote control or on the control panel. The main menu will be displayed. Select the icon with the Main menu buttons on the remote control or on the control panel. -
Page 65: Adjusting The Brightness
ADJUSTING THE BRIGHTNESS 1. Display the “Main” menu. Refer to “Displaying the main menu”(Page57). Press the MENU button on the remote control or on the control panel. The main menu will be displayed. 2. Select the icon with the Main menu buttons on the remote control or on the control panel. -
Page 66: Adjusting The Contrast
ADJUSTING THE CONTRAST 1. Display the “Main” menu. Refer to “Displaying the main menu”(Page57). Press the MENU button on the remote control or on the control panel. The main menu will be displayed. 2. Select the icon with the Main menu buttons on the remote control or on the control panel. -
Page 67: Adjusting The Volume
ADJUSTING THE VOLUME Volume setting 1. Display the “Main” menu. Refer to “Displaying the main menu”(Page57). Press the MENU button on the remote control or on the control panel. The main menu will be displayed. 2. Select the icon with the Main menu buttons on the remote control or on the control panel. -
Page 68: Setting The Language
SETTING THE LANGUAGE Set the language to be used for the menus. 1. Display the “Main” menu. Refer to “Displaying the main menu”(Page57). Press the MENU button on the remote control or on the control panel. The main menu will be displayed. 2. -
Page 69: Detail Settings
DETAIL SETTINGS The following items can be configured: ECO mode/ Display setting/ Auto power off/ Projection mode/ Installation mode/ Factory settings Various information can be obtained from this screen. Refer to “Checking various information” (Page72). Displaying the detail settings 1. Display the “Main” menu. Refer to “Displaying the main menu”(Page57). - Page 70 Icon Name Options Description To set the ECO mode. When the projector is in ECO mode setting the ECO mode, the →P72 LED brightness and fan noise will decrease. Horizontal position To adjust the horizontal →P73 position of the image. Vertical position To adjust the vertical →P74...
- Page 71 Icon Name Options Description To return all the Factory settings settings to factory →P81 default.
-
Page 72: Checking Various Information
Checking various information Detail settings menu Display the “Detail settings” menu. The following information can be viewed. Information Description Input Source The current input source will be displayed. Version The firmware version of the projector will be displayed. SSID SSID of the projector will be displayed. MAC Address MAC address of the projector will be displayed. -
Page 73: Displaying The "Display Setting" Menu
Displaying the “Display setting” menu. 1. Display the “Detail settings” menu. Detail settings menu 2. Select the icon with the buttons on the remote control or on the control panel. Display setting menu Press the button to execute the selection. The “Display settings”... -
Page 74: Adjusting The Vertical Position Of The Image
Adjusting the vertical position of the image 1. Display the “Display setting” menu. Display setting menu 2. Select the icon with the buttons on the remote control or on the control panel. Press the button to execute the selection. 3. Adjust the position with the buttons on the remote control or on the control panel. -
Page 75: Adjusting The Tracking
Adjusting the tracking 1. Display the “Display setting” menu. Display setting menu 2. Select the icon with the buttons on the remote control or on the control panel. Press the button to execute the selection. 3. Adjust the tracking with the buttons on the remote control or on the control panel. -
Page 76: Selecting The Aspect Ratio
Selecting the aspect ratio 1. Display the “Display setting” menu. Display setting menu 2. Select the icon with the buttons on the remote control or on the control panel. Press the button to execute the selection. The “Aspect ratio setting” menu will be displayed. 3. -
Page 77: Setting The Auto Power Off
Setting the auto power off 1. Display the “Detail settings” menu. Detail settings menu 2. Select the icon with the buttons on the remote control or on the control panel. Press the button to execute the selection. The “Auto power off setting” menu will be displayed. - Page 78 The message as shown in the right picture will The projector will be turned be displayed 30 seconds before the projector is off after 30 seconds. turned off automatically.
-
Page 79: Selecting The Projection Mode
Selecting the projection mode 1. Display the “Detail settings” menu. Detail settings menu 2. Select the icon with the buttons on the remote control or on the control panel. Press the button to execute the selection. The “Projection mode setting” menu will be displayed. -
Page 80: Selecting The Installation Mode
Selecting the installation mode 1. Display the “Detail settings” menu. Detail settings menu 2. Select the icon with the buttons on the remote control or on the control panel. Press the button to execute the selection. The “Installation mode setting” menu will be displayed. -
Page 81: Returning To The Factory Settings
Returning to the factory settings 1. Display the “Detail settings” menu. Detail settings menu 2. Select the icon with the buttons on the remote control or on the control panel. Press the button to execute the selection. The “Factory settings” menu will be displayed. 3. -
Page 82: Maintenance
5 MAINTENANCE This section describes the simple maintenance procedures you should follow to clean the lens, the cabinet and the remote control. CLEANING THE LENS, THE CABINET AND THE REMOTE CONTROL Cleaning the lens 1. Before starting the cleaning, turn off the projector, disconnect the power cord and then allow the cabinet to cool. -
Page 83: Cleaning The Inside Of The Projector
squeeze the cloth very well, and then wipe the cabinet. After cleaning, gently wipe the cabinet with a dry cloth. <Cleaning the remote control> Wipe the dirt off the remote control with a dry soft cloth. CAUTION ■ Do not use solvents such as alcohol, benzene or thinner as they may mar the finish of the case, causing electric shock. -
Page 84: Troubleshooting
6 TROUBLESHOOTING INDICATOR ICONS During use of the projector, the following icons may appear at the bottom right of the screen to warn you or indicate errors. When the icon appears, follow the instructions described in the table below. If the same icon still appears after following the above instructions, contact your dealer. - Page 85 Icon Description Solution The brightness of the LED is decreased. It is the time to replace the LED lamp. If you continue to use the projector without brightness replacing the lamp, the degradation Contact your dealer for repair. brightness will decrease continuously.
- Page 86 Example of the error indication An error occurred. The projector will be turned off in 5 seconds. Icon Description Solution Turn off the projector immediately and allow the projector to cool down for at least 30 minutes. Make sure the followings and turn Temperature The internal temperature has on the projector:...
- Page 87 CAUTION ■ Using the projector in places where the temperature is high or where there is a lot of dust or smoke, or using it continuously for long hours for business purposes may deteriorate the performance or the quality of the projector after less than 1 year of use depending on the life of the components.
-
Page 88: List Of Usb Menu Error Messages
LIST OF USB MENU ERROR MESSAGES Sometimes you will see a message like below picture while you are using the USB viewer. ERROR No file was found. Below is a list of error messages for the USB menu. Follow the instructions described in the list when the error message is displayed. Related Error message Description/Solution... -
Page 89: Warning Indicator Display
WARNING INDICATOR DISPLAY The warning indicators indicate the status of the internal temperature and the internal fan, by flashing or by lighting. <Upper part of the Control panel> Power indicator Wireless LAN indicator Warning indicator Warning indicator (Red) Solution Turn off the projector immediately and allow the projector to cool down for at least 30 minutes. -
Page 90: Common Problems And Check Items
COMMON PROBLEMS AND CHECK ITEMS The following problems may not be caused by malfunction of the projector. Check the items in the table below before requesting a repair service. If the problem still persists, contact your dealer. Problem Check item Related Page ➡... - Page 91 Problem Check item Related Page ➡ Is the projector installed correctly? →P22 Image is distorted. ➡ If there is keystone distortion, perform the →P40, 63 keystone correction. ➡ Is the lens correctly adjusted? →P38 Image is blurred. ➡ Is the projector placed correctly to the →P22 screen? ➡...
- Page 92 ➡ Is the IR transmitter aimed at the IR →P21 receiver? ➡ Is the remote control receiving influence from →P21 the fluorescent light? ➡ Refer to the list of indicators. →P89 Indicator flashes. ➡ Please look at a USB menu error message →P88 When using the USB viewer,...
-
Page 93: Specifications
7 SPECIFICATIONS SPECIFICATIONS MODEL MP-350 Display technology Single-chip DLP Display device Size 0.45 type 1,280×800 (WXGA) Resolution Aspect ratio 16:10 Focus Lens Manual adjustment Focal length f = 9.05mm F number F 2.04 3 LED (R,G,B) Lamp Screen size (projection distance) 25 ~ 68 inches ( 0.48 ~ 1.33 m ) Projection method (can be... - Page 94 MODEL MP-350 Power 100~240V、50~60Hz AC adapter 65.4W (DC12V, 5.45A) at ECO mode OFF Power consumption 35W at ECO mode ON 132 mm (W) x 143 mm (D) x 43 mm (H* including External dimensions the rubber foot) Weight 500g * The contrast ratio between the maximum white luminance and the minimum black...
-
Page 95: Remote Control
Remote control DC 3V (Button battery: CR2016) Power Operating range External dimensions 45 mm x 70.5 mm x 5 mm 25g(including battery) Weight Supplied accessories Remote control ・・・・・・・・・・・・・・・・・・・・・・ 1pce *with a battery inserted Power cord ・・・・・・・・・・・・・・・・・・・・・・ 1pce AC adapter ・・・・・・・・・・・・・・・・・・・・・・... -
Page 96: List Of Compatible Signals
LIST OF COMPATIBLE SIGNALS The following system modes are available with the projector. The projector will detect the input signal and select the appropriate system mode automatically. Computer signal input format (for both RGB and HDMI) Horizontal Vertical Resolution Signal mode frequency frequency (H x V) - Page 97 1360×768(60Hz) 1360 × 47.7 60.0 SXGA+ (60Hz) 1400 × 1050 65.3 60.0 WXGA+(60Hz) 1440 × 55.9 59.9 WXGA+(75Hz) 1440 × 70.6 75.0 WSXGA+(60Hz) 1680 × 1050 65.3 60.0 Video signal input format (for both RGB and HDMI) Horizontal Vertical Resolution Signal mode frequency frequency...
-
Page 98: Appendix
8 Appendix Converting an Office file to a PDF file When using the USB viewer function in BOXi, Office files may appear differently from the display in PC applications. In this case, converting the Office files to PDF files will allow them to be displayed properly. -
Page 99: Trademarks
TRADEMARKS is a registered trademark of ELMO Co., Ltd. DLP(Digital Light Processing) is a trademark of Texas Instruments. VGA, XGA, and SXGA are trademarks or registered trademarks of International Business Machines Corp. iPhone and iPad are trademarks or registered trademarks of Apple Inc. -
Page 100: Warranty And After Sales Service
■ WARRANTY COVERAGE This warranty shall apply only when the projector is used under the conditions and in the manner intended by ELMO as specified in the instruction manual during the Warranty Period. ■ EXCLUSIONS AND LIMITATIONS This warranty does not cover the following: (1) Failure or damage caused by misuse, improper application, wrong operation other than specified in the instruction manual;... - Page 101 (2) We do not provide on-site repair service. Faulty units have to be brought to our customer service or to be sent to our customer service at customer’s expenses. (3) Contact our customer service (described below) when you need repair service. ■...
- Page 102 6-14, Meizen-cho, Mizuho-ku Nagoya, 467-8567, Japan OVERSEAS SUBSIDISRY COMPANIES ELMO USA CORP. ELMO Europe SAS Headquarters Headquarters 1478 Old Country Road Immeuble Elysées La Défense, Plainview, NY 11803, U.S.A. 7C, Place du Dôme, Tel. (516) 501-1400 Fax.(516) 501-0429 92056 Paris La Défense, France E-mail: elmo@elmousa.com...
Need help?
Do you have a question about the Boxi MP-350 and is the answer not in the manual?
Questions and answers