Table of Contents
Advertisement
Quick Links
Advertisement
Chapters
Table of Contents

Subscribe to Our Youtube Channel
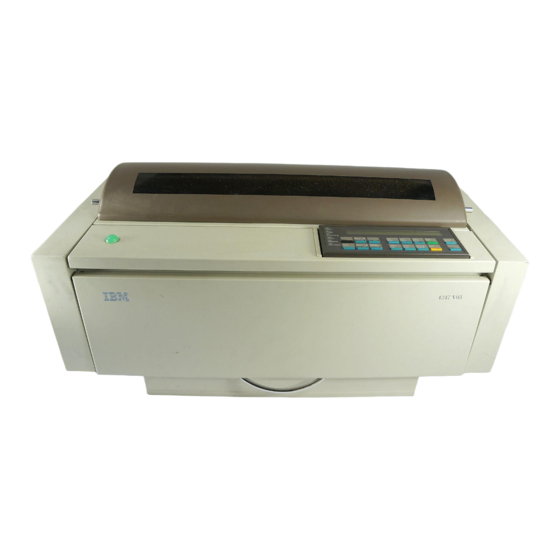
Related Manuals for IBM 4247 A00


Summary of Contents for IBM 4247 A00
- Page 1 4247 Printer Model A00 User’s Guide SA24-4404-02...
- Page 3 4247 Printer Model A00 User’s Guide SA24-4404-02...
- Page 4 Visit our home page at http://www.printers.ibm.com When you send information to IBM or the IBM Printing Systems Company, you grant a nonexclusive right to use or distribute the information in any way IBM or IBM Printing Systems Company believes appropriate without incurring any obligation to you.
-
Page 5: Table Of Contents
Parking Continuous Forms ....29 Setting Up Manual Sheet Feed Path Optional Printer Stand ..... . 32 Summary Chapter 2. - Page 6 Operator Panel Function Keys Used for Configuration ..80 Entering Printer Configuration ....81 Exiting Printer Configuration.
- Page 7 RS-422A ......157 IBM Parallel Attachment ..... 157 .
- Page 8 Airflow......166 Declaration of IBM Product Noise Emission Values ... 166 Operator and Service Clearance .
- Page 9 Form Feed (FF) ..... . . 189 Carriage Return (CR) ..... 190 Shift Out (SO) / Double-Wide Print .
- Page 10 Shift Out (ESC SO) / Double-Wide Print ....226 viii 4247 Printer Model A00 User’s Guide ....204 .
- Page 11 Reassign Graphics Mode (ESC ?) ....232 Initialize Printer (ESC @) ....233 Select n/72 Inch Line Spacing (ESC A) .
- Page 12 Italic Character Table ..... 283 4247 Printer Model A00 User’s Guide ....241...
- Page 13 Epson Extended Character Variables ....284 Glossary ......285 Index .
- Page 14 4247 Printer Model A00 User’s Guide...
-
Page 15: Notices
References in this publication to IBM products, programs, or services do not imply that IBM intends to make these available in all countries in which IBM operates. Any reference to an IBM product, program, or service is not intended to state or imply that only IBM’s product, program, or service may be used. - Page 16 IBM cannot accept responsibility for any failure to satisfy the protection requirements resulting from a non-recommended modification of the product, including the fitting of non-IBM options cards. This product has been tested and found to comply with the limits for Class B Information Technology Equipment according to CISPR 22/European Standard EN 55022.
-
Page 17: Trademarks And Service Marks
As an Energy Star partner, IBM Printing Systems Company has determined that this product meets the Energy Star guidelines for energy efficiency. Trademarks and Service Marks The following are trademarks of the IBM Corporation in the United States or other countries or both. AS/400... -
Page 18: Safety Information
Seek professional assistance before using an adapter or extension cord; such a device could interrupt the grounding circuit. If this printer is connected to an outlet that has been incorrectly connected to the building wiring, serious electric shock could result. DANGER <2>... - Page 19 <3> The paper feed motor may get hot during operation. Avoid contact when installing or removing the front tractor. CAUTION: <4> Close the gear protector cover immediately after removing the front tractor. Do not plug in the power cord or power on (|) the printer until instructed to do xvii Notices...
- Page 20 4247 Printer Model A00 User’s Guide...
-
Page 21: Preface
Preface The 4247 Printer Model A00 User’s Guide describes the operating procedures for the IBM 4247 Printer Model A00. This guide should be read and used by those who install or operate the printer, or supervise printer operations. You can use the printer for many different types of applications. This guide includes the procedures necessary for you to put together step-by-step instructions tailored to your operation. -
Page 22: Related Publications
This guide is often shipped with your Network Print Server. The following publication provides helpful information. v Advanced Function Printer: Cut Sheet Paper Reference for use with IBM Electrophotographic Printers (G544-3915). 4247 Printer Model A00 User’s Guide... -
Page 23: Chapter 1. Printer Setup
Parking Continuous Forms ....29 Setting Up Manual Sheet Feed Path Optional Printer Stand ..... . 32 Summary Information Necessary for Printer Setup You should complete all of “Chapter 1. -
Page 24: Unpacking Your Printer
24.9 kilograms (55 pounds). Before attempting to lift the printer, get help from another person. Unpacking Your Printer Check the list below as you unpack the shipping container. Contact your local IBM Branch Office if any of the following items or items listed on the printer order are missing. -
Page 25: Setting Up Your Printer
Additionally, you can order the following options. Contact your IBM marketing representative. v Automatic Sheet Feeder - Allows feeding of envelopes or from as many as three additional cut sheet forms paths v Printer stand - Especially helpful when using Dual Push forms path... -
Page 26: Installing Operator Panel Overlay
2. Align the bottom of the overlay; align each side. 3. Press the overlay in place at the bottom below the keys and then continue working upwards until the overlay is pressed into place. 4247 Printer Model A00 User’s Guide... -
Page 27: Installing Wire Forms Guide
Locating Operator Accessible Areas and Controls As with many IBM printers, a part that is colored blue or has a blue decal on it is for your use in operating the printer. These blue marks indicate tabs and levers that control settings and changes for the machine. -
Page 28: Operator Panel
Operator Panel The operator panel consists of 6 status indicators, a one-line 16-character display, 12 function keys, and an audible alarm. Figure 2 on page 7 illustrates the operator panel. 4247 Printer Model A00 User’s Guide... -
Page 29: Operator Panel Display
Error messages Audible Alarm The audible alarm beeps to let you know of a printer status condition or an error such as an end-of-forms condition, forms jam, or top cover open. Some operations you are asked to perform, such as opening the top cover when the printer is online, cause the alarm to sound. - Page 30 Communicating with host offline ( not ready ) v Able to receive and print Condition 1 Printer disabled and no data in input buffer Condition 2 Printer in one of following modes: v Power On Configuration v Program Configuration...
-
Page 31: Function Keys
In Push Pull mode, both indicators operate together (this is one forms path, with one set of forms loaded). Push Pull selected key and Micro key position the forms up or down. The Font key Blinking v End of forms (EOF) v Forms jam Chapter 1. Printer Setup... - Page 32 Description Condition 1 If forms are not present in the current path and the printer is in a wait condition ( not ready ), press Path to select a different forms paths. Condition 2 If forms are present and the printer is in a wait...
- Page 33 Before parking a form in the Rear Pull or Push Pull forms paths, tear the form off at the perforation below the front tractor cover. Condition 2 If the printer is currently in Manual Sheet Feed mode, press Park to eject a single cut-sheet page. The message 91 EJECT FORM displays.
- Page 34 Condition 1 If the printer is ready and forms are not loaded, press Load/Form Feed to automatically load the forms according to the forms types selected in the Program Configuration menu.
-
Page 35: Default Forms Path
After this verification, you maintain the printer with this forms path, or you may configure the printer for any one of four other forms paths. IBM recommends you use the Front Push forms path. See “Chapter 2. Considering Other Forms Paths” on page 33 to select a different forms path, and “Preparing Printer for Selected Forms... -
Page 36: Setting Up Front Push Forms Path (Default)
2. Pull the bottom release levers toward you with your finger tips and push the movable edge of the tractor down toward the flat surface with your thumbs or the palms of your hands (position 2). 4247 Printer Model A00 User’s Guide... -
Page 37: Installing Front Push Tractor
Installing Front Push Tractor Install the tractor in the Front Push forms path, as follows: 1. Ensure the printer is powered off (O). 2. Lift the bottom edge of the front tractor cover into the open position. Figure 8. Opening Front Tractor Cover CAUTION: <3>... - Page 38 Save this cap for future storage or shipping of the forms tractor. 5. Stand facing the front of the printer, holding the forms tractor with the tractor doors facing up and the electrical connector tab on the right.
-
Page 39: Installing Ribbon Cartridge
Installing Ribbon Cartridge Note: IBM recommends that you use the IBM ribbon cartridge (Part Number 1053685). To order ribbon cartridges, contact your place of printer purchase or call Lexmark at 1-800-438-2468. To install the ribbon cartridge, follow these steps: 1. Remove the ribbon cartridge from the package. Locate the ribbon guide, snap arm, ribbon advance knob, and the ribbon mounting pins. -
Page 40: Connecting Electrical Power
You can read about removing a ribbon cartridge in “Removing Ribbon Cartridge” on page 133. Connecting Electrical Power Read the following safety information, and follow the steps for connecting electrical power to the printer. 4247 Printer Model A00 User’s Guide... -
Page 41: Changing Display Language
1. The power switch is located on the lower left side of the printer. Ensure the printer is powered off (O). DANGER <1> The construction of this printer provides extra protection against the risk of electric shock by grounding appropriate metal parts. The extra protection may not function unless the power cord is connected to a properly-grounded outlet. -
Page 42: Stacking Forms For Front Push Forms Path
See Figure 12 for forms stacking recommendation for the Front Push forms path. The top of the input forms stack must be lower than the bottom of the printer when parking forms. Consider ordering the optional printer stand designed specifically for your printer. - Page 43 11. If necessary, slide the right tractor either left or right to remove any slack in the form, ensuring that the left and right tractor pins are centered in the holes of the forms. Hold the right tractor in place. Pull the locking lever forward to lock the right tractor. Chapter 1. Printer Setup...
- Page 44 12. Close the front tractor cover. 13. Power on (|) the printer. 4247 Printer Model A00 User’s Guide...
-
Page 45: Creating Print Test Sample (Self Test Printout-With Firmware Level)
The Print Test function allows you to print a sample. You can check printer operations and print quality by running and reviewing this “Self Test Printout.” You also can identify the level of firmware that is installed in your printer. The Print Test can be printed using any forms path. -
Page 46: Tearing Off Forms
Tear. Pressing Tear moves continuous forms up to the top cover tear line and allows you to tear off your printout. The forms move back to the print position after a 10-second delay. 4247 Printer Model A00 User’s Guide... -
Page 47: Choosing Tear-Off Option
When the perforation on a form aligns with the serrated edge on the top cover, the forms will break easily without creasing or leaving ragged edges. If the top of the form that returns into the printer is ragged, ripped, torn, or creased, it may cause a jam. -
Page 48: Adjusting Tear-Off Position
, increasing XXX. To adjust the tear-off position lower, press , decreasing XXX. 4. If your printer uses the Rear Push forms path, press displays. To adjust the tear-off position higher, press , increasing XXX. To adjust the tear-off position lower, press , decreasing XXX. -
Page 49: Checking Configuration
Configuring Your Printer” on page 79 for instructions about changing configuration items. Printing Power On Configuration Setup IBM recommends that you print the Power On Configuration at initial setup and after you have changed your configuration. Save this printout for future reference. To print the Power On configuration: 1. -
Page 50: Printing Program Configuration Setup
Figure 14. Power On Configuration Printout Printing Program Configuration Setup IBM recommends that you print the Program Configuration at initial setup and after you have changed your configuration. Save this printout for future reference. You can save the configuration settings for as many as five forms paths. To print the Program Configuration:... -
Page 51: Parking Continuous Forms
25. Note: For successful forms parking, the top of the input forms stack must be lower than bottom of the printer. See Figure 12 on page 20. To park a forms type, follow these steps: 1. Press Tear. Tear off the forms at the top cover tear line. -
Page 52: Setting Up Manual Sheet Feed Path
(Dual Push)” on page 59. Setting Up Manual Sheet Feed Path The 4247 Printer provides the ability to print on either single-part or multiple-part, cut-sheet forms using the Manual Sheet Feed forms path. Manual Sheet Feed can be used with the Front Push, the Rear Push, and the Dual Push forms paths. See Figure 18 on page 41 for a depiction of the various paths. - Page 53 4. Push the paper into the printer until it covers the black patch on the input shelf. Ensure the paper is straight against the left cut-sheet paper guide (shown as shaded in the drawing). 5. To verify printer operation, print the Program Configuration as described in “Printing Program Configuration Setup”...
-
Page 54: Optional Printer Stand
By completing this chapter, you have set up your printer to use the Front Push forms path and the Manual Sheet Feed. If you are setting up the printer for a different forms path, proceed to “Chapter 2. Considering Other Forms Paths” on page 33. -
Page 55: Chapter 2. Considering Other Forms Paths
4. The adjustable edge of each pin feed assembly must be set to properly guide the forms in that forms path. 5. IBM recommends you test the performance in the printer of any forms you intend to use. © Copyright IBM Corp. 1995, 1998... -
Page 56: Choosing A Forms Path For Your Needs
ASF Mountable Notes: 1. IBM recommends you remove the ASF before loading forms into the Rear Push forms path. 2. To use the Push Pull or Dual Push forms paths you must install the optional, second forms tractor. 4247 Printer Model A00 User’s Guide... -
Page 57: Choosing A Forms Path For Special Forms
Choosing a Forms Path for Special Forms Note: IBM recommends selecting first the Front Push then the Rear Push as your choices for forms paths. The 4247 Printer can print on various sizes, dimensions, and weights of forms. IBM recommends you test all forms for your application before ordering large quantities. -
Page 58: Description Of Each Forms Path
For forms stacking convenience, consider ordering the optional printer stand. See “Optional Printer Stand” on page 32, or contact your IBM marketing representative to order. v Consider the following when using the optional Automatic Sheet Feeder: – You cannot use Rear Pull or Push Pull with the optional Automatic Sheet Feeder installed. -
Page 59: Rear Pull Forms Path
Rear Pull Forms Path Push Pull Forms Path Manual Sheet Feed Manual Sheet Feed can be used with the Front Push, the Rear Push, and the Dual Push forms paths. It is shown here in use with the Dual Push forms path, which is a combination of the Front Push and the Rear Push forms paths. - Page 60 4247 Printer Model A00 User’s Guide...
-
Page 61: Chapter 3. Setting Up Another Forms Path
Removing Rear Forms Tractor ....43 Preparing Printer for Selected Forms Path ....44 Setting Forms Guide Deflector . - Page 62 Forms Path Setting Front Push Rear Push Dual Push Rear Pull Push-Pull Manual Note: * The setting you choose is not affected by the value in this category. 4247 Printer Model A00 User’s Guide Forms Guide Push-Pull Deflector Selector Closed Pull Open —*...
-
Page 63: Changing To A Different Forms Path
2. Identify the new forms path (see “Identifying New Forms Path” on page 42). 3. Remove the existing forms tractor, if necessary (see “Removing Existing Forms Tractor” on page 42). 4. Prepare the new forms path (see “Preparing Printer for Selected Forms Path” on page 44). Chapter 3. Setting Up Another Forms Path... -
Page 64: Identifying Existing Forms Path
If your printer has an optional Automatic Sheet Feeder (ASF) installed, see the 4247 Printer Automatic Sheet Feeder Guide for any information concerning this option. Figure 19 illustrates the Automatic Sheet Feature. Figure 19. Automatic Sheet Feeder Identifying Existing Forms Path Figure 20 illustrates the five forms paths and the Manual Sheet Feed. -
Page 65: Removing Rear Forms Tractor
4. Close the gear protector cover and the front tractor cover. 5. Reinstall the black protective cap on the electrical connector if you are not installing this forms tractor into the printer. Store the forms tractor. Removing Rear Forms Tractor 1. -
Page 66: Preparing Printer For Selected Forms Path
4. Close the forms guide and the top cover. 5. Reinstall the black protective cap on the electrical connector if you are not installing this forms tractor into the printer. Store the forms tractor. Preparing Printer for Selected Forms Path You must perform the following procedures for the forms path you have chosen: 1. - Page 67 Figure 21. Forms Guide Figure 22 on page 46 shows the two settings for the forms guide deflector. Use the open position for push, and the closed position for pull (see Table 7 on page 44). Chapter 3. Setting Up Another Forms Path...
-
Page 68: Setting Push-Pull Selector
Setting Push-Pull Selector See Table 8 for the correct setting you will make for your selected forms path. Table 8. Setting the Push-Pull Selector Push-Pull Selector 4247 Printer Model A00 User’s Guide Rear Push Dual Push Rear Pull with Manual... -
Page 69: Removing Or Installing Paper Bail
Set the Push-Pull selector as follows: 1. Press Online to take the printer offline. 2. Open the top cover and the forms guide, and locate the Push Pull selector. Use Table 8 on page 46 to help you set the selector. -
Page 70: Removing Paper Bail
2. Remove the ribbon cartridge. See “Removing Ribbon Cartridge” on page 133. 3. Move the printhead to the far right. 4. Grasp the paper bail and rotate it toward the front of the printer until it snaps loose. Some force is required. - Page 71 8. Ensure that the paper bail (level 1 or level 2) is installed correctly. Press on the areas that are identified by arrows in Figure 28 on page 50. If your printer has a level 1 paper bail, ensure the paper bail is snapped into the closed position.
-
Page 72: Setting Forms Tractors
Table 10. Setting the Tractors. Numbers in Table Match Numbers in Figure 29 on page 51. Tractor Settings Set the forms tractors to Position 1 or Position 2 for your forms path, as shown in Figure 29 on page 51. 4247 Printer Model A00 User’s Guide Front Push Rear Push Dual Push with Manual... - Page 73 Next, you will perform the following tasks for your selected forms path. 1. Install the necessary tractors. 2. Configure the printer for the selected forms path. 3. Load your forms. 4. Print the configuration for future reference and to verify printer operation. Chapter 3. Setting Up Another Forms Path...
-
Page 74: Setting Up And Configuring Front Push Forms Path
The Front Push tractor is used for the Dual Push and the Push Pull forms paths, as well as the Front Push forms path. The printer is shipped to you with the Front Push forms path set as the default. -
Page 75: Setting Up Rear Push Forms Path
27 and “Printing Program Configuration Setup” on page 28 to print the configuration. If you do not want to use the printer defaults for forms settings (such as Line Spacing, Page Length, or Top of Form), see “Program Configuration” on page 106. -
Page 76: Configuring Forms Path For Rear Push
3. Stand facing the front of the printer. Hold the forms tractor with the tractor doors toward you, and the electrical connector tab on the left pointing down. 4. Use both hands to support the forms tractor by the tractor shaft. Position the electrical connector tab above the rear tractor electrical connector on the left side of the printer and the two lowest pins on the right. -
Page 77: Loading Forms For Rear Push
Consider ordering this option to serve as a shelf for the forms stacks. 2. Press Online to take the printer offline. 3. Open the rear tractor door located at the back of the printer (see Figure 34 on page 56 for location). - Page 78 Figure 34. Installing Forms at the Rear of the Printer 12. From the front of the printer, place the left edge of the form under the forms jam sensor, and on the left tractor pins so that the form engages about three left tractor pins.
-
Page 79: Setting Up Dual Push Forms Paths
27 and “Printing Program Configuration Setup” on page 28 to print the configuration. If you do not want to use the printer defaults for forms settings (such as Line Spacing, Page Length, or Top of Form), see “Program Configuration” on page 106. -
Page 80: Preparing Dual Push Forms Paths
1. Stack the forms as shown in Figure 37. The top of the input forms stack should be lower than the bottom of the printer. Figure 37. Stacking Forms for Dual Push. See page 32 if your printer uses the optional printer stand. -
Page 81: Configuring Printer For Linking Dual Push
If you are using the same type of forms in the Front Push and Rear Push tractors and you want the printer when it runs out of forms in the front forms path to switch automatically to the forms in the rear forms path, continue with these steps. This is known as linking. -
Page 82: Setting Up Rear Pull Forms Path
Paper bail (See “Removing or Installing Paper Bail” on page 47.) Note: It is not recommended to select Manual when the printer is set for either the Rear Pull or the Push Pull forms paths. Manual can be selected from the operator panel, but to use it, you will need to re-configure the forms path... -
Page 83: Installing Rear Pull Tractor
1. Power off (O) the printer. 2. Open the top cover and the forms guide. 3. Stand facing the front of the printer. Hold the forms tractor with the tractor doors toward you and the electrical connector tab on the left. - Page 84 Position the electrical connector tab above its connector on the left side of the printer and the two lowest pins on the right. 5. Adjust the forms tractor until it clicks on both sides and the electrical connector tab is fully seated in the connector.
-
Page 85: Configuring Forms Path For Rear Pull
To configure the printer for the Rear Pull forms path: 1. Enter Power On Configuration mode: a. Press and continue to hold Menu/Enter while powering on (|) the printer, until (1) the message STARTING UP appears, (2) the boxes on the operator panel display are solidly filled in, and (3) the printhead stops. -
Page 86: Loading Forms For Rear Pull
1. Stack the forms as shown in Figure 39. The top of the input forms stack should be lower than the bottom of the printer. Figure 39. Stacking Forms for Rear Pull. See page 32 if your printer uses the optional printer stand. - Page 87 8. Lock the left locking lever. 9. Open both tractor doors. 10. Lift open the front tractor cover. Chapter 3. Setting Up Another Forms Path...
- Page 88 12. Grasp the first form as it appears from under the ribbon, and pull it up onto the rear forms tractor. 13. Place the left edge of the form on the left tractor pins so that the form engages about three left tractor pins. Close the left tractor door. 4247 Printer Model A00 User’s Guide...
- Page 89 14. Move the right tractor to the left and under the form until the holes along the right edge of the form engage the same number of pins as the left tractor. Close the right tractor door. 15. If necessary, slide the right tractor either left or right to remove any slack in the form, ensuring that the left and right tractor pins are centered in the holes of the form.
- Page 90 19. Close the front tractor cover. 20. Close the forms guide and the top cover. 4247 Printer Model A00 User’s Guide until the first perforation advances to be visible behind the want to remove the forms, mark the first perforation, and reload the...
- Page 91 21. Press Online. 22. Press Load/Form Feed to feed the forms. Ensure the forms pass under the forms jam sensor. The printer senses a forms jam when the forms are not under the forms jam sensor. 23. Ensure the forms exit through the rear tractor door (see Figure 40 on page 70).
-
Page 92: Setting Up Push Pull Forms Path
See the 4247 Printer Automatic Sheet Feeder Guide . IBM recommends that you not select Manual when the printer is set for either the Rear Pull or the Push Pull forms paths. Manual can be selected from the operator panel, but to use it you will need to re-configure the forms path both before and... -
Page 93: Installing Push Pull Tractors
1. Enter Power On Configuration mode. To do this, press and continue holding Menu/Enter while powering on (|) the printer, until (1) the message STARTING UP appears, (2) the boxes on the operator panel display are solidly filled in, and (3) the printhead stops. -
Page 94: Loading Forms For Push Pull
1. Stack the forms as shown in Figure 42. The top of the input forms stack should be lower than the bottom of the printer. Figure 42. Stacking Forms for Push Pull. See page 32 if your printer uses the optional printer stand. - Page 95 6. Unlock the locking levers on the rear tractors. Move the right tractor to the extreme right. 7. Move the left tractor to the tractor alignment mark. 8. Lock the left locking lever. 9. Open both tractor doors. 10. If necessary, press Micro to feed enough forms to cover the first four holes of the rear tractors.
- Page 96 13. Move the right tractor to the left and under the form until the holes along the right edge of the form engage the same number of pins as the left tractor. Close the right tractor door. 4247 Printer Model A00 User’s Guide...
- Page 97 14. If necessary, slide the right tractor either left or right to remove any slack in the form, ensuring that the left and right tractor pins are centered in the holes of the form. 15. While holding the right tractor in place, lock the right locking lever. 16.
- Page 98 18. Close the front tractor cover. 19. Close the forms guide and the top cover. 20. Press Online. 21. If the forms are not exiting through the rear tractor door, press Load/Form Feed to feed the forms. 4247 Printer Model A00 User’s Guide...
- Page 99 Ensure the forms pass under the forms jam sensor. The printer senses a forms jam when the forms are not under the forms jam sensor. 22. Ensure the forms exit through the rear tractor door (see Figure 43). Figure 43. Forms Exiting Rear of Printer Note: When loading the form into the rear forms tractor, do not open the front tractor door or hold the form with your hand.
- Page 100 If you do not want to use the printer defaults for forms settings (such as Line Spacing, Page Length, or Top of Form), see “Program Configuration” on page 106. 4247 Printer Model A00 User’s Guide...
-
Page 101: Chapter 4. Configuring Your Printer
Operator Panel Function Keys Used for Configuration ..80 Entering Printer Configuration ....81 Exiting Printer Configuration. -
Page 102: Operator Panel Function Keys Used For Configuration
These key functions are not active during normal printer operation. During normal printer operation, these function keys have the following functions: v Micro v Font key allows font selection; the Pitch key allows pitch selection. -
Page 103: Entering Printer Configuration
Program Configuration mode. The values for these parameters are stored in the printer nonvolatile memory (NVM), an internal printer storage location that is not erased when the printer is powered off or unplugged. Updating storage can take as long as 15 seconds to complete. -
Page 104: Exiting Printer Configuration
Figure 45 on page 83. Notes: 1. After you make configuration changes, IBM recommends that you print your changes and save the printout for future reference. For more information, see “Printing Power On Configuration Setup” on page 105. -
Page 105: Power On Configuration Menu Tree
PACING = XON / XOFF CHAR SET =* PC2 LANG = *CP437 CHAR SET = PC1 LANG = CP1251 SEQUENCE = *NONE ALARM = *YES SEQUENCE = FR + RR ALARM = NO SEQUENCE = ASF1+2 SEQUENCE = ASF123 Chapter 4. Configuring Your Printer... -
Page 106: Pull
5. To exit from Power On Configuration, press Menu/Enter. Your new value is stored in NVM. Parallel Interface Select this category if your printer is connected to your host computer with a parallel interface cable. There are several parameters available: v Interface Types 4247 Printer Model A00 User’s Guide... -
Page 107: Interface Type
To change or check the Interface Types: 1. Ensure the printer is powered off (O). 2. Press and hold Menu/Enter while powering on (|) the printer. The message STARTING UP displays. 3. After start-up is complete, release Menu/Enter and the message PRINT OUT=NO displays. -
Page 108: Data Bits
To change or check the Data Bits: 1. Ensure the printer is powered off (O). 2. Press and hold Menu/Enter while powering on (|) the printer. The message STARTING UP displays. 3. After start-up is complete, release Menu/Enter and the message PRINT OUT=NO displays. -
Page 109: Character Set
7. To exit from Power On Configuration, press Menu/Enter. Your new value is stored in NVM. Print Language You can select any print language that is available for your printer. The following print languages are available when printer emulation is set to Native 4247, 4202 III XL, 2381, or Epson FX:... - Page 110 Turkish 2 Urdu USA (Personal Computer)* * Manufacturing default with emulation set to Native 4247, 4202 III XL, or 2381 These additional print languages are only available if the printer emulation is set to Epson FX: Denmark 1 Denmark 2...
-
Page 111: Automatic Carriage Return On Line Feed
7. To exit from Power On Configuration, press Menu/Enter. Your new value is stored in NVM. Automatic Carriage Return on Line Feed You can set the printer to perform an automatic carriage return at a line feed. You can set this value to: No (default) No automatic carriage return is performed at a line feed. -
Page 112: 20 Cpi
NVM. 20 CPI You can set the printer to allow 20 characters-per-inch (CPI) condensed print from the data stream. For more information, see “Shift In (SI) / Condensed Print” on page 190. You can set this value to:... -
Page 113: Serial Interface
7. To exit from Power On Configuration, press Menu/Enter. Your new value is stored in NVM. Serial Interface Select this category if your printer is connected to your host computer through an RS-232C or RS-422A interface. There are several different parameters available: v Interface Type... -
Page 114: Baud Rate
To change or check the Baud Rate: 1. Ensure the printer is powered off (O). 2. Press and hold Menu/Enter while powering on (|) the printer. The message STARTING UP displays. 3. After start-up is complete, release Menu/Enter and the message PRINT OUT=NO displays. -
Page 115: Parity
To change or check the Parity: 1. Ensure the printer is powered off (O). 2. Press and hold Menu/Enter while powering on (|) the printer. The message STARTING UP displays. 3. After start-up is complete, release Menu/Enter and the message PRINT OUT=NO displays. -
Page 116: Buffer Size
To change or check the Connection Type: 1. Ensure the printer is powered off (O). 2. Press and hold Menu/Enter while powering on (|) the printer. The message STARTING UP displays. 3. After start-up is complete, release Menu/Enter and the message PRINT OUT=NO displays. -
Page 117: Character Set
7. To exit from Power On Configuration, press Menu/Enter. Your new value is stored in NVM. Print Language You can select any print language that is available for your printer. The following print languages are available when printer emulation is set to Native 4247, 4202 III XL, 2381, or Epson FX:... - Page 118 Turkish 2 Urdu USA (Personal Computer)* * Manufacturing default with emulation set to Native 4247, 4202 III XL, or 2381 These additional print languages are only available if the printer emulation is set to Epson FX: Denmark 1 Denmark 2...
-
Page 119: Automatic Carriage Return On Line Feed
7. To exit from Power On Configuration, press Menu/Enter. Your new value is stored in NVM. Automatic Carriage Return on Line Feed You can set the printer to perform an automatic carriage return on a line feed. You can set this value to: No (default) No automatic carriage return is performed at a line feed. -
Page 120: 20 Cpi
7. To exit from Power On Configuration, press Menu/Enter. Your new value is stored in NVM. 20 CPI You can set the printer to allow 20 CPI condensed print from the data stream. For more information, see “Shift In (SI) / Condensed Print” on page 190. You can set this value to:... -
Page 121: Functions
Once printing finishes, the forms automatically move up to the tear-off line. The forms remain there until another job is sent to the printer. When a job is sent, the forms move back down to the print position, and printing continues. -
Page 122: Rear Tear Mode
To change or check the Rear Tear Mode value: 1. Ensure the printer is powered off (O). 2. Press and hold Menu/Enter while powering on (|) the printer. The message STARTING UP displays. 3. After start-up is complete, release Menu/Enter and the message PRINT OUT=NO displays. -
Page 123: Sequence
2. If Paper Overlay is set to YES, when loading cut-sheet paper into the printer, hold the paper firmly in place until it is fed into the printer. To change or check the Paper Overlay value: 1. Ensure the printer is powered off (O). -
Page 124: Alarm
To change or check the Alarm control value: 1. Ensure the printer is powered off (O). 2. Press and hold Menu/Enter while powering on (|) the printer. The message STARTING UP displays. 3. After start-up is complete, release Menu/Enter and the message PRINT OUT=NO displays. -
Page 125: Sensor Tune
Sensor Tune This category establishes the black light threshold levels for the paper-present sensors. This adjustment is set initially by IBM when the printer is manufactured and may have to be adjusted for long-term aging of the sensor if a false end-of-forms occurs. -
Page 126: Bidirectional Adjustment
To change or check the Bidirectional adjustment: 1. Ensure the printer is powered off (O). 2. Press and hold Menu/Enter while powering on (|) the printer. The message STARTING UP displays. 3. After start-up is complete, release Menu/Enter and the message PRINT OUT=NO displays. -
Page 127: Printing Power On Configuration Setup
Power On Configuration Menu and all values are restored to those set at the factory. Printing Power On Configuration Setup Once you have made all your configuration changes, IBM recommends that you print your changes and save the printout for future reference. To print the power on configuration: 1. -
Page 128: Program Configuration
Notes: 1. Each category is described in detail in the sections following the chart. 2. After you make configuration changes, IBM recommends that you print your changes and save the printout for future reference. For more information, see “Printing Program Configuration Setup” on page 121. -
Page 129: Program Configuration Menu Tree
PITCH) *10 CPI 12 CPI 1 5 CPI 17.1 CPI 20 CPI PROP SLASH ZERO SKIP PERF *0 to 660 RIGHT MARGIN *136, 2 to 68 through 2 to 272 (determined by PITCH) RESTORE MFG Chapter 4. Configuring Your Printer... -
Page 130: Tear Position Adjustment
NVM) or STORE=CURRENT (new value remains valid until the printer is powered off (O)). Press Menu/Enter to save the new value. Once you change the value and save it, press Tear to verify the new tear off position. -
Page 131: Form Per Path
The forms path setting can be set to any of the following values: Note: Use the Automatic Sheet Feeder (ASF) only with the Front Push and Manual Sheet Feed paths. Remove the ASF to set up your printer for any other forms path. Front Push (default) -
Page 132: Impact Strength
If you want to save the new value, press value is stored in NVM) or STORE=CURRENT (new value remains valid until the printer is powered off (O)). Press Menu/Enter to save the new value. 4247 Printer Model A00 User’s Guide by the Rear Pull tractor. -
Page 133: Perforation Safety
If you want to save the new value, press value is stored in NVM) or STORE=CURRENT (new value remains valid until the printer is powered off (O)). Press Menu/Enter to save the new value. Adjustments This category contains the following parameters:... -
Page 134: Horizontal
If you want to save the new value, press value is stored in NVM) or STORE=CURRENT (new value remains valid until the printer is powered off (O)). Press Menu/Enter to save the new value. Horizontal Note: You can find similar information in “Left Margin” on page 117 and “Right Margin”... -
Page 135: Form Setting
Left Margin v Right Margin v Slashed Zero v Restore Mfg Defaults Line Spacing You can set vertical spacing in lines-per-inch or in lines-per-30 mm on your printer. Available values are: v 6 LPI (default) v 8 LPI v 12 LPI... -
Page 136: Line Spacing Lock
If you want to save the new value, press value is stored in NVM) or STORE=CURRENT (new value remains valid until the printer is powered off (O)). Press Menu/Enter to save the new value. Page Length You can set the page length for continuous forms to a defined number of lines (1 to 660), or for cut-sheet paper to any of the standard formats (Letter, Legal, A2, A3, A4, or A5). -
Page 137: Perforation Skipping
NVM) or STORE=CURRENT (new value remains valid until the printer is powered off (O)). Press Menu/Enter to save the new value. Font You can set the font on your printer to any of the following values: v DP (default) v DP Text... -
Page 138: Pitch
NVM) or STORE=CURRENT (new value remains valid until the printer is powered off (O)). Press Menu/Enter to save the new value. Pitch You can set the horizontal spacing (characters per inch) on your printer to any of the following values: v 5 CPI v 6 CPI v 7.5 CPI... -
Page 139: Left Margin
If you want to save the new value, press value is stored in NVM) or STORE=CURRENT (new value remains valid until the printer is powered off (O)). Press Menu/Enter to save the new value. Left Margin Note: You can find similar information in “Horizontal” on page 112 and “Right Margin”. -
Page 140: Slashed Zero
If you want to save the new value, press value is stored in NVM) or STORE=CURRENT (new value remains valid until the printer is powered off (O)). Press Menu/Enter to save the new value. Slashed Zero You can set this value to:... -
Page 141: Another Path
You must use the method outlined in “Power On Configuration” on page 82. You can enter the Power On Configuration menu without powering off and powering on the printer by using the Program Configuration menu. Available values for this category are: No (default) To enter the Power On Configuration menu from the Program Configuration menu:... -
Page 142: Hexadecimal Printing
No (default) v Yes If set to YES, any character sent to the printer will be printed in a hexadecimal value. This lets you see a readable printout of all characters sent by the host to the printer even if they are control code characters (for example, ESC, DC4, CR, LF). -
Page 143: Printing Program Configuration Setup
Printing Program Configuration Setup Once you have made all your configuration changes, IBM recommends that you print your changes and save the printout for future reference. You can save up to five different forms paths. To print the program configuration: 1. - Page 144 4247 Printer Model A00 User’s Guide...
-
Page 145: Chapter 5. Attaching Your Printer
Attaching Serial Cable ..... 124 Installing Printer Drivers ..... 125 AIX Operating Systems Installation . -
Page 146: Attaching Serial Cable
To attach a parallel cable: 1. Power off (O) the printer. Disconnect the power cord from the receptacle. 2. Standing behind the printer, insert the parallel interface cable into the lower connector at the bottom left of the printer. -
Page 147: Installing Printer Drivers
6. Power on (|) the printer. Installing Printer Drivers The IBM 4247 Printer is supported by the following operating systems or environments: v AIX version 3.2.5 and later v OS/400 version 2.3 Host Print Transform... -
Page 148: Aix Operating Systems Installation
AIX Operating Systems Installation Use the Printer Driver Diskette shipped with your printer. The files in the AIX subdirectory enable the user to add a 4247 as a printer device and add virtual printers in three emulation modes: v IBM 2381 Personal Printer... -
Page 149: Os/400 Printer Object Installation
4247.txt file. You must understand and agree to the terms and conditions stated in the license.txt file before installing the AIX driver. OS/400 Printer Object Installation The OS/400 printer object files reside on a DOS-formatted diskette in the OS400 subdirectory. The files are: license.txt read.1st 4247.doc... -
Page 150: Attaching Network Print Server
Ethernet attachments. The servers contain the intelligence needed to make your printer fully accessible to all network users. Its multiple protocol support lets you print from Novell NetWare, IBM LAN Server, IBM AIX, and other TCP/IP networks. The Network Print Server has its own unique network address, and interprets data transmitted on the network to the print data stream used by the 4247 Printer. - Page 151 1. Make sure your printer parallel interface is set to CX PARALLEL. To change or check the Interface Type: a. Power off (O) the printer. b. Press and hold Menu/Enter while powering on (|) the printer. The message STARTING UP displays.
- Page 152 flashing and remains unlighted, the Network Print Server is ready for use. 5. Power on (|) the printer. Make sure forms are loaded in the printer. 6. Press and hold the TEST button until the PACKET indicator starts to flash, then release the button to print a print test sample.
-
Page 153: Token-Ring Utp Or Stp
<3> To avoid personal risk, do not install or reconfigure a communication port or a teleport during a lightning storm. 1. Make sure your printer parallel interface is set to CX PARALLEL. To change or check the Interface Type: a. Power off (O) the printer. - Page 154 Network Print Server for Token-Ring Networks Administrator’s Guide (S246-0112) that was shipped with your Network Print Server. 4247 Printer Model A00 User’s Guide One is the 4247 Printer power cord and the other is the Network Print Server power cord.
-
Page 155: Chapter 6. Operator Tasks
Installing Ribbon Cartridge ....135 Cleaning Printer ......137 Cleaning Inside of Printer. - Page 156 3. Slide the printhead to the center of the printer. 4. Pull the ribbon cartridge up until each end snaps free from the cartridge support. 5. Push and hold the lever away from the ribbon lift assembly, and remove the ribbon cartridge from the printer.
-
Page 157: Installing Ribbon Cartridge
Installing Ribbon Cartridge Note: IBM recommends that you use the IBM ribbon cartridge (part number 1053685). To order ribbon cartridges, contact your place of purchase or call Lexmark at 1-800-438-2468. To install the ribbon cartridge, follow these steps: 1. Remove the ribbon cartridge from the package. Locate the ribbon guide, snap arm, ribbon advance knob, and the ribbon mounting pins. - Page 158 5. Slide the printhead to the center of the printer. Figure 47. Sliding the Printhead to the Center of the Printer 6. With the snap arm raised higher than the ribbon lift assembly, insert the ribbon guide between the ribbon shield and the printhead. Position the snap arm with the small lever up onto the ribbon lift assembly.
-
Page 159: Cleaning Printer
“Chapter 3. Setting Up Another Forms Path” on page 39. Cleaning Covers Clean the outside of the printer with a damp cloth and mild soap. Do not use any spray-type or chemical cleaners anywhere on your printer. Do not put any liquids or spray near the air vents. - Page 160 1. If the printer is powered on (|), and the Online indicator is lighted, press Online to make the printer not ready . 2. Open the top cover. 3. Tear off the forms at a perforation ahead of where they enter the printer.
-
Page 161: Chapter 7. Resolving Printer Problems
If you get the same code, call for service. 2. If you cannot fix the problem, power off (O) the printer. Wait 10 seconds. Power on (|) the printer. If the problem still exists, call for service. -
Page 162: Manual Feed
“Sensor Tune” on page 103. If the message still displays, call for service. 20 DSR ERROR CHECK INTF Message: The printer detected a remote connection serial interface error. The Data Set Ready or Data Carrier Detect signal was not sensed. - Page 163 Message: An error occurred because the Horizontal Adjustment value that was set in the Program Configuration menu is too large and would cause the printhead to hit the right side of the printer frame. Recovery: 1. Press Online to clear the error message.
-
Page 164: Various Problems
Message: Displays at power-on when the firmware EPROM is changed. Various Problems Some problems may occur on your printer for which no status code or message will occur such as poor print quality, a visual problem, or a forms-advance problem. Printed Output Problems You may notice problems with the printed output from the printer. -
Page 165: Other Problems
Wavy print Unreadable characters Line-to-line horizontal misregistration Other Problems You may notice other problems with your printer. Locate your symptom in the following tables. Correct the condition by following the steps listed for that problem. Table 14. Configuration Problems Problem... - Page 166 The printer is not at the edge of the table. Solution: Move the front of the printer to the edge of the table if you are using the front forms path; move the rear of the printer to the edge of the table if you are using the rear forms path.
- Page 167 Solution: Move the forms supply to the floor or to a shelf that is below the level of the printer. Consider using the optional printer stand mentioned in “Optional Printer Stand” on page 32. The forms supply is not aligned with the printer.
- Page 168 If the ribbon advance knob does not turn, replace the ribbon. See “Removing Ribbon Cartridge” on page 133. The printer forms path was not configured. Solution: Set the correct forms path setting in the Power On Configuration Menu. See Chapter 4. Configuring Your Printer.
-
Page 169: Print Quality And Ribbon Problems
Problem: Cut-sheet form fed from the Manual Sheet Feed does not overlay continuous forms properly The cut-sheet form is skewed as it goes into the printer or does not feed into the printer at all. Solution: Hold the cut-sheet form firmly in place until the form is fed into the printer. - Page 170 The Automatic Forms Thickness Adjustment (AFTA) setting needs to be increased. Solution: See the procedure for adjusting the forms thickness setting through the operator panel under “Automatic Forms Thickness (AFTA)” on page 111. The ribbon cartridge is defective. 4247 Printer Model A00 User’s Guide...
- Page 171 The Automatic Forms Thickness Adjustment (AFTA) setting needs to be changed. Solution: See the procedure for adjusting the forms thickness setting through the operator panel under “Automatic Forms Thickness (AFTA)” on page 111. Chapter 7. Resolving Printer Problems...
-
Page 172: Configuration Problems
Problem: Throughput of printer at half speed The Quiet Print function is set on. Solution: Press Quiet. If the message QUIET PRINT=ON displays, press Quiet again to disable the function. The printer will now print at its normal speed. Problem: Printer has no power The power cord is not connected. -
Page 173: Chapter 8. Supplies, Forms, And Cables
RS-422A ......157 IBM Parallel Attachment ..... 157 This chapter describes how to order ribbon cartridges, how to define your forms... - Page 174 Weight of top part Attached sheet individual weight Carbon paper individual weight See these notes for each forms path. 4247 Printer Model A00 User’s Guide Forms Paths Continuous Forms Front Push, Rear Pull, Push Pull Rear Push 76.2 to 431.8 mm 76.2 to 431.8 mm...
-
Page 175: Ordering Signal Cable
Modifies how the Park key works for forms in the Front Push and Rear Push forms paths. You cannot back up the forms to park them. Break the forms at a perforation before they enter the printer. Press Park twice, and the forms will move forward until ejected from the printer. -
Page 176: Serial Attachment
Attachment Cables for PCs and Compatible Serial Ports The table below lists part numbers to use when ordering a cable. Note: Before you place an order, IBM recommends you contact your IBM marketing representativeto verify the current part number. 4247 Printer Model A00 User’s Guide... -
Page 177: Attachment Cables For As/400 Workstation Controllers
Attachment Cables for AS/400 Workstation Controllers The table below lists part numbers to use when ordering a cable. Note: Before you place an order for a cable, IBM recommends you contact your IBM marketing representative to verify the current part number. -
Page 178: Local Duplex - Dtr Or Xon/Xoff Pacing
Local Duplex – DTR or XON/XOFF Pacing Local Duplex – DTR or XON/XOFF Pacing Note: This configuration is compatible with IBM cable part number 8509386. Local Duplex – XON/XOFF Pacing Local Duplex – XON/XOFF Pacing 4247 Printer Model A00 User’s Guide... -
Page 179: Rs-422A
The PC-parallel interface attaches to the host with a standard PC Parallel printer cable (IBM part number 92F3176) up to 1.8 m (6 ft) in length. Table 16. IBM Parallel Connector Pin Assignments... - Page 180 Table 16. IBM Parallel Connector Pin Assignments (continued) Pin Number 4247 Printer Model A00 User’s Guide Signal Name -SLCT IN Description Make printer selected...
-
Page 181: Appendix A. Specifications
Airflow......166 Declaration of IBM Product Noise Emission Values ... 166 Operator and Service Clearance . -
Page 182: Environmental Requirements
The printer operates best in business offices. Attention: To prevent printer damage, do not power on (|) the printer immediately after the printer has been moved from an environment that does not meet the following operating requirements. Introduce the printer to the new operating environment at least 24 hours before you power it on (|). -
Page 183: Storage Environment
Note: Depth is with all three ASF bins installed. Clearance Table 18 provides the recommended clearance you should maintain around the printer. Also see Figure 49 on page 167 and Figure 50 on page 168. Table 18. Printer Clearance Location... -
Page 184: Weight
African Electrical Safety Safety is a major consideration in the design and manufacture of IBM products. Proper electrical grounding is essential for safety and for reliable operation of the printer. If you have any questions about the grounding of your receptacle, ask your electrician. -
Page 185: Voltage Range
VOLTAGE RANGE COUNTRY 125 V Bermuda Bolivia Brazil Brunei Bulgaria Burma Canada Channel Islands Chile China Colombia Costa Rica Cyprus Denmark Dominican Republic Ecuador El Salvador Ethiopia Finland France Germany Guatemala Guyana Haiti Honduras Hungary Iceland India Indonesia Iran Iraq Ireland Israel Italy... -
Page 186: Plug And Receptacle Depictions
Plug and Receptacle Depictions The following chart shows the power cord part numbers and their corresponding power plugs and receptacles that are used with the printer. The current rating is that of the power cord or plug, whichever is less. -
Page 187: Power Cord
Power Cord Position the printer so the power cord can plug into the power receptacle without putting stress on the power cord. The standard power cord length in the U.S.A. and in all other countries is 2.74 m (9 ft). A 1.83 m (6 ft) power cord also is available in the U.S.A. -
Page 188: Airflow
Airflow The printer uses two fans to cool its internal parts. Ensure that you do not block the air vents. Lack of correct cooling and ventilation can cause printer failures and improper operation. Declaration of IBM Product Noise Emission Values The following tables show the noise emission values for the 4247 Printer. - Page 189 Symbol Depicts Power cord Figure 49. Clearance - Base Printer Appendix A. Specifications...
- Page 190 Figure 50. Clearance - Printer with ASF 4247 Printer Model A00 User’s Guide...
-
Page 191: Appendix B. Optional Features
Token-Ring Media Type 3 Network Print Server v Token-Ring Media Type 1 Network Print Server v Printer Stand For additional information, see “Optional Printer Stand” on page 32. For more information on these optional features, contact your IBM marketing representative. © Copyright IBM Corp. 1995, 1998... - Page 192 4247 Printer Model A00 User’s Guide...
-
Page 193: Appendix C. Native 4247 Commands
Valid Bar Code Data ..... 177 Reinitialize Printer Command ....178 Set Vertical Spacing (Inches) . - Page 194 Select / Deselect ASF Bin Commands //1// //2// //3// //C// //R// 4247 Printer Model A00 User’s Guide 14 14 1B 21 {HT} 18 {HR} 19 14 14 1B 28 1D {O₁} {data₁} 1D {O₂} {data₂}... 19 14 14 1B 40 14 14 1B 31 {NN}...
-
Page 195: Bar Code Commands
Bar Code Commands To print bar codes with the Native 4247 commands, use the SELECT and PRINT commands. Both commands are required. Command SELECT PRINT Note: The PRINT command will permit multiple bar codes to be printed on a single line using a single PRINT command. - Page 196 Note: POSTNET bar codes will not print human readable characters, even if HR is set to 1. 4247 Printer Model A00 User’s Guide 01 to 0C (hexadecimal), 1 to 12 (decimal) 1/6 inch to 12/6 inch (approx. 0.423 cm to 5.08 cm) bar code height, with a maximum height of 2 inches (approx.
-
Page 197: Print Command Format
PRINT Command Format ASCII DECIMAL Multiple bar codes may be printed using multiple field sets: GS O₁ data₁, GS O₂ data₂,... GS O be printed. Note: Bar code symbols will print over any descenders in the previous character box, if any text is present. O₁...O Bytes O₁... -
Page 198: Bar Code Examples
HEX: DECIMAL: 20 20 27 40 29 00 42 65 66 67 43 48 49 50 51 42 4247 Printer Model A00 User’s Guide DC4 DC4 ESC ! ETX SOH SOH EM 14 14 1B 21 03 01 01 19... -
Page 199: Valid Bar Code Data
Result margin Valid Bar Code Data Bar Code Type Number of Characters EAN-8 Must be 8 digits, including check digit EAN-13 Must be 13 digits, including check digit UPC-A Must be 12 digits, including the first/last characters UPC-E Must be 6 digits, including the first/last characters MSI (PLESSEY) No defined length... -
Page 200: Reinitialize Printer Command
Allow space for Human Readable Characters to print without overlapping adjacent data. 2. If the data field contains other than 0 through 9, all zeros will be printed. Reinitialize Printer Command This command reinitializes the printer. It resets the printer mode and clears the buffer of printable data. ASCII... -
Page 201: Character (Horizontal) Spacing
Byte LM defines the number of lines per 30 mm as the vertical spacing between lines. The possible values for LM are: ASCII Character (Horizontal) Spacing This command sets the character spacing, in characters per inch. ASCII DECIMAL CS specifies the character spacing value. The possible values for CS are: Forms Path Control This command causes single sheet load/eject. -
Page 202: Select Resident Font
This command selects the type of resident font to be used for printing. ASCII DECIMAL RF specifies the character spacing value. The possible values for RF are: Select Emulation This command selects the printer emulation mode. ASCII DECIMAL 4247 Printer Model A00 User’s Guide Decimal... -
Page 203: Select Afta In Column
Feed new form, ASF bin 1 Feed new form, ASF bin 2 Feed new form, ASF bin 3 Feed new form, ASF bin 1; then forms from ASF bin 2 Disable printer to print after ejecting printed form Appendix C. Native 4247 Commands... - Page 204 4247 Printer Model A00 User’s Guide...
-
Page 205: Appendix D. Personal Printer Data Stream (Ppds)
Character Font Image Download (ESC=) ....198 © Copyright IBM Corp. 1995, 1998 ..... . . 189... -
Page 206: About This Appendix
Buffer Terminating Conditions ....213 About This Appendix The IBM 4247 Printer implements a subset of PPDS. The environment in which the printer data stream processor operates is described below. -
Page 207: Page Printing Concept
Changing configuration parameter values while a print job is in progress may cause unpredictable results. IBM recommends the following to ensure that your print jobs run correctly: v Establish a known print environment, and end any previous print job. Start each print job with a Set Initial Conditions control. - Page 208 These internal values are the logical position on the presentation surface. The variable parameters have default values which are established when the printer is initialized. The standard power-on defaults are:...
-
Page 209: Graphic And Control Character Sequences
The 4247 Printer supports several ASCII code pages. Within a code page, a code point can be treated as a printable character (including space) or as a control code. -
Page 210: Ppds Compatibility
Print Single Character or Print All Characters control. PPDS Compatibility PPDS is supported in Native 4247 mode and in IBM 2381 Personal Printer and IBM 4202 Proprinter III XL emulation modes. When Native 4247 mode is selected, PPDS control codes are supported in the same manner as if emulating the IBM 2381 Personal Printer. -
Page 211: Bell (Bel)
Backspace (BS) This control moves the print position horizontally one character width to the left. If the current print position is at the left margin, the printer ignores this command. Horizontal Tab (HT) This control moves the print position to the next horizontal tab stop. If there are no tab stops to the right, or if the next tab stop is beyond the current right margin, the control is ignored. -
Page 212: Carriage Return (Cr)
A combination of 12 CPI and Condensed Print sets the printer to 20 CPI when 20 CPI=YES is set in the Power On Configuration Menu. A combination of 12 CPI and Condensed Print sets the printer to 12 CPI when 20 CPI=NO is set in the Power On Configuration menu. -
Page 213: Device Control 3 (Dc3) / Deselect Or Xoff
Parallel interface (Deselect): DC3 is treated as a NUL. v Serial interface (XOFF): DC3 is treated as a NUL if received from the host. The printer sends DC3 (XOFF) to the host to control data pacing if XON/XOFF pacing is selected. - Page 214 ESC H ESC I ESC J ESC K ESC L ESC N ESC O ESC P ESC Q 4247 Printer Model A00 User’s Guide Name 1B 0A Line Feed 1B 0B Vertical Tab 1B 0C Form Feed 1B 0D Carriage Return...
-
Page 215: Null (Esc Nul)
Configuration menu. Backspace (ESC BS) This control moves the print position horizontally one character width to the left. If the current print position is at the left margin, the printer ignores this command. Horizontal Tab (ESC HT) Name... -
Page 216: Line Feed (Esc Lf)
This control advances the paper one line. The horizontal position does not change unless automatic carriage return mode is activated from the operator panel Configuration menu. If the paper advance crosses the bottom margin, the printer completes all deferred printing on the current page and then does an automatic form feed. -
Page 217: Shift In (Esc Si) / Condensed Print
A combination of 12 CPI and Condensed Print sets the printer to 20 CPI when 20 CPI=YES is set in the Power On Configuration Menu. A combination of 12 CPI and Condensed Print sets the printer to 12 CPI when 20 CPI=NO is set in the Power On Configuration menu. -
Page 218: Device Control 4 (Esc Dc4) / Cancel Double-Wide Print
Auto Underscore (ESC -) This control turns on and off the continuous underscore function. If NN is 1, the printer underscores all text characters and spaces following this sequence. The printer does not underscore white space caused by horizontal tabs. -
Page 219: Set 7/72 Inch Line Spacing (Esc 1)
Invoke Text Line Spacing (ESC 2) This control sets the line spacing at the value set by the last Set Text Line Spacing (ESC A) control received. The printer sets the line spacing to six lines per inch if no ESC A has been issued. -
Page 220: Select Pc Character Set 2 (Esc 6)
This command selects unidirectional printing for one line only. The printhead moves to the home position at the left side of the printer and prints one line, left to right. The command is then cancelled by the carriage return that sends the printhead back to the home position. - Page 221 If both printer provided images and downloaded images are to be printed from the same local font ID, IBM recommends that the downloaded images be sent, using this control, at the start of a print job when the print environment for the job is established.
-
Page 222: Select N/72 Inch Line Spacing (Esc A)
Invoke Text Line Spacing (ESC 2). The valid values for NN are X'01' to X'FF' (1 to 255). The default line spacing is X'0C' (six lines per inch). A value of 0 is not valid and causes the printer to ignore this command. Following are example values for NN:... -
Page 223: Set Horizontal Tabs (Esc D)
28 bytes as tab stops and ignores all the data bytes following the 28 bytes until a Null is received. If the printer receives this control code with no tabs, all horizontal tab stops are cleared. -
Page 224: Relative Move Baseline (Esc J)
NN is a one-byte hexadecimal value that specifies the move amount in units of 1/216 inch. The printer will adjust the value to the nearest 1/144 inch. If Automatic Carriage Return on Line Feed is set in the operator panel Power On Configuration menu, a carriage return also is performed when a Relative Move Baseline code is received (see “Carriage Return (CR)”... -
Page 225: Normal Density Bit Image Graphics (Esc K)
Once this function is activated, it stays active until the End Skip Perforation (ESC O) or Set Page Length (ESC C) control is received or the printer is initialized. NN is a one-byte hexadecimal value that specifies the number of lines to skip at the bottom of each page. -
Page 226: Proportional Space Mode (Esc P)
ESC Q if the printer is to be used. Query Identifiers: If the emulation mode is set to 4202 III XL, the printer ID is X'16'. If the emulation mode is set to Native 4247 or 2381, the printer ID is X'B8'. Set Default Tabs (ESC R) This control resets both the horizontal and vertical tab stops. -
Page 227: End Subscript/Superscript Mode (Esc T)
2. LL should be at least one character width less than the page width. 3. If RR is greater than the page width or is less than LL, RR is set to the page width (MPP). Appendix D. Personal Printer Data Stream (PPDS) -
Page 228: Dual Density Bit Image Graphics Type 2 (Esc Y)
Reverse Line Feed (ESC ]) This command causes the contents of the buffer to be printed and advances the paper one line in the reverse direction from the paper path. 4247 Printer Model A00 User’s Guide NN .. NN NN .. NN 256 + LL.) If the count equals... -
Page 229: Print Single Character (Esc |)
(N1 + [(N2 x 256])/120. Select Line Scoring (ESC [ -) This command selects underscore, strikethrough, and overscore. This command is supported in Native 4247 and 2381 emulation modes only. The values for N1 are: X'01' Underscore Appendix D. Personal Printer Data Stream (PPDS) -
Page 230: Set Presentation Highlight (Sph) (Esc
Double line feeds, character height unchanged (4202 only) X'21' Double line feeds, standard character height X'22' Double line feeds, double character height M4 is a one-byte hexadecimal value that turns double wide on or off as follows: X'00' No Change 4247 Printer Model A00 User’s Guide... -
Page 231: Set Font Global (Sfg) (Esc
Initializes printer to user-defined settings; downloaded fonts are not initialized. Initializes printer to user-defined settings; downloaded fonts are initialized. Initializes printer to factory settings; downloaded fonts are not initialized. Initializes printer to factory settings; downloaded fonts are initialized. Appendix D. Personal Printer Data Stream (PPDS) - Page 232 4247 Printer Model A00 User’s Guide Initializes printer to user-defined settings; downloaded fonts are initialized. Settings are saved in non-volatile memory (NVM). Initializes printer to factory settings; downloaded fonts are initialized. Settings are saved in non-volatile memory (NVM). For Native 4247 or 2381 emulation...
-
Page 233: Select Code Page (Scp) (Esc
CP851 Old Greek CP852 Latin/2 Roece CP853 Turkish CP855 Cyrillic CP857 Turkish CP860 Portuguese CP861 Icelandic CP862 Hebrew CP863 Canadian French CP864 Arabic CP865 Danish/Norwegian CP866 Cyrillic 2 (Personal Computer) CP869 New Greek Appendix D. Personal Printer Data Stream (PPDS) -
Page 234: Set Print Quality (Spq) (Esc
This control allows the host application to specify the desired print quality when the printer is in Native 4247 mode or emulating the IBM 2381 Personal Printer. The setting remains in effect until changed by another Set Print Quality control or until the printer is initialized. -
Page 235: Buffer Terminating Conditions
Dual Density Bit Image Graphics Type 2 v High Density Bit Image Graphics Function No change (Default) Low quality level (highest speed) Medium quality level (medium speed) High quality level (lowest speed) Printer Initialization (Default) Appendix D. Personal Printer Data Stream (PPDS) - Page 236 The next character is then printed at the left margin on the following line. Automatic line wrap occurs for text data but not for bit image graphics. 4247 Printer Model A00 User’s Guide...
-
Page 237: Appendix E. Epson Fx-1050 Data Stream
Set n/216 Inch Line Spacing (ESC 3) ....231 © Copyright IBM Corp. 1995, 1998 ..... . . 220 . - Page 238 Reassign Graphics Mode (ESC ?) ....232 Initialize Printer (ESC @) ....233 Select n/72 Inch Line Spacing (ESC A) .
-
Page 239: About This Appendix
Changing configuration parameter values while a print job is in progress may cause unpredictable results. IBM recommends the following to ensure that your print jobs run correctly: v Establish a known print environment, and end any previous print job. Start each print job with an Initialize Printer control. -
Page 240: Page Presentation
As a job prints, the printer controller maintains both the logical position and the physical position on the page. If a print job does not end with a proper job terminator (for example, Form Feed), then: v All data for the current page may not print v The next print job may be misaligned on the form v Residual data from a previous job could print with the new job. -
Page 241: One-Byte Controls
These internal values are the logical position on the presentation surface. The variable parameters have default values which are established when the printer is initialized. The standard power-on defaults are:... -
Page 242: Null (Nul)
Backspace (BS) This control moves the print position horizontally one character width to the left. If the current print position is at the left margin, the printer ignores this command. Horizontal Tab (HT) This control moves the print position to the next horizontal tab stop. If there are no tab stops to the right, or if the next tab stop is beyond the current right margin, the control is ignored. -
Page 243: Vertical Tab (Vt)
Carriage Return is a line ending control code that causes buffered data to print. Shift Out (SO) / Double-Wide Print This control causes the printer to start double-width printing. Double-width printing prints the characters twice as wide as the current character spacing. This results in half as many characters per inch. -
Page 244: Device Control 1 (Dc1) / Select Or Xon
Parallel interface (Select): DC1 selects the printer. v Serial interface (XON): DC1 is treated as a NUL if received from the host. The printer sends DC1 (XON) to the host to control data pacing if XON/XOFF pacing is selected. -
Page 245: Delete Character (Del)
Delete Character (DEL) This control removes the last text character on the print line and does not affect control codes. Escape Sequence Controls Escape sequence controls have an ESC followed by one or more control parameters. Supported escape sequence controls are: Control ESC NUL ESC BEL... - Page 246 ESC \ ESC a ESC b ESC d ESC e ESC g ESC j ESC k 4247 Printer Model A00 User’s Guide Name 1B 35 Cancel Italic Mode 1B 36 Printable Code Area Expansion 1B 37 Cancel Printable Code Area Expansion...
-
Page 247: Escape (Esc)
Backspace (ESC BS) This control moves the print position horizontally one character width to the left. If the current print position is at the left margin, the printer ignores this command. Horizontal Tab (HT) This control moves the print position to the next horizontal tab stop. If there are no tab stops to the right, or if the next tab stop is beyond the current right margin, the control is ignored. -
Page 248: Vertical Tab (Esc Vt)
Shift Out (ESC SO) / Double-Wide Print This control causes the printer to start double-width printing. Double-width printing prints the characters twice as wide as the current character spacing. This results in half as many characters per inch. -
Page 249: Device Control 1 (Esc Dc1) / Select Or Xon
Parallel interface (Select): DC1 selects the printer. v Serial interface (XON): DC1 is treated as a NUL if received from the host. The printer sends DC1 (XON) to the host to control data pacing if XON/XOFF pacing is selected. -
Page 250: Set Intercharacter Spacing (Esc Sp)
This control applies to DP and NLQ. Proportional cannot be condensed and 10 CPI cannot be combined with 12 CPI. Proportional overrides condensed if both proportional and condensed are selected. Double-strike is ignored in NLQ. Cancel MSB Control (ESC #) 4247 Printer Model A00 User’s Guide Decimal... -
Page 251: Set Absolute Print Position (Esc $)
Cancels the most significant bit (MSB) control. Set Absolute Print Position (ESC $) This control specifies the distance that subsequent characters are to be printed from the set left margin in 1/60 inch units. Where the total number of dots equals N1 + (N2 and the previous setting remains active. -
Page 252: Select Graphics Mode (Esc *)
Auto Underscore (ESC –) This control turns on and off the continuous underscore function. If NN is an odd value (1, 3, 5 ...), the printer underscores all text characters and spaces following this sequence. The printer does not underscore white space caused by horizontal tabs. -
Page 253: Set 7/72 Inch Line Spacing (Esc 1)
Set 1/6 Inch Line Spacing (ESC 2) This control sets the line spacing at the value set by the last Set Text Line Spacing (ESC A) control received. The printer sets the line spacing to six lines per inch if no ESC A has been issued. -
Page 254: Cancel Printable Code Area Expansion (Esc 7)
This control reassigns a graphics command (ESC K, ESC L, ESC Y, or ESC Z) to a different mode (K, L, Y, or Z). Option Single-Density Double-Density High-Speed Double-Density * 4247 Printer Model A00 User’s Guide Alternate Code ESC K ESC L ESC Y... -
Page 255: Initialize Printer (Esc @)
CRT II Double-Density Plotter Note: (*) Adjacent dots cannot be printed in this mode Initialize Printer (ESC @) This control resets all print-related parameters to values previously saved and clears the buffer of printable data. Select n/72 Inch Line Spacing (ESC A) This control sets a line spacing value for subsequent line feeds. -
Page 256: Set Horizontal Tabs (Esc D)
32 bytes as tab stops and ignores all the data bytes following the 32 bytes until a Null is received. If the printer receives this control code with no tabs, all horizontal tab stops are cleared. -
Page 257: Printable Code Area Expansion (Esc I)
NN is a one-byte hexadecimal value that specifies the move amount in units of 1/216 inch. The printer will adjust the value to the nearest 1/144 inch. This control performs an immediate line feed, but does not affect subsequent line spacing and does not produce a CR. -
Page 258: Select 12 Cpi (Esc M)
Once this function is activated, it stays active until the End Skip Perforation (ESC O) or Set Page Length (ESC C) control is received, or the printer is initialized. NN is a one-byte hexadecimal value that specifies the number of lines to skip at the bottom of each page. -
Page 259: Begin Subscript/Superscript Mode (Esc S)
This control activates subscript and superscript printing. Once this printing is active, it stays active until another Begin Subscript/Superscript Mode control changes the mode, an End Subscript/Superscript Mode control is received, or the printer is initialized. NN is a one-byte hexadecimal value that activates subscript or superscript printing. -
Page 260: Dual Density Bit Image Graphics Type 2 (Esc Y)
N2, determine the displacement required in 1/120 of an inch. Send the resulting number using the formula total number of dots equals N1 + (N2 desired formula is to the left, subtract the number from 65536 before using the 4247 Printer Model A00 User’s Guide NN .. NN NN .. NN 256 + LL.) If the count equals... -
Page 261: Set Letter Quality Justification (Esc A)
formula. The printhead will move (N1 + [N2 current print position. The control is ignored if it would move the printhead beyond the page margins. Set Letter Quality Justification (ESC a) This control selects print justification according to the following values of NN: Selects left justification Selects center justification Selects right justification... -
Page 262: Set 15 Cpi (Esc G)
This control overrides condensed and is available for DP, NLQ, and user-defined characters. Quiet Printing (ESC s) This control activates and deactivates Quiet Mode. Quiet mode creates half-speed printing. The following are the values for NN: 4247 Printer Model A00 User’s Guide... -
Page 263: Select Character Table (Esc T)
Set Quiet Mode Off Set Quiet Mode On Select Character Table (ESC t) This control selects italic characters from the Epson Italic character set. The characters selected are ASCII codes 128 to 255 (X'80' through X'FF'). The following values of NN are: X'0' X'1' X'2'... - Page 264 The next character is then printed at the left margin on the following line. Automatic line wrap occurs for text data but not for bit image graphics or advanced function graphics. 4247 Printer Model A00 User’s Guide...
-
Page 265: Unsupported Command Processing
Unsupported Command Processing The following Epson controls are not supported by the 4247 Printer. If any of these commands are received, they are ignored. v Select 9-Pin Graphic Mode (ESC |) v Disable Paper-Out Sensor (ESC 8) v Enable Paper-Out Sensor (ESC 9) - Page 266 4247 Printer Model A00 User’s Guide...
-
Page 267: Appendix F. Code Pages
Epson Extended Character Variables ....284 ASCII Code Pages The table below lists the ASCII code pages used by the 4247 Printer, and also provides page references so you can determine what code page contains the characters you want to use. - Page 268 Code Page 1006 1046 1089 1098 1116 1117 1118 1251 4247 Printer Model A00 User’s Guide Character Set Name Greek/Latin (ISO 8859-7) Latin 1 (ISO 8859-1) Multilingual Old Greek Latin 2/ROECE Turkish Cyrillic Turkish Portuguese Icelandic Hebrew Canadian French Arabic...
-
Page 269: Usa (Personal Computer)
USA (Personal Computer) Appendix F. Code Pages... -
Page 270: Greek/Latin (Iso 8859-7)
Greek/Latin (ISO 8859-7) 4247 Printer Model A00 User’s Guide... -
Page 271: Latin 1 (Iso 8859-1)
Latin 1 (ISO 8859-1) Appendix F. Code Pages... -
Page 272: Multilingual
Multilingual 4247 Printer Model A00 User’s Guide... -
Page 273: Old Greek
Old Greek Appendix F. Code Pages... -
Page 274: Latin 2/Roece
Latin 2/ROECE 4247 Printer Model A00 User’s Guide... -
Page 275: Turkish
Turkish Appendix F. Code Pages... -
Page 276: Cyrillic
Cyrillic 4247 Printer Model A00 User’s Guide... -
Page 277: Turkish
Turkish Appendix F. Code Pages... -
Page 278: Portuguese
Portuguese 4247 Printer Model A00 User’s Guide... -
Page 279: Icelandic
Icelandic Appendix F. Code Pages... -
Page 280: Hebrew
Hebrew 4247 Printer Model A00 User’s Guide... -
Page 281: Canadian French
Canadian French Appendix F. Code Pages... -
Page 282: Arabic
Arabic 4247 Printer Model A00 User’s Guide... -
Page 283: Danish/Norwegian
Danish/Norwegian Appendix F. Code Pages... -
Page 284: Cyrillic 2 (Personal Computer)
Cyrillic 2 (Personal Computer) 4247 Printer Model A00 User’s Guide... -
Page 285: New Greek
New Greek Appendix F. Code Pages... -
Page 286: Thai
Thai 4247 Printer Model A00 User’s Guide... -
Page 287: Ocr-A
OCR-A Appendix F. Code Pages... -
Page 288: Ocr-B
OCR-B 4247 Printer Model A00 User’s Guide... -
Page 289: Latin 2 (Iso 8859-2)
Latin 2 (ISO 8859-2) Appendix F. Code Pages... -
Page 290: Latin 3 (Iso 8859-3)
Latin 3 (ISO 8859-3) 4247 Printer Model A00 User’s Guide... -
Page 291: Latin 4 (Iso 8859-4)
Latin 4 (ISO 8859-4) Appendix F. Code Pages... -
Page 292: Cyrillic (Iso 8859-5)
Cyrillic (ISO 8859-5) 4247 Printer Model A00 User’s Guide... -
Page 293: Latin 8 (Iso 8859-8)
Latin 8 (ISO 8859-8) Appendix F. Code Pages... -
Page 294: Latin 5 (Iso 8859-8)
Latin 5 (ISO 8859-8) 4247 Printer Model A00 User’s Guide... -
Page 295: Baltic Multilingual
Baltic Multilingual Appendix F. Code Pages... -
Page 296: Estonian
Estonian 4247 Printer Model A00 User’s Guide... -
Page 297: Urdu
Urdu Appendix F. Code Pages... -
Page 298: Arabic Extended
Arabic Extended 4247 Printer Model A00 User’s Guide... -
Page 299: Latin 6 (Iso 8859-6)
Latin 6 (ISO 8859-6) Appendix F. Code Pages... -
Page 300: Farsi (Personal Computer)
Farsi (Personal Computer) 4247 Printer Model A00 User’s Guide... -
Page 301: Estonian (Personal Computer)
Estonian (Personal Computer) Appendix F. Code Pages... -
Page 302: Latvian (Personal Computer)
Latvian (Personal Computer) 4247 Printer Model A00 User’s Guide... -
Page 303: Lithuanian (Personal Computer)
Lithuanian (Personal Computer) Appendix F. Code Pages... -
Page 304: Cyrillic Windows
Cyrillic Windows 4247 Printer Model A00 User’s Guide... -
Page 305: Epson Fx-Series Code Pages
Epson FX-series Code Pages The following Epson code charts provide information on the character tables available for Epson FX-series emulation mode. Extended Graphics Character Table ″ & < − > Italic Character Table ″ & < − > ‘ Ç É... -
Page 306: Epson Extended Character Variables
Sweden Italy Spain - 1 Japan Norway Denmark - 2 Spain - 2 Latin America I French Canadian Latin America II 4247 Printer Model A00 User’s Guide Code Point (in hexadecimal) à ° ç § § Ä Ö Ü £... - Page 307 The following terms are defined as they apply to the 4247 Printer documentation. Italicized text indicates terms found elsewhere in this glossary. If you do not find the term you need, refer to the index or to the IBM Dictionary of Computing , ZC20-1699.
- Page 308 CU. See control unit . curl. See paper curl . customer engineer (CE). An IBM service representative who performs maintenance services for IBM hardware. Synonymous with IBM service representative . cut-sheet paper. Paper that, unlike continuous forms, is cut into sheets.
- Page 309 To make functional. Contrast with disable . end-of-forms. A condition sensed by the printer that assumes it is time to add forms to the input area of the printer. EPROM. erasable programmable read-only memory. Ethernet. A 10-megabit baseband local area network that allows multiple stations to access the transmission medium at will without prior coordination, avoids contention by using carrier sense and deference, and resolves contention by using collision detection and transmission.
- Page 310 IBM customer engineer (CE). An IBM representative who services IBM products. IBM marketing representative. An IBM representative who takes product orders. IBM service representative. An IBM representative who services IBM products. See also customer engineer (CE) . icon. A pictorial representation of an object.
- Page 311 A variable that is given a constant value during printer and attachment configuration. parking. A printer state in which a forms type is unloaded from the print area, but still remains on the tractors. When the forms in one forms path are parked, another forms path or the manual sheet feed can be selected, and the forms in that path will be loaded into the print area.
- Page 312 Describes a direction that is parallel to the movement of the paper path. program configuration mode. (1) A printer state that allows you to set the functions you use in your daily job. You can save these values in nonvolatile memory (NVM) . (2) A diagnostic condition.
- Page 313 A graphic representation of information on an output medium. Text can consist of alphanumeric characters and symbols arranged in paragraphs, tables, columns, and other shapes. throughput. A measure of the amount of work performed by the printer over a period of time; for example, number of jobs per day.
- Page 314 A paper that is manufactured specifically for the xerographic process, in which key paper qualities are carefully controlled. zero tear. Conserves forms by not requiring the operator to tear off any of the forms when parking or changing forms types. 4247 Printer Model A00 User’s Guide...
- Page 315 17, 135 installing 17, 135 ordering 151 removing 133 changing configuration 82 display language 19 © Copyright IBM Corp. 1995, 1998 changing (continued) forms path 41 ribbon cartridge 133 checking configuration 27 tear off position 25 choosing...
- Page 316 162 token-ring (UTP and STP) 131 creating print test sample 23 data stream commands Epson FX-1050 217, 245 personal printer data stream (PPDS) 187, 213 default change 118 configuration settings 84, 107 forms path 13 power on 27, 105...
- Page 317 72 rear pull 64 rear push 55 location function keys 9 operator areas and controls 5 operator panel display 7 power switch 19 printer on optional printer stand 32 site 159 status indicators 7 tractor in forms path 36 Index...
- Page 318 85 near letter quality (NLQ) 90 print language 87 select-in signal 85 parking forms 29, 59 perforation safety 111 personal printer data stream (PPDS) commands 187, physical requirements 161 plugs and receptacles by country 162 depictions 164 power...
- Page 319 23 print test sample starting 23 stopping 13 printer cleaning 137 dimensions 161 driver installation 125 set up 3 stand 32 status codes 139 unpacking 2 weight 162 printing firmware level 23 first document 23 hexadecimal 120 impact 110 power on configuration 27, 105...
- Page 320 151 physical requirements airflow 166 clearances 161, 166 heat output 165 noise emission values 166 site location 159 4247 Printer Model A00 User’s Guide specifications (continued) physical requirements (continued) weight 162 power 165 temperature 160 stacking forms dual push forms paths 58...
- Page 322 Part Number: 63H6366 Printed in the United States of America on recycled paper containing 10% recovered post-consumer fiber. SA24-4404-02...
Need help?
Do you have a question about the 4247 A00 and is the answer not in the manual?
Questions and answers