Glow-worm 30ci plus Instructions For Use Manual
Fanned flue combination boiler
Hide thumbs
Also See for 30ci plus:
- Instructions for use manual (56 pages) ,
- Instructions for use manual (52 pages)

Subscribe to Our Youtube Channel
Related Manuals for Glow-worm 30ci plus


Summary of Contents for Glow-worm 30ci plus
-
Page 1: Instructions For Use
4000121772-2.01.03 Instructions for Use Installation and Servicing To be left with the user 30ci plus G.C. No. 47-047-22 Fanned Flue Combination Boiler Hepworth Heating Ltd., Nottingham Road, Belper, Derbyshire. DE56 1JT... -
Page 2: Guarantee Registration
0208 247 9857 Customer service : Glow-Worm GB Great Britain : Tel. 00 44 (0) 828100 Fax. 00 44 (0)1773 828070 Hepworth Heating Ltd., Nottingham Road, Belper, Derbyshire. DE56 1JT Glow-worm IE Ireland: Tel. 00 353 (0)16305757 Fax. 00 353 (0)16305724 C &... -
Page 3: Table Of Contents
Contents CONTENTS DESCRIPTION SECTION PAGE No. Important Information Draining and Filling INSTRUCTION Appliance Introduction Appliance Safety Devices FOR USE Maintenance and Servicing Controls and Lighting Programmer instructions for use Technical Data General Information Heating System Design Domestic Hot Water System Design Boiler Schematic Boiler Location, Flue and Ventilation Fixing Jig... -
Page 4: Important Information
Hepworth Heating Ltd. Alternatively, an unswitched shuttered socket outlet and 3A Any alteration not approved by Hepworth Heating Ltd., could invalidate the certification, boiler warranty and may also fused 3 pin plug, both to the current issue of BS1363 may be infringe the current issue of the Statutory Requirements. -
Page 5: Draining And Filling
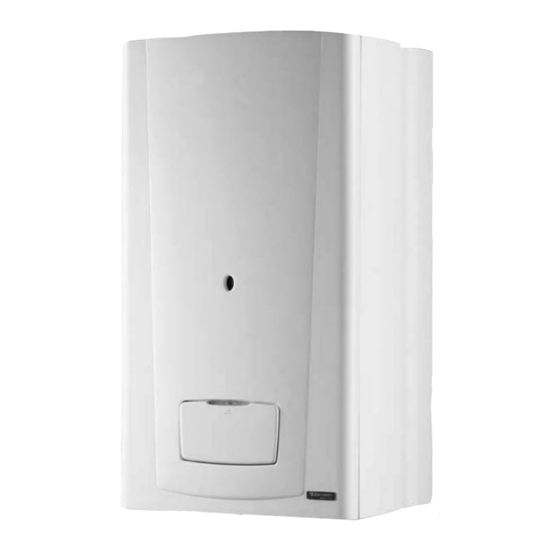
Switch On/Off to ( I ) to reset the appliance. Diagram 1 Appliance Introduction The 30ci plus boiler is a wall mounted modulating combination This boiler may be installed in any room, although particular boiler with electronic ignition providing central heating and attention is drawn to the installation of a boiler in a room instantaneous hot water. -
Page 6: Appliance Safety Devices
Do not use possibility of personal injury. reconditioned or copy parts that have not been clearly authorised by Hepworth Heating Ltd. The boiler casing can be cleaned with a damp cloth, followed by a dry cloth to polish. If a part is required contact Heatcall (Glow-worm’s own service organisation) using the telephone number on the inside front Do not use abrasive or solvent cleaners. -
Page 7: Controls And Lighting
Controls and lighting Central heating adjustment Domestic hot water The temperature of the water in the central heating circuit can The temperature can be adjusted from approx. 38°C up to be set between, approx. 38 C and 87 65°C. It is supplied, factory set to 38 C - 73 Timed central heating and instantaneous domestic hot water... - Page 8 Controls and lighting 4. Central heating temperature adjustment: 7. If a fault occurs: • The green running light will change to a red flashing light and the display will flash the letter ‘F’ with the type of fault. • Press button twice, is displayed and the current temperature setting flashes.
-
Page 9: Programmer Instructions For Use
Programmer instructions for use Setting the time. press "+" and and the will be Make sure there is an electrical supply to the boiler and the displayed along with 0 to 24 hour ON / OFF settings and 1 to 7 boiler is switched ON ( I ). -
Page 10: Technical Data
14,1 litres/min. Threshold flow rate 1,7 litres/min. Maximum supply pressure 10 bar Minimum supply pressure 0,5 bar The 30ci plus is delivered in two separate Combustion packages: Products outlet diameter 60 mm Fresh air inlet diameter 100 mm • The boiler including fixing jig complete with... -
Page 11: General Information
3 Heating System Design • The 30ci plus is for use with sealed central heating systems. • The total volume of water permitted for the heating system depends, amongst other things, on the static head in the cold •... -
Page 12: Domestic Hot Water System Design
(if required) TABLE 1. FLOW RATE Model Minimum flow rate 30ci plus 21.26 litres per minute This is equal to 20°C differential at maximum heat input • A bypass is not required on the central heating circuit unless the system controls could allow the boiler to operate when Bypass there is no flow. -
Page 13: Boiler Schematic
5 Boiler Schematic 1 - Fan. 14 - Gas valve. 2 - Air pressure switch. 15 - Loss of water sensor. 3 - Heat exchanger. 16 - Domestic heat exchanger 4 - Overheat thermostat. 17 - 3 way valve 5 - Combustion chamber. 18 - Domestic water flow sensor 6 - Expansion vessel. -
Page 14: Boiler Location, Flue And Ventilation
6 Boiler Location, Flue and Ventilation 6.1 Boiler Location The recommended clearances are shown in diagram 6.1. 300mm 25mm Note: The boiler must be mounted on a flat wall which is 50mm sufficiently robust to take its weight when full. If in doubt, expert above advice should be obtained, in the event of the wall being found above boiler... - Page 15 6 Boiler Location, Flue and Ventilation 6.2 Terminal guard, see diagram 6.3. A terminal guard is required if persons could come into contact with the terminal or the terminal could be subject to damage. If a terminal guard is required, it must be positioned to provide a minimum of 50mm clearance from any part of the terminal and to be central over the terminal.
-
Page 16: Fixing Jig
7 Fixing Jig Wall template The fixing jig supplied within the boiler pack, is made up as follows: FIXING JIG A - Heating flow isolating valve. Inclusive Isolating Valves B - Domestic hot water outlet. C - Gas service cock. D - Cold water inlet isolating valve. -
Page 17: Boiler Preparation And System Connections
8 Boiler Preparation and System Connections 8.1 Cutting the flue hole • Remove the wall template, follow the instructions given on the REAR TOP wall template. 80 min. FLUE OUTLET • Position the wall template, taking due regard of the minimum clearances for the selected flue application, see diagram 8.1. -
Page 18: Boiler Installation
9 Boiler Installation 9.1 Sheet metal parts WARNING: When installing or servicing this boiler, care should be taken when handling the edges of sheet metal parts to avoid the possibility of personal injury. 9.2 Installing the boiler IMPORTANT NOTE: The system must be thoroughly flushed using a propriety cleanser from Fernox or Sentinel to eliminate any foreign matter and contamination e.g. - Page 19 9 Boiler Installation 9.3 Heating safety valve (3 bar RED) and DOMESTIC SAFETY HEATING SAFETY domestic safety valve (10 bar BLUE) VALVE(10 bar BLUE) VALVE (3 bar RED) discharge, refer to diagrams 9.4. Two short discharge pipes and washers are supplied in the fittings pack, fit these to the heating safety valve 3 bar and the domestic water safety valve 10 bar.
-
Page 20: Horizontal Telescopic Rear Flue Installation
10 Horizontal Telescopic Rear Flue Installation 10.1 Horizontal Telescopic Rear flue - NOTE: If it is necessary to cut the "flue length", make sure kit No. A2018000, refer to diagram 10.1 that the overlaps are as follows:- air duct = 25mm Suitable for installations that require a flue length "L"... - Page 21 10 Horizontal Telescopic Rear Flue Installation FAN RETAINING EARTH TWIST ANTI-CLOCKWISE BOLTS LEAD & LOCK AT 90 POSITION POWER SUPPLY LEADS NOTE: Please check orientation Diagram 10.5 when engaging bayonet spigot Diagram 10.6 10.3 Fan Removal, refer to diagram 10.5 •...
-
Page 22: Horizontal Telescopic Top Flue Installation
11 Horizontal Telescopic Top Flue Installation The Horizontal Telescopic Top Flue, Kit No. SIDE FLUE A2004500 Suitable for installations that require a flue length "L" from 430 minimum to 660 maximum. If longer flueing is required extensions and bends are available, see note below. If the flue length, see diagram 11.2. - Page 23 11 Horizontal Telescopic Top Flue Installation 11.3 Installation of telescopic flue assembly STEP 1. • Remove the elbow (D) and the telescopic flue assembly (A) from the flue kit. FLUE LENGTH Outside • Refer to Step 1. diagram 11.3. Fit the telescopic flue assembly wall face (A) into the prepared hole in the wall.
-
Page 24: Horizontal Top Flue Installation
12 Horizontal Top Flue Installation 12a.1 The Horizontal Top flue - kit 86285H SIDE FLUE Suitable for installations that require a max. flue length "L" of 740mm. If a shorter flue length is required, the flue can be cut to a min. length"L"... - Page 25 12 Horizontal Top Flue Installation 12a.4 Installation of horizontal top flue Outside Flue assembly wall face centre line Important: If the flue has been cut, ensure that there are no burrs that could damage the ‘O’ ring. • For flue systems less than 0,5 m long, fit the flue restrictor (a) into the fan outlet, see diagram 10a.4.
-
Page 26: Electrical Connection
13 Electrical Connection WARNING: This appliance must be earthed. This appliance 13.1 Mains Cable must be wired in accordance with these instructions. Any fault Important: If a replacement supply cable is required it must be arising from incorrect wiring cannot be put right under the terms purchased. -
Page 27: External Controls
13 Electrical Connection 13.3 Mains Voltage External Controls WARNING: UNDER NO CIRCUMSTANCES MUST ANY MAINS VOLTAGE BE APPLIED TO ANY OF THE TERMINALS ON THE VOLTAGE FREE HEATING CONTROLS STRAIN CONNECTION TERMINAL. RELIEF When mains voltage external controls are used, remove the MAINS VOLTAGE HEATING CONTROLS CONNECTION PLUG from the fittings pack and install on the control interface MAINS... -
Page 28: Commissioning
14 Commissioning Important: The commissioning and first firing of the boiler must Air in pipes only be done by a competant person. Important: A central heating system can not operate correctly unless it is filled with water and air bled from the system. If these Gas installation conditions are not met the system may be noisy. - Page 29 14 Commissioning • Bleed each radiator to remove air, ensure all • Leave cap open on automatic air vent. bleed screws are re-tightened. • If necessary repressurise the system, refer to procedure 4 • Ensure the display indicates a system pressure •...
-
Page 30: Boiler Settings
14 Commissioning Bypass The boiler has a built-in bypass, see diagram 15.1. The boiler is supplied with the bypass open half a turn. It should not be necessary to adjust the bypass, but if required ensure that under no circumstances does the flow rate fall below the figures specified, refer to Table 1. - Page 31 15 Boiler Settings Parameter 3 : Setting the minimum heating temperature This can be set to one of two values : 38°C or 50°C. 38°C Factory setting Parameter 4 : Setting the maximum heating temperature This can be set to one of four values : 50°C, 73°C, 80°C and 87°C.
-
Page 32: Changing Gas Type
16 Changing Gas Type Should it be necessary to change the gas type, a conversion kit Press the mode button for about 10 seconds, Use + or - to with instructions will be required. display code ‘35’, Press the mode button to confirm, The display idicates line 23 in the data menu, The figure on the left is the This modification must only be carried out by a suitably qualified data, the one on the right is the setting for the data. -
Page 33: Routine Cleaning And Inspection
Do not use reconditioned or copy parts that have not been clearly authorised by Hepworth Heating. To ensure the continued efficient and safe operation of the boiler it is recommended that it is checked and serviced at PRODUCTS regular intervals. - Page 34 17 Routine Cleaning and Inspection To Drain the Domestic hot water circuit BOILER DRAIN VALVE • Close boiler isolating valve (d). • Turn on one or more hot water taps. To Drain the boiler • Close isolating isolating valves (e) and (a). •...
-
Page 35: Servicing
17 Routine Cleaning and Inspection 17.7 Combustion chamber cover 17.14 Sealed Chamber Cover - Seal Check • Unscrew and remove the two screws securing combustion Check the condition of the seal, replace as required. chamber cover to combustion chamber, see diagram 17.5. To replace remove the old seal, thoroughly clean the casing •... - Page 36 17 Routine Cleaning and Inspection BURNER RETAINING SCREWS BURNER AIR PRESSURE GUIDE SWITCH SENSING TUBE FLUE HOOD Diagram 17.7 HEAT EXCHANGER Diagram 17.9 FAN RETAINING BOLTS CLIP DOMESTIC WATER INLET FILTER EARTH HOUSING LEAD SENSOR PLUG POWER SUPPLY FILTER LEADS Diagram 17.10 Diagram 17.8 RETAINING CLIP...
-
Page 37: Fault Finding
18 Fault Finding Before trying to operate the boiler make sure that : Overheat thermostat reset button • All gas supply cocks are open and that the gas supply has Refer to Section 20.10 to locate the overheat thermostat been purged of air. reset button. - Page 38 18 Fault Finding COMPONENT TESTING DATA COMPONENT NORMAL MEASURE CHECK Gas control valve Under demand during ignition sparks: If 0 Volt: the gas control valve Resistance of coil 116Ω 24V dc for 1 to 2 seconds, then is not faulty. 12Vdc (constant) at the gas control If 24 Volts and then 12 Volts valve electrical connection.
- Page 39 18 Fault Finding DISPLAY FAULT '01' Ignition fault (lockout) caused by no gas, no detection '02' Air fault, pressure switch, no power to fan '03' Air fault lock '04' Ignition fault (lockout) caused by no gas, no detection '05' Overheat fault '06' Central heating flow NTC fault '07'...
- Page 40 18 Fault Finding FAULT: NO HOT WATER, BUT THE HEATING IS WORKING Insufficient water pressure. Is the water pressure greater The appliance will not operate. than 0.5 bar ? Find out why the pressure is so low. Check the cold water inlet filter Is the water flow rate greater for dirt.
- Page 41 18 Fault Finding FAULT: THE BURNER LIGHTS, THEN GOES OUT. The flame is spreading across the With the power turned off, check the whole burner, but not being detected. continuity between the spark electrode CHECK and terminal H24 on the control board CHECK (PCB).
- Page 42 18 Fault Finding FAULT: THE WATER AT THE TAPS IS LUKE-WARM. Is the temperature higher if you reduce Check the 3-way valve is not passing the flow through the taps? into the radiators. (The radiators should stay cold in Summer setting) Check that the flow restrictor on the cold water inlet is fitted.
-
Page 43: Wiring Diagram
19 Wiring Diagram MICRO ACCUMULATOR AIR PRESSURE HEATING ELEMENT SWITCH SENSE MICRO ACCUMULATOR ELECTRODE VESSEL THERMISTOR IGNITION ELECTRODES IGNITER SENSOR UNIT OVERHEAT CONTROL THERMOSTAT VALVE WATER PRESSURE SENSOR PUMP CH PLUG or gn THERMISTOR CH CHASSIS EARTH THREE-WAY VALVE MAINS VOLTAGE HEATING CONTROLS PLUG REMOVE VOLTAGE FREE LINK 230V SWITCHED LIVE FROM OPTIONAL FROST STAT. -
Page 44: Replacement Of Parts
20 Replacement of Parts To Drain the central heating circuit • Open drain valve fitted at the lowest point in the system. • Allow air into the system by opening a radiator bleed screw or the boilers drain valve (f). To Drain the Domestic hot water circuit BOILER DRAIN VALVE •... - Page 45 20 Replacement of Parts 20.2 Fan, refer to Section 17.10 Before starting refer to the front of Section 20 Important information. • Remove the front panel, refer to Section 17.3. RETAINING • Remove the sealed chamber cover, refer to Section 17.5. CLIPS AIR PRESSURE •...
- Page 46 20 Replacement of Parts 20.10 Burner injector assembly, refer to BURNER INJECTOR diagram 20.5 and 20.6. Before starting refer to the front of Section 20 Important information. • Remove the front panel, refer to Section 17.3. • Lower the control panel, refer to Section 17.4. •...
- Page 47 20 Replacement of Parts 20.14 Heat exchanger, refer to diagram 20.7. 20.16 Printed circuit board (PCB), refer to diagram 20.9. Before starting refer to the front of Section 20 Important information. Before starting refer to the front of Section 20 Important information.
- Page 48 20 Replacement of Parts 230V CONTROLS BOARD MAINS CONTROL PANEL SWITCH USER INTERFACE BOARD Diagram 20.10 20.17 User interface board, refer to diagram 20.10. PUMP Before starting refer to the front of Section 20 Important ELECTRICAL information. CONNECTION • Unclip control panel user interface and hinge forward . Do not strain the cables.
- Page 49 20 Replacement of Parts 20.22 Reduced pressure zone valve (RPZ), REDUCED PRESSURE refer to diagram 20.12. ZONE VALVE (RPZ) Before starting refer to the front of Section 20 Important information. • Remove the front panel, refer to Section 17.3. • Lower the control panel, refer to Section 17.4. •...
- Page 50 20 Replacement of Parts 20.26 Bypass valve, refer to diagram 20.15. Before starting refer to the front of Section 20 Important information. • Remove the front panel, refer to Section 17.3. • Lower the control panel, refer to Section 17.4. SYSTEM Drain down the boiler, refer to relevant part of Section 20.1.
- Page 51 20 Replacement of Parts 20.30 Heating safety valve (3 bar RED), refer to diagram 20.19. Before starting refer to the front of Section 20 Important information. • Remove the front panel, refer to Section 17.3. GAS CONTROL • Lower the control panel, refer to Section 17.4. VALVE •...
- Page 52 20 Replacement of Parts 20.34 Domestic hot water plate to plate heat 20.35 Domestic safety valve (10 bar BLUE), exchanger refer to diagram 20.24. Before starting refer to the front of Section 20 Important Before starting refer to the front of Section 20 Important information.
- Page 53 20 Replacement of Parts • Release the micro accumulator vessel heating element cable 20.36 Micro accumulator vessel thermistor, from the securing clips, note the routing of the cable for refer to diagram 20.25. reassembly. Before starting refer to the front of Section 20 Important •...
- Page 54 20 Replacement of Parts Replacing the expansion vessel • Lift up to remove the boiler from the wall. Before starting refer to the front of Section 20 Important • Remove sealed chamber cover, refer to Section 17.4. information. • Remove the combustion chamber cover, refer to Section •...
- Page 55 20 Replacement of Parts 20.40 Sealed chamber cover seal, refer to diagram 20.29 Before starting refer to the front of Section 20 Important information. SEALED • Remove the front panel, refer to Section 17.3. CHAMBER • Remove the sealed chamber cover, refer to Section 17.5. COVER •...
-
Page 56: Spare Parts
21 Spare parts When ordering spare parts, quote the part number and description, stating the appliance model number and serial number from the data label. Short parts list Description Part No. G.C. No. 802037 E94-796 Air pressure switch 801862 E92-063 Domestic water flow sensor 801910 E84-014...
Need help?
Do you have a question about the 30ci plus and is the answer not in the manual?
Questions and answers