Table of Contents
Advertisement
Quick Links
Advertisement
Table of Contents

Related Manuals for IBM ThinkVision L190


Summary of Contents for IBM ThinkVision L190
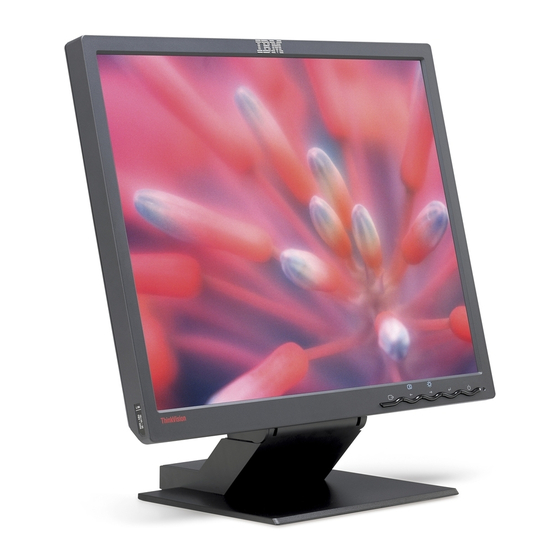
- Page 1 IBM ThinkVision Monitor L190 L190 English User’s Guide...
- Page 2 First Edition (December / 2004) Note: For important information, refer to the Monitor Safety and Warranty manual that comes with this monitor. ii i...
-
Page 3: Table Of Contents
Safety (Read first)...2 Setting up the monitor ...5 Product description ...5 Handling instructions...5 Kensington security slot ...6 Workplace preparation ...7 Adjusting the monitor position...7 Working practices...8 Caring for your monitor ...8 Connecting your monitor...9 Turning on your monitor ...10 Device driver installation ...11 Windows 95/98...11 Windows 2000/Me...12 Windows XP ...13... - Page 5 Always observe the following precautions to reduce the risk of injury and property damage. Do not attempt to service a product yourself unless instructed to do so by the IBM Support Center. Use only an IBM authorized service provider who is approved to repair your particular product.
- Page 6 In addition many mobile products such as ThinkPad notebook PCs utilize a rechargeable battery pack to provide system power when in portable mode. Batteries supplied by IBM for use with your product have been tested for compatibility and should only be replaced with IBM approved parts.
-
Page 7: Setting Up The Monitor
Setting up the monitor Product description The IBM ThinkVision Monitor, L190, is a TFT LCD Color Monitor. It requires a computer with a suitable on-board sub-system or Video Adapter card that can support SXGA 1280 x 1024, XGA 1024 x 768, SVGA 800 x 600, or VGA 640 x 480 at 60Hz. -
Page 8: Kensington Security Slot
Kensington security slot This slot can be used to connect to a locking cable. Locking cables can be purchased separately at most computer stores. Kensington security slot... -
Page 9: Workplace Preparation
3. Tilt the monitor to a comfortable viewing angle. Adjusting the monitor position With the IBM Flat Panel Viewing angle Monitor, you can adjust its You can tilt the screen forward and backward as shown below in Figure A. -
Page 10: Working Practices
• Remove finger marks and grease with a damp cloth and mild detergent. • Never use flammable cleaning materials to clean your IBM monitor or • Do not rub, touch, or tap the surface of the screen with sharp or •... -
Page 11: Connecting Your Monitor
Connecting your monitor 1. Turn off your computer and all attached devices. Next, unplug all power Be sure to read the Safety Information located in the cords to your computer and all attached devices. Monitor Safety and Warranty Information Manual before 2. -
Page 12: Turning On Your Monitor
Turning on your monitor 1. Turn on your computer. 2. Turn on your monitor by pushing and releasing the power switch marked " at the front of the bezel. To turn off your monitor, push and release the power switch again. •... -
Page 13: Device Driver Installation
9. Ensure that the CD drive letter is selected, and then select the DRIVERS folder. 10. Select IBM L190 monitor and click OK. The files will be copied from the CD to your hard disk drive. 11. Close all open windows and remove the CD. -
Page 14: Windows 2000/Me
13. Click OK. 14. Ensure that the CD drive letter is selected, and then select the 15. Select IBM L190 monitor and click OK. The files will be copied from 16. Close all open windows and remove the CD. 17. Restart the computer. -
Page 15: Windows Xp
14. Ensure that the CD drive letter is selected, and then select the DRIVERS folder. 15. Select IBM L190 monitor and click OK. The files will be copied from the CD to your hard disk drive. 16. Close all open windows and remove the CD. -
Page 16: Automatic Image Setup
In order to optimize the displayed image a set-up utility is provided on the The Setup Utility included IBM User’s Guide and Installation Files CD. Operation of this utility is on the setup CD displays a dependent on the operating system on your computer. You may choose to test pattern of dots. -
Page 17: Image Setup For Dos
Image setup for DOS If the monitor is in standby To set up the monitor automatically in DOS, do the following. mode, it may automatically turn off while you are waiting for 1. Turn on the monitor first; then turn on the computer. it to warm up. -
Page 18: Windows Me, Or Windows Xp
Image setup for Windows 95, Windows 98, Windows NT, Windows 2000, Windows Me, or Windows XP If the monitor is in standby To set up the monitor automatically in Windows 95, Windows 98, Windows mode, it may automatically NT, Windows 2000, Windows Me, or Windows XP, do the following: turn off while you are waiting for it to warm up. -
Page 19: Manual Image Setup
Manual Image setup If the monitor is in standby Normally, you can complete the setup procedure using Automatic Image setup mode, it might automatically however, if your screen image is still distorted after you perform Image setup or turn off while you are waiting the setup CD does not run on your system, perform M for it to warm up. -
Page 20: Adjusting Your Lcd Monitor
Adjusting your LCD monitor User controls The image is already optimized for many display modes, however the user controls can be used to adjust the image to your liking. The settings are saved after adjustment and when exiting the OSD and USER CONTROL FEATURES will be effective thereafter. -
Page 21: On-Screen Display (Osd) Controls
On-screen display (OSD) controls The settings adjustable with the user controls are viewed through the On - The LCD monitor needs Screen Display (OSD). Press the enter button " time to become thermally menu. stable the first time you turn it on each day. - Page 22 OSD Icon The Image setup function is used to adjust the level of noise in the video signal, which causes horizontal lines Automatic or areas on the screen where the Image Setup image appears to be unstable and jitter or shimmer. This can be adjusted automatically or manually.
- Page 23 OSD Icon Displays the detailed information of mode, model name, serial number and microcode. Information Options The language chosen affects only the language of the OSD. Select one of the five languages to use for the OSD. Language Your selection does not affect any software running on the computer.
-
Page 24: Further Information
Further information Display modes If your computer has previously been used with a CRT monitor and is currently configured to a display mode outside the range that the Flat Panel monitor can display, you may need to re-attach the CRT monitor temporarily until you have reconfigured the computer, preferably to 1280 x... -
Page 25: Power Management
* There may be a slight delay before the picture reappears. Product disposal The fluorescent lamps in the liquid crystal display contain a small amount of mercury. Dispose of it as required by local ordinances and regulations. ® Partner, IBM has determined that this product Power Screen State Indicator... -
Page 26: Troubleshooting
Troubleshooting If you have a problem setting up or using your monitor, you may be able to solve it yourself. Before calling your retailer or IBM Support Center, try the suggested actions that are appropriate to your problem. Possible Problem... - Page 27 Problem Screen is blank and power indicator is flashing green every 0.5 second Check Signal Cable message is shown and power indicator is steady amber. Image appears to be smeared For image problems, you Image appears may want to run Image to be discolored setup again before referring to this section.
-
Page 28: Help And Service Information
If you are unable to correct the problem yourself, you may seek further help as follows: Call the IBM Service and Support. In other countries contact your dealer, retailer, or other IBM authorized If possible, stay by your computer. Your Technical service representative. -
Page 29: Specifications
Analog-75 ohm 0.7V 1280 pixels (max) 1024 lines (max) 135 MHz Analog - Separate DDC 1/2B IBM, VESA, MAC 30-83 kHz 55-76 Hz 10 to 35° C - 20 to 60° C - 20 to 60° C 10 to 80%... -
Page 30: Service Information
Service information The following parts are for use by IBM service, or IBM authorized dealers, to support the customer warranty. Parts are for service use only. 73P4590 73P4592 22P9262 73P4593 73P4595 Model Type 9329-Ax9 Description Video Analog Business Black FRU Monitor... -
Page 31: Notices And Trademarks
Any reference to an IBM product, program, or service is not intended to state or imply that only that IBM product, program, or service may be used. Any functionally equivalent product, program, or service that does not infringe any IBM intellectual property right may be used instead. - Page 32 Trademarks The following terms, used in this publication, are trademarks or service marks of the IBM Corporation in the United States, other countries, or both; IBM logo ThinkPad ThinkVision and the E logo are U.S Govt. registered trademarks. NERGY NERGY Microsoft, Windows, and Windows NT are trademarks of Microsoft Corporation in the United States, other countries, of both.
Need help?
Do you have a question about the ThinkVision L190 and is the answer not in the manual?
Questions and answers