Table of Contents
Advertisement
Advertisement
Table of Contents
Troubleshooting

Subscribe to Our Youtube Channel
Related Manuals for Nordic ID RF601


Summary of Contents for Nordic ID RF601
- Page 1 USER MANUAL Nordic ID RF601...
-
Page 3: Table Of Contents
Disclaimer Trademarks User safety Medical equipment compatibility EC Declaration on Conformity Document history Warranty and safety warnings Using the RF601 for the first time Unpacking the unit Installing batteries The keyboard Activating the device Splash screen and initial display System... - Page 4 Locking the keyboard Built-in Menu Settings 6.1.1 RF-settings “WHAT” Behaviour Adjustments Info Laser conf. Setting up a RF601 network Site Survey Installation of the network Using the scanner © 2006 Nordic ID Oy RF601 User Manual May 2006 Version 1...
- Page 5 Returning the unit for service 15.3 Extending the normal warranty Application development 16.1 Software tools and documents 16.2 PLServer, PiccoLink driver ActiveX control Accessories Technical Support Latest information © 2006 Nordic ID Oy RF601 User Manual May 2006 Version 1...
- Page 6 APPENDIX A - Troubleshooting APPENDIX B - Introduction to the Laser Engine APPENDIX C - Introduction to the Linear Imager APPENDIX D - Factory default settings of the scan engines © 2006 Nordic ID Oy RF601 User Manual May 2006 Version 1...
-
Page 7: Copyright
RF601 hand terminals. The sale, transfer and use of Nordic ID RF601 is subject to the then-current Nordic ID General Conditions of Sale and the then-current Nordic ID End User License Agreement, the then-current referring to the original purchase date. -
Page 8: Medical Equipment Compatibility
EM (Electromagnetic) field which has a strength of 3V/m over a frequency band from 26 to 1000 MHz. The RF601 is transmitting at a frequency range of 433.60 to 434.20 MHz, however, all electric appliances may emit spurious RF-signals at other than specified frequencies. -
Page 9: Warranty And Safety Warnings
Please read the following warranty and safety related warnings carefully before using the product. Nordic ID RF601 is a radio device and should not be used in any environments where radio transmitting may cause any harm. Typical but not limited to are the following types of environments: environments with explosive materials, liquids or gases, demolition sites, hospitals and emergency care rooms, airplanes and areas with highly sensitive measurement instrumentation. -
Page 10: Nordic Id Oy
In some configurations the RF601 contains a Class II laser device which may cause eye injury if the beam is directed straight or via a shining surface to the eye. The laser beam should never be pointed at the eye or eyes of persons or animals. -
Page 11: Using The Rf601 For The First Time
Remove the unit from the packing and check that all above is included. Save the packing for possible future purposes. Installing batteries Before using the RF601 install 2 AA-sized alkaline or fully charged rechargeable batteries as shown in the figure 1. Fig. Installing batteries to the RF601 ©... -
Page 12: The Keyboard
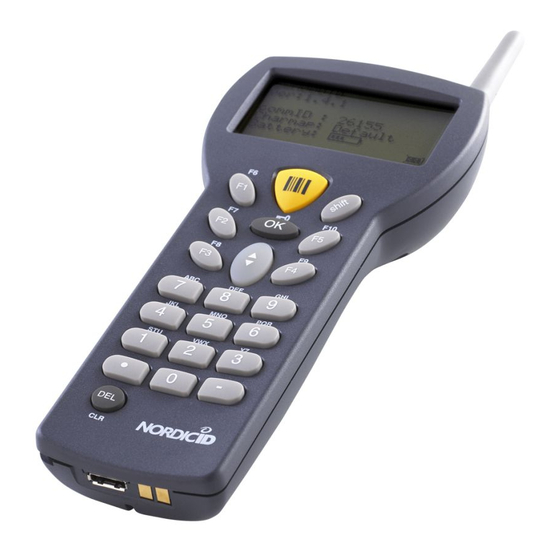
��������������� The keyboard RF601 has 22 button keyboard; scan-key, 5 programmable function keys F1-F5, OK, shift and Up-Down movement –key, 12 alpha/numeric keys and a DEL-key. Scan -key Shift -key OK -key Programmable function keys Programmable function keys Up / Down movement -key /... -
Page 13: System
The application software that runs on the Host Computer This picture (figure 4) illustrates how a Nordic ID RF601 operates. The information will be sent from the handheld terminal via the base station to the host application. In some configurations the base station includes an ethernet connector which can be used to connect the base station to the host computer via LAN network. -
Page 14: Operation Of The Hand Terminal
• Radio link encryption By default, the radio link between the RF601 hand terminal and the base station is not secured. Messages sent by the hand terminal can be read with the base station, which is operating in same channel. Data from the hand terminal input fields can be read with any terminal program (ex. -
Page 15: Setting Up An Example System
5. Select correct COM port number from Fast Inventory program “Serial Connection” and press “StartServer” button to start the application. 6. If successful COM connection, COMx (where the x is the number of COM port) text appears in below the “Nordic ID RF6xx Driver Control “ text. - Page 16 The RF6xx Demo applications have several methods for connecting the base stations to the sample application. • COM port: The most simple way is to connect RF601 base station directly to the demo application by using a PC COM port. Serial connection can be opened from the demo application by using the “Serial Connection” combo box: •...
-
Page 17: Rf601 Hand Terminal
3 beeps with different levels Reception of message At least 1 beep, can be more. Successful reading of laser scanner 1 beep Opening keylock 1 long beep Wrong password 3 fast beeps © 2006 Nordic ID Oy RF601 User Manual May 2006 Version 1... -
Page 18: Key Function Table
+ * / % = $ £ ± Backlight (option) ½ Removes a character from the current Reset Normal function field. Table: Key function table NOTE: The characters depends on the keymap used. © 2006 Nordic ID Oy RF601 User Manual May 2006 Version 1... -
Page 19: F-Keys
Input fields The Nordic ID RF601 Hand Terminal has a virtual display page of 12 x 20 characters. The actual display size is 8 x 20 characters, thus 2/3 of the virtual page can be viewed at a time. Rows may be scrolled by pressing the keys accordingly. -
Page 20: Writing Text In A Field
For changing existing settings values, delete previous value using the <DEL> button. Type in the new value and press <OK>. After choosing an item in the Menu, confirm the selection by pressing the <OK> key. Changed setting will be signalled by a beep. © 2006 Nordic ID Oy RF601 User Manual May 2006 Version 1... -
Page 21: Settings
Beeper level and frequency. Battery type 0, if NI-CD or NI-MH rechargeable batteries are used. 1, if using normal batteries. Info This screen shows some basic info about the RF601. Header Device and Firmware version commID The communication identification number of the device... -
Page 22: Laser Conf
This feature may be used to test the reader functionality and programming the laser module. A special use of this feature relates to the programming of the laser module with the help of special programming barcodes provided Nordic ID. For further information about programming the laser module, please contact Nordic ID Technical Support (support@nordicid. -
Page 23: Setting Up A Rf601 Network
1. Hold the RF601 at a slight angle about 10 – 30 cm (few inches) from the barcode label to be read. If the surface of the barcode label is very reflective, scanning from directly above (90° angle) may cause reading errors. -
Page 24: Labels
Hand Terminal) • The configuration code of the hand terminal Fig: Type label of the RF601 hand terminal Please note that there might be several types of Hand Terminals with different configuration. For further details please contact Nordic ID or your local reseller. -
Page 25: Desk Top Charger (Dtc05)
General information The Desk Top Charger is used for charging the rechargeable batteries of the Nordic ID RF601 Hand Terminal. It is a fast charger which reduces the charging time. Using the Desk Top Charger the batteries may be charged without removing them from the Hand Terminal. -
Page 26: Charging The Batteries
It is normal for the base of the charger to become warm during charging. Fig. The Nordic ID RF601 and the charger Requirements for using the Desk Top Charger: • Batteries must be placed inside the Hand Terminal to allow charging. -
Page 27: Audible Signals And The Led Indicator On The Hand Terminal
Size AA, (see chapter “Warranty and safety warnings” at page 3 of this manual) Charging methods Quick charge and trickle Charging current 800 mA Charging time Ca 1,5 h (1800 mAh battery) © 2006 Nordic ID Oy RF601 User Manual May 2006 Version 1... -
Page 28: Troubleshooting
��������������� Troubleshooting In case of problems encountered during the use of the RF601, please contact your system integrator or your local Nordic ID dealer. The following Guidelines are to be followed when optimal working distance needs to be determined or if barcode decoding related problem is encountered. -
Page 29: Warranty, Support And Service Information
Repair service done by the Manufacturer after the warranty period will be charged according to the valid service price list. The repair service is valid for five years after shipping the Product to the System Integrator or the local Nordic ID dealer. -
Page 30: Application Development
PLServer is ActiveX software component for communication between the hand terminal and the Host application. Tools for the RF601 software development is available by request. To register and order the tools package please contact Nordic ID by email using the address info@nordicid.com or via your sales contact. -
Page 31: Accessories
• 2 pcs BS-extension cable with RS-11 connectors 10m (920) • BS extension socket with DC-cable (925) • BS extension socket (927) Cables can be also sold separately. Ask your local Nordic ID dealer or mail to support@nordicid.com. © 2006 Nordic ID Oy RF601 User Manual... -
Page 32: Technical Support
+358 – 2 – 727 7720 support@nordicid.com (7 – 16 CET) Latest information For latest information on RF601 and related products and on possible changes to this manual please consult our Web- pages at: www.nordicid.com © 2006 Nordic ID Oy... -
Page 33: Appendix A - Troubleshooting
Should you have some more questions or problems, please go to our website: www.nordicid.com. If you cannot find the answer for your problem there, please contact Technical Support by sending email to support@nordicid.com . © 2006 Nordic ID Oy RF601 User Manual May 2006... -
Page 34: Appendix B - Introduction To The Laser Engine
Reading distances Near ranges on lower densities (not specified) are largely dependent upon the width of the bar code and the scan angle. Table: Laser engine technical specifications © 2006 Nordic ID Oy RF601 User Manual May 2006 Version 1... - Page 35 Usable scan distance depends on the barcode size and pitch, quality of the barcode print and ambient light conditions as well as the pitch and angle of the laser beam in reference to the barcode surface. Further information is available from Nordic ID Technical Support upon request (support@nordicid.com). © 2006 Nordic ID Oy...
-
Page 36: Appendix C - Introduction To The Linear Imager
18 cm / 7 in on 0.3 / 12 mil resolution code print contrast down to 25% Reading distance 0 to 49.2 cm / 19.4 in Table: Linear engine technical specifications © 2006 Nordic ID Oy RF601 User Manual May 2006 Version 1... -
Page 37: Appendix D - Factory Default Settings Of The Scan Engines
APPENDIX D - Factory default settings of the scan engines The scan engine used in the RF601 is programmed during the manufacturing process by defining certain operational parameters with default values. These values may be changed by special programming barcodes (detailed information available upon request from Nordic ID Technical Support). - Page 38 Discrete 2 of 5 0x05 Disable Set Length(s) for D 2 of 5 0x14 0x15 Chinese 2 of 5 Chinese 2 of 5 0xF0 0x98 Disable Codabar Codabar 0x07 Disable © 2006 Nordic ID Oy RF601 User Manual May 2006 Version 1...
- Page 39 Host Character Time-out 0xEF 200 msec Event Reporting* Decode Event 0xF0 0x00 Disable Boot Up Event 0xF0 0x02 Disable Parameter Event 0xF0 0x03 Disable Reset to default settings (se-955) © 2006 Nordic ID Oy RF601 User Manual May 2006 Version 1...
- Page 40 “ B1 “ check digit verification disabled check digit transmission disabled reading tolerance high length L1 0 (any length) length L2 length L3 length mode L1 as minimum length © 2006 Nordic ID Oy RF601 User Manual May 2006 Version 1...
- Page 41 L1 length L2 length L3 length mode L1 as minimum length Matrix 2 of 5 = 0x45 activation disabled symbology identifier “ B4 “ length L1 length L2 © 2006 Nordic ID Oy RF601 User Manual May 2006 Version 1...
- Page 42 RSS Limited activation disabled RSS Expanded activation RSS-14 symbology identifier RSS Limited disabled “ C3 “ “ C4 “ “ symbology identifier RSS Expanded symbology identifier C5 “ © 2006 Nordic ID Oy RF601 User Manual May 2006 Version 1...
- Page 43 UPC-A number system transmitted enabled UPC-E number system transmitted enabled GTIN compliant disabled UPC-A transmitted as EAN-13 enabled UPC-E transmitted as UPC-A disabled EAN-8 transmitted as EAN-13 disabled © 2006 Nordic ID Oy RF601 User Manual May 2006 Version 1...
- Page 44 Decoding security = 0x71 consecutive same read data validation timeout between identical consecutive codes 300 ms timeout between different consecutive codes 0 ms Reset to default settings (EV-15) © 2006 Nordic ID Oy RF601 User Manual May 2006 Version 1...
- Page 45 ��������������� Nordic ID Oy owns all rights to this manual. All rights reserved. Copying this manual without the written permission from the manufacturer by printing, copying, recording or by any other means or the full or partial translation of the manual to any other language including all programming languages using any electrical, mechanical, magnetic, optical, manual or other methods or devices is forbidden.
Need help?
Do you have a question about the RF601 and is the answer not in the manual?
Questions and answers