Table of Contents
Advertisement
Advertisement
Table of Contents

Related Manuals for VTech VT1047


Summary of Contents for VTech VT1047
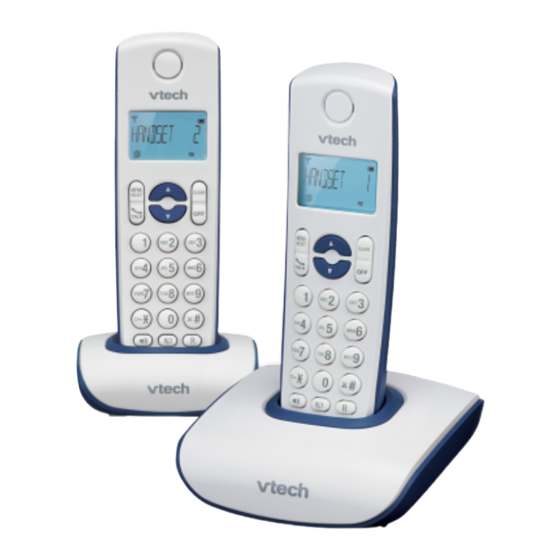
- Page 1 User’s manual w w w . v t e c h . c o m DECT Model: VT1047/ VT1047-2...
-
Page 2: Table Of Contents
Delete the Entire Redial List .... 14 2.4 Installing and charging the batteries ....4 Find the Handset ..........15 4.10 Make an Internal Call (For VT1047-2) .... 15 3. GETTING TO KNOW YOUR PHONE.... 5 4.10.1 Intercom Another Handset ....15 3.1 Overview of the Handset ........ - Page 3 Table of contents 7. PHONE SETTINGS ........22 8. DEFAULT SETTINGS ........32 7.1 Date and Time Settings........22 9. TROUBLESHOOTING .........33 7.1.1 Change the Date Format ....22 7.1.2 Change the Time Format....22 10. TECHNICAL SPECIFICATIONS....34 7.1.3 Set the Time ........23 7.1.4 Set the Date........
-
Page 4: Important Safety Instructions
12. Please note the correct polarity while inserting the batteries. 13. Do not immerse batteries in water, do not place in fire. If you have questions about this product, or having difficulty with setup or operation, call our VTech Electronics (HK) Ltd. Customer Service Centre Tel: 852-2776 3223... -
Page 5: Installing Your Phone
INSTALLING YOUR PHONE Package contents The package for VT1047/VT1047-2 contains the following items: VT1047 • 1 Handset • 1 Base station • 1 AC power adapter • 1 Telephone line cord • 2 rechargeable batteries • 1 Chinese user manual •... -
Page 6: Connecting The Base Station
Connecting the base station 1. Plug the power supply & line cord into the base station. 2. Plug the power supply & line cord into the wall socket. 3. Always use the cables provided in the box. -
Page 7: Installing And Charging The Batteries
Installing and charging the batteries 1. Slide open the battery compartment cover. 2. Place the 2 batteries as indicated. Respect polarity. 3. Slide the battery compartment cover back. 4. Put the handset on the base or charger and charge for 14 hours first time. A beep will indicate if the handset is properly placed on the base or charger. -
Page 8: Getting To Know Your Phone
GETTING TO KNOW YOUR PHONE Overview of the Handset 1. LEFT SOFT KEY (MENU/SELECT) 6. TALK OFF In idle mode: Press to access the main menu During a call: Press to end a call and go In sub-menu mode: Press to confirm the back to idle screen selection In menu / editing mode: Press to go back to... -
Page 9: Base Station Overview
Base Station Overview 1. PAGE Press to page your handset. The handset will ring for approximately 60 seconds. 2. CHARGING CRADLE... -
Page 10: Display Icons And Symbols
Display Icons and Symbols The LCD display gives you information on the current status of the telephone. Scrolls up / down the menu items / Phonebook list / Redial list / Call List. Steadily on when the handset is in range of the base. Flashes when out of range of the base or not registered to the base. - Page 11 Steadily on when an alarm is set. Flashes when the alarm time set before reaches. Indicates when the keypad is locked. Indicates when the battery is fully charged. Whole icon flashes when the battery performs initial charging. Internal block icon flashes when the battery is in final charging stage.
-
Page 12: Menu Structure
Menu Structure will firstly access the Call List menu. Refer to the following for the menu structure. In idle mode, press Key Press Main Menu CALL LIST PHONEBOOK BS SETTINGS HS SETTINGS REGISTRATION DEFAULT Sub menu Review Call List Review DELETE HS ALARM phonebook list... -
Page 13: Latin Character Set
Writing Tips: 1. Once a character is selected, the cursor will move to the next position after a short pause. 2. You can move the cursor within the text by to amend the text entry. 3. Press to delete the last character. 4. -
Page 14: Using Your Phone
USING YOUR PHONE Make a Call 4.1.1 Preparatory Dialing Enter the phone number and press to dial the number. Press to clear the entry. 4.1.2 Direct Dialing Press to take the line and enter the phone number. 4.1.3 Call from the phonebook Press to access the phonebook and press to select the desired phonebook entry. -
Page 15: Answer A Call
Answer a Call If the handset is not on the base or charger: When the phone rings, press to answer a call. If the handset is on the base or charger and if AUTO ANSWER is set to ON: When the phone rings, pick up the handset to answer a call. End a Call During a call connection, press to end the call. -
Page 16: Set The Silent Mode
Set the Silent Mode In idle mode, press and hold to turn off the handset ringer. The icon is displayed on the LCD. In silent mode, press and hold to turn on the handset ringer. The icon will disappear. Keypad Lock / Unlock In idle mode, press and hold to turn on the keypad lock. -
Page 17: Store A Redial Number Into The Phonebook
4.8.2 Store a Redial Number into the Phonebook 1. Follow Steps 1 and 2 in section 4.8.1. 2. Press to select ADD TO PB. 3. Press to enter the name. 4. Press to store the redial number into the phonebook. 5. -
Page 18: Find The Handset
If there is an incoming call during paging, the phone will ring with the incoming call instead of paging. 4.10 Make an Internal Call (For VT1047-2) This feature is only applicable when there are at least two registered handsets. It allows you to make internal calls, transfer external calls from one handset to another handset and make conference calls. -
Page 19: Transfer An External Call To Another Handset
4.10.3 Transfer an External Call to another handset During an external call: 1. Press to select INTERCOM. 2. Press to select the desired handset to intercom with. 3. The external call is put on hold automatically and the called handset rings. 4. -
Page 20: Private Phonebook
PRIVATE PHONEBOOK Your phone can store up to 20 private phonebook entries with names and numbers. Each phonebook entry can have a maximum of 20 digits for the phone number and 12 characters for the name. You can also select different melodies for your phonebook entries. -
Page 21: View A Phonebook Entry
View a Phonebook Entry In idle: 1. Press to access the phonebook. 2. Press to select the desired phonebook entry. 3. Press to select VIEW. 4. Press to review the name, number and melody of the selected phonebook entry. Note: If number is more than 12 digits, press to view the remaining digits. -
Page 22: Delete The Entire Private Phonebook
Delete the Entire Private Phonebook 1. Press to access the phonebook. 2. Press to select DELETE ALL. 3. Press to confirm. 4. Press to re-confirm. Check the Phonebook Usage You can check how many phonebook entries have been occupied in your phone and how many phonebook entries are available for you to store in the phonebook. -
Page 23: Caller Display (Network Dependent)
CALLER DISPLAY (NETWORK DEPENDENT) This feature is available if you have subscribed the Caller Line Identification service with your network service provider. Your phone can store up to 10 received calls with date/time information in the Call List. The number will be shown on the LCD when the phone is ringing. -
Page 24: Delete An Entry In The Call List
5. Edit the number if necessary. 6. Press to select the melody. 7. Press to confirm. Delete an entry in the Call List 1. Follow Steps 1 and 2 in Section 6.1. 2. Press to select DELETE. 3. Press to confirm. Delete the entire list of the Call List 1. -
Page 25: Phone Settings
PHONE SETTINGS Your phone comes with a selection of settings that you can change to personalize your phone the way you like it to work. Date and Time Settings You will need to set the correct time and date so that you know when you received call list entries. 7.1.1 Change the Date Format 1. -
Page 26: Set The Time
7.1.3 Set the Time 1. Press to select HS SETTINGS. 2. Press to select DATE & TIME. 3. Press to select SET TIME. 4. Press to enter the time information. The time entered will be in the format you set in Section 7.1.2. 5. -
Page 27: Turn On/Off The Alarm
Note: a. Key press is still applicable if handset keypad is locked and when the alarm time is reached. b. The alarm volume level is the same as the settings of the handset ringer volume. If the handset ringer is set to VOLUME OFF, the alarm still sounds at VOLUME 1 level. -
Page 28: Handset Settings
Handset Settings 7.3.1 Set the Ringer Melody for Internal Calls 1. Press to select HS SETTINGS. 2. Press to select RING SETUP. 3. Press to select INT RING. 4. Press to select the desired ringer melody (a total of 10 melodies for your selection) for setting ringer melody for internal calls. -
Page 29: Set The Ringer Volume
7.3.3 Set the Ringer Volume 1. Press to select HS SETTINGS. 2. Press to select RING SETUP. 3. Press to select RING VOLUME. 4. Press to select the desired ringer volume (a total of 6 ringer volume levels including VOLUME OFF). Note: The respective ringer volume will be played during your selection. -
Page 30: Set The Handset Language
7.3.5 Set the Handset Language 1. Press to select HS SETTINGS. 2. Press to select LANGUAGE. 3. Press to select the desired language. 4. Press to confirm. 7.3.6 Rename the Handset 1. Press to select HS SETTINGS. 2. Press to select RENAME HS. 3. -
Page 31: Set The Auto Answer
7.3.8 Set the Auto Answer If you turn on the Auto Answer, you can pick up the call from the base or charger without pressing any key. 1. Press to select HS SETTINGS. 2. Press to select AUTO ANSWER. 3. Press to turn on or off the auto answer feature. -
Page 32: Change The Dial Mode
7.4.2 Change the dial mode 1. Press to select BS SETTINGS. 2. Press to select DIAL MODE. 3. Press to select TONE or PULSE. 4. Press to confirm. 7.4.3 Change the Flash Time The flash time settings is country dependent. Please contact your local service provider for the correct settings. 1. -
Page 33: Eco Mode Setting
Note: If the new PIN entered in Step 6 is not matched with the new system PIN entered in Step 5, user is requested to enter the valid system PIN again in Step 5. 7. Press to confirm. 7.4.5 ECO Mode Setting 1. -
Page 34: Reset Your Phone
Reset Your Phone You can reset your phone to the default settings. After reset, all you personal settings and call list entries will be deleted, but your phonebook remains unchanged. 1. Press to select DEFAULT. 2. Press and you are requested to enter the 4-digit system PIN. (Default is 0000) 3. -
Page 35: Default Settings
DEFAULT SETTINGS Items Default Values EXT RING MELODY 1 INT RING MELODY 2 Handset RING VOLUME VOLUME 3 EARPIECE VOLUME VOLUME 3 SPEAKER VOLUME VOLUME 3 HANDSET NAME HANDSET KEY TONE BATTERY TONE OUT OF RANGE RINGER OFF AUTO ANSWER HS DISPLAY HS NAME DATE FORMAT... -
Page 36: Troubleshooting
Please contact the technical support of the network provider for further information. This telephone is not equipped with a grounding function! Therefore some of the functions may be limited when used in PBX systems. For technical support, please call VTech Technical Inquiry Hotline Tel: 852-2667 7433. -
Page 37: Technical Specifications
10. TECHNICAL SPECIFICATIONS Basic Information Handset: 15x5x2cm Dimensions Base: 12x11x3cm Charger: 9x8x3cm Handset: 120g Weight Base: 120g Charger: 50g Base: < 0.5W Power consumption Charger: < 0.5W Indoor: 50m Valid range Outdoor: 300m Standby time: 100 hours Handset Operating Time Talk time: 10 hours RF Parameter Base: <... - Page 38 Customer Service Centre Suite 1601, Lever Tech Centre, 69-71 King Yip Street, Kwun Tong, Kowloon, Hong Kong. Customer Service Hotline: (852) 2666 5558 Technical Inquiry Hotline: (852) 2667 7433...
Need help?
Do you have a question about the VT1047 and is the answer not in the manual?
Questions and answers
I cannot make the additional handsets to work
To make additional handsets work with the VTech VT1047, follow these steps to register them to the base station:
1. Press and hold the button on the base station for about five seconds to enter registration mode.
2. On the handset, press and use the navigation buttons to select REGISTRATION.
3. Press the confirm button, and you will be prompted to enter the 4-digit system PIN (default: 0000).
4. Enter the system PIN.
5. Press the confirm button.
If registration is successful, the flashing icon will stop, and the handset will be assigned the next available handset number, displayed in standby mode.
This answer is automatically generated