Advertisement
Table of Contents
- 1 Table of Contents
- 2 Notice to Installers
- 3 Packing List
- 4 Product Features Chart
- 5 Packing List
- 6 Rough-In Diagram
- 7 Water & Electric Requirements
- 8 Installation Instructions
- 9 Faucet Functions & Usage
- 10 Cleaning, Maintenance & Tips
- 11 BF1101 Main Control Panel Diagram
- 12 Description of Functions
- 13 MID1101 Remote Control
- 14 Troubleshooting
- Download this manual
Advertisement
Table of Contents

Related Manuals for Steam Planet MA6023

Summary of Contents for Steam Planet MA6023
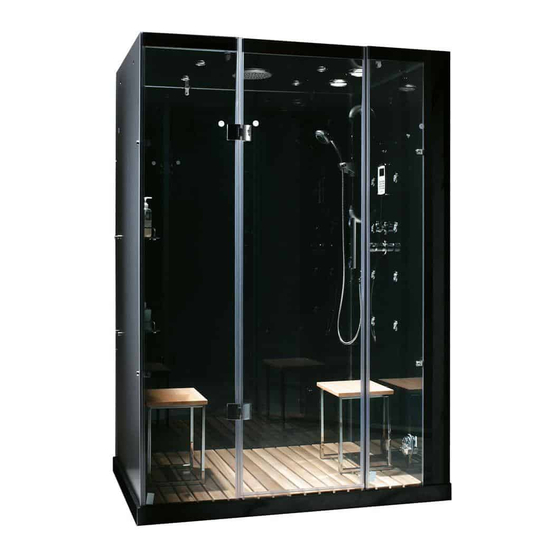
- Page 1 CONTEMPORARY STEAM ROOM Installation & Operation Manual Note: You must read all installation & operation instructions prior to assembly and use of this unit. P a g e Rev 10/2012...
-
Page 2: Table Of Contents
Troubleshooting ………………………………………….. Thank you for selecting Steam Planet Corp Computerized Steam Rooms. In order to operate and use the product properly, please follow all instructions provided in this User’s Manual. Our company reserves the right to change the Manual at anytime. The manual takes effect the date it is published. This manual shall prevail if there is any difference between this and previous documents and manuals. -
Page 3: Notice To Installers
(1) When first opening the boxes, please make sure everything is in good condition, especially if any visible damage has been done to the package, please contact Steam Planet immediately with photographic documentation of the damage. (2) Make sure all water and electrical components are up to local and national standards. -
Page 4: Product Features Chart
PRODUCT FEATURES DESCRIPTION MA6020 MA6023 3kW Quick heating Self-Draining Steam Generator w/Steam Aromatherapy Cup Multiple Body Massage Jets Hand-held Shower w/ Various water massage settings & adjustable height bracket 8 inch wide water-drenching Rainfall Shower ... -
Page 5: Packing List
PACKING LIST Glass angle bracket installation instruction Hinge installation instruction A.Glass panel A.Hinge B.Threaded Connector B.Glass door C.Angle Bracket C.Gasket D.Connecting Bolt D.Screw E.Bolt cap E.Allen wrench SECTION PICTURE OF RUBBER SEAL A.Half-moon shape seal B.Corner seal C.Magnetic seal D.Door bottom seal GLASS A:Glass A—Main Panel, Black B:Glass B—Back Panel, Black... -
Page 6: Rough-In Diagram
ROUGH-IN DIAGRAMS Note: All diagrams below are for right hand units only. Please reverse for left hand units. M-A6023 (35.4×35.4×84in.) M-A6020 (43×31.5×84in.) M-A6027 (59×32×84in.) M-A6028 (59×40×84in.) A. Cold water in Rated voltage Rated power Rated frequency B. Power jack(AC30A) AC220V 50/60Hz C. -
Page 7: Water & Electric Requirements
WATER AND ELECTRICITY INSTALLATION INSTRUCTION FOR ALL MODELS (1) Water: Two water lines for cold and hot water respectively ½-inch National Pipe Thread (NPT). (2) Power: Power requirement: Single-phase three-wire 220V power supply. TECHNICAL INFORMATION Materials: Tempered Glass • Power Supply: 3KW 20amp, 220V •... -
Page 8: Installation Instructions
INSTALLATION INSTRUCTIONS FOR MA6020 & MA6023 Silicone joints & seams where needed Note: 4. Install angle brackets over the installation holes of Note: Determine the drain setup. There needs to be a 3/8 inch glass A, connect with connector bolts (make the diameter hose connected from the steam box to the main drain. - Page 9 6. The wires for the fan, speaker, and light are labeled. 10. Insert the corner seal to the right edge of glass C, then Make the corresponding connections from the install angle brackets to the glass panel (C). Tighten accessory to the wire coming from the control box. snugly, but leave enough tension to adjust.
- Page 10 13. Place glass D (top) on the top of the unit, align 16. (MA6027 & MA6028 ONLY) Attach glass panel E connecting holes with glass D to glass panels A, B, which has a black stripe across the top and side to and C.
-
Page 11: Faucet Functions & Usage
19. Attach handle to the door and shelves to panels B and 20. Steam Cup Connection Diagram A: Steam outlet B: Steam line Connector C: Glass D: Steam hose FAUCET FUNCTION AND USAGE On/Off Control • o When the temperature is adjusted, the water flow can be adjusted through the handle in the middle section o Clockwise turns on, and counterclockwise turn off Water Diverter handle... -
Page 12: Cleaning, Maintenance & Tips
CLEANING AND MAINTENANCE 1. Liquid detergents and soft cloth should be used. DO NOT clean with acetone and ammonia detergents on fixtures. Do not use detergents with formic acid or formaldehyde. Do not use any abrasive cleaners. 2. Mineral deposits/scaling on surface can be cleaned by soft cloth with heated vinegar. 3. -
Page 13: Bf1101 Main Control Panel Diagram
BF1101 CONTROL SYSTEM FOR MA602X SERIES Time & Temperature setting Radio frequency -Up Rainfall shower Volume Increase Body Massage Jets Radio frequency Memory Top light Steam ON/OFF Time / Temperature Increase Radio frequency -down Time / Temperature Decrease Volume decrease Circulation Fan Remote sensor Back light (not active for this model) -
Page 14: Description Of Functions
DESCRIPTION OF FUNCTIONS Not in the same order above 1. ON/OFF Key Under ON state, press “ON/OFF” Key on the panel to start the system, and the top light is turned on, all functions are activated on the panel, the back light is on, LCD shows the ambient temperature and all icons are lit; press the “ON/OFF” to shut off the system. -
Page 15: Mid1101 Remote Control
MID-1101 REMOTE CONTROL SYSTEM • Note: Sauna key does not have any functions for this model • Note: Rainfall shower head and body jets are controlled by manifold only • Note: “B” light does not have any functions for this model •... -
Page 16: Troubleshooting
TROUBLESHOOTING Problem Possible Reason Solution 1. Power line is not connected properly. 1. reconnect the power supply 2. Insufficient power supply. 2. Power supply must reach 50/60Hz – 220V Unit does not start 3. Fuse is damaged 3. Replace the 2A fuse 4.
Need help?
Do you have a question about the MA6023 and is the answer not in the manual?
Questions and answers