Advertisement
SPINNING BIKE
Owner's Manual
CP-920
UPC: 62248859704-1
IMPORTANT !
Please read all instructions in this manual carefully before using this product.
Retain this manual for future reference.
The specifications of this product may vary slightly from the illustrations and are subject to change without
notice.
Advertisement
Table of Contents

Related Manuals for Healthware Fit CP-920


Summary of Contents for Healthware Fit CP-920
- Page 1 SPINNING BIKE Owner’s Manual CP-920 UPC: 62248859704-1 IMPORTANT ! Please read all instructions in this manual carefully before using this product. Retain this manual for future reference. The specifications of this product may vary slightly from the illustrations and are subject to change without...
-
Page 2: Year Warranty
1 YEAR WARRANTY This product is warranted for one year on parts from the date of original purchase at retail. This warranty: a) is conditional on the product being set-up, installed and used as directed in the instruction manual; b) does NOT cover damage, malfunction or failure which, in Club Piscine’s sole opinion, is the result of normal wear and tear, accident, misuse, abuse, neglect, negligence, abnormal •... -
Page 3: Important Safety Information
Important Safety Information This Healthware exercise equipment is built for optimum safety. However, certain precautions apply whenever you operate a piece of exercise equipment. Be sure to read the entire manual before you assemble or operate your machine. In particular, note the following safety precautions: 1. -
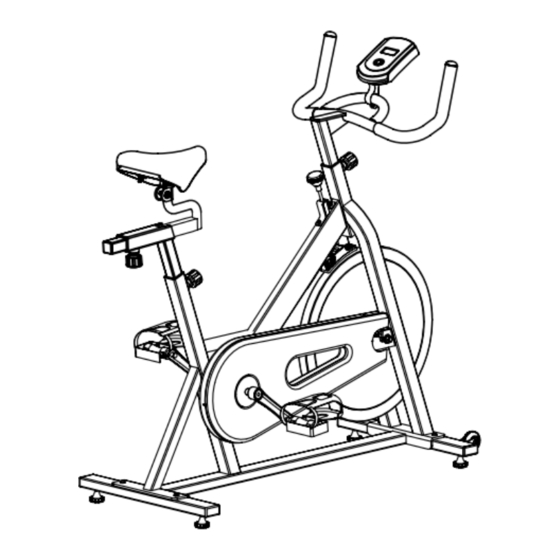
Page 4: Exploded Diagram
Exploded Diagram... -
Page 5: Parts List
Parts List Part No Description Part No Description Main frame Crank sealing Front stabilizer Fran nut Rear stabilizer Adjustment knob Handlebar Bushing Seat post End cap Seat slider Sensor wire Saddle Foam grip Computer Hex nut 9L/R Pedal Square end cap 10L/R Crank Cross screw... -
Page 6: Assembly Instructions
Assembly Instructions Step 1: Attach the Front (2) and the Rear Stabilizer (3) to the Main Frame (1) using the Allen Bolt (14) and Flat Washer (13). Step 2: Insert the Handlebar (4) to the upright post of the Main Frame (1) and then lock in place with the Adjustment Knob (17) after finding the suitable height. - Page 7 Step 3: Attach the Computer Bracket (25) to the Handlebar (4), using the Cross Screw (24) and Hex Nut (22), and then insert the end of the Sensor Wire (20) into the hole at the back of Computer (8) after connecting the wires. Step 4: Attach the Left and Right Pedals (9L/R) to the Left and Right Crank (10L/R), found on the Main Frame (1).
-
Page 8: Function Buttons
COMPUTER OPERATION BUTTONS: MODE: Used for selecting the different functions – SCAN, TIME, SPEED, DIST, CAL, ODO, & PULSE RESET: Used to reset the TIME, DISTANCE AND CALORIES functions. Hold it for 3 to reset Time, Distance and Calories FUNCTION BUTTONS: SCAN: Press the “MODE”... -
Page 9: Maintenance And Treatment
Maintenance and Treatment Verify that all the bolts and nuts are locked properly and all turning parts should be turning freely without any damage to those parts. Clean the equipment with soap and slightly damp cloth only. Please do not use any solvent to clean the equipment. -
Page 10: Warm Up Exercises
Warm Up Exercises A successful exercise program consists of a warm-up, aerobic exercise, and a cool-down. Do the entire program at least two and preferably three times a week, resting for a day between workouts. After several months, you can increase your workouts to four or five times per week. Warming up is an important part of your workout, and should begin every session. - Page 11 Calf-Achilles Stretch Lean against a wall with your left leg in front of the right and your arms forward. Keep your right leg straight and the left foot on the floor; then bend the left leg and lean forward by moving your hips toward the wall.
Need help?
Do you have a question about the CP-920 and is the answer not in the manual?
Questions and answers