Table of Contents
Advertisement
Seaward
OWNER'S MANUAL
Installation – Operation - Maintenance
Princess Gourmet
Model 345
Serial Number:
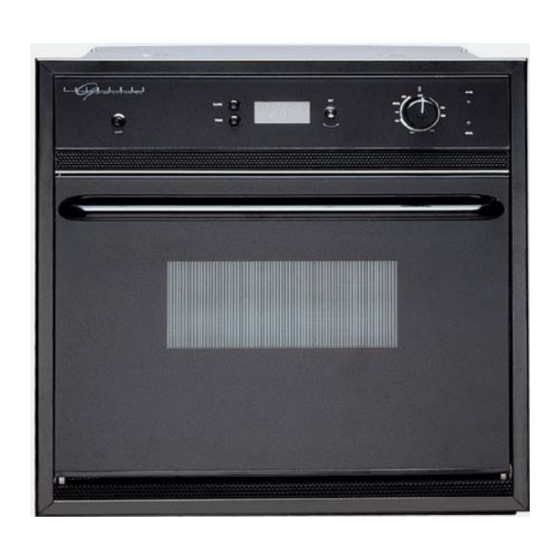
Princess Gourmet Model 345
Built-in Electric Oven
Products
ELECTRIC WALL OVEN
Read all instructions before operating Oven.
Save the Owner's Manual / Installation instructions
for local inspector's use.
Installer:
Provide this manual to the owner.
Owner:
Keep this manual for future reference.
IMPORTANT:
Advertisement
Table of Contents

Summary of Contents for Seaward Princess Gourmet 345
- Page 1 Seaward Products ELECTRIC WALL OVEN OWNER’S MANUAL Installation – Operation - Maintenance Princess Gourmet Model 345 Built-in Electric Oven IMPORTANT: Read all instructions before operating Oven. Save the Owner’s Manual / Installation instructions for local inspector’s use. Installer: Princess Gourmet Provide this manual to the owner.
-
Page 2: Important Instructions
IMPORTANT INSTRUCTIONS Save the Owner’s Manual / Installation instructions for local electrical inspector’s use. PROPER INSTALLATION: Be sure your appliance is properly installed and grounded by a qualified technician. NEVER USE YOUR APPLIANCE FOR WARMING OR HEATING A ROOM DO NOT LEAVE CHILDREN ALONE: Children should not be left alone or unattended in an area where appliances are being used. -
Page 3: Electrical Installation
2. Connect leads from flexible conduit to a junction box conveniently located for service or inspection. 345 WALL OVEN MOUNTING (4) Four 8 x 1 stainless screws are provided for securing the oven to the cabinet. Counter sunk mounting holes on the side trims are accessible when the door is open. See mounting diagram and cut-out dimensions on page 3. - Page 4 MODEL 345 WALL OVENS 20 3/8” 20 ½” 20 3/8” Cut – Out Dimensions Width = 20 3/8” Depth = 20 3/8” Height = 20 ½”...
- Page 5 CAUTION Heating elements may be hot, even though they are dark in color. During and after use, do not touch, or let clothing or other flammable materials near heating elements, or internal surfaces of oven until they have had sufficient time to cool. Other surfaces of the appliance may become hot enough to cause burns.
-
Page 6: To Set The Clock
CLOCK / TIMER TO SET THE CLOCK: 1. Press the “CLOCK” button. ”SET TIME” will be displayed 2. Turn the “SET” dial until the time of the day appears on the display. The dial can be turned clockwise or counter-clockwise. In a few seconds, the clock will automatically exit the “SET TIME”... -
Page 7: Use Of Aluminum Foil
USE OF ALUMINUM FOIL Do not use aluminum foil in your oven to cover racks or the oven bottom. Aluminum foil may be used to line the bottom part of the two-piece broiler pan, but if foil is placed over the slotted broiler tray, care must be taken to slit the foil at each slot so that the drippings and excess grease can drain into the pan below. -
Page 8: Safety Precautions
SAFETY PRECAUTIONS TO BE OBSERVED WHEN USING YOUR OVEN In case of future emergency, know where the main oven electric circuit breaker is located. Have the installer show you where the breaker is and how to reset it. Use the oven only for cooking. It will work better and longer if treated with care and used as intended. - Page 11 OVEN INFORMATION For future reference fill in the following information: Model Number: Serial Number: MFG. Code: Purchase Date: Purchased From: NOTES:...
-
Page 12: Limited Two-Year Warranty
LIMITED TWO YEAR WARRANTY SEAWARD PRODUCTS warrants the products delivered will be: A. Free from (1) encumbrances and (2) defects in material and workmanship under the normal use and service. B. Will meet applicable specifications and descriptions at time of delivery to BUYER. The obligation of SEAWARD under this warranty is limited to the repair, Rework, or replacement, at SEAWARD’S option, any part or component thereof, which examination discloses to our satisfaction to have been nonconforming or defective.
Need help?
Do you have a question about the Princess Gourmet 345 and is the answer not in the manual?
Questions and answers
The door hinge on the right side of our princess gourmet oven is not working right and the door is not closing properly.
Can you give us instruction on how to fix it?
The manual does not provide specific instructions for fixing the right side door hinge on the Seaward Princess Gourmet 345 oven. It is recommended to refer the issue to a qualified technician, as user servicing is not advised unless specifically recommended in the manual.
This answer is automatically generated
how to calibrate a Seaward Princess electric wall oven Model 345-120
@Lee Brown