Table of Contents
Advertisement
Advertisement
Table of Contents

Related Manuals for Sandstrom S66IDAB10


Summary of Contents for Sandstrom S66IDAB10
- Page 1 Instruction Manual DAB Radio with docking for iPod S66IDAB10 (iPod not included)
-
Page 3: Table Of Contents
Contents Unpacking ..........................3 Product Overview .........................4 Front View ...............................4 Top View ................................4 Rear View .................................4 Remote Control .............................5 Battery Installation for the Remote Control..................6 Handling the Battery ..........................6 Handling the Remote Control .........................7 Remote Control Operation Range......................7 Power Source ........................8 Mains Power ..............................8 Switching on Your Unit for the First Time ................8 Basic Operation ........................9... - Page 4 FM Operation ........................15 Selecting FM Mode ........................... 15 Auto Scan ..............................15 Manual Scan ..............................15 Storing Stations............................15 Recalling a Stored Station ........................15 Display Modes ............................16 Software Version ............................17 System Reset ............................... 17 iPod Operation ........................18 Selecting iPod Mode ..........................
-
Page 5: Unpacking
IN FO E N TE The Main Unit Remote Control part number DS267-18 Mains Adapter Instruction Manual part number part number UKAD83005-1500 S66IDAB10-002 If items are missing or damaged, please contact Partmaster (UK only). Tel: 0870 6001 338 for assistance. GB-3... -
Page 6: Product Overview
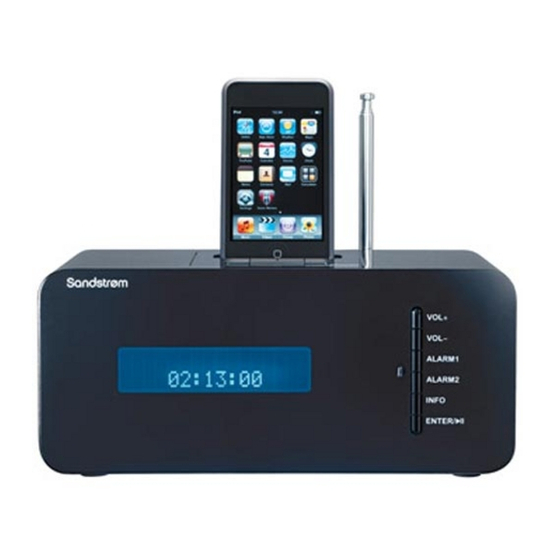
Product Overview Front View VOL+ VOL– ALARM 1 ALARM 2 INFO ENTER LCD Display Window INFO Button VOL+ / – Button ENTER Button ALARM1 / 2 Button Remote Sensor Top View STANDBY MODE SCAN PRESETS SNOOZE/SLEEP iPod Dock Button STANDBY Button SNOOZE/SLEEP Button MODE Button... -
Page 7: Remote Control
Remote Control REPEAT SLEEP SCAN PRESETS INFO SNOOZE ALARM1 ALARM2 ENTER MENU MODE VOL- VOL+ STANDBY Button INFO Button PRESETS Button 10. SLEEP / SNOOZE Button SCAN Button Button ALARM1 Button Button ALARM2 Button Button MENU Button 14. ENTER Button MODE Button 15. -
Page 8: Battery Installation For The Remote Control
Battery Installation for the Remote Control Press and hold the battery release tab in CR2025 the direction of arrow Pull out the battery holder completely in the direction of arrow Place a new CR2025 battery (not supplied) in the holder. Install the battery correctly by following the polarity (+ and -) indications in the battery compartment. -
Page 9: Handling The Remote Control
Handling the Remote Control • Take care of your fingernails when you press and hold the battery release tab. • Do not drop or cause impact to the remote control. • Do not spill water or any liquid on the remote control. • Do not place the remote control on a wet object. -
Page 10: Power Source
Power Source Mains Power Connect the mains adapter (included) to the DC 5V socket and the mains socket. DC 5V AUX IN Switching on Your Unit for the First Time Connect the unit to the mains socket and then press the STANDBY button to turn the unit on. -
Page 11: Basic Operation
Basic Operation Powering ON/OFF When you first connect the unit to the mains socket. The unit will be in Standby mode. STANDBY button to switch the unit on. • Press the • Press the STANDBY button to switch the unit back to Standby mode. • Disconnect the power cable of the mains adapter from the mains socket if you want to switch the unit off completely. -
Page 12: Snooze Function
Snooze Function Press the SNOOZE/SLEEP button when the alarm sounds. The snooze indicator “ Zz ” will illuminate in the display. The alarm will go off and will then sound again in approximately 5 minutes. STANDBY button when the alarm sounds. The “ To turn off the alarm, press the ”... -
Page 13: Dab Operation
DAB Operation To listen to the tuned stations press either the buttons. Each time you press the buttons, you will skip to the previous or next stored station. The unit will display the station name. Memory When you power up the unit again, the unit plays the same mode and station (DAB, FM, iPod or AUX) as the last operation. -
Page 14: Display Modes
Display Modes Every time you press the INFO button, the display will cycle through the following display modes: Multiple Name, Signal Strength, Time/Date, Channel Frequency, Audio Type/ Bit Rate, DLS (Scrolling Text), Programme Type. The information is displayed on the lower segment of the LCD display. DLS (Dynamic Label Segment) Multiplex Name Dynamic label segment is a scrolling message... -
Page 15: Software Version
Software Version Press and hold the INFO button for 2 seconds and then release it to view the software version of this unit. The software version will automatically disappear after 5 seconds. Auto Scan Modes There are two types of scans, one is Quick scan and the other is Full scan. • Quick scan: Searches the stations between channels 10A and 12D. -
Page 16: System Reset
System Reset There may be times when you need to reset your unit back to the factory settings. If you experience reception problems you may want to reset and try again. If you move the unit to another part of the country and pick up the local and national DAB stations in that area, your previously tuned channels may no longer be available. -
Page 17: Fm Operation
FM Operation Selecting FM Mode Press the MODE button on the unit or the remote control repeatedly until the display shows “Switch to FM”. On the top line of the display is the current frequency. On the bottom of the display, <Programme Type>... -
Page 18: Display Modes
Display Modes Every time you press the INFO button, the display will cycle through the following display modes: Programme Type, Signal Strength, Time/Date, Channel Frequency, Audio Mode, Radio Text. Programme Type Programme Type This describes the “Style” or “genre” of music that is being broadcast e.g. -
Page 19: Software Version
Software Version Press and hold the INFO button for 2 seconds and then release it to view the software version of this unit. Press the INFO button again to display the Program Identification code (PI code). The software version will automatically disappear after 5 seconds. System Reset There may be times when you need to reset your unit back to the factory settings. -
Page 20: Ipod Operation
iPod Operation Selecting iPod Mode Press the MODE button on the unit or the remote control repeatedly until the display shows “Switch to iPod”. Inserting the iPod Insert the Universal iPod dock adapter (not included) into the iPod dock until it sits firmly in place. -
Page 21: Charging Your Ipod
Charging Your iPod Your iPod has an internal non-removable battery, the battery may need to be charged if it has not been used for a while. You can automatically charge the iPod through the unit when in STANDBY / AUX / iPod mode. -
Page 22: Maintenance
Maintenance Ensure to unplug the unit from the mains socket before cleaning. • To clean the unit, wipe the case with a slightly moist, lint-free cloth. • Do not use any cleaning fluids containing alcohol, ammonia or abrasives. • Do not spray an aerosol at or near the radio. Hints and Tips Problem Cause / Solution... -
Page 23: Safety Warnings
Safety Warnings • Retain the manual. If you pass the unit Ventilation onto a third party make sure to include this • To prevent the risk of electric shock or manual. fire hazard due to overheating, ensure • Check that the voltage marked on the that curtains and other materials do not rating label matches your mains voltage. - Page 24 Service • To reduce the risk of electric shock, do not remove screws. The unit does not contain any user-serviceable parts. Please leave all maintenance work to qualified personnel. • Do not open any fixed covers as this may expose dangerous voltages. Maintenance • Ensure to unplug the unit from the mains socket before cleaning.
- Page 25 UKAD83005-1500 Remote Control DS267-18 Instruction Manual S66IDAB10-002 Visit Partmaster.co.uk today for the easiest way to buy electrical spares and accessories. With over 1 million spares and accessories available we can deliver direct to your door the very next day. Visit www.partmaster.co.uk or call 0870 6001 338 (UK customers only) Calls charged at National Rate.