Table of Contents
Advertisement
Advertisement
Table of Contents

Related Manuals for Ubiqconn T10C


Summary of Contents for Ubiqconn T10C
- Page 1 Rugged Tablet PC T10C User’s Guide...
-
Page 2: Introduction
T10C User Guide Introduction Please read these safety instructions carefully. Please keep this User’s Manual for later reference. Please disconnect this equipment from connecter before cleaning. Don’t use liquid or prayed detergent for cleaning. User moisture sheet or cloth for cleaning. - Page 3 T10C User Guide Caution on use of battery: User the battery recommended by the manufacturer or the same type of battery installed by the manufacturer. If incorrect battery is used, it may cause explosion or fire hazard. Recycle or discard used batteries according the manufacturer’s instruction or your local...
-
Page 4: Fcc Compliance Statement
T10C User Guide Replace only with same or equivalent type recommended by the manufacturer. Discard used batteries according to the manufacturer’s instructions. FCC Compliance Statement This equipment has been tested and found to comply with the limits for a class B digital device, pursuant to part 15 of the FCC Rules. - Page 5 T10C User Guide FCC Caution: Any changes or modifications not expressly approved by the party responsible for compliance could void the user's authority to operate this equipment. FCC RF Radiation Exposure Statement: 1. This Transmitter has been demonstrated co-location compliance requirements with Wi-Fi, Bluetooth and RFID Modules.
- Page 6 T10C User Guide EN 55022: 2006 +A1: 2007 EN 61000-3-2 : 2006 EN 61000-3-3 : 1995 + A1 : 2001 + A2 : 2005 EN 55024: 1998 + A1: 2001 + A2: 2003 (IEC 61000-4-2: 2008;...
- Page 7 T10C User Guide network services. This device may not be used for setting up outdoor radio links in France and in some areas the RF output power may be limited to 10 mW EIRP in the frequency range of 2454 – 2483.5 MHz. For detailed information the end-user should contact the national spectrum authority in France.
-
Page 8: Table Of Contents
T10C User Guide Table of Contents Introduction ............2 Table of Contents ........... 8 Chapter 1 .............. 12 General Information ..........12 1.1. Introduction ..................12 1.2. Specification ..................13 1.2.1. Main System .................... 13 1.2.2. I/O Interface ..................... 14 1.2.3. - Page 9 1.2.10. Optional: External Accessories .............. 17 1.3. Packing List ..................19 Chapter 2 .............. 20 System Setup ............20 2.1. Exploring Your T10C ................20 2.1.1. The T10C IO ................... 20 2.2.Preparing for Installation ..............26 2.2.1.Switch ON the main battery ..............26 2.2.2.Plugging to the DC supply ................
- Page 10 4.3.Security Chip Configuration .............. 40 4.4.Boot Management Setup ..............42 4.5.Exit Control ..................43 Chapter 5 .............. 44 User Interface for T10C ........44 5.1.Introduction ..................44 5.2.About the User Interface ..............44 5.2.1.Enable or disable the User Interface ............44 5.2.3.System Status Information ................
- Page 11 5.3.2.Volume Control ..................49 5.3.3.Webcam Launch ..................50 5.3.4.Monitor Switch ..................51 5.3.5.RF Device ON/OFF Control ..............52 Chapter 6 .............. 55 Maintenance ............55 6.1.Maintaining the Battery ..............55 6.2.Maintaining the LCD Display .............. 56 6.3.Cleaning the T10C ................56...
-
Page 12: Chapter 1
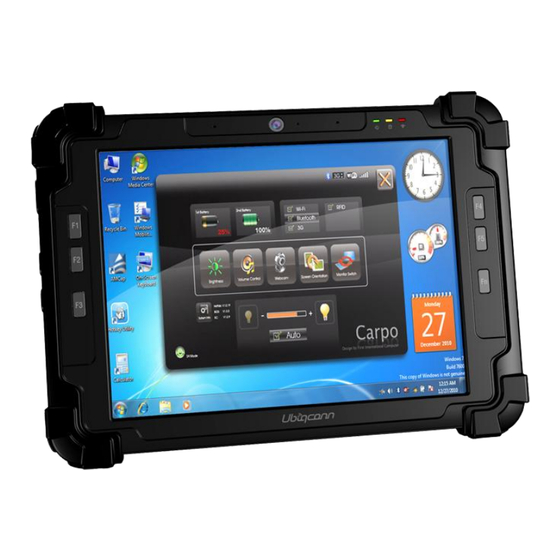
T10C User Guide General Information T10C rugged tablet PC is Intel® Cedar Trail Platform (N2600+NM10) processor core architecture based rugged Tablet PC with a bright 10.4-inch LED backlight LCD display. The powerful CPU brings the most dynamic applications to life without sacrifices to any industrial reliability. -
Page 13: Specification
T10C User Guide The T10C rugged tablet PC is a flexible, multi-functional flat tablet PC. With following specifications that can be applied in diverse operational environments and implemented in multi-faceted applications. 1.2.1. Main System Platform: Intel® Cedar Trail Platform (N2600+NM10) ... -
Page 14: I/O Interface
T10C User Guide 5-wire Resistive Touch Screen Audio: -1 x High Quality Speaker (2W) -Internal Microphone : 1 x in front Bezel Communication : - 10/100Mbps Ethernet - Wi-Fi IEEE 802.11 a/b/g/n ; Bluetooth 4.0 Webcam: Front - 2 Mega-pixel Camera Rear - 5 Mega-pixel Camera with LED Flash light 1.2.2. -
Page 15: Power Management
T10C User Guide 1 x Lock Button 1 x RF Button Button : Program Function Buttons : 6 x Function keys (Programmable) 1.2.4. Power Management Power Adapter : AC to DC, 19VDC@3.42A, 65W AC 100V ~ 240V, 50~60Hz input ... -
Page 16: Material
T10C User Guide Operating : 20g, 11ms, Terminal sawtooth Non-operating : 40g, 11ms, Terminal sawtooth (MIL-STD- 810G Method 516.6 Procedure I) Water/Dust Resistance : IP65 equivalent 1.2.6. Material Chassis : Semi-Rugged Tablet PC Slate Enclosure : ... -
Page 17: Optional: Internal Module
T10C User Guide RF : FCC part 15 subpart C SAR : FCC SAR (OET 65 C) 1.2.9. Optional: Internal Module 3.5G Sierra MC8355 Gobi3000 : Protocol : HSUPA/HSDPA/UMTS/EVDO/EDGE Frequency : UMTS/HSUPA/HSDPA 850/900/1800/2100MHz ... - Page 18 T10C User Guide 2D Symbologies: Data Matrix, PDF417, Micro PDF 417, Maxicode, QR, Aztec, EAN.UCC composite. GPS : Channel : 50 channel all-in-view tracking GPS,GLONASS support 1 x Signal Color LED (Blue) Desktop Docking : ...
-
Page 19: Packing List
T10C User Guide GPS (option) -
Page 20: Chapter 2
T10C User Guide System Setup Before starting to set up the T10C, get familiar with the locations and purpose of controls, connectors and I/O ports, which are illustrated in the figures below. When placed upright, the front panel of the T10C appears as shown in below. - Page 21 T10C User Guide F1 Button F1=explorer F2 Button F2=Windows Media Player F3 Button F3=OnScreen keyboard F4 Button F4=Task Manager F5 Button F5=Calculator Fn Button Fn = Hotkey Utility Implement Secure Attention Sequence (SAS) Fn+F3 Button (SAS) Similar function as pressing...
- Page 22 T10C User Guide Digital Microphone The built-in microphone receives sounds and voices when used with the built-in camera. LED Power/Storage/Wi-Fi Keeps you informed of your system’s current power status, Storage access status, and Wi-Fi ON/OFF status. 1. Power Indicator LED 2.
- Page 23 T10C User Guide Lights off when power off or the battery is fully charged. Storage Access When LED in blue light indicates that the system is accessing the Storage Drive. WiFi ON/OFF When LED turns on, blue light indicates that the WiFi is activated.
- Page 24 T10C User Guide F3_PATH="" F4_EXE="C:\WINDOWS\system32\taskmgr.exe" F4_PARA="" F4_PATH="" The configuration file is "c:\FKeySet.txt" Camera/5Mega-pixel The built-in camera can be used as a communication device for allowing you to capture images, record videos, and have video chats. It is 5.0 M pixels and transmitting instant image through network for conference.
- Page 25 T10C User Guide By removing the two long screws on top side of the system, allows you to install optional snap-on module. External Battery Connector To install the external battery pack, install external battery holder first and remove the cover of external battery connector before snap the battery pack into the external battery connector.
-
Page 26: Preparing For Installation
Lets you connect the system to docking station to dock the tablet PC when you are at home or office desk. Your T10C is designed and pre-configured for easy setup and use. This section describes the installation steps you should follow to get the system running as quickly as possible. -
Page 27: Plugging To The Dc Supply
T10C User Guide c. Place back the battery door 2.2.2.Plugging to the DC supply The AC adapter provides external power source to your system and charges the internal battery pack at the same time. The AC adapter also has an auto-switching design that can connect to any 100VAC ~ 240VAC power outlets. -
Page 28: Starting Your System
T10C User Guide 5. Plug the other end of the power cord to a live wall outlet, at the same time, the Power LED at front panel lights up. For the power supply of this equipment, an approved power cord has to be used. -
Page 29: Connecting The Keyboard And Mouse
T10C User Guide optimal operation. After the test has completed, your computer will start to search and boot up the operating system from your hard drive. 2.2.4.Connecting the keyboard and mouse Before setting up the system, please make sure the following items are available. -
Page 30: Chapter 3
T10C User Guide Using the T10C This chapter describes the basic features and procedures for using the panel PC. It includes the I/O ports connecting and the touch screen operation. USB (Universal Serial Bus) is a hardware interface that enables you to connect multiple devices (such as printers, mice, keyboards, storage devices, joysticks, digital cameras, and video conference cameras, etc.) -
Page 31: Using The External Audio System
2. Plug the jack into the port on the right side of the system. T10C provides optional external battery to extend the power of your system. For installing the battery pack, please follow the steps below: 1. -
Page 32: Using A Sim Card
To insert a SIM card into the SIM Card slot: 1. Turn off your System. The T10C must be powered off while the SIM Card is being connected. Otherwise, it is harmful to both devices and it shortens the life of these devices. -
Page 33: Removing A Sim Card
T10C User Guide 3. Make sure the clipped corner facing inward with the metallic label of the card facing down. Push the SIM Card firmly but slowly into the SIM Card slot. To insert a SIM card into the slot, please pay attention only one correct side can be accepted for the card slot. - Page 34 T10C User Guide The T10C System provides barcode scanner and MSR functions for your optional selection, before installing either of these two modules on the top side of the system, please remove the screws previously (illustrated in the following graphics as indicated step 1).
- Page 35 T10C User Guide 3. Insert FFC cable of barcode scanner into connector slot or attached the MSR cable to the connectors on the daughter board. 4. Screw to secure the Barcode Scanner/MSR onto the tablet.
-
Page 36: Chapter 4
T10C User Guide The BIOS Setup Program This system comes with a chip from Phoenix BIOS that contains the ROM Setup information for your system. (This chip serves as an interface between the processor and the rest of the system components.) This section explains the information contained in the Setup program and tells you how to modify the settings according to your system configuration. -
Page 37: Main Screen Setup Utility
T10C User Guide Function Function Description Key (s) + / - To change option for the selected items <Tab> To bring up the selected screen <F1> To display the General Help screen <F9> To load bios setup defaults value. <F10>... - Page 38 T10C User Guide The Standard CMOS Setup screen is displayed above. Each feature may have one or more option settings. Use the arrow keys to highlight the feature you want to change and then use “”or “” to select the value you want for that feature.
-
Page 39: Advanced Bios Features
T10C User Guide System Memory Speed The system will automatically displays the information of System Memory Speed. L2 Cache RAM The system will automatically displays the information of L2 Cache RAM. Total Memory The system will automatically displays the information of Total Memory. -
Page 40: Security Chip Configuration
T10C User Guide Select Language Lets you select the language displayed in SETUP UTILITY. (The current BIOS support the languages of English, Japanese and French.) UEFI Boot Lets you activate or close the UEFI boot function by selecting Enabled or Disabled option. - Page 41 T10C User Guide Supervisor Password is: This option displays the status of Supervisor Password. If the password is entered, it will display “Set” information, or it will display “Cleared” information when there is no password setting. User Password is ...
-
Page 42: Boot Management Setup
T10C User Guide This page allows you to set the search drive sequence where the system will try to boot up first. To select the boot device, you can use the up or down arrow key, then press <+> to move up the device in the list or press <-> to move down... -
Page 43: Exit Control
T10C User Guide Exit Saving Changes When you select this option, it will pop-out the following message, “Save configuration changes and exit setup?” Select [OK] to save the changes and exit the BIOS SETUP UTILITY. Exit Discarding Changes ... -
Page 44: Chapter 5
T10C User Guide User Interface for T10C This user interface provides specific mobile utility to let you easily setup some helpful functions and aware the system status directly. This utility also let you adjust some function to fit the requirements, such as brightness and volume adjustment, webcam launch, screen orientation and monitor switching. -
Page 45: System Status Information
T10C User Guide the top right corner on this User Interface for disabling this utility from the screen. If there is no action took for this utility in 5 seconds, the UI screen will close automatically. 5.2.3.System Status Information This utility shows you the battery capacity status, RF status with its signal strength and system information, and provides the control panel for the function setting. - Page 46 T10C User Guide For battery capacity status: The T10C is equipped with one internal battery and one optional external battery. The battery capacity status shown below advises you, that only one internal battery is embedded with the system which is fully charged, and there is no 2 optional battery installed in the system.
- Page 47 T10C User Guide For RF status: The following RF status shows you that the system is equipped with Wi-Fi, and Bluetooth functions. If you want to close either of these functions, please refer section for how to disable it. The following signal strength shows you that the Wi-Fi function is connecting currently, the stronger the signal strength, the more scale will show on the bar.
-
Page 48: Using The Application
BIOS and EC version and you can use them for customer service when asked. Your T10C has numbers of applications on the control panel for executing specific command. It provides you to adjust brightness, volume, launch webcam, make screen orientation and switch monitor. -
Page 49: Volume Control
T10C User Guide When you press it, the brightness control panel is appeared as follows: You can click to reduce or increase the brightness. Also, you can slide the scale bar to set the brightness. Since the system supports the light sensor, if you tick the ... -
Page 50: Webcam Launch
T10C User Guide When you press it, the Volume control panel is appeared as follows: You can click to reduce or increase the audio volume incrementally. Also, you can slide the scale bar to set the audio volume. -
Page 51: Monitor Switch
You can click Duplicate to display the same contents both on the T10C screen and external display device. The resolution on these two display modes are same, it is not available to adjust the resolution on the external display mode. -
Page 52: Rf Device On/Off Control
T10C User Guide projector only. 5.3.5.RF Device ON/OFF Control Press this soft button (via hotkey utility menu) to enable or disable Wi-Fi, Bluetooth, WWAN, or GPS devices. When you press the RF ON/OFF soft button, the screen pops-up the option list for your selection. - Page 53 T10C User Guide Disable Wi-Fi function Disable Bluetooth function Disable WWAN function Disable GPS function To activate the function, please again tick the option as shown in the following graphics to make the device enable. Activate Wi-Fi function Activate Bluetooth function...
- Page 54 T10C User Guide Activate WWAN function Activate GPS function...
-
Page 55: Chapter 6
Maintenance Your T10C needs occasional cleaning to prolong their life. Please read this section carefully to ensure proper care of T10C. When it is necessary to clean it, use a soft, lint-free cloth, slightly dampened with a mild detergent solution or use the contents of any commercially available computer cleaning kit. -
Page 56: Maintaining The Lcd Display
Clean the LCD display only with a soft cloth dampened with denatured alcohol or a proprietary LCD screen cleaner. Turn off the T10C and unplug the power cord. Wipe the screen and exterior with a soft, damp cloth moistened ...
Need help?
Do you have a question about the T10C and is the answer not in the manual?
Questions and answers