Table of Contents
Advertisement
Advertisement
Table of Contents

Related Manuals for Sirius Satellite Radio Stratus 5


Summary of Contents for Sirius Satellite Radio Stratus 5
- Page 1 User Guide User Guide Stratus 5 Stratus 5 Satellite Radio...
- Page 3 SIRIUS Stratus 5 ® Dock & Play Radio Your new SIRIUS Stratus 5 Dock & Play Radio comes with everything you need to enjoy SIRIUS in your car. With available SIRIUS Universal Docking accessories you can use ® your Stratus 5 just about anywhere.
-
Page 4: Table Of Contents
Controls ......SIRIUS Stratus 5 Front Panel ......64 Vehicle Dock Reference Guide . - Page 5 Menu Options ......72 SIRIUS ID ....... . . 73 FM Transmitter .
-
Page 6: Warning And Safety Information
Warning & Safety Information FCC Information This device complies with part 15 of the FCC Rules. Operation is subject to the following two conditions: This device may not cause harmful interference, and This device must accept any interference received, including interference that may cause undesired operation. -
Page 7: Canadian Compliance
• Do not operate your Stratus 5 in a way that might divert your attention from driving safely. As a driver, you alone are responsible for safely operating your vehicle in accordance with traffi... - Page 8 • Be sure the unit is installed as described in the installation instructions which accompany each accessory kit. SIRIUS Satellite Radio is not responsible for issues arising from installations which were not installed according to the instructions. •...
-
Page 9: Warnings
Vehicle Code Section 26708(a); Minnesota Statutes 2005, Section 169.71) Operating Temperature The Stratus 5 is designed to operate between -20° to +85° C (-4° to +185° F). Avoid leaving the radio in a vehicle or elsewhere where the temperature may fall outside this range. -
Page 10: Copyrights & Trademarks
Portions of the software on this radio are licensed under the eCos License. Distribu- tion of eCos requires that the eCos source code be made available to SIRIUS Satellite Radio customers. The eCos License and eCos source code are available to the public at http://www.sirius.com/ecoslicense... -
Page 11: Package Contents
Package Contents The following items are included with your purchase of the SIRIUS Stratus 5 radio: Stratus 5 Radio Vehicle Dock Vent Mount & Cigarette Lighter Adhesive Dash Mount Extended Vent Hooks Adapter Package Contents... - Page 12 Magnetic Antenna Screws Alcohol User Guide Antenna Cover/Tail Swab FM Extender Antenna Suction Cups (2) Self Adhesive Cable Guides (3) Package Contents...
- Page 13 Unpack your SIRIUS Stratus 5 radio carefully and make sure that everything shown is present. If anything is missing or damaged, or if your the radio fails to operate, notify your dealer immediately. We recommend that you retain the original carton and packing materials in case you need to ship your radio in the future.
-
Page 14: Installation
If the locations of your SIRIUS radio and your vehicle’s FM antenna make the performance the SIRIUS radio’s built in FM transmitter within your vehicle poor, a professional installer will have the necessary accessories to install an optional FM Direct Adapter or audio cable to connect the audio output of the Vehicle Dock directly to your vehicle’s... - Page 15 Figure 1 Installation...
-
Page 16: Mounting The Vehicle Dock
Mounting the Vehicle Dock Dash Mount Method (A) Attach the dash mount to the vehicle dock using the provided screws (see Figure 2 ). Attach Dock to Mount with Included Screws Figure 2 Select the mounting position carefully before adhering the mount to your vehicle. Once the mount has been adhered to a surface, it will not be possible to remove it and adhere it again. - Page 17 Vent Mount Method (B) To mount the vehicle dock using the vent mount, install the vent mount as follows: If the vent louvers in your vehicle are recessed, you may need to use the supplied longer vent hooks with the vent mount. Refer to Figure 3 and install the longer vent hooks into the vent mount.
- Page 18 Refer to Figure 5 and attach the vent mount to a heating/air conditioning vent in your vehicle. Position the two tension springs A against a vent louver B. Then push the vent mount into the vent, far enough so that the hooks C drop down and hook the rear of the vent louver (see Figure 6 ).
- Page 19 The angle of the docking station may be changed by changing the position of foot D on the vent mount to a different adjustment hole (see Figure 7 ). ADJUSTMENT HOLES Figure 7 Installation...
-
Page 20: Installing The Magnetic Antenna
Be sure not to cut, damage, or puncture the external jacket of the antenna cable during the installation procedure. Damage to the antenna cable can degrade the SIRIUS signal or make it unavailable, and can also cause water to intrude via the cable into the antenna causing the antenna to fail. - Page 21 ANTENNA MOUNTING The SIRIUS Magnetic Mount Vehicle Antenna has a strong magnetic mount designed to hold it in place during normal driving conditions (highway/city). This also makes the antenna easy to remove for transferring it to other vehicles. Figure 8 shows the optimal mounting location for the antenna on several types of vehicles.
- Page 22 The SIRIUS antenna needs to have an unobstructed area of 3 inches by 3 inches around it. It is important to mount the antenna where no obstructions will block the antenna from receiving the SIRIUS signal. Objects which can obstruct the antenna could be a roof rack, a sunroof, a roof-mounted cargo container, another antenna, etc.
- Page 23 During this period, avoid car washes and other contact with the antenna and the Rubber Cover/Tail. CABLE ROUTING After you have mounted the antenna you can route the antenna cable to the SIRIUS Vehicle Dock. Separate antenna cable routing procedures are provided for each type of vehicle: Sedan/Coupe, Pickup Truck, SUV/Mini-Van and Convertible.
- Page 24 Sedan /Coupe Antenna Cable Routing Procedure Figure 10 shows how the antenna cable should be routed from the antenna to your SIRIUS radio in a sedan/coupe. 1. Feed Cable Under 6. Bring Cable Out To Rubber Molding SIRIUS Receiver Around Window Location 2.
- Page 25 Secure the excess cable with wire ties. Bring the end of the cable out at the SIRIUS Vehicle Dock location. Leave yourself enough cable so you can easily connect it to the antenna connector on the Vehicle Dock.
- Page 26 Pickup Truck Antenna Cable Routing Procedure Figure 11 shows how the antenna cable should be routed from the antenna to your SIRIUS radio in a pickup truck. ANTENNA 1. Route Cable Under Rubber Molding Around Windshield 2. Continue Tucking Cable...
- Page 27 Secure the excess cable with wire ties. Bring the end of the cable out at the SIRIUS Vehicle Dock location. Leave yourself enough cable so you can easily connect it to the antenna connector on the Vehicle Dock.
- Page 28 SUV/ Mini-Van Antenna Cable Routing Procedure Figure 12 shows how the antenna cable should be routed from the antenna to your SIRIUS radio in an SUV or a Mini-Van. 1. Feed Cable Under 4. Bring Cable Out To Rubber Seal Around...
- Page 29 Secure the excess cable with wire ties. Bring the end of the cable out at the SIRIUS Vehicle Dock location. Leave yourself enough cable so you can easily connect it to the antenna connector on the Vehicle Dock.
- Page 30 Convertible Antenna Cable Routing Procedure Figure 13 shows how the antenna cable should be routed from the antenna to your SIRIUS radio in a convertible. 6. Bring Cable Out To SIRIUS Receiver Location 1. Bring Cable from Antenna Into Inside 5.
- Page 31 Secure the excess cable with wire ties. Bring the end of the cable out at the SIRIUS Vehicle Dock location. Leave yourself enough cable so you can easily connect it to the antenna connector on the Vehicle Dock.
- Page 32 TIPS The following DO and DO NOT antenna mounting tips illustrate how to install the antenna for optimal performance, and also illustrate where the antenna should not be installed. Mount the antenna on the roof, at least 3 inches from the edge.
- Page 33 Mount the antenna 3” on the roof where it has at least 3 inches of clear space around supplied Rubber Tail Cover to protect the antenna cable. Installation...
- Page 34 Don’t mount antenna inside the vehicle, for example, on the dashboard. Don’t mount antenna on any of the vehicle’s front, back or side pillars. Installation...
- Page 35 Don’t mount the an- tenna close to a roof rack. Adjust the rack so it’s further away from the antenna or move antenna closer to the center of the roof. Don’t mount antenna close another antenna. Mount it at least 3 inches away.
- Page 36 After you’ve routed the cable to the SIRIUS Vehicle Dock, connect the antenna cable to the A connection on the right side of the Vehicle Dock. (See Figure 14. ) Antenna...
-
Page 37: Connecting The Cigarette Lighter Adapter
HIS COULD DAMAGE THE SIRIUS EHICLE YOUR RECEIVER OR BOTH Docking Your SIRIUS Radio To place your Stratus 5 into the Mounting Vehicle Dock, align the radio Rails against the rear of the Dock so that the rails on the Dock fit into the mounting slots in the back of the radio (see Figure 16 ). -
Page 38: Cable Separation And Routing
Cable Separation and Routing FCC Information The satellite antenna cable, FM Extender Antenna (FEA) cable and cigarette lighter adapter (CLA) power cable must be appropriately separated and routed for your radio to be compliant with federal regulations. Step 1 LEFT RIGHT The connections on your vehicle dock are clearly marked. - Page 39 Figure 19 Step 4 D. Route Cable Under Carpet or Console Follow the instructions in this manual to vehicle dock or SIRIUS radio C. Coil Excess Cable Under Carpet to install, route and hide the antenna or Mat cable and the FEA cable. Be sure to B.
-
Page 40: Connecting Your Stratus 5 To Your Vehicle's Audio System
Connecting Your Stratus 5 to Your Vehicle’s Audio System There are two ways to connect your SIRIUS Stratus 5 to your vehicle’s audio system: Direct Connection or Wireless Connection. Which one will perform best in your vehicle depends on your vehicle’s audio system. -
Page 41: Direct Fm Audio Connection
FM Direct Adapter (sold separately) will provide the next best quality connection between your Stratus 5 and your vehicle radio. You will listen to your Stratus 5 through your car radio’s FM tuner, but the SIRIUS FM Direct Adapter connects your vehicle’s FM radio directly to the Vehicle Dock’s FM O... -
Page 42: Cassette Adapter
Cassette Adapter If your vehicle’s audio system has a cassette player you can purchase a cassette adapter http://shop.sirius.com from your local electronics retailer or from SIRIUS at . Plug the adapter’s connector into the A jack on the left side of the Vehicle Dock, and insert UDIO the adapter into your vehicle’s cassette player. -
Page 43: Wireless Audio Connection
FM radio. To use this you need to tune the Stratus 5’s FM transmitter to an FM frequency that’s not being used in your area (See Figure 24 ). If you use an FM channel that is being used by a local broadcaster, it will interfere with the performance of your SIRIUS radio. - Page 44 4. Press and hold the FM Presets/M button (see Figure 25 , left). The M screen will appear. Press the Channel UP/DOWN buttons to highlight FM PTIONS and press the Select button to select it. RANSMITTER Channel UP/DOWN menu Buttons FM Presets/ Select Figure 25...
-
Page 45: Wireless Audio Connection Using The Fm Extender Antenna
To listen to SIRIUS, turn your SIRIUS Stratus 5 ON, then turn your vehicle’s FM radio ON and press the SIRIUS preset you set in Step 2 , on page 43. You should hear your SIRIUS Stratus 5 through your vehicle’s FM radio. -
Page 46: Warning And Safety Information
Professional installation provides an experienced technician to install the Extender Antenna, knowledge of your vehicle for locating its radio antenna, and routing the cable and connecting it to your SIRIUS radio. Ask your SIRIUS retailer if they provide professional installation services, or can recommend a professional installation service. - Page 47 Other dashboard or friction mounting options should be used. SIRIUS does not take any responsibility for any fi nes, penalties, or damages that may be incurred as a result of disregarding this notice. (See California Vehicle Code Section 26708(a);...
- Page 48 INSTALLATION Step 1: Determine the type and location of your vehicle’s FM antenna The key to properly installing the FEA in your vehicle is being able to determine the type and location of your vehicle’s FM antenna. The type and location of the FM antenna in your vehicle should be one of the following (see Figure 29 , opposite): A.
- Page 49 Figure 29 Installation...
- Page 50 Figure 30 . The antenna portion of the FEA is the relatively thinner section of the cable in between the bead and the arrow that transmits the FM signal to your vehicle’s FM antenna. ATTACH SUCTION CUPS AS SHOWN ANTENNA CONNECTS TO YOUR SIRIUS ARROW BEAD ON BOTH ENDS OF THE THIN WIRE CABLE VEHICLE DOCK’S ‘FM OUT’...
- Page 51 For vehicles with type FM antennas: • Whip/aerial mounted on the front fender or hood • Whip/aerial mounted in the A-pillar of car frame Mount FEA at Edge of Windshield Nearest to Vehicle Antenna Alternate Mounting Location on Adjacent A-Pillar Figure 31 Mount the FEA vertically on the front windshield at the edge of the glass, on the same side as the vehicle’s antenna (i.e.
- Page 52 For vehicles with type FM antennas: • In-glass, in the rear windshield • Whip/aerial mounted on rear part of roof FM ANTENNA Mount FEA on Rear Windshield DEFROSTER WIRES Figure 32 Mount the FEA horizontally along the top edge of the rear windshield (see Figure 32 ). For vehicles with a rooftop antenna, center the FEA below the antenna whip.
- Page 53 For vehicles with an type FM antenna: • Whip/aerial mounted on the rear fender or trunk Mount FEA at Edge of Windshield Nearest to Vehicle Antenna Figure 33 Mount the FEA vertically on the rear windshield at the edge of the glass, on the same side as the vehicle’s antenna (i.e.
- Page 54 For vehicles with type FM antennas: • Whip/aerial mounted on the front part of roof • In-glass, in the front windshield Alternate Mounting Mount FEA Along Location Tucked Top Edge of Into Headliner Windshield Figure 34 Mount the FEA horizontally along the top edge of the front windshield or install it into the headliner of the vehicle just above the front windshield (see Figure 34 ).
- Page 55 For vehicles with an type FM antenna: • In-glass, in a rear side window Mount FEA Directly Over Antenna Wires Figure 35 Mount the FEA directly over the in-glass antenna wires. If the antenna wires are verti- cal, mount the FEA vertically on the glass; if the in-glass antenna wires are horizontal, mount the FEA horizontally on the glass.
- Page 56 This will become your SIRIUS preset. Step 6: Set Your SIRIUS Stratus 5’s FM transmitter to the same FM channel a. Dock your Stratus 5 and turn its power ON. Wait for the Channel Update to fi nish before pressing any buttons. Installation...
- Page 57 b. Press and hold the FM Presets/M button (see Figure 37 , left). The M screen will appear. Press the Channel UP/DOWN buttons to highlight PTIONS FM T and press the Select button to select it. RANSMITTER Channel UP/DOWN menu Buttons FM Presets/ Select...
- Page 58 To listen to SIRIUS, turn your SIRIUS Stratus 5 ON, then turn your vehicle’s FM radio ON and press the SIRIUS preset you set in Step 5 , on page 56. You should hear your SIRIUS Stratus 5 through your vehicle’s FM radio (see Figure 40 ).
- Page 59 Step 8: Permanently install the FEA ’ F YOU ARE MOUNTING THE IN THE VEHICLE S HEADLINER SKIP THIS STEP When you are satisfi ed with the FEA’s mounting location, remove the suction cup mounts and peel the backing off the bead and arrow adhesive mounts. Clean the area where the FEA will be attached with the alcohol swab.
- Page 60 Step 9: Route and hide the cable through the vehicle to the Vehicle Dock Hide the FEA cable by properly routing it to your SIRIUS Vehicle Dock (see Figure 43 ). Use the cable guides to hold the cable in place until it reaches the inner trim or moulding at the edge of the window.
- Page 61 Appendix A: Tips for Identifying the FM Antenna Correctly identifying your vehicle’s FM antenna is a key to successfully installing the FEA. The preceding installation section already showed you the different kinds of FM antennas found on vehicles. However, there are several types of antennas found on ve- hicles that you may at fi...
- Page 62 If after searching your vehicle you’re still uncertain as to where its FM antenna is located then SIRIUS recommends professional installation of the FM Extender Antenna. Ask your SIRIUS retailer if they provide professional installation services, or can recommend a professional installer.
-
Page 63: Subscribing To The Sirius Service
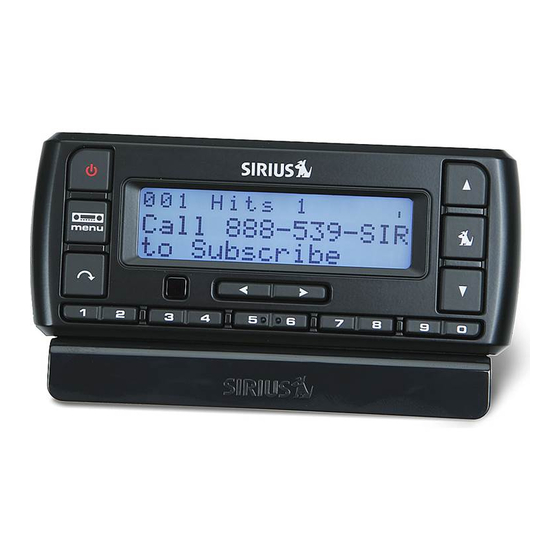
Before you can listen to the SIRIUS service, you need to subscribe to the SIRIUS Satellite Radio service. To subscribe, do the following: Be sure that your SIRIUS Stratus 5 is correctly installed, is properly docked in the Vehicle Dock, and that the antenna is oriented to receive the SIRIUS signal. -
Page 64: Controls
Controls SIRIUS Stratus 5 Front Panel Figure 47 and the section following identify and describe the SIRIUS Stratus 5’s buttons and controls. menu Figure 47 Controls... - Page 65 Category < > Buttons: Navigates through the Category List screen which displays SIRIUS channel categories. LCD Display: Displays information about the Stratus 5’s operation and about the program that is playing. Channel UP/DOWN Buttons: Navigates through channels and display screens.
-
Page 66: Vehicle Dock Reference Guide
) Connector: Audio output for directly connecting to your UDIO vehicle’s audio system (see pages 40 & 42). Docking Rails: Fit-into slots in the back of the Stratus 5 to secure it while it is docked (see page 37). FM O Connector: FM output for use with the optional FM Direct Adapter (see page 41). -
Page 67: Operation
Display Screen Information Whenever you power your Stratus 5 ON, the previously-selected channel will automatically begin playing, and the Stratus 5’s display screen will show the currently- tuned channel, the song or show being played, the artist name and other information. -
Page 68: Changing Channels And Categories
Changing Channels and Categories Pressing the Channel UP or DOWN button will cause the Stratus 5 to immediately tune to the next or previous channel. Pressing the Category < or > button once will display a list of the channels in the cur- rent category, highlighting the currently-tuned channel (see Figure 51 ). -
Page 69: Channel Presets
To store a favorite channel as a preset, do the following: Tune the Stratus 5 to the channel you want to store as a preset. Press and hold for 1 second the numbered preset button (0 – 9) in which you want to store the channel. -
Page 70: Fm Presets/Menu Button
FM Presets/M Button If you are using a wireless connection between your Stratus 5 and your vehicle’s audio system (see page 41), you can easily select between the fi ve different preset FM transmitter frequencies without having to go through the Menu Options (see page 70). -
Page 71: Jump Button
If your traffi c/weather report is not immediately available, the display will indicate that a jump is pending (see Figure 58 ). Once your local traffi c/weather report is ready, the Stratus 5 will automatically tune to the traffi c/weather channel. You may have to wait a few minutes for your desired report. -
Page 72: Menu Options
Use the Channel UP/DOWN buttons to highlight selections in the menu lists and press the Select button to select them. To exit a menu, press the FM Presets/Menu button. If you don’t make a selection within 10 seconds the Stratus 5 will exit the M PTIONS screen and revert to the last active display mode. -
Page 73: Sirius Id
This displays your Stratus 5’s 12-digit SIRIUS ID (SID) number (see Figure 60 ). Figure 60 The SID is unique to each SIRIUS radio, and is required to activate your service. We recommend that you write this number in the space provided near the end of this user guide. -
Page 74: Fm Transmitter
FM Transmitter The FM Transmitter menu option allows you to enable or disable the Stratus 5’s built-in FM transmitter, and select up to 5 different preset FM transmitter frequencies (see Figure 61 ). Figure 61 FM P RESETS You can select from the 5 preset FM transmitter frequencies:... - Page 75 FM O You can turn the Stratus 5’s FM transmitter ON and OFF: From the FM Transmitter screen (see Figure 61 , on page 74), highlight and select FM O . The FM O screen will appear (see Figure 63 ).
-
Page 76: Settings
ETTINGS HANNEL Figure 64 Display Options The D menu ( Figure 65 ) lets you adjust the Stratus 5’s LCD display to ISPLAY PTIONS improve its visibility in different lighting conditions, and to display different types of information. Figure 65... - Page 77 BRIGHTNESS AND CONTRAST Brightness adjusts the overall intensity of the LCD display to help with viewing in different lighting conditions. Contrast adjusts the relationship between the background and the text on the LCD display. Use the Channel UP/DOWN buttons to adjust the brightness and contrast. The bar graphs will indicate the change (see Figure 66 ).
-
Page 78: Audio Level
Channel UP/DOWN buttons to adjust the UDIO EVEL Stratus 5’s audio output level (see Figure 69 ). The bar graph will indicate the change. Figure 69 Tones You can select whether to hear an audible confi rmation tone as you navigate menus and lists. -
Page 79: Time Zone
(see Figure 71 ) allows you to setup the clock that appears on the LOCK Default screen, based on the format desired and the time zone in which you reside. The actual time is provided via the SIRIUS satellite signal, and will automatically update your Stratus 5. Figure 71 Format Displays the time in either 12-hour (default) or 24-hour format (see Figure 72 ). -
Page 80: Daylight Savings Time
Figure 74 Jump Settings The Jump menu lets you select which city’s traffi c and weather reports the Stratus 5 will provide when you press the Jump button. Use the Channel UP/DOWN buttons to select a city and press the Select button to set your choice (see Figure 75 ). -
Page 81: Channel Lock
Channel Lock Your SIRIUS Stratus 5 has the ability to lock channels you do not want others (such as children) to access without your permission. Locked channels will not appear on the Channel List screen, or when browsing channels with the Channel UP/DOWN buttons. - Page 82 Figure 77 When the lock code is confi rmed, the lock code is set. You can use this same procedure to change the lock code after you have set it. SIRIUS C F YOU HAVE FORGOTTEN YOUR HANNEL OCK CODE...
-
Page 83: Signal
The Signal screen (see Figure 78 ) visually shows the strength of the satellite and terrestrial signals being received by the Stratus 5. (Refer to the Home Docking Station installation guide for more information about properly orienting the antenna.) Figure 78 The SAT bar graph indicates the strength of the satellite signal strength;... - Page 84 , the Stratus 5 will restore the original factory settings (see Figure 80 ). Figure 80 When the Restore is complete, the Stratus 5 will tune to the last channel that was active before the Factory Default was begun. Menu Options...
-
Page 85: Troubleshooting
The audio cables are not connected, or the FM radio is set to the wrong frequency. • Check the audio cables at the SIRIUS radio and the vehi- cle’s audio system. • Tune the vehicle’s FM radio to the same FM frequency the SIRIUS FM transmitter is tuned. -
Page 86: Specifi Cations
Specifications Satellite Frequencies ................2322.293/2330.207 MHz Terrestrial Frequencies..................2326.250MHz Radio Power Requirements ......... 4.9 – 5.6 Volts, Negative Ground, DC Audio Output ..................700mVrms (+/- 50mVrms) Total Harmonic Distortion (THD) ..................<0.2% Signal-to-noise (S/N) ..................Greater than 73dB Fuse Requirement ......................2A ATC Radio Dimensions (Length x Width x Depth) ........114mm x 48mm x 15mm (4.5”... -
Page 87: Sirius Id
SIRIUS ID SIRIUS ID Write down the SIRIUS ID (SID) of your SIRIUS Stratus 5 in the space provided below. SID: ____________________________________ SIRIUS ID... - Page 88 Notes...
- Page 89 Notes...
- Page 90 SIRIUS Customer Service: 1-888-869-5590 customercare@sirius-radio.com SIRIUS Satellite Radio Inc. 1221 Avenue of the Americas New York, NY 10020 1-888-869-5590 http://www.sirius.com...
- Page 92 Sirius Satellite Radio Inc. 1221 Avenue of the Americas New York, NY 10020 800.869.5590 Stratus 5 User Guide (050508a)
Need help?
Do you have a question about the Stratus 5 and is the answer not in the manual?
Questions and answers