
Related Manuals for Kenwood TK-2400


Summary of Contents for Kenwood TK-2400
-
Page 1: Instruction Manual
INSTRUCTION MANUAL VHF FM TRANSCEIVER TK-2400 UHF FM TRANSCEIVER TK-3400 © B62-2478-00 (K) 09 08 07 06 05 04 03 02 01 00... - Page 2 THANK YOU We are grateful for your purchase of this KENWOOD product and welcome you to the Business Radio Service (BRS). Your KENWOOD 2-way Business Radio is called a “transceiver”, meaning “transmitter & receiver”. We believe this easy-to- use transceiver will provide you with dependable and reliable communications.
- Page 3 FCC LICENSE INFORMATION Your KENWOOD transceiver operates on communications frequencies which are subject to FCC (Federal Communications Commission) Rules & Regulations. FCC Rules require that all operators using Private Land Mobile radio frequencies obtain a radio license before operating their equipment. Application for license must be made on FCC form 601, schedules D and H, and Remittance form 159.
- Page 4 For information on Li-ion battery recycling in your area, call (toll free) 1-800-8-BATTERY (1-800-822-8837). KENWOOD’s involvement in this program is part of our commitment to preserve our environment and conserve our natural resources.
- Page 5 Ensure that there are no metallic items located between the transceiver and the battery pack. • Do not use options not specified by KENWOOD. • If the die-cast chassis or other transceiver part is damaged, do not touch the damaged parts.
- Page 6 If an abnormal odor or smoke is detected coming from the transceiver, switch the transceiver power off immediately, remove the battery pack from the transceiver, and contact your KENWOOD dealer. • Use of the transceiver while you are driving may be against traffic laws.
- Page 7 Information concerning the battery pack: The battery pack includes flammable objects such as organic solvent. Mishandling may cause the battery to rupture producing flames or extreme heat, deteriorate, or cause other forms of damage to the battery. Please observe the following prohibitive matters.
- Page 8 • Use only the specified charger and observe charging requirements! If the battery is charged in unspecified conditions (under high temperature over the regulated value, excessive high voltage or current over regulated value, or with a remodeled charger), it may overcharge or an abnormal chemical reaction may occur.
- Page 9 • Do not touch a ruptured and leaking battery! If the electrolyte liquid from the battery gets into your eyes, wash your eyes with fresh water as soon as possible, without rubbing your eyes. Go to the hospital immediately. If left untreated, it may cause eye-problems.
-
Page 10: Table Of Contents
KEY ASSIGNMENT MODE ..........20 TROUBLESHOOTING GUIDE ......... 25 ALL RESET MODE ............. 26 OPTIONAL ACCESSORIES ..........26 Firmware Copyrights The title to and ownership of copyrights for firmware embedded in KENWOOD product memories are reserved for JVC KENWOOD Corporation. viii... -
Page 11: Unpacking And Checking Equipment
UNPACKING AND CHECKING EQUIPMENT Carefully unpack the transceiver. If any of the items listed below are missing or damaged, file a claim with the carrier immediately. SUPPLIED ACCESSORIES • Battery charger/ AC adapter (KSC-35S) ........ 1 • Li-ion Battery pack (KNB-45L) ..........1 •... - Page 12 INSTALLING/ REMOVING THE BATTERY PACK ◆ Do not short the battery terminals or dispose of the battery by fire. ◆ Never attempt to remove the casing from the battery pack. 1 Align the battery pack with the back of the transceiver, then press the battery pack and transceiver firmly together until the release latch on the...
- Page 13 1 Plug the AC adapter cable into the jack located on the rear of the charger. 2 Plug the AC adapter into an AC outlet. 3 Slide a battery pack or a transceiver equipped with a battery pack into the charging slot of the charger.
-
Page 14: Microphone Jacks
INSTALLING THE BELT CLIP If necessary, attach the belt clip using the two supplied M3 x 8 mm screws. Note: If the belt clip is not installed, its mounting location may get hot during continuous transmission or when left sitting in a hot environment. Belt clip Do not use glue which is designed to prevent screw loosening when installing the belt clip, as it may cause damage to the transceiver. - Page 15 INSTALLING THE (OPTIONAL) SPEAKER/ MICROPHONE Note: The transceiver is not fully water resistant when using a speaker/ microphone or headset. 1 Insert the speaker/ microphone plugs into the speaker/ microphone jacks of the transceiver. 2 Place the locking bracket over the speaker/ microphone plugs so that the locking tabs insert into the transceiver grooves.
-
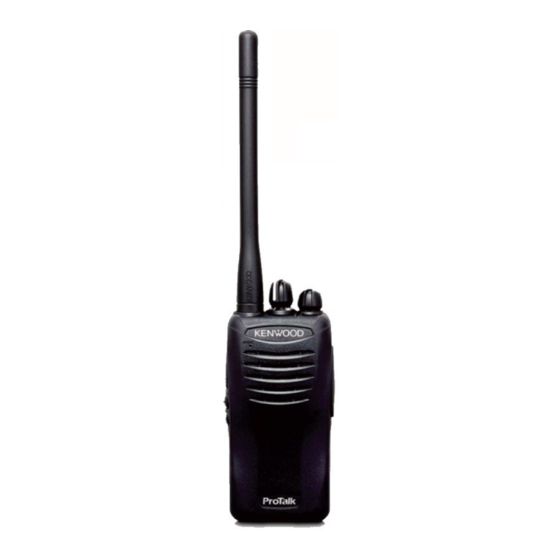
Page 16: Orientation
ORIENTATION Antenna Battery pack Channel selector Rotate to change the operating channel. • To change the operating frequency or QT/DQT settings of a channel, refer to “CHANNEL SETUP MODE” on page 11. • Channel Announcement: When changing channels, the transceiver will announce the newly selected channel number. LED indicator For the LED indicator status, refer to page 8. - Page 17 Side 1 key Press to activate its programmable function. The default setting is Super Lock. • For function descriptions and details on how to change the function of the Side 1 key, refer to “KEY ASSIGNMENT MODE” on page 20. Side 2 key Press to activate its programmable function.
-
Page 18: Basic Operations
BASIC OPERATIONS 1 Turn the Power switch/ Volume control clockwise to switch the transceiver power • A beep sounds. 2 Rotate the Channel selector to select your desired channel. • When you receive an appropriate signal, you will hear audio from the speaker. Adjust the volume as necessary. -
Page 19: Voice Operated Transmission (Vox)
VOICE OPERATED TRANSMISSION (VOX) VOX operation allows you to transmit hands-free. VOX can only be used if you are using a supported headset. This function can be turned off for specific channels. To activate VOX and set the VOX Gain level, perform the following steps: 1 Connect the headset to the transceiver . -
Page 20: Background Operations
BACKGROUND OPERATIONS TIME-OUT TIMER (TOT) The Time-out Timer prevent callers from using a channel for an extended duration (60 seconds). If you continuously transmit for the duration, transmission will stop and an alert tone will sound. To stop the tone, release the PTT switch. LOW BATTERY WARNING While operating the transceiver, the Low Battery Warning sounds an alert tone every 30 seconds and the LED indicator... -
Page 21: Channel Setup Mode
QT (Quiet Talk)/ DQT (Digital Quiet Talk) settings. The table below lists the default channel settings. Channel Table Frequency (MHz) QT/DQT Setting Number Number TK-2400 (K) 4 channel model 154.4900 67.0 Hz 154.5150 67.0 Hz 151.6250 67.0 Hz 151.9550 67.0 Hz TK-2400 (K2) 16 channel model 154.4900... - Page 22 467.9000 67.0 Hz 461.1875 67.0 Hz 461.2125 67.0 Hz Note: Due to FCC regulations, the default values of TK-2400/ TK- 2300 (VHF) are different from TK-2200 (VHF) series. Make sure to choose a compatible frequency to interoperate with each other.
- Page 23 CHANNEL OPERATING FREQUENCIES To change the operating frequency of a channel: 1 With the transceiver power OFF, press and hold the PTT switch and Side 1 key while turning the transceiver power • Continue to hold the PTT switch and Side 1 key until the LED lights orange and the transceiver announces “Self”.
- Page 24 TK-2400 Operating TK-2400 Operating Table Number Frequency (MHz) Table Number Frequency (MHz) 151.7450 151.6250 151.7750 151.9550 151.8650 152.8850 151.8950 152.9150 151.9250 151.7000 152.9000 151.7600 154.4900 152.9450 154.5150 151.8350 154.5275 151.8050 154.5400 151.5125 153.0050 151.6550 154.5475 151.6850 158.4000 151.7150 158.4075 TK-3400...
- Page 25 TK-3400 Operating TK-3400 Operating Table Number Frequency (MHz) Table Number Frequency (MHz) 464.4875 467.1875 464.5125 467.4625 464.5375 467.4875 464.5625 467.5125 466.0375 451.1875 466.0625 451.2375 466.0875 451.2875 466.1125 451.3375 466.1375 451.4375 466.1625 451.5375 466.1875 451.6375 466.2125 452.3125 466.2375 452.5375 466.2625 452.4125 466.2875 452.5125 466.3125...
- Page 26 QT/ DQT SETTINGS Quiet Talk (QT) and Digital Quiet Talk (DQT) are functions that reject undesired signals on your channel. You will hear a call only when you receive a signal that contains a matching QT tone or DQT code. If a call containing a different tone or code is received, squelch will not open and you will not hear the call.
- Page 27 6 Press the PTT switch to save the setting. • A beep will sound. • Repeat steps 3 to 6 to set up another channel. 7 Turn the transceiver power OFF and then ON again to activate the new settings. Note: The transceiver will automatically return to normal operation if no action is performed for 20 seconds.
- Page 28 DQT Channel Settings: Number Code Number Code Number Code Number Code D023N D223N D503N D047I D025N D226N D506N D051I D026N D243N D516N D054I D031N D244N D532N D065I D032N D245N D546N D071I D043N D251N D565N D072I D047N D261N D606N D073I D051N D263N D612N D074I...
- Page 29 Number Code Number Code Number Code Number Code D261I D371I D516I D703I D263I D411I D532I D712I D265I D412I D546I D723I D271I D413I D565I D731I D306I D423I D606I D732I D311I D431I D612I D734I D315I D432I D624I D743I D331I D445I D627I D754I D343I D464I D631I...
-
Page 30: Key Assignment Mode
KEY ASSIGNMENT MODE This transceiver allows you to reprogram the Side 1 and Side 2 keys with any of the functions listed in the table below. Explanations on the use of each function are provided under “PROGRAMMABLE FUNCTIONS”, on page 22. Table Number Function Name None (no function) - Page 31 To change the functions of the Side 1 and Side 2 keys: 1 With the transceiver power OFF, press and hold the Side 1 and Side 2 keys while turning the transceiver power ON. • Continue to hold the Side 1 and Side 2 keys until the LED lights orange and the transceiver announces “Setup”.
- Page 32 PROGRAMMABLE FUNCTIONS ■ Calling Alert Calling alert tone helps alerting party members that you are calling. To make a call, press the key programmed as Calling Alert. • Release the key to end the tone, and press and hold the PTT switch to transmit and speak into the microphone.
- Page 33 ■ Scan Scan is useful for monitoring signals on the transceiver channels. When scanning, the transceiver checks for a signal on each channel and only stops if a signal is present. If the QT/DQT matches, the transceiver stops at the channel and opens the squelch so you can listen to the call.
- Page 34 ■ Super Lock (Side 1 key default) Super Lock locks the same keys as Key Lock. Press and hold this key for 4 seconds to lock the transceiver keys. To deactivate Super Lock, with the transceiver power OFF, press and hold the Side 2 key for 2 seconds while turning the transceiver power ON.
-
Page 35: Troubleshooting Guide
TROUBLESHOOTING GUIDE Problem Solution • The battery pack may be dead. Recharge or replace the battery pack. Cannot turn the transceiver power ON. • The battery pack may not be installed correctly. Remove the battery pack and install again. • The battery pack life is finished. -
Page 36: All Reset Mode
ALL RESET MODE At some point in time, you may desire to reset the transceiver settings to their default values. This function will reset all channels to their default frequencies and QT/DQT, the VOX function to its default status, and all keys to their default functions. - Page 37 Use only Kenwood authorized accessories (antennas, battery packs, belt clips, Speaker/ Mics or headsets etc.): When worn on the body, always place the radio in a Kenwood recommended clip or carrying case meant for this product. The use of other than recommended or approved body- worn accessories may result in RF exposure levels which exceed the FCC’s occupational/ controlled...
Need help?
Do you have a question about the TK-2400 and is the answer not in the manual?
Questions and answers