
Related Manuals for Kenwood TK-2400


Summary of Contents for Kenwood TK-2400
- Page 1 INSTRUCTION MANUAL VHF FM TRANSCEIVER TK-2400 UHF FM TRANSCEIVER TK-3400 B62-2478-20 (K)
- Page 2 FEATURES • 4 (K type) or 16 (K2 type) channels with 27 VHF (TK-2400) or 90 UHF (TK-3400) operating frequencies and each channel can be set up with a QT tone or DQT code allowing you to ignore unwanted calls.
- Page 3 FCC LICENSE INFORMATION Your KENWOOD transceiver operates on communications frequencies which are subject to FCC (Federal Communications Commission) Rules & Regulations. FCC Rules require that all operators using Private Land Mobile radio frequencies obtain a radio license before operating their equipment.
- Page 4 For information on Li-ion battery recycling in your area, call (toll free) 1-800-8-BATTERY (1-800-822-8837). KENWOOD’s involvement in this program is part of our commitment to preserve our environment and conserve our natural resources.
- Page 5 The negative terminal connects to the chassis ground. The battery is mounted on the rear side of the transceiver using a latch mounting method. Firmware Copyrights The title to and ownership of copyrights for fi rmware embedded in KENWOOD product memories are reserved for JVC KENWOOD Corporation.
- Page 6 Ensure that there are no metallic items located between the transceiver and the battery pack. • Do not use options not specifi ed by KENWOOD. • If the die-cast chassis or other transceiver part is damaged, do not touch the damaged parts.
- Page 7 If an abnormal odor or smoke is detected coming from the transceiver, switch the transceiver power off immediately, remove the battery pack from the transceiver, and contact your KENWOOD dealer. • Use of the transceiver while you are driving may be against traffi c laws.
- Page 8 Information concerning the battery pack: The battery pack includes fl ammable objects such as organic solvent. Mishandling may cause the battery to rupture producing fl ames or extreme heat, deteriorate, or cause other forms of damage to the battery. Please observe the following prohibitive matters.
- Page 9 • Use only the specifi ed charger and observe charging requirements! If the battery is charged in unspecifi ed conditions (under high temperature over the regulated value, excessive high voltage or current over regulated value, or with a remodeled charger), it may overcharge or an abnormal chemical reaction may occur.
- Page 10 • Do not touch a ruptured and leaking battery! If the electrolyte liquid from the battery gets into your eyes, wash your eyes with fresh water as soon as possible, without rubbing your eyes. Go to the hospital immediately. If left untreated, it may cause eye-problems.
-
Page 11: Table Of Contents
CONTENTS UNPACKING AND CHECKING EQUIPMENT ......1 PREPARATION ............2 ORIENTATION ............6 BASIC OPERATIONS ........... 8 VOICE OPERATED TRANSMISSION (VOX) ......9 BACKGROUND OPERATIONS ........10 CHANNEL SETUP MODE ..........11 KEY ASSIGNMENT MODE ..........20 TROUBLESHOOTING GUIDE ......... 25 ALL RESET MODE ............. -
Page 12: Preparation
PREPARATION INSTALLING THE ANTENNA Screw the antenna into the connector on Antenna the top of the transceiver by holding the antenna at its base and turning it clockwise until secure. Note: The antenna is neither a handle, a key ring retainer, nor a speaker/ microphone attachment point. - Page 13 CHARGING THE BATTERY PACK The battery pack is not charged at the factory; charge it before use. Average battery pack life (calculated using 5% transmit time, 5% receive time, and 90% standby time) is 17 hours. ATTENTION: Always switch OFF a transceiver equipped with a battery pack before inserting the transceiver into the charger.
-
Page 14: Installing The Belt Clip
INSTALLING THE BELT CLIP If necessary, attach the belt clip using the two supplied M3 x 8 mm screws. Note: If the belt clip is not installed, its mounting location may get hot during continuous transmission or when left sitting in a hot environment. Belt clip Do not use glue which is designed to prevent screw loosening when installing the belt clip, as it may cause damage to the transceiver. - Page 15 INSTALLING THE OPTIONAL SPEAKER/ MICROPHONE (OR HEADSET) Note: The transceiver is not fully water resistant when using a speaker/ microphone or headset. 1 Insert the speaker/ microphone (or headset ) plugs into the speaker/ microphone jacks of the transceiver. 2 Place the locking bracket over the speaker/ microphone (or headset) plugs so that the locking tabs insert into the transceiver grooves.
-
Page 16: Orientation
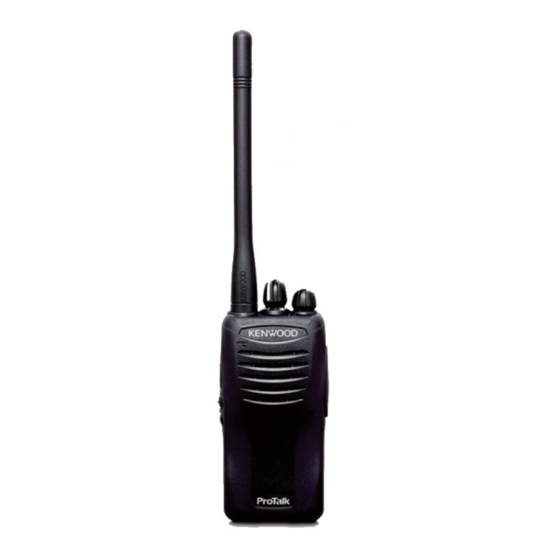
ORIENTATION Microphone Speaker Antenna Battery pack Channel selector Rotate to change the operating channel. • To change the operating frequency or QT/DQT settings of a channel, refer to “CHANNEL SETUP MODE” on page 11. LED indicator For the LED indicator status, refer to page 8. Power switch/ Volume control Turn clockwise to switch the transceiver ON. - Page 17 Side 1 key Press to activate its programmable function. The default setting is [None] (no function). • For function descriptions and details on how to change the function of the Side 1 key, refer to “KEY ASSIGNMENT MODE” on page 20. Side 2 key Press to activate its programmable function.
-
Page 18: Basic Operations
BASIC OPERATIONS 1 Turn the Power switch/ Volume control clockwise to switch the transceiver power • The LED indicator lights blue for 1 second when turning the Power ON. 2 Rotate the Channel selector to select your desired channel. • When you receive an appropriate signal, you will hear audio from the speaker. -
Page 19: Voice Operated Transmission (Vox)
VOICE OPERATED TRANSMISSION (VOX) VOX operation allows you to transmit hands-free. VOX can only be used if you are using a supported headset. This function can be turned off for specifi c channels. To activate VOX and set the VOX Gain level, perform the following steps: 1 Connect the headset to the transceiver . -
Page 20: Background Operations
BACKGROUND OPERATIONS TIME-OUT TIMER (TOT) The Time-out Timer prevent callers from using a channel for an extended duration (60 seconds). If you continuously transmit for the duration, transmission will stop and an alert tone will sound. To stop the tone, release the PTT switch. LOW BATTERY WARNING While operating the transceiver, the Low Battery Warning sounds an alert tone every 30 seconds and the LED indicator... -
Page 21: Channel Setup Mode
QT (Quiet Talk)/ DQT (Digital Quiet Talk) settings. The table below lists the default channel settings. Channel Table Frequency (MHz) QT/DQT Setting Number Number TK-2400 (K) 4 channel model 154.4900 67.0 Hz 154.5150 67.0 Hz 151.6250 67.0 Hz 151.9550 67.0 Hz TK-2400 (K2) 16 channel model 154.4900... - Page 22 467.9000 67.0 Hz 461.1875 67.0 Hz 461.2125 67.0 Hz Note: Due to FCC regulations, the default values of TK-2400/ TK- 2300 (VHF) are different from TK-2200 (VHF) series. Make sure to choose a compatible frequency to interoperate with each other.
- Page 23 CHANNEL OPERATING FREQUENCIES To change the operating frequency of a channel: 1 With the transceiver power OFF, press and hold the PTT switch and Side 1 key while turning the transceiver power • Continue to hold the PTT switch and Side 1 key until the LED lights orange and the transceiver announces “Self”.
- Page 24 TK-2400 Operating TK-2400 Operating Table Number Frequency (MHz) Table Number Frequency (MHz) 151.7450 151.6250 151.7750 151.9550 151.8650 152.8850 151.8950 152.9150 151.9250 151.7000 152.9000 151.7600 154.4900 152.9450 154.5150 151.8350 154.5275 151.8050 154.5400 151.5125 153.0050 151.6550 154.5475 151.6850 158.4000 151.7150 158.4075 TK-3400...
- Page 25 TK-3400 Operating TK-3400 Operating Table Number Frequency (MHz) Table Number Frequency (MHz) 464.4875 467.1875 464.5125 467.4625 464.5375 467.4875 464.5625 467.5125 466.0375 451.1875 466.0625 451.2375 466.0875 451.2875 466.1125 451.3375 466.1375 451.4375 466.1625 451.5375 466.1875 451.6375 466.2125 452.3125 466.2375 452.5375 466.2625 452.4125 466.2875 452.5125 466.3125...
- Page 26 QT/ DQT SETTINGS Quiet Talk (QT) and Digital Quiet Talk (DQT) are functions that reject undesired signals on your channel. You will hear a call only when you receive a signal that contains a matching QT tone or DQT code. If a call containing a different tone or code is received, squelch will not open and you will not hear the call.
- Page 27 6 Press the PTT switch to save the setting. • A beep will sound. • Repeat steps 3 to 6 to set up another channel. 7 Turn the transceiver power OFF and then ON again to activate the new settings. Note: The transceiver will automatically return to normal operation if no action is performed for 20 seconds.
- Page 28 DQT Channel Settings: Number Code Number Code Number Code Number Code D023N D223N D503N D047I D025N D226N D506N D051I D026N D243N D516N D054I D031N D244N D532N D065I D032N D245N D546N D071I D043N D251N D565N D072I D047N D261N D606N D073I D051N D263N D612N D074I...
- Page 29 Number Code Number Code Number Code Number Code D261I D411I D546I D731I D263I D412I D565I D732I D265I D413I D606I D734I D271I D423I D612I D743I D306I D431I D624I D754I D311I D432I D627I D645I D315I D445I D631I D023N D331I D464I D632I D023N D343I D465I D654I...
-
Page 30: Key Assignment Mode
KEY ASSIGNMENT MODE This transceiver allows you to reprogram the Side 1 and Side 2 keys with any of the functions listed in the table below. Explanations on the use of each function are provided under “PROGRAMMABLE FUNCTIONS”, on page 22. Table Number Function Name None (no function) <default>... - Page 31 To change the functions of the Side 1 and Side 2 keys: 1 With the transceiver power OFF, press and hold the Side 1 and Side 2 keys while turning the transceiver power ON. • Continue to hold the Side 1 and Side 2 keys until the LED lights orange and the transceiver announces “Setup”.
-
Page 32: Calling Alert
PROGRAMMABLE FUNCTIONS ■ Calling Alert Calling alert tone helps alerting party members that you are calling. To make a call, press the key programmed as Calling Alert. • Release the key to end the tone, and press and hold the PTT switch to transmit and speak into the microphone. -
Page 33: Squelch Off
■ Scan Scan is useful for monitoring signals on the transceiver channels. When scanning, the transceiver checks for a signal on each channel and only stops if a signal is present. If the QT/DQT matches, the transceiver stops at the channel and opens the squelch so you can listen to the call. - Page 34 ■ Super Lock Super Lock locks the same keys as Key Lock. Press and hold this key for 4 seconds to lock the transceiver keys. To deactivate Super Lock, with the transceiver power OFF, press and hold the Side 2 key for 2 seconds while turning the transceiver power ON.
-
Page 35: Troubleshooting Guide
TROUBLESHOOTING GUIDE Problem Solution • The battery pack may be dead. Recharge or replace the battery pack. Cannot turn the transceiver power ON. • The battery pack may not be installed correctly. Remove the battery pack and install again. • The battery pack life is fi... -
Page 36: All Reset Mode
ALL RESET MODE At some point in time, you may desire to reset the transceiver settings to their default values. This function will reset all channels to their default frequencies and QT/DQT, the VOX function to its default status, and all keys to their default functions. - Page 37 MANUAL DE INSTRUCCIONES TRANSCEPTOR FM VHF TK-2400 TRANSCEPTOR FM UHF TK-3400...
- Page 39 Es posible configurar 4 canales (tipo K) o 16 (tipo K2) con 27 frecuencias operativas VHF (TK-2400) o 90 frecuencias operativas UHF (TK-3400) y cada canal con un tono QT o código DQT para no atender las llamadas no deseadas.
- Page 40 INFORMACIÓN SOBRE CONCESIÓN DE LICENCIA DE LA FCC Su transceptor KENWOOD funciona en frecuencias de comunicación sujetas a la Normativa y Reglamento de la FCC (Federal Communications Commission). El Reglamento de la FCC exige que todos los operadores que utilizan radiofrecuencias móviles terrestres privadas deben solicitar una licencia de radio antes de utilizar su equipo.
- Page 41 La batería se coloca por la parte posterior del transceptor mediante un sistema de montaje picaporte. Derechos de propiedad intelectual del firmware La titularidad y propiedad de los derechos de propiedad intelectual del firmware integrado en las memorias de los productos KENWOOD están reservados para JVC KENWOOD Corporation. E-iii...
- Page 42 Compruebe que no hay ningún objeto metálico interpuesto entre el transceptor y la batería. • No utilice opciones no indicadas por KENWOOD. • Si el chasis de fundición u otra pieza del transceptor resultara dañada, no toque ninguna de dichas piezas.
- Page 43 • Si detecta un olor anormal o humo procedente del transceptor, desconecte la alimentación, retire la batería del aparato y póngase en contacto con su distribuidor KENWOOD. • El uso del transceptor mientras conduce puede infringir las leyes de tráfico.
- Page 44 Información acerca de la batería: La batería contiene objetos inflamables, como disolvente orgánico. Su uso inapropiado puede hacer que la batería se rompa y se incendie o genere calor extremo, se deteriore o sufra otros tipos de daños. Observe las siguientes prohibiciones. PELIGRO ¡...
- Page 45 PELIGRO ¡ Utilice únicamente el cargador especificado y observe los requisitos • de carga! Si se carga la batería en condiciones distintas a las especificadas (a una temperatura superior al valor regulado, tensión o corriente muy superior al valor regulado o con un cargador modificado), ésta se podría sobrecargar o sufrir una reacción química anormal.
- Page 46 PELIGRO ¡ No toque la batería si está rota y tiene fugas! • Si el líquido electrolito de la batería llegara a entrarle en los ojos, láveselos con agua fresca lo antes posible, sin frotarlos. Vaya al hospital inmediatamente. Si no se trata, podría causar problemas a la vista. ADVERTENCIA ¡...
- Page 47 CONTENIDO DESEMBALAJE Y COMPROBACIÓN DEL EQUIPO ....1 PREPARATIVOS ............1 ORIENTACIÓN ............6 OPERACIONES BÁSICAS ..........8 TRANSMISIÓN ACTIVADA POR VOZ (VOX) ......9 OPERACIONES DE FONDO ......... 10 MODO DE CONFIGURACIÓN DE CANAL ......11 MODO DE ASIGNACIÓN DE TECLAS ......20 GUIÍA DE RESOLUCIÓN DE PROBLEMAS ......25 MODO DE REINICIO INTEGRAL ........
-
Page 48: Antenna
PREPARATIVOS INSTALACIÓN DE LA ANTENA Sujete la antena por su base y enrósquela en Antena el conector de la parte superior del transceptor girándola hacia la derecha, hasta que quede asegurada. Nota: Esta antena no es una empuñadura, ni un llavero ni un punto de acoplamiento del micrófono/ altavoz. - Page 49 CARGA DEL PAQUETE DE BATERÍAS Como el paquete de batería no viene cargado de fábrica, deberá cargarlo antes de utilizarlo. La vida media útil del paquete de batería (calculada utilizando 5% de tiempo de transmisión, 5% de tiempo de recepción y 90% de tiempo de espera) es de 17 horas. ATENCIÓN: Apague siempre el transceptor equipado con paquete de batería antes de insertarlo en el cargador.
- Page 50 INSTALLING THE BELT CLIP Cuando sea necesario, acople el gancho para cinturón sirviéndose de los dos tornillos de M3 x 8 mm que se suministran.. Note: If the belt clip is not installed, its mounting location may get hot during Gancho continuous transmission or when left para...
- Page 51 INSTALACIÓN DEL MICRÓFONO/ ALTAVOZ (O MICRÓFONO- AURICULAR) OPCIONAL Nota: El transceptor no es totalmente resistente al agua cuando se utiliza un micrófono/ altavoz o un micrófono-auricular. 1 Inserte las clavijas del micrófono/ altavoz (o micrófono-auricular) en los jacks del micrófono/ altavoz del transceptor.
-
Page 52: Orientación
ORIENTACIÓN Micrófono Altavoz Antena Paquete de batería Selector de canales Gírelo para cambiar de canal operativo. • Para cambiar de frecuencia operativa o los ajustes de QT/DQT de un canal, consulte “MODO DE CONFIGURACIÓN DE CANAL” en la página 11. Indicador LED Para conocer el estado del indicador LED, consulte la página 8. - Page 53 Tecla Lateral 1 Púlsela para activar su función programable. El valor predeterminado es [Ninguno] (ninguna función). • Para obtener una descripción de las funciones e información detallada sobre cómo cambiar la función de la tecla Lateral 1, consulte “MODO DE ASIGNACIÓN DE TECLAS” en la página 20. Tecla Lateral 2 Púlsela para activar su función programable.
-
Page 54: Operaciones Básicas
OPERACIONES BÁSICAS 1 Gire el interruptor de Encendido/ control de Volumen hacia la derecha para encender el transceptor. • El indicador LED se ilumina en azul durante 1 segundo al encender el transceptor. 2 Gire el selector de Canales para seleccionar el canal deseado. -
Page 55: Transmisión Activada Por Voz (Vox)
TRANSMISIÓN ACTIVADA POR VOZ (VOX) El uso de VOX le permite transmitir en modo manos libres. VOX sólo puede utilizarse si usa un micrófono-auricular compatible. Esta función se puede desactivar para determinados canales. Para activar VOX y ajustar su nivel de ganancia, siga estos pasos: 1 Conecte el micrófono-auricular al transceptor. -
Page 56: Operaciones De Fondo
OPERACIONES DE FONDO TEMPORIZADOR DE TIEMPO LÍMITE (TOT) El Temporizador de tiempo límite impide que las personas que realicen una llamada ocupen un canal durante demasiado tiempo (60 segundos). Si transmite de forma ininterrumpida durante dicho tiempo, la transmisión se detendrá y sonará un tono de aviso. Para detener el tono, suelte el conmutador PTT. -
Page 57: Modo De Configuración De Canal
En la siguiente tabla se recogen los ajustes de canal predeterminados. Número de Número de Frecuencia (MHz) Ajuste de QT/DQT Canal Tabla TK-2400 (K) modelo de 4 canales 154 , 4900 67,0 Hz 154 , 5150 67,0 Hz 151 , 6250 67,0 Hz 151,9550... - Page 58 67,0 Hz 461,2125 67,0 Hz Nota: Por motivos del reglamento de la FCC, los valores predeterminados de la serie TK-2400/ TK-2300 (VHF) difieren de los de la serie TK-2200 (VHF). Elija una frecuencia compatible para interactuar con cada uno. E-12...
- Page 59 FRECUENCIAS OPERATIVAS DE CANALES Para cambiar la frecuencia operativa de un canal: 1 Con el transceptor apagado, presione prolongadamente el conmutador PTT y la tecla Lateral 1 mientras lo enciende. • Mantenga presionado el conmutador PTT y la tecla Lateral 1 hasta que el indicador LED se ilumine en naranja y el transceptor anuncie “Self (Mismo)”.
- Page 60 TK-2400 TK-2400 Frecuencia Frecuencia Número de Número de operativa (MHz) operativa (MHz) tabla tabla APAGADO 151,7450 151,6250 151,7750 151,9550 151,8650 152,8850 151,8950 152,9150 151,9250 151,7000 152,7000 151,7600 154,4900 152,9450 154,5150 151,8350 154,5275 151,8050 154,5400 151,5125 153,0050 151,6550 154,6550 151,6850 158,4000...
- Page 61 TK-3400 TK-3400 Frecuencia Frecuencia Número de Número de operativa (MHz) operativa (MHz) tabla tabla 464,4875 467,1875 464,5125 467,4625 464,5375 467,4875 464,5625 467,5125 466,0375 451,1875 466,0625 451,2375 466,0875 451,2875 466,1125 451,3375 466,1375 451,4375 466,1625 451,5375 466,1875 451,6375 466,2125 452,3125 466,2375 452,5375 466,2625 452,4125 466,2875...
- Page 62 AJUSTES DE QT/ DQT Charla silenciar (QT) y Charla silenciar digital (DQT) son funciones que rechazan señales no deseadas en su canal. Sólo oirá las llamadas cuya señal recibida contenga un todo QT o un código DQT coincidente. Si recibe una llamada con un tono o un código distinto, el silenciador no se abrirá...
- Page 63 7 Apague el transceptor y vuelva a encenderlo para activar la nueva configuración. Nota: El transceptor volverá automáticamente a su estado de funcionamiento normal si no se realiza ninguna operación durante 20 segundos. Ajustes de canal QT: Número Frecuencia Número Frecuencia Número Frecuencia...
- Page 64 Ajustes de canal DQT: Número Código Número Código Número Código Número Código de DQT de DQT de DQT de DQT D023N D223N D503N D047I D025N D226N D506N D051I D026N D243N D516N D054I D031N D244N D532N D065I D032N D245N D546N D071I D043N D251N D565N...
- Page 65 Número Código Número Código Número Código Número Código de DQT de DQT de DQT de DQT D261I D411I D546I D731I D263I D412I D565I D732I D265I D413I D606I D734I D271I D423I D612I D743I D306I D431I D624I D754I D311I D432I D627I D645I D315I D445I D631I...
-
Page 66: Modo De Asignación De Teclas
MODO DE ASIGNACIÓN DE TECLAS Este transceptor le permite reprogramar las teclas Lateral 1 y Lateral 2 con cualquiera de las funciones que se enumeran en la siguiente tabla. Podrá encontrar una descripción de cada una de estas funciones en “FUNCIONES PROGRAMABLES” en la página 22. Número de Tabla Nombre de la Función Ninguno (ninguna función) <valor predeterminado>... - Page 67 Para cambiar las funciones de las teclas Lateral 1 y Lateral 2: 1 Con el transceptor apagado, pulse prolongadamente la tecla Lateral 1 y Lateral 2 mientras lo enciende. • Mantenga pulsadas las teclas Lateral 1 y Lateral 2 hasta que el indicador LED se ilumine en naranja y el transceptor anuncie “Setup (Configuración)”.
- Page 68 FUNCIONES PROGRAMABLES ■ Aviso de llamada El tono de aviso de llamada le ayuda a avisar a los usuarios de que está realizando una llamada. Para realizar una llamada, pulse la tecla programada con la función Aviso de llamada. • Suelte la tecla para finalizar el tono y luego pulse prolongadamente el conmutador PTT para transmitir y hable al micrófono.
- Page 69 ■ Exploración Exploración sirve para escuchar señales en los canales del transceptor. Durante la exploración, el transceptor busca una señal en cada canal y se detiene únicamente si hay una señal presente. Si el código QT/DQT coincide, el transceptor se detiene en el canal y abre el silenciamiento, para que pueda escuchar la llamada.
- Page 70 ■ Súperbloqueo Súperbloqueo bloquea las mismas teclas que Bloqueo de teclas. Pulse prolongadamente esta tecla durante 4 segundos para bloquear las teclas del transceptor. Para desactivar Súperbloqueo, con el transceptor apagado, pulse prolongadamente la tecla Lateral 2 durante 2 segundos mientras enciende el transceptor. •...
-
Page 71: Guiía De Resolución De Problemas
GUIÍA DE RESOLUCIÓN DE PROBLEMAS Problema Solución • Es posible que el paquete de batería esté agotado. Recargue o cambie el paquete de batería. No se puede encender el • Es posible que el paquete de batería transceptor. no esté instalado correctamente. Retire el paquete de batería y vuelva a instalarlo. - Page 72 MODO DE REINICIO INTEGRAL Es posible que en algún momento desee restablecer los valores predeterminados del transceptor. Esta función restablecerá las frecuencias predeterminadas y QT/DQT de todos los canales, el estado predeterminado de la función VOX y las funciones predeterminadas de todas las teclas. Para restablecer el transceptor: 1 Con el transceptor apagado, presione prolongadamente el conmutador PTT, la tecla Lateral 1 y la tecla Lateral 2 mientras lo...
Need help?
Do you have a question about the TK-2400 and is the answer not in the manual?
Questions and answers