Troy-Bilt TB90BC Operator's Manual
2-cycle gasoline
Hide thumbs
Also See for TB90BC:
- Operator's manual (80 pages) ,
- Parts list (2 pages) ,
- Specification sheet (1 page)
Table of Contents
Advertisement
Available languages
Available languages
TM
S t a r t i n g
TABLE OF CONTENTS
Service Information . . . . . . . . . . . . . . . . . . . . . . . . . . . . . .1
Rules for Safe Operation . . . . . . . . . . . . . . . . . . . . . . . . . .2
Know Your Unit . . . . . . . . . . . . . . . . . . . . . . . . . . . . . . . . .4
Assembly Instructions . . . . . . . . . . . . . . . . . . . . . . . . . . . .4
Oil and Fuel Information . . . . . . . . . . . . . . . . . . . . . . . . . . .8
Starting/Stopping Instructions . . . . . . . . . . . . . . . . . . . . . .9
Operating Instructions . . . . . . . . . . . . . . . . . . . . . . . . . . .10
Maintenance and Repair Instructions . . . . . . . . . . . . . . .12
Cleaning and Storage . . . . . . . . . . . . . . . . . . . . . . . . . . .15
Troubleshooting Chart . . . . . . . . . . . . . . . . . . . . . . . . . . .16
Specifications . . . . . . . . . . . . . . . . . . . . . . . . . . . . . . . . .17
Warranty Information . . . . . . . . . . . . . . . . . . . . . . . . .19, 20
Parts List . . . . . . . . . . . . . . . . . . . . . . . . . . . . . . . . . . . .E22
P/N 769-03454
Operator's Manual
2-Cycle Gasoline Trimmer/
Brushcutter
TB90BC
SAVE THESE INSTRUCTIONS
For service call 1-800-828-5500 in the United States, or
1-800-668-1238 in Canada to obtain a list of authorized service
dealers near you. For more details about your unit, visit our
website at www.troybilt.com.
DO NOT RETURN THE UNIT TO THE RETAILER. PROOF OF
PURCHASE WILL BE REQUIRED FOR WARRANTY
SERVICE.
THIS PRODUCT IS COVERED BY ONE OR MORE U.S.
PATENTS. OTHER PATENTS PENDING.
Service on this unit both within and after the warranty period
should be performed only by an authorized and approved
service dealer.
SPARK ARRESTOR NOTE
NOTE: For users on U.S. Forest Land and in the states of
California, Maine, Oregon and Washington. All U.S. Forest
Land and the state of California (Public Resources Codes 4442
and 4443), Oregon and Washington require, by law that certain
internal combustion engines operated on forest brush and/or
grass-covered areas be equipped with a spark arrestor,
maintained in effective working order, or the engine be
constructed, equipped and maintained for the prevention of
fire. Check with your state or local authorities for regulations
pertaining to these requirements. Failure to follow these
requirements could subject you to liability or a fine. This unit is
factory equipped with a spark arrestor. If it requires
replacement, ask your LOCAL SERVICE DEALER to install the
Accessory Part #753-05169 Spark Arrestor Kit.
CALIFORNIA PROPOSITION 65 WARNING
WARNING
THE ENGINE EXHAUST FROM THIS PRODUCT CONTAINS
CHEMICALS KNOWN TO THE STATE OF CALIFORNIA TO
CAUSE CANCER, BIRTH DEFECTS OR OTHER
REPRODUCTIVE HARM.
All information, illustrations, and specifications in this manual
are based on the latest product information available at the
time of printing. We reserve the right to make changes at any
time without notice.
Copyright© 2008 MTD SOUTHWEST INC, All Rights Reserved.
(03/08)
Advertisement
Chapters
Table of Contents

Related Manuals for Troy-Bilt TB90BC


Summary of Contents for Troy-Bilt TB90BC
- Page 1 Operator’s Manual 2-Cycle Gasoline Trimmer/ Brushcutter TB90BC SAVE THESE INSTRUCTIONS S t a r t i n g For service call 1-800-828-5500 in the United States, or 1-800-668-1238 in Canada to obtain a list of authorized service dealers near you. For more details about your unit, visit our website at www.troybilt.com.
-
Page 2: Rules For Safe Operation
RULES FOR SAFE OPERATION • IMPORTANT SAFETY INSTRUCTIONS • READ ALL INSTRUCTIONS BEFORE OPERATING • Wear heavy long pants, boots, gloves and a long sleeve shirt. Do not wear loose clothing, jewelry, short pants, WARNING: When using the unit, you must follow sandals or go barefoot. - Page 3 RULES FOR SAFE OPERATION • A coasting blade can cause injury while it continues to spin after After Use the engine is stopped or the throttle trigger is released. Maintain • Clean cutting blades with a household cleaner to remove any proper control until the blade has completely stopped rotating.
-
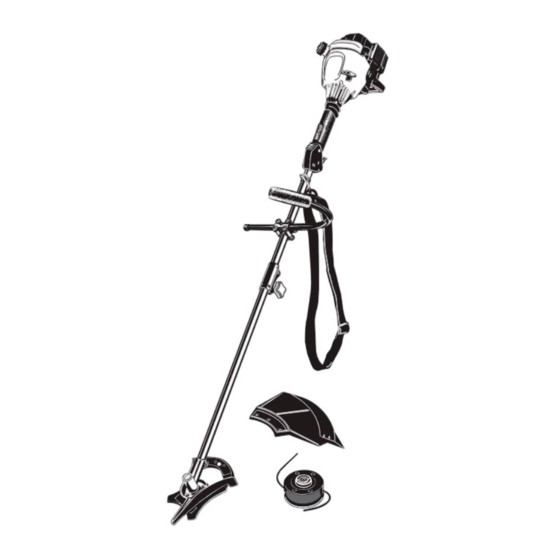
Page 4: Know Your Unit
KNOW YOUR UNIT APPLICATIONS As a trimmer: Fuel Cap • Cutting grass and light weeds Starter Rope Grip • Edging • Decorative trimming around trees, fences, etc. Shaft Grip NOTE: The below illustration may differ slightly from your unit. For example, the picture shows a straight shaft. Your unit may Throttle Lock-Out have a curved shaft. - Page 5 ASSEMBLY INSTRUCTIONS REMOVE AND INSTALL THE CUTTING ATTACHMENT SHIELD Install the cutting attachment shield when using the unit as a grass trimmer WARNING: The cutting attachment shield should WARNING: To avoid serious personal injury, the NOT be installed when operating the unit with a cutting attachment shield MUST be in place at all blade.
- Page 6 ASSEMBLY INSTRUCTIONS Install the Cutting Blade WARNING: To avoid serious personal injury or damage to the unit, do not start or operate this unit WARNING: To avoid serious personal injury, with the locking rod in the locking rod slot. always wear gloves while handling or installing the blade.
- Page 7 ASSEMBLY INSTRUCTIONS OPERATING THE EZ-LINk™ SYSTEM CAUTION: Add-ons are to be used in the The EZ-Link™ system enables the use of these optional Add-Ons: primary hole only. Using the wrong hole could Cultivator ........GC720 lead to personal injury or damage to the unit.
-
Page 8: Oil And Fuel Information
OIL AND FUEL INFORMATION OIL AND FUEL MIXING INSTRUCTIONS Thoroughly mix the proper ratio of 2-cycle engine oil with unleaded gasoline in a separate fuel can. Use a 40:1 fuel/oil Old and/or improperly mixed fuel are the main reasons for the unit ratio. -
Page 9: Starting/Stopping Instructions
STARTING/STOPPING INSTRUCTIONS WARNING: Operate this unit only in a well- ventilated outdoor area. Carbon monoxide exhaust fumes can be lethal Stop/Off (O) in a confined area. Start/On ( I ) WARNING: Avoid accidental starting. Make sure you are in the starting position when pulling the starter rope (Fig. -
Page 10: Operating Instructions
OPERATING INSTRUCTIONS HOLDING THE TRIMMER TIPS FOR BEST TRIMMING RESULTS • For best trimming results, operate unit at full throttle. WARNING: Always wear eye, hearing, foot and • Keep the cutting attachment parallel to the ground. body protection to reduce the risk of injury when operating this unit. - Page 11 OPERATING INSTRUCTIONS Cutting Blade Operating Tips • The cutting blade is designed with a second cutting edge. You can use it by removing the blade, turning it upside down, To establish a rhythmic cutting procedure: and reinstalling it. • Plant feet firmly, comfortably apart. •...
-
Page 12: Maintenance And Repair Instructions
MAINTENANCE AND REPAIR INSTRUCTIONS • MAINTENANCE SCHEDULE • Perform these required maintenance procedures at the NOTE: Maintenance, replacement, or repair of the emission frequency stated in the table. These procedures should also be control devices and system may be performed by any a part of any seasonal tune-up. - Page 13 MAINTENANCE AND REPAIR INSTRUCTIONS NOTE: Always use the correct line length when installing trimming 13. Insert the ends of the line through the eyelets in the outer line on the unit. The line may not release properly if the line spool and place inner reel with spring inside the outer spool is too long.
- Page 14 MAINTENANCE AND REPAIR INSTRUCTIONS Cleaning the Air Filter SPARK ARRESTOR MAINTENANCE Clean and re-oil the air filter every 10 hours of operation. It is an 1. Remove air filter/muffler cover. Refer to Removing the Air important item to maintain. Failure to maintain your air filter Filter/Muffler Cover.
-
Page 15: Replacing The Spark Plug
MAINTENANCE AND REPAIR INSTRUCTIONS CARBURETOR ADJUSTMENT REPLACING THE SPARK PLUG The idle speed of the engine is adjustable through the air Use a Champion RDJ7Y spark plug (or equivalent). The correct filter/muffler cover (Fig. 42). air gap is 0.025 inch (0.635 mm). Remove the plug after every 25 hours of operation and check its condition. -
Page 16: Troubleshooting
TROUBLESHOOTING ENGINE WILL NOT START C A U S E A C T I O N Empty fuel tank Fill fuel tank with properly mixed fuel Primer bulb wasn't pressed enough Press primer bulb fully and slowly 10 times Engine is flooded Place blue choke lever in position 3, squeeze the trigger and pull the starter rope Old or improperly mixed fuel... -
Page 17: Specifications
SPECIFICATIONS ENGINE* Engine Type ................................Air-Cooled, 2-Cycle Stroke ..................................1.25 in. (31.75 mm) Displacement .................................. 1.9 cu in. (31 cc) Clutch Type....................................Centrifugal Idle Speed RPM................................2,600 - 3,600 rpm Operating RPM ..................................6,500+ rpm Ignition Type....................................Electronic Ignition Switch ................................... Rocker Switch Spark Plug Gap ................................ -
Page 18: Parts List
• Repair or replacement of warranted part will be performed at no charge to the owner at an Authorized Troy-Bilt Service Center. For the nearest location please contact Troy-Bilt at: 1-800-828-5500. - Page 19 (1) Any warranted part that is not scheduled for replacement as required maintenance in the written instructions must be warranted for the warranty period defined in subsection (b)(2). If any such part fails during the period of warranty coverage, it must be repaired or replaced by Troy-Bilt. Any such part repaired or replaced under the warranty must be warranted for a time not less than the remaining warranty period.
- Page 20 MANUFACTURER’S LIMITED WARRANTY FOR: The limited warranty set forth below is given by Troy-Bilt LLC No implied warranty, including any implied warranty of (“Troy-Bilt”) with respect with new merchandise purchased and merchantability or fitness for a particular purpose, applies used in the United States, its possessions and territories.
-
Page 21: Table Of Contents
Manuel de L'utilisateur Désherbeuse/débroussailleuse à gaz à 2-temps TB90BC CONSERVEZ CES INSTRUCTIONS Obtenez la liste des concessionnaires agréés appelez le 1-800- S t a r t i n g 828-5500 aux États-Unis ou le 1-800-668-1238 au Canada. Pour de plus amples informations à propos de votre appareil, visitez www.troybilt.com. -
Page 22: Consignes De Sécurité
CONSIGNES DE SÉCURITÉ • IMPORTANTES CONSIGNES DE SÉCURITÉ • LIRE TOUTES LES INSTRUCTIONS AVANT UTILISATION fumées d'échappement peut tuer. Ne faites fonctionner cet appareil qu'à l'extérieur dans un endroit bien aéré. AVERTISSEMENT: Lorsque vous utilisez la • Portez des lunettes de sécurité conformes aux normes ANSI machine, vous devez suivre les consignes de Z87.1 ainsi que des protège-oreilles durant l'utilisation de sécurité. - Page 23 CONSIGNES DE SÉCURITÉ soigneusement qu'il n'y a ni écrous ni boulons desserrés, ni couper, elle donne un coup brusque qui peut pousser aucun dommage avant de continuer. Réparez ou remplacez violemment l'opérateur et l'appareil vers n'importe quelle les pièces affectées au besoin. direction et faire perdre le contrôle de l'appareil.
-
Page 24: Instructions De Montage
• Coupe de mauvaises herbes et broussailles légères de 1,3 cm Déverrouilleur de (1/2") de diamètre maximum manette des gaz D'autres accessoires peuvent être utilisés avec le TB90bc. Voir la liste d'accessoires. Commande Marche/Arrêt Stop Protecteur de lame / Matériel... - Page 25 INSTRUCTIONS DE MONTAGE RETRAIT ET INSTALLATION DU PROTECTEUR Installez le protecteur d'accessoire de coupe lorsque vous D'ACCESSOIRE DE COUPE vous servez de l'appareil comme désherbeuse. Enlevez le protecteur d'accessoire de coupe lorsque vous AVERTISSEMENT : pour éviter des blessures vous servez de l'appareil comme débroussailleuse. graves, le protecteur d'accessoire de coupe DOIT toujours être installé...
- Page 26 INSTRUCTIONS DE MONTAGE 9. Retirez la tige de blocage de sa fente. Installer la lame de coupe AVERTISSEMENT : pour éviter des blessures AVERTISSEMENT : pour éviter des blessures graves, portez toujours des gants lorsque vous graves et ne pas endommager l'appareil, ne le manipulez ou installez la lame.
- Page 27 INSTRUCTIONS DE MONTAGE FONCTIONNEMENT DU EZ-Link MISE EN GARDE : verrouillez le bouton de Le système EZ-Link permet d'utiliser ces accessoires déclenchement dans le trou principal et vissez optionnels : bien le bouton avant de faire marcher l'appareil. Cultivateur ........GC720 Edger .
-
Page 28: Informations Sur L'huile Et Le Carburant
INFORMATIONS SUR L’HUILE ET LE CARBURANT MÉLANGE D'HUILE ET DE CARBURANT Mélangez soigneusement l'huile moteur 2-temps avec de l'essence sans plomb dans un bidon séparé. Utilisez un En général, si l'appareil ne fonctionne pas correctement, c'est rapport 40:1 d'essence/huile. Ne les mélangez pas directement que le carburant est vieux ou mal mélangé. -
Page 29: Instructions De Démarrage Et D'arrêt
INSTRUCTIONS DE MÉMARRAGE ET ARRÊT AVERTISSEMENT : n’utiliser l’outil qu’à l’extérieur, dans un endroit bien aéré. Les émanations d’oxyde de carbone dans un endroit confiné peuvent être mortelles. Stop/Arrêt (O) Démarrage/ Allumage (I) AVERTISSEMENT : évitez tout démarrage accidentel. Tenez-vous en position de démarrage lorsque vous tirez sur la corde de démarrage (Fig. -
Page 30: Mode D'emploi
MODE D’EMPLOI TENUE DE LA DÉSHERBEUSE Chaque fois que vous donnez un coup sur la tête, vous déroulez environ 25,4 mm (1 po) de fil. La lame du protecteur d'accessoire AVERTISSEMENT : portez toujours des de coupe est conçue pour couper le fil à la bonne longueur si protections (yeux, oreilles, pieds et corps) pour vous déroulez trop de fil. - Page 31 MODE D’EMPLOI COUPE DÉCORATIVE AVERTISSEMENT : la lame continue de tourner La coupe décorative consiste à déblayer la végétation autour à vide une fois le moteur éteint et peut vous blesser sérieusement si vous la touchez accidentellement. des arbres, des bornes, des clôtures, etc. Tournez entièrement l'appareil de manière à...
-
Page 32: Entretien Et Réparations
ENTRETIEN ET RÉPARATIONS • PROGRAMME D'ENTRETIEN • REMARQUE: l'entretien, le remplacement ou la réparation des REMARQUE : certaines procédures d'entretien nécessitent des compétences ou des outils particuliers. Si vous n'êtes dispositifs et systèmes antipollution peuvent être effectués par tout atelier, technicien ou pas sûr de pouvoir les entreprendre, emmenez votre appareil dans un atelier, chez un technicien ou un concessionnaire agréé... - Page 33 ENTRETIEN ET RÉPARATIONS REMARQUE : utilisez toujours la bonne longueur de fil lorsque vous posez le fil sur l'appareil. Le fil risque de ne pas se dérouler correctement s'il est trop long. Installation du fil simple Pour l’installation du SplitLine , passez à...
- Page 34 ENTRETIEN ET RÉPARATIONS Réinstallation du filtre à air/couvercle du silencieux Levier 1. Placez le filtre à air/couvercle du silencieux sur l'endos du d'étranglement carburateur et du silencieux. Alignez les trous à vis. bleu 2. Insérez les quatre (4) vis dans les trous du filtre à air/couvercle du silencieux (Fig.
- Page 35 ENTRETIEN ET RÉPARATIONS Nettoyage du filtre à air MISE EN GARDE : évitez de sabler, gratter ou L'état du filtre à air influe directement sur le fonctionnement de nettoyer les électrodes car de la saleté dans le moteur pourrait endommager le cylindre. l'appareil.
- Page 36 DÉPANNAGE LE MOTEUR REFUSE DE DÉMARRER C A U S E S O L U T I O N Réservoir de carburant vide Remplissez-le de carburant bien mélangé. La poire d'amorçage n'a pas été pressée assez fort Utilisez la procédure de démarrage Moteur noyé...
-
Page 37: Caractéristiques
CARACTÉRISTIQUES MOTEUR* Type de moteur ..............................Refroidi par air, 2-temps Course..................................31,75 mm (1,25 po) Cylindrée .................................... 31 cc (1,9 po3) Type d'embrayage..................................Centrifuge Régime ralenti................................2.600 - 3.600 tr/min Régime de fonctionnement (désherbeuse) ........................... 6.500+ tr/min Type d'allumage..................................Électronique Contact d'allumage .............................. - Page 38 • Repair or replacement of warranted part will be performed at no charge to the owner at an Authorized Troy-Bilt Service Center. For the nearest location please contact Troy-Bilt at: 1-800-828-5500.
- Page 39 (1) Any warranted part that is not scheduled for replacement as required maintenance in the written instructions must be warranted for the warranty period defined in subsection (b)(2). If any such part fails during the period of warranty coverage, it must be repaired or replaced by Troy-Bilt. Any such part repaired or replaced under the warranty must be warranted for a time not less than the remaining warranty period.
-
Page 40: Garantie
écrite ci-dessus concernant les pièces qui sont identifiées. Aucune autre garantie ou caution expresse, écrite ou orale, à Troy-Bilt garantit ce produit contre tout vice de matière ou de l’exception de celle mentionnée ci-dessus, accordée par toute façon pendant une période de deux (2) ans à compter de la date personne ou entité, y compris tout distributeur ou détaillant,... - Page 41 Manual del Operador Recortador / Cortamalezas de 2 Ciclos a Gasolina TB90BC CONSERVE ESTAS INSTRUCCIONES Llame 1-800-828-5500 en EE.UU. o al 1-800-668-1238 en Canada para obtener una lista de distribuidores de servicio S t a r t i n g localizados cerca de usted.
-
Page 42: Normas Para Una Operación Segura
NORMAS PARA UNA OPERACIÓN SEGURA • IMPORTANTE INFORMACION DE SEGURIDAD • LEA TODAS LAS INSTRUCCIONES ANTES DE LA OPERACION opere esta unidad. Use siempre una máscara facial o para protegerse contra el polvo si la operación levanta polvo. ADVERTENCIA: Al utilizar la unidad, debe •... - Page 43 NORMAS PARA UNA OPERACIÓN SEGURA en cualquier dirección, y posiblemente perder el control de la la vibración indica que hay problemas. Inspeccione si hay tuercas unidad. El impulso de la cuchilla puede ocurrir si la cuchilla se o pernos flojos o daños antes de continuar. Repare o cambie las tropieza, se traba o se atasca.
-
Page 44: Conozca Su Unidad
• Corte de hierbas y arbustos delgados de hasta 1,3 cm (1/2 Traba del pulgada) de diámetro regulador Puede usar otros accesorios con el TB90bc. Lea la lista de accesorios. Control de encendido y apagado Protección de la cuchilla / Adaptador de apoyo Montaje de la protección... - Page 45 INSTRUCCIONES DE ENSAMBLE REMOCIÓN E INSTALACIÓN DEL PROTECTOR Instale el protector accesorio de corte cuando use la ACCESORIO DE CORTE unidad como recortador de césped. ADVERTENCIA: ADVERTENCIA: El protector accesorio de corte Para evitar graves lesiones NO debe estar instalado cuando use la unidad con personales, el protector accesorio de corte DEBE estar una cuchilla.
- Page 46 INSTRUCCIONES DE ENSAMBLE Instalación de la cuchilla de corte ADVERTENCIA: Para evitar graves lesiones personales o el daño de la unidad, no arranque ni ADVERTENCIA: Para evitar graves lesiones use esta unidad con la varilla de cierre en la ranura personales, use siempre guantes cuando maneje de la varilla de cierre.
- Page 47 INSTRUCCIONES DE ENSAMBLE OPERACION DEL SISTEMA EZ-Link™ Gire la perilla en sentido horario para ajustarla (Fig. 18). El sistema EZ-Link™ le permite el uso de estos accesorios PRECAUCIÓN: Trabe el botón de desconexión optativos. en el orificio primario y ajuste bien la perilla antes Cultivador .
-
Page 48: Información Del Aceite Y Del Combustible
INFORMACION DEL ACEITE Y DEL COMBUSTIBLE INSTRUCCIONES PARA MEZCLAR EL ACEITE Y EL Mezcle bien la proporción correcta de aceite para motor de 2 COMBUSTIBLE ciclos y gasolina sin plomo en una lata de combustible por separado. Use una proporción de 40:1 de combustible y aceite. El combustible viejo o mal mezclado son los motivos principales No los mezcle directamente en el tanque de combustible de la del mal funcionamiento de la unidad. -
Page 49: Instrucciones De Arranque Y Apagado
INSTRUCCIONES DE ARRANQUE Y APAGADO Parado/ ADVERTENCIA: Use esta unidad sólo en un área Apagado (O) exterior bien ventilada. Los gases de escape de monóxido Arranque/ de carbono pueden ser letales en un área cerrada. Encendido (I) ADVERTENCIA: Evite los arranques accidentales. Colóquese en posición de inicio cuando hale de la cuerda de arranque (Fig. -
Page 50: Instrucciones De Operación
INSTRUCCIONES DE OPERACIÓN COMO SOSTENER EL RECORTADOR Cada vez que se golpea la cabeza, se suelta alrededor de 25,4 mm (1 pulgada) de línea de corte. La cuchilla en la protección ADVERTENCIA: Use siempre protección para del accesorio de corte detendrá la línea en la longitud correcta sus ojos, audición, pies y cuerpo para reducir el si se suelta demasiada línea. - Page 51 INSTRUCCIONES DE OPERACIÓN RECORTE DECORATIVO ADVERTENCIA: La cuchilla continúa girando El recorte decorativo se realiza eliminando toda la vegetación de luego de apagar el motor. La cuchilla en alrededor de los árboles, postes, cercos, etc. deslizamiento puede causarle graves cortes si lo toca en forma accidental.
-
Page 52: Instrucciones De Mantenimiento Y Reparación
INSTRUCCIONES DE MANTENIMIENTO Y REPARACIÓN • PROGRAMA DE MANTENIMIENTO • NOTA: El mantenimiento, la sustitución o arreglo de NOTA: Algunos procedimientos de mantenimiento pueden dispositivos para el control de emisiones y sistemas requerir el uso de herramientas o habilidades especiales. pueden ser hechos por cualquier establecimiento de Si no está... - Page 53 INSTRUCCIONES DE MANTENIMIENTO Y REPARACIÓN NOTA: Use siempre la longitud correcta de línea cuando instale la línea de corte en la unidad. La línea puede no soltarse en forma adecuada si es demasiado larga. Instalación de la línea individual Lea la instalación de la línea SplitLine™ en el paso 8 6.
- Page 54 INSTRUCCIONES DE MANTENIMIENTO Y REPARACIÓN Reinstalación de la cubierta del silenciador/ filtro de aire Palanca azul 1. Coloque la cubierta del silenciador / filtro de aire sobre la del obturador parte posterior del carburador y del silenciador. Alinee los orificios de los tornillos. 2.
- Page 55 INSTRUCCIONES DE MANTENIMIENTO Y REPARACIÓN Limpie el filtro de aire PRECAUCIÓN: No limpie con chorro de arena, La condición del filtro de aire es importante para la operación de la ni raspe ni limpie los electrodos. El motor podría unidad. Un filtro de aire sucio limitará el flujo de aire y cambiará la dañarse si penetran pequeñas partículas en el mezcla de combustible y aire en el carburador.
- Page 56 RESOLUCIÓN DE PROBLEMAS EL MOTOR NO ARRANCA C A U S A A C C I Ó N El tanque de combustible está vacío Llene el tanque con combustible bien mezclado La bombilla de cebado no fue oprimida lo suficiente Use el procedimiento de arranque El motor está...
-
Page 57: Especificaciones
ESPECIFICACIONES MOTOR* Tipo de motor ............................... Enfriado por aire, de 2 ciclos Carrera..................................31,75 mm (1,25 pulg.) Desplazamiento ................................31 cm (1,9 pulg Tipo de embrague ..................................Centrífugo R.P.M. de velocidad mínima............................2.600 - 3.600 r.p.m. R.P.M. de operación (Recortador) ............................6.500+ r.p.m. Tipo de encendido ................................... -
Page 58: Garantía
• Para presentar una reclamación, vaya a su Centro de Servicio Troy-Bilt Autorizado más cercano. Los servicios o reparación por motivo de garantía se realizarán en todos los Centros de Servicio Troy-Bilt Autorizados. - Page 59 Los Derechos y Obligaciones de Usted según la Garantía El Consejo de Recursos del Aire (Air Resources Board) de California y Troy-Bilt LLC (Troy-Bilt) tienen el placer de explicar la garantía del sistema de control de emisiones evaporativas en su motor “off-road” pequeño (tipo de equipo) modelo del año 2007 y posterior. En California, los nuevos equipos que usen motores “off-road”...
- Page 60 NOTES...
- Page 61 NOTES...
- Page 62 PARTS LIST REPLACEMENT PARTS - MODEL 2-CYCLE 2-CYCLE GAS TRIMMER/ BRUSHCUTTER Item Part No. Description Item Part No. Description 753-04402 Starter Housing Assembly 753-04511 Air Cleaner Cover Assembly (includes 2 & 38) (includes 24-31, 33 & 38) 791-180350B Air Cleaner Filter 791-181862 Housing Screw 791-180351...
- Page 63 PARTS LIST REPLACEMENT PARTS - MODEL 2-CYCLE 2-CYCLE GAS TRIMMER/ BRUSHCUTTER Item Part No. Description 753-05192 Throttle Housing Assembly (includes 2-5) 753-04991 Throttle Trigger 753-05007 Throttle Trigger Spring 753-05171 Throttle Trigger Lock-Out 791-182405 Switch Assembly 753-05172 Throttle Cable Assembly 791-610327 Harness Clip 753-04236 Upper Drive Shaft Housing Assembly...
- Page 64 Troy-Bilt. Troy-Bilt LLC Troy-Bilt se reserva el derecho a cambiar o mejorar el diseño de cualquier producto Troy-Bilt, sin asumir ninguna obligación para modificar ningún producto fabricado con anterioridad.
Need help?
Do you have a question about the TB90BC and is the answer not in the manual?
Questions and answers