Table of Contents
Advertisement
Advertisement
Table of Contents

Related Manuals for Pioneer F-208


Summary of Contents for Pioneer F-208
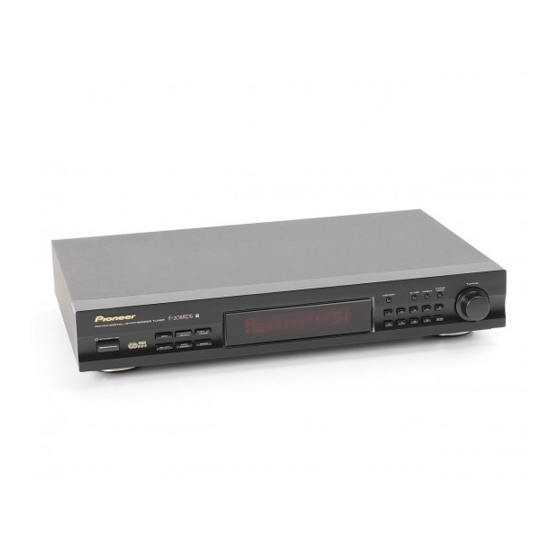
- Page 1 FM/AM DIGITAL-SYNTHESIZER TUNER F-208 Operating Instructions Manual de instruções...
- Page 2 SERVICE PERSONNEL. shock to persons. D3-4-2-1-1_En Thank you for buying this Pioneer product. WARNING: Please read through these operating instructions so you BEFORE PLUGGING IN THE UNIT FOR THE FIRST will know how to operate your unit properly. After you TIME, READ THE FOLLOWING SECTION CAREFULLY.
-
Page 3: Table Of Contents
CONTENTS FEATURES ..........3 PRESETTING STATIONS ..... 12 CHECKING THE ACCESSORIES ... 3 PRESET STATIONS ........ INSTALLATION ........4 PRESET STATION TUNING ....CONNECTIONS ........5 MEMORY SCAN ........ANTENNA CONNECTIONS ...... MANUAL STATION NAME MEMORY ..FRONT PANEL FACILITIES ....7 TROUBLESHOOTING ...... -
Page 4: Installation
A damaged power cord can cause fire or give you an electrical shock. Check the power cord once in a while. When you find it damaged, ask your near- est PIONEER authorized service center or your dealer for a replacement. Maintenance of external surfaces ¶... -
Page 5: Connections
Left channel wires from antenna. White plug CONTROL terminals When using together with a Pioneer component bear- Red plug ing the Î mark, connect the CONTROL IN terminal on the rear panel of the tuner to the CONTROL OUT termi- nal on the component using the supplied control cord. -
Page 6: Antenna Connections
CONNECTIONS Outdoor AM antenna ANTENNA CONNECTIONS If reception is still poor even when a lead antenna has been stretched out indoors, stretch out a vinyl-coated wire and secure it outdoors. Radio reception is not possible unless the antenna is properly connected. Connecting the external AM antenna The strength of broadcast signals varies from one area to Outdoor AM antenna... -
Page 7: Front Panel Facilities
FRONT PANEL FACILITIES 2 3 4 TUNING TUNING MEMORY CLASS DIRECT MODE X¿<?˘ Î F M / A M D I G I T A L - S Y N T H E S I Z E R T U N E R STANDBY/ON MEMORY DISPLAY... -
Page 8: Band Button
FRONT PANEL FACILITIES - RF ATT button ~ BAND button Set this button to on when receiving strong FM signals The button is used to select either FM or AM reception. (nearby stations) to reduce sound distortion (RF ATT indicator lights). ! STATION CALL buttons Normally, this button should be set to off. - Page 9 FRONT PANEL FACILITIES Operating display RF ATT M O N O MEMORY S T E R E O AUTO T U N E D 1 MEMORY indicator 5 MONO indicator Lights when presetting stations. Stays lit while MPX MODE button is set to MONO. 2 AUTO indicator 6 STEREO indicator Lights during auto tuning mode.
-
Page 10: Basic Tuning Operations
BASIC TUNING OPERATIONS The following steps show you how to tune in FM and [Manual tuning mode] AM radio broadcasts using “Auto and Manual Tuning”. If To raise the frequency, turn clockwise; to lower the fre- you already know the exact frequency of the station you quency, turn counterclockwise. -
Page 11: Direct Access Tuning
BASIC TUNING OPERATIONS DIRECT ACCESS TUNING <Example> To receive FM 106.00 MHz. 1 Press the DIRECT button. When you know the frequency of the desired station, 2 Press the frequency can be input directly using the STATION 3 Press 0/10 CALL buttons in the following way. -
Page 12: Presetting Stations
PRESETTING STATIONS NOTES: PRESET STATIONS ¶ You can also store MPX MODE and RF ATT settings in memory. 10 stations can be preset in each of the 3 classes, for a ¶ If a station is memorized with the STATION CALL but- total of 30 station presets. -
Page 13: Preset Station Tuning
PRESETTING STATIONS PRESET STATION TUNING MEMORY SCAN This function receives preset stations within a class (A, B or C) in order. While checking programs received, you can select the desired station. . Select the class number with the CLASS button. 1. -
Page 14: Manual Station Name Memory
PRESETTING STATIONS NOTES: MANUAL STATION NAME MEMORY ¶ If you perform no operations within about 5 seconds after “INPUT” is displayed, the display returns to fre- Using up to 4 characters, you can store a name of your quency indications. ¶... - Page 15 PRESETTING STATIONS When erasing a memorized station name, use the following procedure. 1 Perform the steps 1 to 3 of "Manual Station Name Memory". 2 While "INPUT" is displayed,turn the TUNING knob clock- wise or counterclockwise to display a space. 3 Press the MEMORY button.(One space is input.) 4 Repeat the step 3 three more times to input four space.
-
Page 16: Troubleshooting
Sometimes the trouble may lie in another component. Investigate the other components and electrical appliances being used. If the trouble cannot be rectified even after exercising the checks listed below, ask your nearest PIONEER authorized service center or your dealer to carry out repair work. -
Page 17: Specifications
Specifications and design are subject to possible Signal-to-Noise Ratio .......... 51 dB modifications without notice, due to improvements. Image Response Ratio ........35 dB IF Response Ratio ..........51 dB Antenna ..........Loop Antenna Published by Pioneer Corporation. Copyright © 2004 Pioneer Corporation. All rights reserved. - Page 18 TWO VOLTAGE SERECTORS 110V 120 - 127V 240V 220V 110 - 127V 220 - 240V D3-4-2-1-5_ChH...
- Page 20 ¶ ¶ ¶...
- Page 21 INPUT PHONO TUNER ANTENNA TWO VOLTAGE SERECTORS OUTPUT CONTROL 110V AM LOOP UNBAL ANTENNA 75Ω 120 - 127V 240V 220V 110 - 127V 220 - 240V ¶ ¶ Î Î Î ANTENNA AM LOOP UNBAL 75Ω ANTENNA ¶ CONTROL CONTROL CONTROL CONTROL...
- Page 22 ¶ ¶ ¶...
- Page 23 2 3 4 78 9 TUNING TUNING MEMORY CLASS DIRECT MODE X¿<?˘ Î F M / A M D I G I T A L - S Y N T H E S I Z E R T U N E R STANDBY/ON DISPLAY MEMORY...
- Page 24 ¶ ¶...
- Page 25 RF ATT M O N O MEMORY S T E R E O AUTO T U N E D...
- Page 26 ¶ ¶ ¶ ¶ ¶ ¶ ¶ ¶ ¶...
- Page 27 DIRECT 0/10 0/10 0/10 STEREO TUNED ¶ ¶ →...
- Page 28 ¶ ¶ ¶ MEMORY ¶ CLASS ¶ ¶...
- Page 29 ¶ ¶...
- Page 30 ¶ ¶ ¶ ¶ CLASS CHARACTER 1 1 1 1 1 TUNING MEMORY 2 2 2 2 2...
- Page 31 " & –...
- Page 32 ¶ ¶ ¶ ¶ ¶ ¶ ¶ ¶ ¶ ¶ ¶ ¶ ¶ ¶ ¶ ¶ ¶ ¶ ¶ ¶ ¶ ¶ ¶ ¶ ¶ ¶ ¶ ¶ ¶ ¶ ¶ ¶ ¶ ¶ ¶ ¶ ¶ ¶ ¶ ¶ ¶...
- Page 33 µ µ µ µ 2004...
- Page 34 Published by Pioneer Corporation. Copyright © 2004 Pioneer Corporation. All rights reserved. K002_En <04C00001> Printed in Japan <ARE7342-A>...
Need help?
Do you have a question about the F-208 and is the answer not in the manual?
Questions and answers