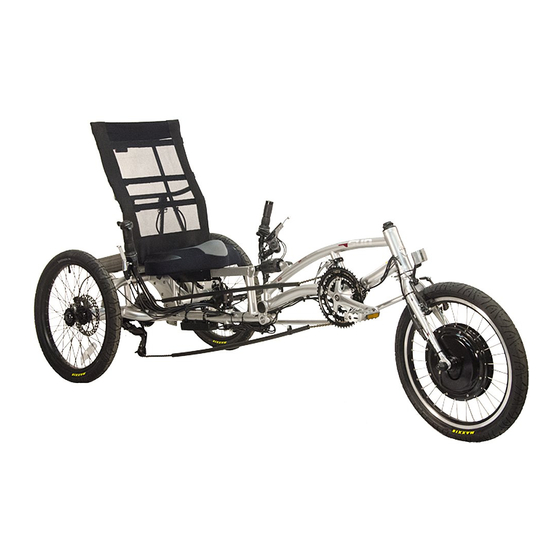
BICYCLES BICYCLES BICYCLES BICYCLES EST. 1971 TABLE OF CONTENTS General Rules....1 Night Riding.....1 Recumbent Riding Tips...2 Fitting Your Recumbent..3 Assembly....4-11 EZ Rider ......12 EZ Speedster ....13 EZ-3 USX.....14 Maintenance.....15-19 Limited Warranty..20-21 Specifications.....22-27 Notice: This bicycle is partially assembled. It is intended to be sold in fully assembled and fully adjusted condition. Final assembly and adjustment are to be performed by your SUN BICYCLE dealer.
Page 1 RECUMBENT SAFETY AND RIDING TIPS General Rules for Safe Recumbent Riding 1. Always wear a CPSC approved helmet and some form of eye protection. 2. Always ride with a rear view mirror attached to your helmet or mounted on the recumbent. 3.
Page 2 Wet Weather Caution When rims and brakes are wet due to muddy, wet or icy road conditions the distance needed to stop safely increases. You must, therefore, anticipate the additional distance needed to stop in such circumstances. Reduce your speed and take corners slowly and carefully. Hard appli- cation of the brakes on wet or icy pavement (or on loose gravel or debris) can cause the wheel(s) to lock up and skid, resulting in possible loss of control.
Page 3 Recumbent Riding Tips (continued) Your body may require some adjustment to the riding position and muscle groups used that the Sun Recumbent promotes. This is natural; adaptation to the new position will vary, depending on individual physiology and exercise regimes. 1.
Flat blade screwdriver condition. Final assembly and adjustment are to be Philips head screwdriver performed by your SUN BICYCLES dealer. . Scissors/Diagonal Cutters Unpack Carefully as Follows: 1. Carefully remove the recumbent by lifting it straight out of the box. Be careful not to scratch the recumbent or yourself on the carton staples.
Page 7
Page 5 Handlebar and Front Wheel Installation (continued) Tighten the nut and close the quick-release lever with firm pressure (see Quick Release Lever Operations on page 16, for full operation instructions). 9. Align the handlebars perpendicular to the front wheel by standing with the front wheel between your legs. Look at the alignment of the handlebars in relation to the front wheel.
Page 8
Page 6 SPECIAL CAUTION: Braking in wet weather conditions: In wet weather conditions, you will need to increase the distance needed to stop safely. Anticipate the extra distance you will need, ride slowly and carefully. Squeeze your brake levers slowly and with gradual pressure to avoid skidding or loss of control.
Page 9
Page 7 TRIKE CAUTIONS: A trikes widest point is behind you, if the front goes by an obstacle there is no guarantee that the rear wheels will also clear. When riding, you must give clearance to the edge of the road or sidewalk. Stay clear of pot- holes and be aware that you can lose control if any wheels should drop into a hole.
Page 10
Rear Disc Brake Set-up and Adjustment (if equipped) Continued Page 8 4. Spin hub in forward rotating direction. Rotor should run freely between brake pads. Some drag is normal prior to first usage. Pads will wear down gradually with normal usage. As this occurs, loosen the cable fixing bolt and retension the cable.
Page 11
Disc Brake User Maintenance Tips Page 9 1. The spring load of the action arm should be fast and smooth. Be sure to inspect brake cable prior to installation for any broken wires. Replace with a high-quality cable if necessary. Make sure cable is lubricated before it is inserted into the housing.
Page 12
Seat Installation, Removal and Adjustment Page 10 Installation 1. Install seat base onto top rail of Sun Recumbent. 2. Install quick release bolts below seat rail. (Fig. 10.1) 5. Install seat back struts onto the rear of the seat back frame (Fig. 10.2) .Install lower strut to eyelets of the rear frame drop outs (Fig.
Page 13
Derailleur Adjustment Page 11 IMPORTANT: It is advised that you have a professional bicycle mechanic adjust the front or rear derailleur. Rear Derailleur Adjustment Adjustment to the rear derailleur can be done while turning the cranks, in a stationary position, while the rear wheel(s) is elevated off the ground.
Page 12 THIS MODEL IS EQUIPPED WITH REAR SUSPENSION Basic assembly and adjustments are similar to other recumbent models (Pages 4 - 11), except as noted below for this model. Fig. 16.1 Front Brake Installation (If Equipped With Disc Brakes) Remove rotor from package, check for warpage by placing on a flat surface and examine.
Page 13 Basic assembly and adjustments are similar to other recumbent models (Pages 4 - 11), except as noted below for this model. Fig. 17.1a Fig. 17.1 Handlebar Installation 1. Install stem in front fork and align to keep the upper handlebar unit aligned with the front wheel.
Page 14 Basic assembly and adjustments are similar to other recumbent models (Pages 4 - 11), except as noted below for this model. Frame Assembly (Fig. 18.1) Remove trike from box. Make sure parts box is complete before starting assembly. Loosen 6mm Allen Bolts.
Page 17
Page 15 CARE AND MAINTENANCE WARNING: Do not ride your Sun Recumbent until both front and rear brakes have been checked and are functioning properly. Keep all nuts, bolts and quick release levers well tightened. Lubricate cables occasionally to prevent binding. Failure to do so may cause a malfunction, resulting in a serious or fatal accident.
Page 18
POSITIONING OF THE QUICK RELEASE LEVER Page 16 For safety, the quick release lever should be along the recumbent frame when in the CLOSE position.(Fig. 13.1) REMOVING THE WHEEL (Fig. 13.1) Move the quick release lever from CLOSE position to the OPEN position. Loosen the adjusting nut, and then remove the wheel.
Page 19
Warning: Removal and installation of the rear wheel may cause misalignment of the rear derailleur. We recommend (Fig. 14.1) your local Sun Bicycles dealer or bicycle mechanic do this procedure. Refer to Derailleur adjustment on page-7. Also check rear brake adjustment refer to Brake Adjustments on page-5.
Page 20
Page 18 Front Wheel Removal 1. Release the front brake cable by holding the front brake shoes against the wheel rim and removing the guide pipe from the holder on the brake arm. (Fig. 15.1) 2. Open the quick-release lever and back the nut off a few turns to clear tabs on the fork. 3.
Page 19 Maintenance Check List In order to keep your Sun Recumbent in top condition you should run a thorough maintenance check frequently. This will ensure a longer component life of your Sun Recumbent. General Recumbent Inspection General inspection should be done before each ride and should include the following: Check for loose nuts and bolts.
OTHER RECUMBENT FRAMES Also subject to the following limitations, terms and conditions, Sun Bicycles warrants to the original owner for the lifetime of the original owner of each new steel framed Sun Bicycles that the recumbent frame when new is free of defective materials and workmanship.
Sun Bicycles recumbent. Any one or a combination of these conditions may result in an unpredictable failure of a Sun Bicycles recumbent that would not be covered by this warranty.
Page 32
sunbicycles. Sun Bicycle Co. Div. of J&B Importers, Inc. 11925 South West 128th. Street Miami, Florida USA 33186, 305-238-1866 BICYCLES BICYCLES BICYCLES BICYCLES EST. 1971...
Need help?
Do you have a question about the EZ-1 and is the answer not in the manual?
Questions and answers