Subscribe to Our Youtube Channel
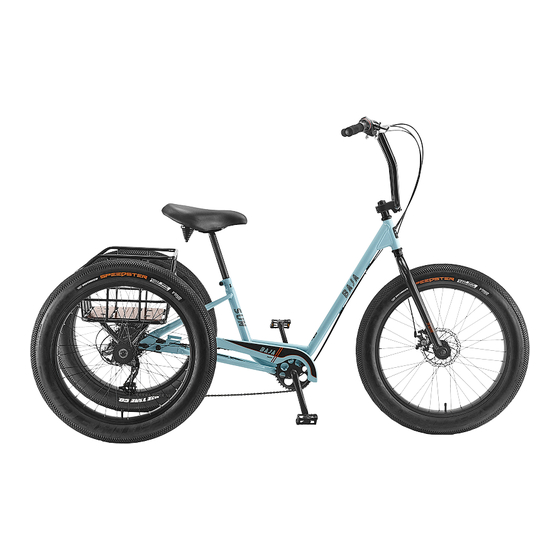
Summary of Contents for Sun Bicycles Baja
- Page 1 Sun Baja Trike Supplemental Owner’s Manual Find us online at Sun.Bike Revised 9-2017...
- Page 2 CONGRATULATIONS! Congratulations and welcome to the Sun Trike family! You have selected one of the best three-wheeled bicycles on the market. Please read this manual before riding your Sun Trike. In this manual you will find that we cover the basics for setting up and understanding your new trike. IMPORTANT: This manual is only a supplement to the main Sun Bicycle/Tricycle Owner’s Manual.
- Page 3 PLEASE READ THIS BEFORE RIDING YOUR SUN TRIKE This manual is intended to be read carefully so that you may enjoy your new three-wheeler and be an informed rider aware of the benefits as well as the warnings and safety issues in riding this trike. A trike is not a bicycle and this manual contains specific information and warnings that will let you enjoy your Sun Trike in comfort and safety.
-
Page 4: Pre-Ride Checklist
PRE-RIDE CHECKLIST 1. Check your tires for proper air pressure. Keep tire pressure between the minimum and maximum air pressure rating printed on the tire sidewall. Do not inflate over the maximum air pressure rating on the tire sidewall. 2. Test your front brake and make sure it stops the trike. If you have any doubts do not ride and see your dealer. - Page 5 Sun Trike Reference Views Side View 3/4 View...
- Page 6 Sun Trike Assembly Reference Sun Trike PARTS LIST ITEM DESCRIPTION Main Frame Assembly Rear Unit Assembly Rear Unit Hardware Set (2x long carriage bolts, 2x short carriage bolts, nuts & washers) 1 set Rear Unit Axle Assembly (17mm OD with 4mm keyway) Rear Unit Bearings (35mm OD x 17mm ID for 17mm axle) Freewheel (7S 13-34T) Drive Chain (1/2”...
-
Page 7: Assembly Guide
Assembly Guide Rear Derailleur Installation Install #26 Rear derailleur onto #2 Rear unit. See Figure A Fig A Rear Unit Installation Install #2 Rear unit of dropout insert #1 Frame of dropout and Screws up with #3 Carriage bolts. See Figure B Chain Installation Install #7 Chain through #6 Freewheel and #26 Rear derailleur. -
Page 8: Rear Wheel Installation
Final Tightening of Rear Unit Tighten #2 Rear Unit Hardware to 18-20 Nm (160-175 in. lbs.) Rear Wheel Installation Assemble #12 Rear Wheel Assembly, # 10 Rear Wheel Washer and #9 Rear Wheel Nylock Retaining Nut onto right side (drive side) rear axle. See Figure C Assemble #11 Rear Wheel Spacer, #12 Rear Wheel Assembly, #10 Rear Wheel Washer and #9 Rear Wheel Nylock Retaining Nut onto left side (non-drive side) rear axle. -
Page 9: Handlebar Installation
Handlebar Installation Take out Stem of four bolts, Put in Handlebar and adjust to appropriate angle and Screws up with the 4 bolts. See figure G. Fig G Handlebar Adjustment #16 Brake Lever through #15 Handlebar, Right side install #23 Shift Lever then #22 Grip, Pipe plug and adjust to appropriate angle.See figure H. Fig H... - Page 10 Saddle Installation Lubricate seat tube with heavy grease, place #18 Seat Post into seat tube of trike and tighten. Place #17 Saddle, in a level position, onto seat post and tighten seat post clamp. Adjust saddle height, tighten seat post, saddle clamp and seat brace hardware securely. See Figure I WARNING! THE SEAT POST MINIMUM INSERT MARK MUST BE BELOW THE SEAT TUBE.
-
Page 11: Variable Speed Adjustment
Pedal Installation Apply grease to the threads of the #20 Pedals. This will protect both the threads of the pedal and the crank arm over time. Use pedal washers where required. Using your hands, thread the #20 Pedals (marked for L or R) into the respective left or right crank arms by turning them toward the front of the bike. Once the threads catch, use your pedal wrench to finish tightening down the pedals.


Need help?
Do you have a question about the Baja and is the answer not in the manual?
Questions and answers
what is the recomended tire pressure for the tire on a sun baja fat tire trike ?