Table of Contents
Advertisement
INSTALLATION
& OPERATION
MANUAL
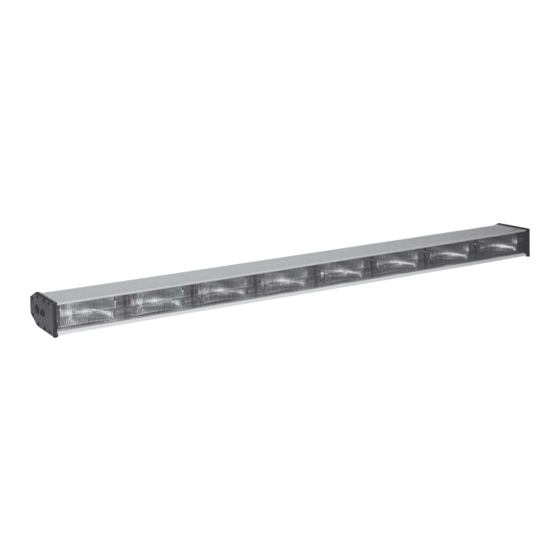
AS-10/AS-847/AS-839
ARROWSTIK
MODELS AS-10,
AS-847, AS-839, AS6FL
AND SPLIT ARROWSTIK
IMPORTANT:
®
Contents:
Introduction (with warnings) .................................................... 2
Unpacking & Pre-installation .................................................... 2
Installation & Mounting ............................................................. 2
Permanent Mounting ............................................................... 2
On Code 3
On Code 3
Wiring Instructions .................................................................... 6
Operations ................................................................................ 6
Options & Specifications ........................................................... 7
Maintenance ............................................................................. 7
Changing the Lamps & Optic Filters ......................................... 8
Trouble Shooting Guide ............................................................ 8
Parts List (Replacement parts / Exploded View) ................. 9-10
Notes....................................................................................... 11
Warranty ................................................................................. 12
Read all instructions and warnings before installing and using.
INSTALLER:
This manual must be delivered to the end user of this equipment.
®
®
XL 5000
TM
Series Frame .................................... 3
® ® ® ® ®
SYSTEMS
Advertisement
Table of Contents

Related Manuals for Code 3 ARROWSTIK AS-10

Summary of Contents for Code 3 ARROWSTIK AS-10
-
Page 1: Table Of Contents
INSTALLATION & OPERATION MANUAL AS-10/AS-847/AS-839 ® ARROWSTIK MODELS AS-10, AS-847, AS-839, AS6FL ® ® ® ® ® AND SPLIT ARROWSTIK SYSTEMS Contents: Introduction (with warnings) ............ 2 Unpacking & Pre-installation ............ 2 Installation & Mounting ............. 2 Permanent Mounting ............... 2 ®... -
Page 2: Introduction (With Warnings)
The ArrowStik was designed with a flexible mounting system to allow its use with as many lightbars as possible. ® The following installation instructions provide direction for mounting the ArrowStik to the Code 3 XL 5000 Series and LP 6000 Series Lightbar frames. -
Page 3: On Code 3 ® Lp 6000 Tm Series Frame
LP 6000 Series Frame: 1) If an LP lightbar is currently mounted on the vehicle, remove the lightbar from the vehicle roof and turn it upside down. Rest it on cloth or some other soft surface. It is not necessary to disconnect the wiring. ™... -
Page 4: Wiring Instructions
7) Loosely mount the ArrowStik ® bracket to the lightbar as shown in Figure 6. 8) Loosely mount the ArrowStik to the bracket as shown in Figure 4. 9) Put the lightbar on the vehicle roof making sure not to scratch the vehicle. Check for clearance below the lightbar as you proceed. - Page 5 ® 5. Route a 20 gauge wire from the first position of the ArrowStik control head plug to the +12Vdc (positive) of the battery. Use a 5 amp fuse or breaker to protect the control head from over current conditions. 6.
-
Page 6: Operations
Wiring directions for AS6FL (9 wire cable) The AS6FL 9 wire cable has different wire colors than the standard Arrowstik. The six center lamps are used as an ArrowStik ® while the two outboard lamps are connected to a 700 alternating flasher. The red wire goes to the passenger side outboard lamp and the red/black wire goes to the driver side outboard lamp. -
Page 7: Options & Specifications
Options & Specification AS-839 / AS-847 / AS-10 AS-10/ AS-847 Size: 47¼" L, 4¼" W, 2¾" H AS-839 Size: 39 1/4"L, 3 1/4" W, 2 3/4" H Weight: 10 lb The following are optional features that may or may not be included in your control head depending upon which model you've purchased. -
Page 8: Changing The Lamps & Optic Filters
Bad wiring connection. Verify connections. correctly. One or more lamps do not light and Control box is damaged. Return control head to Code 3 ® LED's on control head do not call Technical Hotline. function. LED's on control box burn Control box is damaged. -
Page 9: Parts List (Replacement Parts / Exploded View)
Parts List & Exploded View AS-10 AS-847 AS-839 Ref No. Description Part No. Qty. Part No. Qty. Part No. Qty. #6 x ½" SMS, pan head T02797 8 T02797 8 T02797 8 Hole plug T05431 1 T05431 1 T05431 1... - Page 10 FIGURE 10...
-
Page 11: Notes
Notes:... -
Page 12: Warranty
*Code 3, Inc. reserves the right to repair or replace product at its discretion and assumes no responsibility or liability for expenses incurred for the removal and/or reinstallation of products requiring service and/or repair.
Need help?
Do you have a question about the ARROWSTIK AS-10 and is the answer not in the manual?
Questions and answers