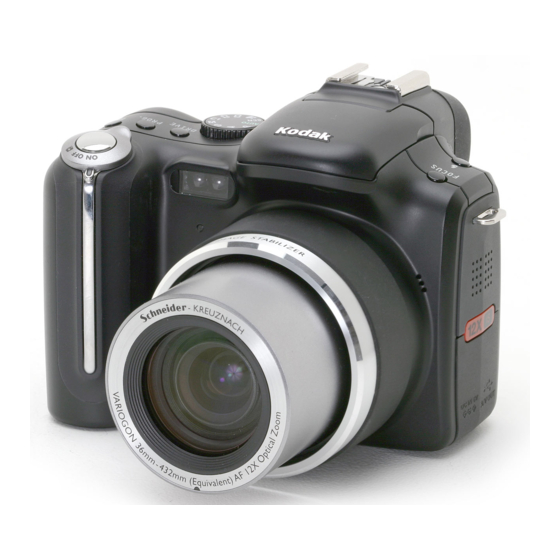
Kodak EasyShare P850 User Manual
Zoom digital camera
Hide thumbs
Also See for EasyShare P850:
- User manual (106 pages) ,
- Service manual (106 pages) ,
- Extended user manual (49 pages)

Subscribe to Our Youtube Channel
Related Manuals for Kodak EasyShare P850


Summary of Contents for Kodak EasyShare P850
-
Page 1: Zoom Digital Camera
Kodak EasyShare P850 zoom digital camera User’s guide www.kodak.com For interactive tutorials, www.kodak.com/go/howto For help with your camera, www.kodak.com/go/p850support... - Page 2 Eastman Kodak Company Rochester, New York 14650 © Eastman Kodak Company, 2005 All screen images are simulated. Kodak and EasyShare are trademarks of Eastman Kodak Company. P/N 4J3576_en...
-
Page 3: Front View
Product features Front View Lens Hot shoe Grip Flash Self-timer/Video light Flash button LED indicator Focus button Shutter button Strap post Mode /Power switch Speaker Exposure metering button Microphone Program button USB, A/V Out Drive button DC-In (5V) Mode dial www.kodak.com/go/support... -
Page 4: Product Features
Status button LCD screen Review button EVF/LCD toggle button Joystick ( ); OK button (press in) Diopter dial Slot for optional SD or MMC card EVF (Electronic Viewfinder) 16 Share button Zoom lever Menu button Command dial Battery compartment www.kodak.com/go/support... -
Page 5: Table Of Contents
Using an external flash unit................. 10 Reviewing pictures and videos..............11 Multi-selection of pictures during review..........12 Magnifying a picture during review............13 Identifying the review icons ..............14 Protecting pictures and videos from deletion..........16 Deleting pictures and videos..............17 www.kodak.com/go/support... - Page 6 Transferring pictures with a USB cable, model U-8 ........19 Transferring pictures with an EasyShare dock.......... 19 Printing from a Kodak EasyShare printer dock or your computer ....20 Printing from an optional SD or MMC card ..........20 Ordering prints online ................. 21 Direct printing with a PictBridge enabled printer ..........
- Page 7 Tagging pictures and videos for emailing ..........62 Tagging pictures as favorites ..............63 5 Troubleshooting ..................67 Camera problems..................67 Computer/connectivity problems..............69 Picture quality problems ................70 Direct printing (PictBridge) problems............72 6 Getting help ..................73 Helpful links....................73 Telephone customer support ............... 74 www.kodak.com/go/support...
- Page 8 Important safety instructions ............... 83 Using this product .................. 83 Battery safety and handling ..............84 Battery information ..................85 Kodak battery replacement types/battery life........... 85 Extending battery life ................85 Upgrading your software and firmware............86 Additional care and maintenance ..............86 Warranty.....................
-
Page 9: Setting Up Your Camera
Setting up your camera Attaching the lens cap and strap www.kodak.com/go/support... -
Page 10: Charging The Battery
Red—charging Green—complete Approximately 3 hours for full charge You can also charge the battery using a Kodak EasyShare printer dock or camera dock. Purchase these and other accessories at a dealer of Kodak products or visit www.kodak.com/go/p850accessories. Loading the battery... -
Page 11: Turning On The Camera
64 Setting the language and date/time, first time Language: Move Joystick to highlight Language. Press OK to accept. Date & Time: to change. Press OK; for previous/next field. Follow the prompts for the next setting. Press OK to accept. www.kodak.com/go/support... -
Page 12: Setting The Language And Date/Time, Other Times
OK to accept. Storing pictures on an SD or MMC card Your camera has 32 MB of internal memory. You can purchase a Kodak SD or MMC card to conveniently store more pictures and videos. For best results, purchase a Kodak card. -
Page 13: Taking Pictures And Videos
AF/AE indicator: green—successful red—failed Use the Diopter to failed focus adjust the sharpness failed exposure of the Viewfinder. Taking a video Press the Shutter button completely down and release. To stop recording, press and release the Shutter button again. www.kodak.com/go/support... -
Page 14: Reviewing A Quickview Of The Picture Or Video Just Taken
Delete To view pictures and videos anytime, see page Checking camera and picture status Press to toggle through the Quickview options. (Press OK to exit.) To view picture/video information in Review mode, see page www.kodak.com/go/support... -
Page 15: Using The Auto-Focus Framing Marks (Pictures)
3 Press the Shutter button completely down to take the picture. NOTE: Framing marks do not appear in Landscape, Night Landscape, Fireworks, or Video mode. When you use AF Zone (page 51) and set Center Zone, the framing marks are fixed at Center Wide. www.kodak.com/go/support... -
Page 16: Capture Modes In Liveview
Framing marks Exposure metering Exposure bracketing interval Aperture Flash compensation Shutter speed Exposure compensation Capture modes—shutter pressed halfway Framing marks Battery indicator Auto Focus/ Auto Exposure (AF/AE indicator) Slow shutter speed warning Aperture Flash compensation Exposure compensation Shutter speed www.kodak.com/go/support... -
Page 17: Using Optical Zoom
NOTE: You cannot use digital zoom for video recording. You may notice decreased image quality when using digital zoom. The blue slider on the zoom indicator pauses and turns red when the picture quality reaches the limit for an acceptable 4 x 6 in. (10 x 15 cm) print. www.kodak.com/go/support... -
Page 18: Using The Flip-Up Flash
Using an external flash unit Use an external flash unit when you want additional or specialized lighting (we recommend a Kodak external flash unit for fully automatic extended flash capabilities). You can use the camera’s built-in flash, as well, to provide extra fill flash. -
Page 19: Reviewing Pictures And Videos
End video play. 1 second to set the rate of rewind/fast forward. Press again to increase/ decrease the rate. To save battery power, use the optional Kodak EasyShare camera or printer dock, or Kodak 5-volt AC adapter. (See www.kodak.com/go/p850accessories.) www.kodak.com/go/support... -
Page 20: Multi-Selection Of Pictures During Review
Press Set to select a picture. A blue box appears around your picture. Scroll to the next picture with a yellow box. To deselect, press Set again (blue box disappears). NOTE: Each time you press Set to select a picture, a blue box appears. www.kodak.com/go/support... -
Page 21: Magnifying A Picture During Review
Taking pictures and videos Magnifying a picture during review Use this feature to determine the sharpness and detail of the composition. View other parts of the picture. Return to 1X. Magnify 1X–10X. www.kodak.com/go/support... -
Page 22: Identifying The Review Icons
Image storage location Review mode Battery indicator Album name Date stamp Scroll arrows Video Video length Favorite tag Protect Email tag Video number Selected/ Image storage Total number location Review mode Battery indicator Album name Play/Pause Video date display www.kodak.com/go/support... - Page 23 Taking pictures and videos Highlight/shadow clipping = Highlight clipping Yellow Blue = Shadow clipping Shadow clipping Highlight clipping See Using highlight/shadow clipping on page Histogram Histogram Scroll arrows See Using the histogram on page www.kodak.com/go/support...
-
Page 24: Protecting Pictures And Videos From Deletion
CAUTION: Formatting internal memory or an SD or MMC card deletes all (including protected) pictures, videos. (Formatting internal memory also deletes email addresses, album names, and favorites. To restore them, see EasyShare software Help.) www.kodak.com/go/support... -
Page 25: Deleting Pictures And Videos
EXIT—exits the Delete screen. SELECTED—deletes selected pictures and videos from your current storage location. You can scroll to verify selected pictures. ALL—deletes all pictures and videos from your current storage location. NOTE: To delete protected pictures and videos, remove protection before deleting. www.kodak.com/go/support... -
Page 26: Transferring And Printing Pictures
1 Close all software applications that are open on your computer. 2 Place the Kodak EasyShare software CD into the CD-ROM drive. 3 Load the software: if the install window does not appear, choose Run from the Start Windows OS—... -
Page 27: Transferring Pictures
You can transfer pictures to your computer using an USB cable (U-8), EasyShare dock, or Kodak multi-card reader/Kodak SD multimedia card reader-writer. Purchase these and other accessories at a dealer of Kodak products or www.kodak.com/go/p850accessories. Transferring pictures with a USB cable, model U-8 If your package does not include an EasyShare dock, use the USB cable (model U-8) that came with your camera. -
Page 28: Printing From A Kodak Easyshare Printer Dock Or Your Computer
Printer dock—Dock your camera to the Kodak EasyShare printer dock and print directly with or without a computer. For dock compatibility for your camera, see page 23. Purchase this and other accessories at a dealer of Kodak products or www.kodak.com/go/p850accessories. Computer—Click the Help button in the Kodak EasyShare software. -
Page 29: Ordering Prints Online
Connecting the camera to the printer 1 Turn off the camera and printer. 2 Optional: If you have a Kodak 5-volt AC adapter (optional accessory), plug it into the camera and into an electrical outlet. 3 Using a USB cable for your camera, connect the camera to the printer. (See your printer user’s guide for details.) -
Page 30: Printing Pictures
Image Storage Access internal memory, a memory card, or Favorites. NOTE: If you turned the Mode dial to Favorites, the current favorite picture is displayed. Disconnecting the camera from the printer 1 Turn off the camera and printer. 2 Disconnect the USB cable from the camera and printer. www.kodak.com/go/support... -
Page 31: Dock Compatibility For Your Camera
6000 Kodak dock adapter kit D-22 Dock ■ others, including series 3 printer docks and camera docks Custom camera insert Dock Purchase camera docks, printer docks, and other accessories at a dealer of Kodak products or www.kodak.com/go/p850accessories. www.kodak.com/go/support... -
Page 32: Doing More With Your Camera
Choose the mode that best suits your subjects and surroundings. Use Auto mode for general picture-taking. NOTE: For rapid setting changes, see page Use this mode Mode Switch—Capture and Favorites. Capture Taking pictures and videos. Favorites Viewing your favorites (see page 63). www.kodak.com/go/support... - Page 33 To prevent camera shake, use a tripod for slow shutter speeds. Use the Command dial and Set button to select and adjust settings (see page 38). Press the Menu button to change other settings www.kodak.com/go/support...
- Page 34 Custom If you created settings in another mode, you can transfer them to any of the C modes using Copy to Custom (see page 52). Custom Scene Point-and-shoot simplicity when taking pictures under 16 special conditions (see page 27). Video Capturing video with sound (see page www.kodak.com/go/support...
-
Page 35: Scene Modes
Distant scenery at night. Flash does not fire. Place the camera on a flat, Landscape steady surface or use a tripod. Snow Bright snow scenes. Beach Bright beach scenes. Text Documents. Flower Close-ups of flowers or other small subjects in bright light. www.kodak.com/go/support... - Page 36 Subjects that are in shadow or “backlit” (when light is behind the subject). Manner/ Quiet occasions, like a wedding or lecture. Flash and sound are Museum disabled. Fireworks Flash does not fire. Place the camera on a flat, steady surface or use a tripod. Party People indoors. Minimizes red eye. www.kodak.com/go/support...
-
Page 37: Using The Focus Button
Landscape Distant subjects. Auto-focus framing marks are unavailable. Flash is forced off. Manual Focus is at center position. A magnified image appears in the center of the screen when using the Joystick to set the focus adjustment. A graphic shows the approximate degree of focus. www.kodak.com/go/support... -
Page 38: Using The Drive Mode For Self-Timer, Burst, Exposure Bracketing
Camera takes a series of pictures at 2.3 fps (see page while the Shutter button is pressed. For determining the Flash forced off. quantity saved, see page 32. (Capture an event when the (Unavailable in Tiff.) precise timing is uncertain e.g., a child blowing out birthday candles.) www.kodak.com/go/support... - Page 39 NOTE: To cancel self-timer and shutter delay during countdown, press the Shutter button again. NOTE: During Quickview, you can delete all pictures in the burst series. To delete selectively, do so in Review (see page 17). www.kodak.com/go/support...
-
Page 40: Determining The Burst Capacity
Standard Basic 4.5 MP (3:2) 2592 x 1728 TIFF Fine Standard Basic 3.1 MP 2048 x 1536 TIFF Fine Standard Basic 2.1 MP 1664 x 1248 TIFF Fine Standard Basic 1.2 MP 1280 x 960 TIFF Fine Standard Basic www.kodak.com/go/support... -
Page 41: Using The Ae/Af Button
Extreme differences in brightness within the framing marks: light is in the background and main subject is in shadow. Use when you want to control both exposure and focus independent of pressing the Shutter button. www.kodak.com/go/support... -
Page 42: Taking Pictures Using The Af Lock
Press the Program button 3 seconds NOTE: The Program button to access your favorite shortcut assignment is kept until you setting. change it in Setup menu or reprogram it by holding the Program button. NOTE: For rapid setting changes, see page www.kodak.com/go/support... -
Page 43: Program Review Settings
Pressing the Program button in Review, after program setup, allows for direct access to these review functions without navigating the menu. Shortcut menu selections Shortcut menu selections View Copy Album Raw file develop Protect Video date display Edit Multi up (can also be set at main menu) Red-eye reduction www.kodak.com/go/support... -
Page 44: Changing The Flash Settings
In low light, hold the camera steady or use a tripod. Slow Regardless of the shutter speed and right after the shutter fully opens. Only useful when slower shutter speeds are used. For other slow-flash settings, see page Never. www.kodak.com/go/support... -
Page 45: Pasm And C1, C2, C3 Modes
ISO—controls sensitivity of the camera sensor. Higher settings are more sensitive to light, but may produce unwanted “noise” in a picture. You can only use ISO 800 if you are in the 1.2 MP Picture Size setting (see page 43). www.kodak.com/go/support... -
Page 46: Changing Pasm Or C1, C2, C3 Mode Settings
In PAS modes, you can use exposure compensation in conjunction with exposure bracketing. If exposure And if the exposure Then the exposures taken compensation is bracketing interval is set to set to 3 steps –0.3, 0.0, +0.3 Interval is set to 0.3 +1.0 +0.7, +1.0, +1.3 –1.0 –1.3, –1.0, –0.7 www.kodak.com/go/support... -
Page 47: Using Exposure Metering
Ideal when you need an exact exposure of a specific area in the picture. Selectable Zone—creates an exposure-metering setting from 1 of 25 selected screen locations. If used with Selectable Focus Zone (see page they track together. www.kodak.com/go/support... -
Page 48: Using The Command Dial For Rapid Setting Changes
You can also use the Command dial to adjust manual settings in PASM modes, see page Function buttons that provide rapid setting changes: • Flash button (page • Exposure metering button (page • Focus button (page • Program button (page • Drive button (page www.kodak.com/go/support... -
Page 49: Using The Histogram
In Quickview or Review, you can view the clipped area of the picture. It’s normal to have some highlight and shadow clippings because of the wide range of reflectance within a scene. Press the Status button to turn the Highlight/ Shadow clipping on/off. Shadows appear in blue Highlights appear in yellow www.kodak.com/go/support... -
Page 50: Changing Picture-Taking Settings
Capture + for advanced picture-taking settings. ■ (Only available in PASM and C settings.) 3 Move the Joystick to highlight the setting you wish to change, then press the OK button. 4 Choose an option, then press the OK button. www.kodak.com/go/support... -
Page 51: Still Menu Options
Ideal for software programs for This setting remains until you scanners and graphics applications. change it. RAW—Unprocessed image data in its original state to which white balance, sharpness, contrast, etc., have not been applied. To create a printable file for printing, see page www.kodak.com/go/support... - Page 52 & white or sepia. But you cannot restore a black & white or sepia picture to color, except with a RAW file. Unavailable in Video mode. Date Stamp Choose a date option, or turn off the feature. (Default is off.) Imprint the date on pictures. www.kodak.com/go/support...
-
Page 53: Video Menu Options
This setting is kept across PASM the Shutter button halfway down to focus. and C until you change it. Single AF —uses external AF sensor and TTL-AF when the Shutter button is pressed halfway down. www.kodak.com/go/support... -
Page 54: Setup Menu Options
Automatically corrects red eyes in pictures. Preflash & Auto fix The red-eye reduction is also available in the Auto fix only flash mode settings (see page 36). Set AE/AF Lock Button AE lock (default) Choose how the button works. AF lock AE/AF lock page www.kodak.com/go/support... - Page 55 None (default)—digital zoom is disabled. Sound Themes Theme (default)—overall. Shutter Choose an overall theme or individual sounds. Self-timer Error Sound Volume Turn off all sounds, or choose a volume level. Medium (default) High www.kodak.com/go/support...
- Page 56 5, 10, 15, or 30 minutes to turn off. Language page Choose a language. Auto, SCN, and PASM mode Reset Camera Reset to its default setting. Settings for C Reset all picture-taking settings to the modes are retained. camera defaults. www.kodak.com/go/support...
- Page 57 Internal Memory—deletes are protected. Removing a card everything in internal memory including email addresses, album during formatting may damage names, and favorites; formats the the card. internal memory. About Camera name and firmware version. View camera information. www.kodak.com/go/support...
-
Page 58: Pasm And C1, C2, C3 Menu Options
Custom —saves a white balance setting after registration function in the Custom White Balance setting (see page 50). Unavailable in Video mode. Custom White Balance Compensation—provides for custom color adjustment. Registration—saves white balance settings. www.kodak.com/go/support... - Page 59 High This setting is kept across PASM Normal and independently in C1, C2, and C3 until you change it. Contrast High This setting is kept across PASM Normal and independently in C1, C2, and C3 until you change it. www.kodak.com/go/support...
- Page 60 Custom mode. Custom Exposure Mode Program (default) Choose a preferred capture Aperture Priority mode. (See Custom modes, Shutter Priority page 26.) Manual This setting remains until you Available only in Custom (C) mode. change it. www.kodak.com/go/support...
-
Page 61: Editing Functions For Still And Video
Press Review. (Press again to exit.) to highlight Edit. to locate a picture or video. Press OK. Choose from the following options. Video Still • Make Picture • Crop • Trim • Resize • Cut • Split • Merge www.kodak.com/go/support... -
Page 62: Creating A Printable Raw File Copy
White Balance Color Mode White Balance Compensation Sharpness NOTE: Pictures taken at the 4.5 MP (3:2) quality setting are displayed at a 3:2 aspect ratio with a black bar at the top of the screen. (See Picture Size, page 43.) www.kodak.com/go/support... -
Page 63: Viewing Picture/Video Information
Using optional review menu In Review, press the Menu button to access review functions. • View • Slide Show • Album • Copy • Protect • Raw File Develop • Edit • Video Date Display • Redeye Reduction Program • Multi-Up www.kodak.com/go/support... -
Page 64: Copying Pictures And Videos
NOTE: Pictures and videos are copied, not moved. To remove pictures and videos from the original location after copying, delete them (see page 16). Tags that you applied for print, email, and favorites are not copied. Protection settings are not copied. To apply protection to a picture or video, see page www.kodak.com/go/support... -
Page 65: Running A Slide Show
Use the Slide Show to display your pictures and videos on the LCD screen. To run a slide show on a television or on any external device, see page To save battery power, use an optional Kodak 5-volt AC adapter. (Visit www.kodak.com/go/p850accessories.) Starting the slide show 1 Press the Review button, then press the Menu button. -
Page 66: Running A Continuous Slide Show Loop
Then, all the pictures or videos you take are tagged with those album names. First—on your computer Use Kodak EasyShare software that came with your camera to create album names on your computer. Then copy up to 32 album names to the album name list the next time you connect the camera to the computer. -
Page 67: Second-On Your Camera
First—on your computer Use Kodak EasyShare software that came with your camera to create album names on your computer, then copy up to 32 album names to the camera’s internal memory. See Kodak EasyShare software Help for details. - Page 68 Clear All, Exit, and OK. Third—transfer to your computer When you transfer the tagged pictures and videos to your computer, the Kodak EasyShare software opens and categorizes your pictures and videos in the appropriate album folder. See Kodak EasyShare software Help for details.
-
Page 69: Sharing Your Pictures
Repeat this step until the desired print quantity is applied to the pictures. 6 Press the OK button. Then press the Share button to exit the menu. * To remove print tagging for all pictures in the storage location, highlight Cancel www.kodak.com/go/support... -
Page 70: Tagging Pictures And Videos For Emailing
Printing tagged pictures When you transfer the tagged pictures to your computer, the Kodak EasyShare software print screen opens. For details on printing, click the Help button in the Kodak EasyShare software. For more information on printing from your computer, printer dock, PictBridge-... -
Page 71: Tagging Pictures As Favorites
When you transfer the tagged pictures/videos to your computer, the Email screen opens and lets you send them to the addresses you specified. For details, click the Help button in the Kodak EasyShare software. Tagging pictures as favorites You can preserve your favorite pictures in the Favorites section of your camera’s... - Page 72 NOTE: The camera holds a limited number of favorites. Use Camera Favorites in the EasyShare software to customize the size of your camera Favorites section. Videos tagged as favorites remain in the Favorites folder in the EasyShare software. For more information, click the Help button in the Kodak EasyShare software.
-
Page 73: Optional Settings
4 Press the Menu button to exit the menu. Preventing favorites from transferring to the camera 1 Open the Kodak EasyShare software. Click the My Collection tab. 2 Go to the Albums view. 3 Click the Camera Favorites Album for your camera. - Page 74 5 Move to highlight an album folder, then press the OK button. NOTE: Favorites that were taken on this camera (not imported from another source) are good for prints up to 4 x 6 in. (10 x 15 cm). www.kodak.com/go/support...
-
Page 75: Troubleshooting
■ Insert a charged battery. Camera does not turn off ■ Place the camera on a Kodak EasyShare camera dock (sold and the lens does not separately), then try again. retract ■ Connect the camera to a Kodak 5-volt AC adapter (sold Camera buttons and separately), then try again. - Page 76 If all else fails, get customer support help (see page 73). ■ Memory card not Card may be corrupted. Format card in camera (see page Data will be erased if formatted. recognized or camera freezes with card. ■ Use another memory card. www.kodak.com/go/support...
-
Page 77: Computer/Connectivity Problems
■ Slide Show does not Adjust the camera Video Out setting (NTSC or PAL, page 48). run on an external ■ Make sure the external device settings are correct (see the device’s video device user’s guide). www.kodak.com/go/support... -
Page 78: Picture Quality Problems
To automatically set exposure and focus, press the Shutter button halfway and hold. When the AF/AE indicator turns green, press the Shutter button completely down to take the picture. ■ Use P mode to adjust the Exposure and Flash Compensations (page 22). www.kodak.com/go/support... - Page 79 ■ Make sure camera is not in Telephoto mode if you are closer than the telephoto focus specification. ■ Place the camera on a flat, steady surface or use a tripod, especially in high-zoom settings or in low light. www.kodak.com/go/support...
-
Page 80: Direct Printing (Pictbridge) Problems
Ensure the printer and camera have power (page 21). ■ Camera or printer display an Follow the prompts to resolve the issue. error message. Still having problems? Visit www.kodak.com/go/p850support, or see Helpful links, page For Direct printing issues, contact the printer manufacturer. www.kodak.com/go/support... -
Page 81: Getting Help
Get help with the Windows operating www.kodak.com/go/pcbasics system and working with digital pictures Other Get support for other cameras, software, www.kodak.com/go/support accessories, more Get information on Kodak EasyShare www.kodak.com/go/printerdocks printer docks Get information on Kodak inkjet www.kodak.com/go/inkjet products Optimize your printer for truer, more www.kodak.com/go/onetouch... -
Page 82: Telephone Customer Support
Computer model, Operating system Camera serial number ■ ■ ■ Processor type and speed (MHz) ■ Version of Kodak EasyShare software ■ Amount of memory (MB) & free hard ■ Exact error message you received disk space Australia 1800 147 701... -
Page 83: Appendix
Appendix Camera specifications For more specifications, visit www.kodak.com/go/p850support. Kodak EasyShare P850 zoom digital camera CCD (charge-coupled device) 1/2.5 in. CCD, 5.1 MP, 4:3 aspect ratio Output image size 2592 x 1944 5.0 MP 2592 x 1728 4.5 MP (3:2) 2048 x 1536 3.1 MP 1664 x 1248 2.1 MP... - Page 84 Appendix Kodak EasyShare P850 zoom digital camera Focus system TTL–AF with program modes: Center weighted and Multi-pattern, 25-Selectable zones. Working range: 3.9 in. (10 cm)–infinity @ wide 35.4 in. (90 cm)–infinity @ tele 3.9 in.–35.4 in. (10 cm–90 cm) @ macro, wide 35.4 in.–6.6 ft (90 cm–2.0 m) @ macro, tele...
- Page 85 Kodak EasyShare P850 zoom digital camera External flash Extended flash range with Kodak external flash unit: Guide no. 37 (working range 43 ft (13 m) @ ISO 100, f/2.8, Wide) Guide no. 100 (working range 88 ft (27 m) @ ISO 100, f/3.7, Tele) Flash compensation –1 to +1 EV in 0.3 EV steps...
- Page 86 Appendix Kodak EasyShare P850 zoom digital camera Power Kodak 1700 mAh Li-Ion (or equivalent) rechargeable battery (KLIC-5001); 5V AC adapter, optional Communication with computer/TV USB 2.0 (PIMA 15740 protocol), via USB, 8-pin cable (Model U-8), EasyShare camera dock or printer dock, AV cable, 8-pin (Model AV-8)
-
Page 87: Storage Capacities
Picture storage capacity—JPEG standard compression Number of JPEG pictures 5.0 MP 4.5 MP (3:2) 3.1 MP 2.1 MP 1.2 MP 16 MB SD/MMC 32 MB internal memory 32 MB SD/MMC 64 MB SD/MMC 128 MB SD/MMC 256 MB SD/MMC 512 MB SD/MMC www.kodak.com/go/support... -
Page 88: Picture Storage Capacity-Jpeg Fine Compression
32 MB 5.0 MP 2592 x 1944 7435 TIFF 14816 4.5 MP (3:2) 2592 x 1728 TIFF 13176 3.1 MP 2048 x 1536 TIFF 9270 2.1 MP 1664 x 1248 TIFF 6138 1.2 MP 1280 x 960 TIFF 3654 www.kodak.com/go/support... -
Page 89: Video Storage Capacity
15, 30 seconds; EVF/LCD screen turns off. Press any button. 1, 2 minutes 3, 5, 10, 15 or Enters auto power off. Turn camera Off/On. 30 minutes NOTE: See EVF/LCD Stand By and Auto Power-Off in Setup on page www.kodak.com/go/support... -
Page 90: Accessories
Appendix Accessories Item Description Where to buy Kodak 0.7X wide-angle lens Expand your creativity and photographic www.kodak. options with the versatile 0.7X wide-angle com/go/p850 lens. accessories Kodak 1.4 tele converter Extends maximum focal length up to lens 605 mm. Kodak lens adapter... -
Page 91: Important Safety Instructions
Contact your computer manufacturer if you have questions. ■ The use of an accessory attachment that is not recommended by Kodak, such as an AC adapter, may cause fire, electric shock, or injury. If using this product in an airplane, observe all instructions of the airline. -
Page 92: Battery Safety And Handling
Remove battery when the product is stored for an extended period of time. In the ■ unlikely event that battery fluid leaks inside the product, contact your local Kodak Customer Service representative. ■ In the unlikely event that battery fluid leaks onto your skin, wash immediately with water and contact your local health provider. -
Page 93: Battery Information
Auto mode, using 64 MB internal memory ) We recommend using only a Kodak Li-Ion rechargeable battery. Not all manufacturers’ 3.7V Li-Ion rechargeable batteries are compatible with the camera. Damage caused by unauthorized accessories is not covered under warranty. -
Page 94: Upgrading Your Software And Firmware
4 x 6 in. (10 x 15 cm) prints with or without a computer, transfers pictures, and charges the included Kodak Li-Ion rechargeable battery. Kodak 5-volt AC adapter—powers your camera. IMPORTANT: Do not use the AC adapter included with the Kodak EasyShare printer dock to power your camera. Upgrading your software and firmware Download the latest versions of the software included on the Kodak EasyShare software CD and the camera firmware (the software that runs on the camera). -
Page 95: Warranty
Limitations Request for Warranty service will not be accepted without proof of date of purchase, such as a copy of the original dated Kodak digital camera or accessory sales receipt. (Always keep the original for your records.) This warranty does not apply to the battery(s) used in digital cameras or accessories. -
Page 96: Your Rights
FAILURE TO USE ITEMS SUPPLIED BY KODAK (SUCH AS ADAPTERS AND CABLES), OR CLAIMS MADE AFTER THE DURATION OF THIS WARRANTY. Kodak makes no other express or implied warranty for this product. In the event that the exclusion of any implied warranty is ineffective under the law, the duration of the implied warranty will be one year from the purchase date. -
Page 97: Regulatory Compliance
Regulatory compliance FCC compliance and advisory Kodak EasyShare P850 zoom digital camera This equipment has been tested and found to comply with the limits for a Class B digital device, pursuant to Part 15 of the FCC Rules. These limits are designed to provide reasonable protection against harmful interference in a residential installation. -
Page 98: Canadian Doc Statement
à la norme NMB-003 du Canada. Waste Electrical and Electronic Equipment labeling In the European Union, do not discard the product as unsorted municipal waste. Contact your local authorities or go to www.kodak.com for recycling program information. VCCI Class B ITE... - Page 99 (AE), 33 shutter, i auto flash, 36 status, ii auto focus (AF), 33 auto white balance, 50 C1, C2, C3, 37, 38 cable backlight, 28 audio/video, 58 basic picture compression, 43 camera accessories, 82 batteries camera dock, 86 www.kodak.com/go/support...
-
Page 100: Delete Button
30, 31 dock contrast, 51 camera, 86 copy pictures printer, 20, 86 card to memory, 56 dock connector, ii memory to card, 56 downloading pictures, 18 to computer via USB cable, 18 drive button, i copy to custom, 52 www.kodak.com/go/support... - Page 101 39 focus framing marks, 7 selectable-zone, 39 focus mode external flash, i, 48 close-up, 29 external video device landscape, 29 viewing pictures, videos, 58 manual, 29 normal AF, 29 focus modes, 29 favorites, 24 focus system, 76 www.kodak.com/go/support...
-
Page 102: Lcd Screen
85 Kodak EasyShare software help installing, 18 web links, 73 upgrading, 86 high color, 44 Kodak web sites, 73 highlight clipping, 15 hightlight clipping, 41 landscape histogram, 15, 41 scene mode, 27 hot shoe, external flash, i, 77... - Page 103 35, 43 night landscape, 27 pictures night portrait, 27 changing settings, 42 party, 27, 28, 29, 30 checking settings, 6 portrait, 27 compression, 43 program, 25 copying, 56 self-portrait, 27 deleting, 17 snow, 27 emailing tagged, 62 www.kodak.com/go/support...
- Page 104 57 program button capture, 47 program button review, 47 program button, direct access to sub safety menus, 34 battery, 84 protecting pictures, videos, 16 SCN (Scene) modes, 27 putting yourself in the picture, 30 SD/MMC card inserting, 4 www.kodak.com/go/support...
- Page 105 46, 47, 48 program button, 34 video out, 48 sunset, 28 video quality, 45 sunset white balance, 50 white balance, 50 support, technical, 74 setup mode, using, 46 share button, ii tagging sharpness, 51 favorites, 63 shutoff, auto, 81 www.kodak.com/go/support...
-
Page 106: Zoom Lever
78 turning camera on and off, 3 white balance, 50 Windows computers upgrading software, firmware, 86 installing software, 18 URLs, Kodak web sites, 73 USB (universal serial bus) zoom transferring pictures, 18 combined, 75 USB cable (model U-8), 19...
Need help?
Do you have a question about the EasyShare P850 and is the answer not in the manual?
Questions and answers
Memory card size for p850
The Kodak EasyShare P850 supports memory cards up to SDHC, which has a maximum capacity of 32 GB.
This answer is automatically generated