Table of Contents
Advertisement
Quick Links
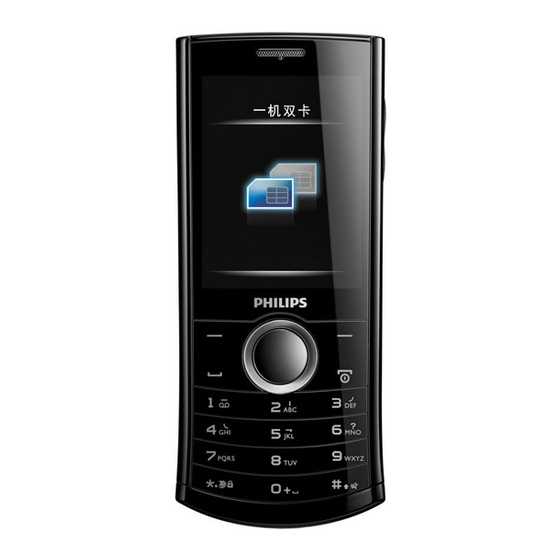
Back of phone: 3.2MP camera lens
Charger & USB port
Left soft key
Pick-up key
Alphanumeric keypad
Lock/unlock key,
Symbol input
Philips continuously strives to improve its products. Therefore, Philips reserves the rights to revise this
user guide or withdraw it at any time without prior notice. Philips provides this user guide "as is" and
does not accept, except as required by the applicable law, liability for any error, omission or discrepancy
between this user guide and the product described. The device is meant to be connected to GSM/GPRS/
EDGE networks.
Discover your phone
3.5mm headset jack
+/-Side volume key
TFT LCD
Right soft key
,
Navigation and
keys
Hang-up and On/
Off key
Meeting profile On/
Off, selection of text
Advertisement
Table of Contents

Related Manuals for Philips Xenium X503


Summary of Contents for Philips Xenium X503
-
Page 1: Discover Your Phone
Philips continuously strives to improve its products. Therefore, Philips reserves the rights to revise this user guide or withdraw it at any time without prior notice. Philips provides this user guide “as is” and does not accept, except as required by the applicable law, liability for any error, omission or discrepancy between this user guide and the product described. - Page 2 How to ... Switch the phone On/Off Long press and release Enter your PIN code Enter your PIN code using the keypad and press to confirm. Lock/Unlock keypad On the idle screen, long press . To unlock keypad, long press Make a call Enter the phone number by using the keypad and press Answer a call...
- Page 3 Dual SIM settings On the idle screen, press Menu to go to Settings > settings, press to select: Dual SIM setting, Mode setting Query on power Access a submenu directly On the idle screen, press Shortcut. Quickly return to idle Press when browsing menus Vibration on/off (for default...
-
Page 4: Soft Keys
Soft keys Applications Browser Media player are located at the top of the keypad area. Pressing the soft keys allow you to select the options above them on the screen. Such options are contextual: they vary according page 46 page 42 page 48 to current context. - Page 5 < > navigate through the icons and lists. Press Select default settings of the navigation keys access the options related to the selected item. To change the default settings, Press Back to return to previous menu. Press 1. Select the item to be changed. to return to the idle screen.
- Page 6 • On the idle screen, press Shortcut, and To unlock the keypad you can select a functional display as desired. Long press The idle screen switches to the relevant display. To lock the keypad manually Power-saving mode On the idle screen, long press After the set time span, the phone has the idle screen turned off automatically.
-
Page 7: Table Of Contents
Table of contents Table of contents 1 Getting Started Making an emergency call Insert the SIM card 4 Messaging Charge the battery Creating messages Mode settings Organizing your messages Set clock Defining your message settings Insert the micro-SD card E-mail Remove SIM2 Broadcast messages 2 Text Entry... - Page 8 8 Camera Create your task list Check your calendar Camera Edit your task list Video recorder Sound recorder 9 Applications Using your clock and timer Java games and application Alarm Stopwatch 10 Media player Text reader Music player Others FM radio Calculator View photos Unit converter...
- Page 9 Connecting to a Bluetooth device Precautions Getting connected by Tips a Bluetooth device Troubleshooting Editing your device list Philips Authentic Accessories 14 Profiles Adjusting ringer settings to Trademark Declaration different scenes Specific Absorption Rate Information 84 15 Settings Limited Warranty...
-
Page 10: Getting Started
Philips! To get the most of your product and enjoy all Press on the back cover and slide the cover Philips has to offer, register your product at as shown. www.philips.com/welcom. Please read the safety instructions in the "Precautions"... - Page 11 2. As shown, take out the battery. gold contact downwards. Insert your SIM card under the metal clip holder. You may lose all your personal settings if you remove the battery when the phone is switched 3. As shown, align your SIM card with the SIM care slot, bevelled corner facing you and Getting Started...
-
Page 12: Charge The Battery
4. As shown, align the metallic connectors on Remove the protective film covering the screen the battery and battery slot. Insert the and camera lens before using the phone. battery until it is locked. Charging the battery Your phone is powered by a rechargeable battery. -
Page 13: Mode Settings
preconfigured and communicated to you by damage the battery. The only way to turn off the charger is to unplug it, so it is advisable to use an your network or retailer. easily accessible power socket. If you enter an incorrect PIN code three times in succession, your SIM card will be blocked. - Page 14 < > hour clock) and date format by pressing the Local settings/Foreign settings: Press navigation keys select time zone and city. Press Options time/date: Enter the time and date. Press to turn on the daylight saving time if to select the box to be defined, and applicable.
-
Page 15: Insert The Micro-Sd Card
Inserting Micro-SD card (memory Remove SIM2 card) 1. Follow Step 1 and Step 2 under "Inserting the SIM card" . You can expand the memory of your phone by 2. Press on the card and remove the card as adding a micro-SD card. shown. -
Page 16: Text Entry
editing screen. When you access the editor 2 Text Entry again, it will automatically select the last input method you have used. Your mobile phone supports a number of text Depending on the language you select for your entry methods, including T9 input, multi-tap phone, the supported input methods may vary. - Page 17 Select To confirm the selection Examples: how to enter the word "home": 1. Press To input a space The screen displays the first word of a list: Clear Short press to clear a letter, Good. > Long press to clear all entries. 2.
- Page 18 the character, press the keys corresponding to the required strokes according to sequence to get the desired character. The stroke input method in this phone classifies a Chinese character into 5 basic strokes: (horizontal, vertical, left falling stroke, right falling stroke and over-down) as well as a special stroke.
-
Page 19: Calling
name (up to 5 characters) using the 3 Calling alphanumeric keypad, or select a contact from the list. 2. Press to dial the selected number. Making a call For IP calls (China only), select Options > IP dial (SIM1)/IP dial (SIM2). -
Page 20: Answering And Ending A Call
To make a speed dial, always check to Blacklist (For more information about that the speed-dial function is enabled. blacklist, see “Blacklist” on page 65). 3. In number, select one of the locations Options during a call (corresponding to the numeric keys , to select During a call, you can press 4. -
Page 21: Handling Multiple Calls (Network-Dependent)
Sound recorder Adjust the volume During a call, press side volume key + or - to In most countries, recording of telephone increase or decrease the volume. conversation is subject to legislation. We advise Handling multiple calls (Network- you to notify the caller if you intend to record the conversation and only do so if they agree. -
Page 22: Making An Emergency Call
- Conference: To introduce the caller into a and the screen displays information about the conference call. incoming call. You can then: End single: To disconnect one party from • Press to answer the call (the first the call. one is put on hold). End all calls: To disconnect all party from •... -
Page 23: Messaging
2. Press Options to access the following 4 Messages options: Send to Enter a number or select a contact from the phonebook. Writing Select your desired writing language language. Creating messages Insert template Select to insert a preset message. SMS enables you to send text messages to the Advanced Select to insert the name and other party, using Short Messaging Service... - Page 24 Preview Preview the current MMS. Press < > to move to previous or Your mobile phone can also send and receive next page. MMS (Multimedia Messaging Service) messages. Slide options Add Slide beind/Add slide before: With MMS, you can send messages that contain Insert more slides into your pictures, sound and text.
-
Page 25: Organizing Your Messages
1. Select Templates > or MMS. Insert bookmark 2. Select your desired templates. Add website information you 3. Press Options, and select Write message. saved bookmark (see The ready-made message appears on the “Browser” on page 42). edit screen. Save to Save the MMS to Drafts. - Page 26 Select Select multiple messages to be Manage messages multiple deleted. Press Check Uncheck Select a desired message, press View to read to select messages. To delete the message, or press Options to access the selected messages, select following options: Options >...
-
Page 27: Defining Your Message Settings
Defining your message settings Validity period: Select the length of time your messages will be Some of your message settings are dependent stored in the SMS centre. This is on the service you subscribe with the network useful when the recipient is not operator. - Page 28 Common Delivery report: When set to On, Memory This option can display the settings status this option will inform you via memory status of the messages SMS whether or not your own saved in the SIM card and the SMS was received. phone.
-
Page 29: E-Mail
Retrieval Home network, Roaming, Filters, Set up E-mail profiles Read report Delivery report E-mail accounts allows you to Activate, or Edit options for receiving an MMS one of the available email profiles. You can also message. create a new Email account. Consult the Memory View the memory status of your network operator for the account information. - Page 30 press Activate to activate the selected E- receive E-mails from the Internet to the mailbox mail account. you have preset on your phone. You can only attach one file (JPEG, MID, JAR, Write E-mail TXT, MP3) or one sound at a time. To write an Email, select E-mail >...
- Page 31 For different folders, available options may vary. Organize your E-mail For your activated account, the Emails are Reply Reply to the senders. sorted in the following folders: Reply Reply to the sender without the Inbox: received E-mail without email history. Outbox: unsuccessfully sent E-mail content Sent: sent E-mail...
-
Page 32: Broadcast Messages
Mark as Displays the current E-mail as Define settings for broadcast deleted deleted. messages Delete Delete the current E-mail. Broadcast messages > SIM1 broadcast message/ To clear mailboxes SIM2 broadcast message, You can quickly remove all of mails under a Receive Press On/Off... -
Page 33: Contacts
2. Select a number type (Mobile number, 5 Contacts Home number or Office number): Name: Press Edit to go to the editing screen. To select input methods, press repeatedly; long press to turn T9 input on or off. Press Back to exit the input Contacts are stored in one of the two available mode, if necessary. -
Page 34: Searching For A Contact
3. Press Done to save. Press repeatedly to select an input method. Edit a contact Names starting with the character are listed. 1. Go to Contacts. 2. Select your desired contact (see "Searching Managing your contacts for a contact"). 3. Press Options >... -
Page 35: Create Your Name Card
To add multiple contacts to smart Delete multiple contacts phonebook, 1. Go to Contacts, select your desired page of Go to Contacts, press Options > Caller contacts. groups, select the desired groups, press View 2. Press Options > Select multiple. Press the check the member list, and then press to select the desired contact, or press Add. -
Page 36: Special Numbers
2. Select your sending options. SIM1/SIM2 Press Edit to edit your emergency phone number. vCard sending and receiving are available on the number primary SIM card only. Special numbers This menu allows you to keep a list of useful numbers such as own numbers, voice mail and emergency numbers. -
Page 37: Tools
3. To keep yourself reminded, 6 Tools following: Note Add a note about the task. Press Edit to edit the task. On editing screen, press Using your business organizer Options > Use template to use the preset note. You can add your new tasks to the phone. Such <... -
Page 38: Check Your Calendar
< > Repeat Press to repeat the alarm at Edit your task list the specified time once, everyday, 1. In Tools > To do list, or Tools > Calendar, weekly or monthly. press Options > Go to weekly view/Go to To repeat the alarm at certain monthly view to enter the task list. - Page 39 To make recording To edit recording files 1. Go to Tools > Sound recorder. 1. Go to My files > Phone Memory card > 2. Press New record to start recording. Audio. 3. Press to pause/resume recording Press 2. Select the desired file. Stop to stop recording.
-
Page 40: Using Your Clock And Timer Alarm
To change the ringtone, see "Adjusting ring Audio options: Select an alarm tone: Ringer settings to different scenes" on Page 61. radio. To use ringer as the alarm tone, press Using your clock and timer and then Options to select a ringtone; To use FM radio as the alarm tone, press Alarm and then... -
Page 41: Stopwatch
Existing files are listed. The alarm clock will ring even if your mobile 4. To display a file correctly, select your phone is switched off, or the Profiles is set to desired file, and press Options > View Silent. settings >... -
Page 42: Others Calculator
Others The result is then truncated after the 10th decimal digit for the next operation. Calculator Enter figures and operation symbols by using the on-screen numeric keypad. Unit converter You can make different types of unit conversion < > at a fixed rate. Press to select unit types, and input figures in boxes. -
Page 43: Browser
Clear cache, Clear cookies: Clear the history and 7 Browser cookies of the browser. Accessing web sites You can access a web site in different ways: Home: Access the homepage. Save your favorite You can use this function to browse the Internet. -
Page 44: Stk
To enable or disable the function, go to Browser > > Settings > Service message settings > Enable push. The availability of the features in this menu depends on whether or not your SIM card supports STK. If your SIM card supports STK function, the STK menu will be displayed on the screen. -
Page 45: Camera
MMS, E-mail bluetooth, press 8 Camera Options > Send; to exit Camera, press < > • During photographing, press decrease or increase the brightness; press to zoom out or in (for the image size of Your mobile phone features a digital camera that 240x320) allows you to take pictures (up to 3.2 Mega •... -
Page 46: Video Recorder
Video recorder Video recording Camera > Video recorder, • Press to start or pause videorecording. • Press to stop recording. • Press the side volume key to zoom in or out. • To select your desired video recorder settings, video file settings, and storage location, press ;... -
Page 47: Applications
When installing games via a USB data cable, 9 Applications make sure that you save the .jar and .jad files in the same file folder under My files > Others your phone or memory card. Select a file to be installed, and press Install to start the... - Page 48 MIDlet automatically Java SIM1 Select Java network for SIM1 and Messaging: permission to send and receive Profile/Java SIM2 (service subscription- messages SIM2 Profile dependent). Multimedia: permission to photographing, or Heap Size Display allowed maximum size sound/video recording for Java memory. Read user data: permission to read your data, like contacts and calendar entries...
-
Page 49: Media Player
3. On the left pane, select Music. 10 Media player On the right pane, all the music files you added are displayed. 4. Click Title, Artist, Album to edit them as desired. Music player Operations may vary according to music management software or Windows Media Save MP3, Midi, SP-Midi, AMR, WMA, WAV, Player versions. - Page 50 4. On your phone, go to Media player > Music - Select Equalizer: Select sound settings player > Settings > Refresh all lists. suitable to your songs. All the music files are transferred. - Select Music in background: Continue to play music after exiting the music player.
-
Page 51: Fm Radio
< > : Long press to select a section within 1. Select your desired song. a song. 2. Press Options > Add to playlist. Volume side keys: Adjust the volume. Exiting playlists are displayed. Back: Return to the previous menu 3. - Page 52 The radio frequency scanning starts Editing the channel list automatically. Up to 20 available radio You can assign a preset to a certain location. stations are saved to Channel list. The first When pressing the numeric key on the radio preset radio station starts to play.
- Page 53 3. To edit the channel name, press Options 4. To return to the idle screen during playback, 。 > Channel list to select a channel. Press press Options > Edit to edit the channel name. To turn off the radio on the idle screen, •...
-
Page 54: View Photos
View photos Play video clips With the image viewer, you can browse and edit Your video recording is saved to My files > the photos you have taken. Phone Memory card > Videos. Go to Media player > Image viewer. The photos 1. -
Page 55: My Files
3. If necessary, open a folder, and press 11 My files Options > Sort by to show files in the order of name, type, time or size. To find your files on the phone, save the files under the Pictures, Video, Audio and Others folders On the phone, all the files are stored under the on the phone or memory card. -
Page 56: Sharing Your Files
"Text Entry" on page 15). Press Back To copy, move, or delete multiple files, exit the input mode, if necessary, press 1. In a file folder, press Options > Select Options > Done to finish editing. multiple, and select your desired option. A sub-folder is created. -
Page 57: Using Your Files
Using your files Set a photo as contact picture You can use your photo as the contact picture of the contacts in your Smart Phonebook (see "Add a contact to Smart phonebook" on page 32). 1. Select a photo under My files >... -
Page 58: Calls
12 Calls You are provided with the records about your incoming and outgoing calls. Go to Calls to check your call history. You can reply to such calls or add such contacts < > to your phone book. Go to Calls, press select a page: All calls/Dialled calls/Received calls//... -
Page 59: Bluetooth
1. Go to Bluetooth > Power. Press to select 13 Bluetooth if necessary, to turn on the Bluetooth function. 2. Select Find devices to start searching for available Bluetooth devices. A list of available Bluetooth devices appears. About Bluetooth 3. Select the device you wish to connect. Press Pair. -
Page 60: Getting Connected By A Bluetooth Device
4. Select the device you wish to connect. Press To control music playback through a Pair. Bluetooth headset 5. Enter the password of your Bluetooth Consult the user documentation of the headset to start pairing. Bluetooth headset. Check that your Bluetooth The pairing is made if the password is headset supports AVRCP profile (audio/video correctly input. -
Page 61: Editing Your Device List
visible to other Bluetooth devices. If you do not use the Bluetooth feature for some Change device name: Press Select to edit time, you should deactivate it in order to your phone name to be identified by other conserve battery power. Bluetooth devices. -
Page 62: Profiles
To change the settings: 14 Profiles 1. In Profiles, select the profile to be changed. Press Options. 2. Select the item to be changed, press Select to select your desired options. 3. Repeat Step 2 until you finish the settings. Adjusting ring settings to different scenes Apply a profile... -
Page 63: Settings
Only SIM1 open: Only use SIM1 to 15 Settings make/receive calls send/ receive messages. Only SIM2 open: Only use SIM2 to make/receive calls send/ SIM settings receive messages. Dual SIM Change current SIM card slot Query on Display SIM settings screen or not setting settings: power up... - Page 64 Languages Select a language for your phone. Backlight duration: Select duration of backlight. Display Wallpaper: Select an image as the wall paper of your phone. You Show date time: Select select either default whether to show date and time wallpaper or one of your pictures on the idle screen.
-
Page 65: Call Settings
Fast keys Set a navigation key as a direct Call divert Divert incoming calls to your access to a menu (see “Fast Keys” voice mailbox or to another on page 4). phone number (regardless of whether or not the number is in Shortcut Direct access to functional sub- your phonebook). -
Page 66: Network
Network Turn Blacklist Blacklist mode: blacklist mode on or off. Select network Select the network for your phone (service subscription- Blacklist number: Edit a list of dependent). phone numbers. You can reject all the calls from such numbers. Automatic is recommended. Auto redial Keep redialing the call number Preferred network... -
Page 67: Security
Security Phone lock Set password protection for your phone. You are required to This menu allows you to use passwords to enter the password each time protect your SIM card, phone, and information you turn on the phone (0000 by stored on the phone. -
Page 68: Icons & Symbols
Battery - The bars indicate the battery Icons & symbols level (4 bars = full, 1 bar = low). In idle mode, several symbols can be displayed simultaneously on the main screen. When Missed call - You have a missed call. pressing some of the status icons, the Call divert - All your incoming voice... - Page 69 Home zone - A zone designated by your Memory card - Indicates the memory network operator. Subscription card is in use. You can access your dependent, contact your service memory card through the My files provider for details. menu. network: your phone is connected Keypad lock - The keypad has been to a GSM network.
-
Page 70: Precautions
compatibility (Ref. 89/336/EEC) and low Precautions voltage directives (Ref. 73/23/EEC). Your cellular mobile phone your responsibility. To avoid damage to yourself, to Radio Waves others or to the phone itself, read and follow all Your cellular mobile phone is a low the safety instructions and make them known to power radio transmitter and anyone borrowing your phone. - Page 71 follow all local recommendations and Before boarding an aircraft and/ regulations when using your cellular phone or when packing the phone in your both at home and when away. Regulations on luggage: the use of mobile phones the use of cellular phones in vehicles and in an aircraft may be dangerous for aircraft are particularly stringent.
- Page 72 In areas where you are requested to turn off radio Hearing aids transmitting devices, such as quarries or other If you are a user of a hearing aid, consult your areas where blasting operations are in progress. physician and hearing aid manufacturer to learn Check with the vehicle manufacturer whether your particular device is susceptible to that electronic equipment used in...
- Page 73 Philips phone null and menus will also help to save the battery’s void. The use of an incorrect type of battery may energy for longer phoning and stand-by also cause an explosion.
- Page 74 Philips replacement phone calls is prohibited on public roads in parts. some countries. Check local regulations. Your mobile phone and your car EN 60950 Norm Studies have shown that speaking on In hot weather or after prolonged exposure to the telephone while driving lowers the sun (e.g., behind a window or a windscreen),...
- Page 75 Philips has marked the battery and packaging WEEE Marking in the DFU: with standard symbols designed to promote the “Information to the Consumer” recycling and appropriate disposal of your eventual waste. Disposal of your old product Your product is designed and manufactured with...
-
Page 76: Tips
6. Establish GPRS connection when needed. Tips Otherwise, your phone will keep searching for GPRS connection, and drain your battery power. How to prolong the battery life of 7. Turn off your phone if there is no coverage. your phone Otherwise, the phone will keep searching To have your mobile phone function properly, for network, and drain your battery power. -
Page 77: Troubleshooting
Your phone doesn’t return to idle Troubleshooting screen Long press the hang-up key or switch off the The phone does not switch on phone, check that the SIM card and the battery Remove/reinstall the battery. Then charge the are installed correctly and switch it on again. phone until the battery icon stops scrolling. - Page 78 Make sure phone if it is too large, if its name is too long, or you always use the Philips authentic accessory if it doesn’t have the correct file format. shipped with your phone.
- Page 79 The display shows SIM failure The autonomy of your phone seems Check that the SIM card has been inserted lower than indicated on the user correctly. If the problem persists, your SIM card guide may be damaged. Contact your operator. The autonomy is linked to your settings (e.g., ringer volume, backlight duration) and the When attempting to use a feature in...
- Page 80 Your phone is not charging If the battery is completely flat, it might take several minutes of pre-charge (up to 5 minutes in some cases) before the charging icon is displayed on the screen. The picture captured with the phone camera is not clear Make sure that the camera lens on both sides is clean.
-
Page 81: Philips Authentic Accessories
Package contents USB cable may therefore vary. When connected to a computer through the To maximize the performance of your Philips USB cable (compatible with most computers), mobile phone and not to void the warranty, your phone can work as... - Page 82 like phonebook, calendar, SMS messages, and COM port Allows you to back up phone audio/video/picture files. With the software and data, like phonebooks, on a GPRS service, you can also connect your PC to computer or recover the data the Internet through your phone. from the computer.
- Page 83 2. On your double click MobilePhoneTools icon. On the bottom left of the menu, “Philips X503 connected” displayed.
-
Page 84: Trademark Declaration
PHILIPS and PHILIPS’ Trademark Declaration Shield Emblem registered ® trademarks registered Koninklijke Philips trademark Nuance Electronics N.V. Communications, Inc. manufactured Tegic Euro. Pat. Shenzhen Sang App. 0842463 Consumer Communications Co., Ltd. under license from Koninklijke Philips Electronics N.V. JAVA is a trademark of Sun Microsystems, Inc. -
Page 85: Specific Absorption Rate Information
Specific Absorption Rate Information International standards THIS MOBILE PHONE MEETS THE INTERNATIONAL RECOMMENDATIONS FOR EXPOSURE TO RADIO WAVES Your mobile phone is a radio transmitter and receiver. It is designed and manufactured not to exceed the limits for exposure to radio frequency (RF) energy defined by the international standards. These recommendations have been established by the International Commission on Non-Ionizing Radiation Protection (ICNIRP) and, the Institute of Electrical and Electronics Engineers (IEEE) that forecast a substantial safety margin for assuring the protection of all persons, regardless of age and health. - Page 86 While there may be differences between the SAR levels of various phones and at various positions, they all meet the international protection standards for exposure to radio waves. The highest SAR value for this Xenium X503 model phone when tested for compliance against the standard was 0.365 W/kg for ICNIRP recommendation.
-
Page 87: Limited Warranty
(6) months from the date of purchase. What Does This Limited Warranty Cover? What Will Philips Do if The Product is Not Free From Material Defects in Materials and Philips warrants to the original retail Workmanship... - Page 88 Return the Product to an authorized Product defects or problems caused by service center of Philips. You may uses with non-Philips products or contact the local Philips office for the accessories; or location of the nearest authorized service center.
- Page 89 The SIM card must be removed from EXCEPT EXPRESS the Product before it is given to Philips. WARRANTIES SET FORTH ABOVE AND Philips assumes no liability for damaged THOSE IMPLIED BY LAW AND WHICH or loss of the SIM card or the data CANNOT BE EXCLUDED OR MODIFIED contained therein.
- Page 90 This limited warranty represents the PHILIPS BE LIABLE FOR ANY PUNITIVE, complete and exclusive agreement between SPECIAL, INCIDENTAL, INDIRECT OR the Consumer and Philips with respect to CONSEQUENTIAL DAMAGES this cellular Product and it supercedes all (INCLUDING BUT NOT LIMITED TO THE...
-
Page 91: Declaration Of Conformity
1999/5/EC has been followed with the declare under our sole responsibility that the involvement of the following Notified Body: product TÜV RHEINLAND PRODUCT SAFETY GMBH Xenium X503 Am Grauen Stein, 51105 Köln Philips GSM/GPRS 900/1800/1900 TAC number: 35320904 Germany... - Page 92 In general, the lower the backlight level and the shorter the duration, the Here are some steps to help you optimize your Philips more power you will save. Xenium’s battery performance. •...
Need help?
Do you have a question about the Xenium X503 and is the answer not in the manual?
Questions and answers