
Subscribe to Our Youtube Channel
Related Manuals for Yanmar 6CXM-GTE


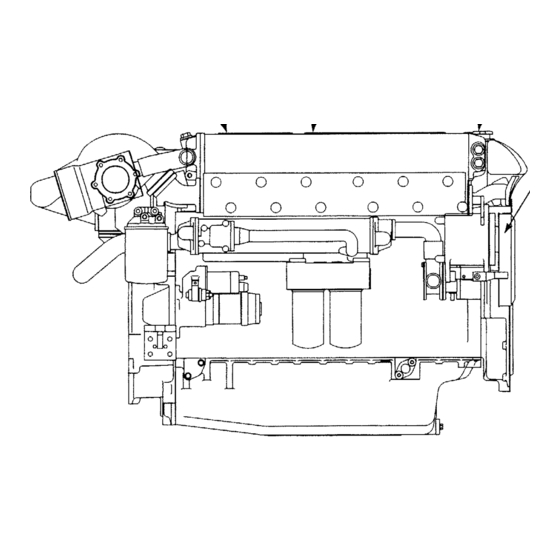
Summary of Contents for Yanmar 6CXM-GTE
- Page 1 M9961-H13021 SERVICE MANUAL MARINE DIESEL ENGINE 6CXM-GTE/GTE2...
- Page 3 Literature No. M9961-H13021 Revision history list Page No. Document name SERVICE MANUAL FOR YANMAR MARINE DIESEL ENGINE Product name 6CXM-GTE/GTE2 Revised item Revision No. Revision date Reason for revision Revision outline Revised by (page) Rev.1 November, 05 To add more details of 3.11 Fuel Oil System...
-
Page 75: Fuel Oil System
Damping valve 3.11.1 Fuel Injection Pump Delivery valve The Yanmar YPES-PS fuel injection pump is an integrated type and the engine revolutions are transmitted to the cam- Plunger barrel shaft of the pump through the driving gear and advance timer. - Page 76 (2) Feature (3) Injection volume control The fuel injection pump supplies pressurized fuel to the The fuel control mechanism is shown in following fig. injection nozzles through the action of the plunger. The T-shaped flange at the bottom of the plunger is fixed The plunger reciprocates in the plunger barrel with a in the grooves of the pinion sleeve, and the pinion is fixed stroke and is lapped for a precise fit.
- Page 77 2) Half injection volume position At the same time, the suck-back collar (1) blocks off the fuel injection pipe and the delivery chamber, and the Discharge ends earlier as the rack is moved towards valve continues descending until the seat (2) comes in zero from the maximum setting.
- Page 78 3.11.2 Governor (1) Feature The two-point weight centrifugal type all speed control governor is directly coupled with the fuel pump. The governor weight assembly, driven by the pump shaft end, controls the control rack of the fuel pump to adjust the fuel injection quan- tity.
- Page 79 (2) Reversed angleich mechanism The CXM model employs the high pressure fuel injection pump to match with its high output structure. When using the high pressure pump, however, the injection volume at the equalized rack condition tends to decrease according to the rise of engine speed. Accordingly, a larger capacity pump is used. The use of a large capacity pump, however, gives over-torque and adverse exhaust color due to excessive fuel injection dur- ing medium speed high load operation.
- Page 80 1) Before starting The starting fuel increase spring let the governor lever move to the "fuel increase" side to raise the starting performance. 2) After starting The starting fuel increase spring is compressed by the thrust force of the governor to stop the starting fuel increase.
-
Page 81: Boost Compensator
3.11.3 Boost Compensator The boost compensator, installed to the injection pump of the turbocharged engine models, limits the movement of the fuel con- trol rack with the boost pressure detection equipment. It optimizes fuel injection and combustion according to the air volume inside the cylinder for complete combustion and higher output. - Page 82 When the turbocharger catches up the engine speed and the boost pressure is raised, the diaphragm is pressed by the charg- ing pressure, causing the boost compensator's lever to move to turn the control rack to the fuel increase side: max. injection quantity is obtained.
- Page 83 3.11.4 Disassembly of Governor 8) After removing the o-ring, lightly tap another end of the shaft, and remove the governor lever shaft. Then remove The fixing wire and seal are attached to the governor to limit the governor shaft assembly and washer. engine speed and output for protecting the engine.
- Page 84 11) Remove the governor weight nut and washer with a box spanner, fixing the fuel camshaft by the hole of the fuel pump coupling or holding the coupling with a vice. Screw the governor weight nut back in two or three times.
- Page 85 3.11.6 Reassembly of governor 4) Mount the governor link to the governor lever assembly. Inspect all parts after disassembly and replace any parts as Note: 1. Make sure that the correct governor link necessary. Before starting reassembly, clean both the new mounting holes are used, and that it is parts and parts to be reused, and put them in order.
- Page 86 7) Hook the governor spring on the pin of the governor lever and control lever. 8) Insert the rack link in the governor link, hook the link con- necting spring on the spring pin of the governor link side with the spring set bar, and connect the governor link with the rack link.
- Page 87 3.11.7 Disassembly of fuel injection pump 2) Screw the puller into the nut hole. Remove the automatic timer by screwing in the puller When disassembling the fuel injection pump, separate the bolt. parts for each cylinder and be careful not to get them mixed Be especially careful to keep the plunger/plunger barrel, delivery valve/delivery valve seat and other assemblies sepa- rate for each cylinder (the parts of each assembly must be...
- Page 88 5) Remove the plunger barrel tightening nuts. 9) Remove the delivery valve holder, delivery valve, valve spring, valve stopper and O-ring from the plunger barrel. Note: Mark each part to recall the original assembly. 6) Remove the plunger barrel assembly. Insert two drivers under the barrel flange.
- Page 89 11) Remove the rack setting screw and the control rack. 15) Remove the cam support and the shims by prying open the slots in the support with screw drivers. 12) Remove the tappets. 13) Remove the fuel feed pump. 16) Remove the camshaft together with the middle bear- ing from the drive side.
- Page 90 3.11.8 Inspection of fuel injection pump (3) Inspection of pump housing 1) Inspect the sliding surface against the tappet guide for (1) Inspection of plunger extreme wear. Scratches on the sliding surface against 1) Thoroughly wash the plungers, and replace the plung- the roller pin are not a problem.
- Page 91 3.11.9 Reassembly of fuel injection pump 4) Provisionally install the camshaft support. Sure to use the standard thickness shim. (1) Preparation Standard thrust clearance 1) After inspection, arrange and clean all parts. 0.01 0.05mm of camshaft 2) Prepare the parts for replacement before starting assembly.
- Page 92 7) After adjusting the preload, remove the camshaft sup- 12) Screw in the spring shoe setting bolts. port and install new O-ring in the groove in the sup- port. 8) Apply clean lube oil to the O-rings, pump housing bore and the camshaft support. Note: Be careful not to damage the O-rings.
- Page 93 16) Insert the plunger barrel in the deflector and barrel 20) Hook the neck of the plunger to the spring retainer, collar. Align the hole in the barrel with the hole in align the plunger flange with the slots in the pinion the collar, then set the straight pin in the holes of the and push the plunger until it is locked by the clip ring barrel and collar to fix them.
- Page 94 23) Align the groove of the spring shoe with the setting 25) Install the delivery valve seat, valve, spring, stopper bolt and carefully insert the plunger barrel assembly and O-ring, then finger tighten the delivery valve in the pump housing bore. holder.
- Page 95 28) Install the fuel feed pump to the pump housing. In each case, disassemble and repair. 31) Assemble the governor. 32) Fill the pump and governor with clean lube oil. 29) Remove the rack set bolt and install the rack setting screw securely.
- Page 96 3.11.10 Adjustment of fuel injection pump 4) Fill the pump and governor with clean lube oil. oil capacity : pump 250 cc Adjust the fuel injection pump after completing reassembly. governor 300 cc The pump itself must be readjusted with a special pump tester when you have replaced major parts such as the plunger assembly, tappet assembly, fuel camshaft, etc.
- Page 97 4) Slowly rotate the pump in the normal rotation direc- (4) Plunger pressure test tion by hand, and measure the plunger lift until fuel 1) Mount the pressure gauge to the delivery valve holder flow from the overflow pipe on the measuring device of the cylinder to be tested.
- Page 98 (6) Measurement and adjustment of injection volume (7) Injection adjustment standard (on engine) The injection volume is determined by the fuel injection Adjustment procedures pump rpm and rack position. Check and adjust to bring it 1) Set the initial rack position of the boost compensator to the specified value.
- Page 99 Standard Adjustment Value Average injection Pump speed Note Adjustment Not uniform (rpm) q'ty (mm /st) Rack scale Point 6CXM-GTE 6CXM-GTE2 6CXM-GTE 6CXM-GTE2 6CXM-GTE 6CXM-GTE2 13.5 1425 1450 at 2850rpm at 2900rpm (11.7) 1000 Reversed angleich (11.0) (191) (196) (12.4) 1175...
- Page 100 (8) Adjusting points Setting of injection q'ty at start Setting of reduced injection q'ty of boost compensator Adjusting of rated injection q'ty Adjusting of stroke of reversed "Angleich" - 3-43-12 -...
-
Page 101: Fuel Feed Pump
3.11.11 Fuel feed pump (2) Double action piston and automatic pressure control mechanism (1) Feature When the piston moves upward, the pressure in the Fuel feed pump is double action piston type with four upper chamber rises and the pressure in the lower cham- check valves. -
Page 102: Inspection After Assembly
3.11.12 Disassembly of fuel feed pump 3.11.15 Inspection after assembly 1) Remove the piston spring stopper plug and pull out the 1) Air leak test piston spring. Inspect the air-tightness of each pipe and packing etc. Especially check the inlet side because air is likely to 2) Remove the piston. - Page 103 2) Suction test for the priming pump Loosen the handle of the priming pump, and push the handle at 60 - 100 strokes/minute. If fuel comes out of the delivery side of the feed pump after about 25 strokes, the priming pump is normal. If it takes longer, replace the priming pump as a set.
-
Page 104: Automatic Timer
3.11.17 Automatic timer (1) Feature The automatic timer controls the fuel injection timing automatically through the centrifugal force of its rota- tion. The automatic timer adjusts the advancing angle auto- matically as follows: - When the speed is increased, the fly weight expands outward from the fly weight holder under centrifugal force. - Page 105 (2) Disassembly (3) Inspection 1) Remove the attaching bolts of the timer case cover to 1) Check the guide cam surface for wear or damage and remove the cover. replace the timer if necessary. 2) Check the roller and bush for wear and cracks. 3) Check the spring for rust, flaws and degeneration.
-
Page 106: Fuel Injection Nozzle
Adjustment of injection starting pressure is effected with the adjustment bolt. (2) Nozzle specifications Engine model 6CXM-GTE 6CXM-GTE2 Type Semi-long type hole-nozzle Nozzle No. YDLL155S296CZ YDLL155S306CAZ Yanmar part No. 127672-53000 127694-53050 Valve seat Single cone Operating pressure 23.5 0.49 MPa (240 5kgf/ No. of injection 6-0.29 6-0.30... - Page 107 8) Apply lube oil to the puller bolt and screw it to the (3) Nozzle body identification number return oil joint bolt hole of the upper injection valve The type of nozzle can be identified by the number on the body to remove the injection valve body.
- Page 108 (7) Reassembly of fuel injection nozzle a) Clean off the carbon on the outside of the of the nozzle body with a brass brush. 1) Install the fuel injection nozzle (B). b) Clean the nozzle seat with cleaning spray. 2) Install the fuel injection pipe joint to the fuel injection c) Clean off the carbon on the tip of the nozzle with a nozzle (B), (together with the rubber packing (E).
-
Page 109: Fuel Filter
3.11.19 Fuel filter (1) Feature The fuel filter is installed between the fuel feed pump and fuel injection pump. Fuel is filtered as it passes through the filter element and the dirt/foreign matter and water from the fuel tank are removed. - Page 110 3.11.20 Troubleshooting of fuel oil system (1) Before removing fuel injection pump Basic check points Check for breaks or oil leaks through out the fuel system, It is necessary to find out the cause of the trouble before from the fuel tank to the nozzle. replacing the defective parts.
- Page 111 Fault Cause Remedy 3. Engine's Defective injection (1) Knocking sounds caused by improper (too early) injection timing. Inspect and adjust output is timing, and (2) Engine overheats or emits large amount of smoke due to improper Inspect and adjust insufficient other failures (too late) injection timing.
- Page 112 3.11.21 Tools Name of tool Shape Apprication Governor weight support extractor 721820-92580 Timer extractor 158591-54200 Spring set bar 121978-51610 Prestroke measuring device 155900-51350 Pressure gauge 155900-51500 - 3-43-24 -...
Need help?
Do you have a question about the 6CXM-GTE and is the answer not in the manual?
Questions and answers