Table of Contents
Advertisement
Quick Links
Advertisement
Table of Contents

Subscribe to Our Youtube Channel
Related Manuals for Advanced Elements AirFusion AE1040-Y


Summary of Contents for Advanced Elements AirFusion AE1040-Y
- Page 1 AirFusion™ Inflatable Kayak Owner’s Manual MODEL AE1040-Y PATENT PENDING 1 PERSON KAYAK IMPORTANT! PLEASE READ THIS MANUAL CAREFULLY BEFORE PROCEEDING. AFTER READING THIS MANUAL, SAVE THESE INSTRUCTIONS FOR FUTURE REFERENCE. ADVANCED ELEMENTS, INC. 2011 REV 11-2010...
- Page 2 INTRODUCTION It is our goal, at Advanced Elements, to develop new and unique paddlesports products that enhance our customers’ outdoor experience. Our focus is on designing and manufacturing “Inflatable kayaks with cutting edge technology”. Our kayaks incorporate many different materials and components and deliver high performance at a very reasonable price.
-
Page 3: Table Of Contents
TABLE OF CONTENTS 1. Caution/Safety ..............4 1.1 Boating Safety ............5 2. Specification ..............6 2.1 Capacity ..............6 2.2 Features ..............6 3. Assembly/Inflating/Deflation Instruction ....7 3.1 Assembly ............... 7 3.2 Set Up ..............9 3.3 Understanding Your Valves......14 3.4 Inflating .............. -
Page 4: Caution/Safety
· READ OWNER’S INFORMATION PACKET PRIOR TO USING THIS PRODUCT. THE USER OF THIS PRODUCT ACKNOWLEDGES BOTH AN UNDERSTANDING AND AN ASSUMPTION OF THE RISK INVOLVED IN PADDLESPORTS. ADVANCED ELEMENTS, INC. TOLL FREE 866-262-9076 Please read this entire manual for additional safety information. Please pay close attention to items... -
Page 5: Boating Safety
AirFusion™ Inflatable Kayak Owner’s Manual 1.1 Boating Safety This is the safety alert symbol. It is used to alert you to potential personal injury hazards. Obey all safety messages that follow this symbol to avoid possible injury or death. Indicates an imminently hazardous situation which, if not avoided, will DANGER result in death or serious injury or... -
Page 6: Specification
PERSON OR 235 LBS. 235 LBS PERSON, GEAR PRESSURE = 4.5 psi (main chambers) MANUFACTURER: ADVANCED ELEMENTS, INC. CONCORD, CA USA 94524 MODEL AE1040 - AIRFUSION™ KAYAK THIS BOAT COMPLIES WITH NMMA STANDARDS OF EFFECT ON THE DATE OF CERTIFICATION NATIONAL MARINE MANUFACTURES ASSN. -
Page 7: Assembly/Inflating/Deflation Instruction
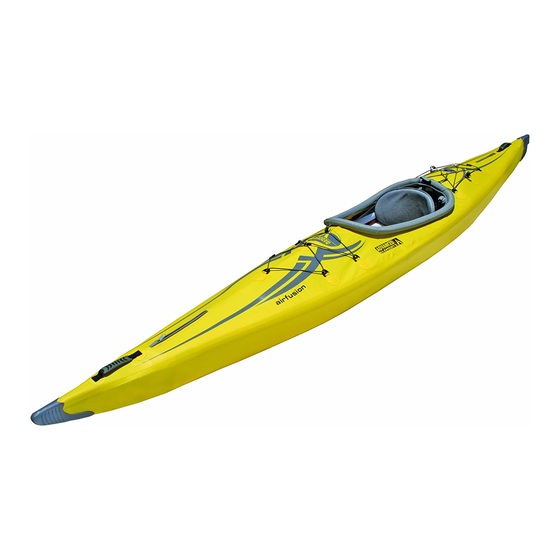
AirFusion™ Inflatable Kayak Owner’s Manual Zippered access to below deck storage compartment Bungee deck lacing Adjustable foot brace/thwart Molded Rubber end cap molded Bungee deck handle lacing Molded end cap Hybrid frame design Zipper lips 3. ASSEMBLY/INFLATING/DEFLATION INSTRUCTION 3.1 Assembly Your kayak comes from the factory pre-assembled with the Bow and Stern Ribs, and Main Inflation Chambers in place. - Page 8 Figure 1 1. Your AirFusion kayak comes direct from the factory with the Bow and Stern Ribs, as well as the main inflation tubes already installed. However, should you take your kayak apart, you will need to place the Bow and Stern Ribs into each end of the kayak and secure the bottom of them into place using the Velcro loops at the bottom position.
-
Page 9: Set Up
AirFusion™ Inflatable Kayak Owner’s Manual Main Inflation Chambers Bow Rib Stern Rib Main Inflation Chambers Outer Cover Figure 2 3.2 Set Up 1. Familiarize yourself with the different assembly parts. a. All of the assembly poles have a number marked on them at one end. b. - Page 10 Front of thwart. Face towards bow. Push button Pole #1 DETAIL A Figure 4 5. Install pole #1 into the front end of the kayak connecting it with the bottom portion of the Bow Rib. The pole should be placed on top of the foam floor and the numbered end of the pole should be at the cockpit of the kayak.
- Page 11 AirFusion™ Inflatable Kayak Owner’s Manual 7. Install pole #2 into the rear end of the kayak, connecting it with the bottom portion of the Stern Rib. The pole should be on top of the foam floor and the numbered end of the pole should be at the cockpit of the kayak.
- Page 12 poles #1 and #2 is in the middle of Locking Sleeve #3. Align the hole on Locking Sleeve #3 with the push button located on pole # 1 and snap into place. Warning: Make sure to snap Locking Sleeve #3 into place IMMEDIATLY to prevent poles #1 and #2 from springing upwards and causing any injury to you or the kayak.
- Page 13 AirFusion™ Inflatable Kayak Owner’s Manual 10. Moving to one side of the kayak, you will install poles #4 and #5. See Figure 11. Slide pole #4 into the Velcro guide loops along the main inflation chambers at the side of the kayak. The two loops you will need for this pole are at the front end of the kayak, along the side, and at the midpoint, also along the side.
-
Page 14: Understanding Your Valves
3.3 Understanding Your Valves 1. The AirFusion kayak uses the standard Boston valves and the Advanced Elements Twistlok Valve. The following figures have details on how to operate these valves. Inflate Deflate Figure 1. -
Page 15: Inflating
See Figure 1. Remove small cap and use the appropriate pump nozzle. If you own an Advanced Elements pump you should have a screw on valve adaptor; if you do not have this adaptor, you can obtain one by visiting our website at www. advancedelements.com. -
Page 16: Deflation And Break Down
then screw the adaptor down to secure it. Inflate the two bottom side chambers partially, approx 5 pumps. 2. Locate the valves for the two top side chambers. These valves operate the same as the bottom side chambers. Inflate the two chambers partially, approx 5 pumps. 3. -
Page 17: Folding
AirFusion™ Inflatable Kayak Owner’s Manual 3.6 Folding NOTICE: Reverse your pump to completely deflate all chambers. 1. Completely deflate all air chambers, remove the frame poles and thwarts, remove the seat, foam floor, and thoroughly dry out the kayak. 2. Fold in half, down the center, lengthwise. 3. -
Page 18: Guidelines For Usage
4. GUIDELINES FOR USAGE Paddlesports can be very dangerous and physically demanding. The user of this product should understand that participation in paddlesports may involve serious injury or death. Observe the following safety standards whenever using this product. The user of this product acknowledges both an understanding and an assumption of the risk involved in paddlesports. -
Page 19: Repairs
AirFusion™ Inflatable Kayak Owner’s Manual 2. Remove the Bow and Stern Ribs by first undoing the Velcro retention loops located on the interior hull of the kayak. You can then slide the ribs out through the deck zippers or through the cockpit. -
Page 20: Troubleshooting
7. TROUBLESHOOTING PROBLEM SOLUTION Check the Boston Valve and make sure that it is tightly screwed into the Does not hold air valve body. See Figure 1 in section 3.3 of this manual. while inflating. Be sure that the right pump is being used. You need a bellows foot The kayak is sagging pump or a double action hand pump. - Page 21 PADDLING NOTES: It is alway a good idea to keep nots of your paddling experiences. Your notes can serve as a reminder of what to look out for, as well as what gear to bring along, and what conditions are like. DATE TIME LOCATION...
- Page 22 NOTES:...
- Page 23 AirFusion™ Inflatable Kayak Owner’s Manual NOTES:...
- Page 24 NOTES:...
-
Page 25: Statement Of Origin
Note: If your state requires the licensing of this boat, please use the form below. If you need any assistance filling out this form, please contact Advanced Elements Customer Service Department. MANUFACTURER’S STATEMENT OF ORIGIN FOR A VESSEL SOLD IN THE STATE OF_____________________________________... -
Page 26: Declaration Of Conformity
Declaration of Conformity (according to ISO/IEC Guide 22 and EN 45014) M anufacturer’s Name: Advanced Elements, Inc. M anufacturer’s Address: P.O. Box 5128 Concord, CA 94524 d eclares, that the product: P roduct Name: AirFusion™ Kayak M odel Number (s): A E1040 to which this declaration relates, meets the essential health and safety... -
Page 27: Warranty And Registration
For warranty service, contact Advanced Elements, Inc. Advanced Elements, Inc shall inspect all warranty claims and in the event of a defect, repair or replace the defective part or entire item, at its option. The purchaser must, before return of a defective product, obtain from Advanced Elements, Inc, a return authorization number and return center address. - Page 28 If you would like a catalog of our latest products please visit our website at www.advancedelements.com or call Toll Free 866-262-9076 PLEASE COMPLETE THE OTHER SIDE OF THIS WARRANTY REGISTRATION CARD AND RETURN TO ADVANCED ELEMENTS, INC. PLACE STAMP HERE P.O. Box 5128...
Need help?
Do you have a question about the AirFusion AE1040-Y and is the answer not in the manual?
Questions and answers
What is the total weight of the bag with everything inside