Advertisement
Advertisement
Table of Contents

Related Manuals for VWR International 1310


Summary of Contents for VWR International 1310
- Page 1 ECONOMY OVENS : 1310, 1320, 1321F, ODELS 1324, 1325F, 1326, 1327F NSTALLATION PERATION ANUAL Sheldon Manufacturing Inc. P.O. Box 627 Cornelius, Oregon 97113 EMAIL: tech@Shellab.com INTERNET: http://www.Shellab.com/~Shellab 1-800-322-4897 (503) 640-3000 FAX (503) 640-1366...
-
Page 2: Table Of Contents
TABLE OF CONTENTS SECTION 1.0 RECEIVING AND INSPECTION SECTION 2.0 GRAPHIC SYMBOLS SECTION 3.0 INSTALLATION SECTION 4.0 CONTROL PANEL OVERVIEW SECTION 5.0 PRECAUTIONS SECTION 6.0 OPERATION SECTION 7.0 MAINTENANCE SECTION 8.0 TROUBLESHOOTING SECTION 9.0 PARTS LIST UNIT SPECIFICATIONS WIRE DIAGRAM REV 3/01 4861467 These units are general purpose utility ovens for professional, industrial or educational use... -
Page 3: Receiving And Inspection
Section RECEIVING AND INSPECTION Your satisfaction and safety require a complete understanding of this unit, including its proper function and operational characteristics. Read the instructions thoroughly and be sure that all operators are given adequate training before attempting to put the unit in service. -
Page 4: Graphic Symbols
Section GRAPHIC SYMBOLS Your oven is provided with a display of graphic symbols to help in identifying the use and function of the available adjustable components. This symbol, when shown, indicates that you should consult your manual for further description or discussion of a control or user item. Indicates "AC Power"... -
Page 5: Installation
Section INSTALLATION Local city, county, or other ordinances may govern the use of this equipment. If you have any questions about local requirements, please contact the appropriate local agency. Installation may be performed by the end user. Under normal circumstances this unit is intended for use indoors, at room temperatures between 5°... - Page 6 NOT USE chlorine-based bleaches or abrasive cleaners, as they will damage the ovens interior surfaces. DO NOT USE spray cleaners that might leak through openings and cracks and get on electrical parts or that may contain solvents that will harm coatings. A regular periodic cleaning is recommended. WARNING: Never clean the unit with alcohol or flammable cleaners with the unit connected to the electrical supply.
-
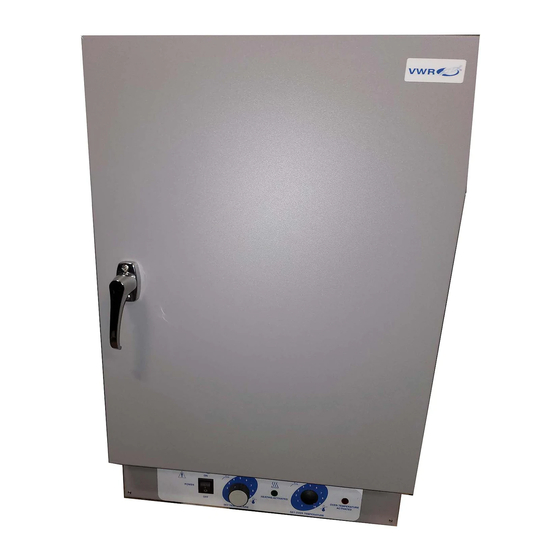
Page 7: Control Panel Overview
Section CONTROL PANEL OVERVIEW Figure 2 Power Switch: The main power I/O (on/off) switch controls all power to the oven. It must be in the I, or ON position before any systems are operational. Main Temperature Controller: Marked SET TEMPERATURE, this control is equipped with an adjustment knob and a graduated dial. - Page 8 Over Temperature light: This red pilot light is marked OVERTEMPERATURE ACTIVATED and is on when the Over Temperature Thermostat has been activated and taken control of the elements. Under normal operating conditions this pilot light should never be on.
-
Page 9: Precautions
Section PRECAUTIONS This unit has been designed with a dampered vent from the chamber. In order to work effectively and safely, some precautions will need to be taken by the operator. In most applications, the exhaust damper will need to be open during drying or degassing for best results. -
Page 10: Operation
Section OPERATION Power Supply: The power supply must be properly grounded (earthed) and correctly sized to match the unit data plate rating. The supply voltage must match the data plate voltage within 10%. If supplied with a detachable cord set, plug the female end into the inlet on the unit and the male plug into the supply. - Page 11 Figure 3...
-
Page 12: Maintenance
Section MAINTENANCE Note: Prior to any maintenance or service on this unit, disconnect service cord from the power supply. Cleaning: Clean the oven interior on a regular basis. When washing interior of unit, handle gasket carefully so as not to impair the positive seal. Clean the inside of the chamber thoroughly with a disinfectant that is appropriate for your application. -
Page 13: Troubleshooting
Section TROUBLESHOOTING TEMPERATURE Temperature too high 1/ controller set too high-see section 6.4 2/ controller failed on – call Customer Service 3/ wiring error – call Customer Service Chamber temp spikes over set point and then settles to set point Recalibrate –... - Page 14 Indicated chamber temperature unstable 1/ ±0.1 may be normal but gravity models may vary ±2.0 degrees 2/ is ambient room temperature radically changing – either door opening or room airflow from heaters or air conditioning ? – stabilize ambient conditions . 3/ it may happen if exhaust stack is 100% open –...
-
Page 15: Parts List
SECTION PARTS LIST 1310 , 1320 & 1321F Description 115V 220V Cord Set – European 1800500 Cord Set – USA 1800516 101990 Door Gasket 600002 600002 Door Handle 300142 300142 CIRCUIT BREAKER 1100505 1100505 Fan 1321F 2600502 2600502 Fan Blade 1321F... -
Page 16: Unit Specifications
PARTS LIST 1324 & 1325F Description 115V 220V Main Temperature Control 100026 100026 Over Temperature Conrol 1750615 1750615 Cord Set 1800516 101990 Door Handle 300142 300142 Heating Element 1324 9570771 9570801 Heating Element 1325F 9570777 9570804 On/Off Switch 103351 103351 Knob Main Temperature X1000771 X1000771... - Page 17 PARTS LIST 1326 & 1327F Description 115V 220V Main Temperature Control 100026 100026 Over Temperature Conrol 1750615 1750615 Cord Set 1800516 101990 Door Handle 300142 300142 Heating Element 1326 9570774 9570803 Heating Element 1327F 9570778 9570805 On/Off Switch 103351 103351 Knob Main Temperature X1000771 X1000771...
-
Page 18: Wire Diagram
WIRE DIAGRAM 1310 AND 1320 9850514... - Page 19 WIRE DIAGRAM 1324 AND 1325F 9850514...
- Page 20 WIRING DIAGRAM 1321,1326,1327F...
Need help?
Do you have a question about the 1310 and is the answer not in the manual?
Questions and answers