Table of Contents

Related Manuals for Nikai NDVD1073VR

Summary of Contents for Nikai NDVD1073VR
- Page 1 DVD Player + Video Cassette Recorder NDVD1073VR Please read this manual carefully before connecting your DVD+VCR and operating it for the first time. Keep the manual in a safe place for future reference. INSTRUCTION MANUAL P/N: 97P95600D0-...
-
Page 2: Table Of Contents
Contents DVD Operation Product Information Playing a desired scene ........... 37 Important Safeguards ..........2 Confirming the current PLAYING TIME .... 41 Advantages of This Product Are ......5 Selecting an AUDIO language and SUBTITLE Read Carefully before Using ........6 language.............. -
Page 3: Important Safeguards
Important Safeguards Important Safeguards The lightning flash with arrowhead symbol, CAUTION This set has been designed and manufactured to assure within an equilateral triangle, is intended to personal safety. Improper use can result in electric A unit and cart combination should be moved RISK OF ELECTRIC SHOCK alert the user to the presence of uninsulated DO NOT OPEN... -
Page 4: Advantages Of This Product Are
Important Safeguards Advantages of This Product Are ..13 LIGHTNING those controls that are covered by the operating • DVD, VCD, CD, CD-R(MP3), CD-RW, VHS • Multi Audio function (DVD) For added protection for this unit during a instructions. Improper adjustment of other lightning storm, or when it is left unattended and controls may result in damage and will often •... -
Page 5: Read Carefully Before Using
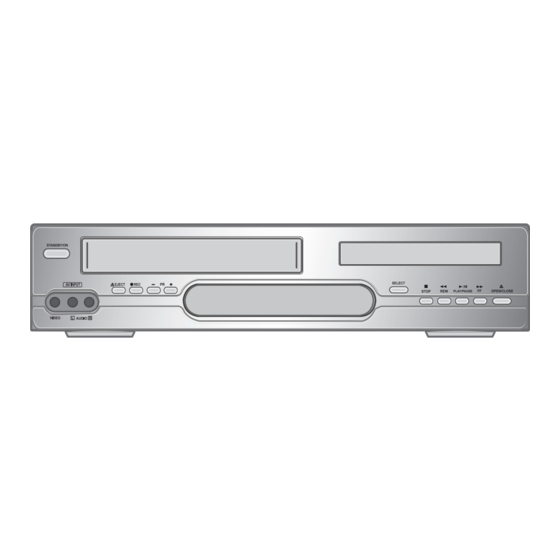
Read Carefully before Using Identification of Controls Cautions in use of DVD-Video player are described and maintenance every 1,000 hours of use by Main body (front panel) below. technical engineers. • For checking, contact your dealer or your nearest Please read carefully before using a DVD-Video player. service center. - Page 6 Identification of Controls Identification of Controls Main body (Rear Panel) Operation Display Window & - RECORDING MODE - Timer Recording Standby Timer Recording Error Recording in Progress ! POWER CORD % A/V OUTPUT Jack It is a jack for supplying power to the unit. ^ A/V INPUT Jack Timer Recording in Connect to outlet in a wall.
-
Page 7: Remote Control
Identification of Controls Remote Control [DVD] OPEN/CLOSE button, [VCR] EJECT button @ VCR SELECT button Accessories [DVD, VCR] NUMBER button, [VCR] TRACKING -/+ button $ SYSTEM button [VCR] `This button is not available for this [DVD] Activates Progressive Scan button Instruction Remote control 2 Batteries... -
Page 8: Connecting Up Your Player With Rf Lead
Connecting up your player with RF lead Before you start, unplug all the equipment from the mains supply. Before you start, unplug all the equipment from the mains supply. (Option 1) - How to connect with RF lead (Option 2) - How to Connect with Audio/Video jack REAR PANEL OF TV REAR PANEL OF DVD-VIDEO INPUT 1... -
Page 9: Connecting With Other Vcr Or Camcorder
Connecting with Other VCR or Camcorder How to Connect with Jack in Front Panel ¡ Connect AUDIO/VIDEO OUT jack in Camcorder(or playback video) to AUDIO/VIDEO IN jack REAR PANEL OF PLAYBACK VCR(CAMCORDER) FRONT PANEL OF DVD-VIDEO in rear panel (or front panel) of DVD-Video with connecting cable. ™... -
Page 10: Connecting With Audio
Connecting with Audio Connecting to a television with Component jack and a Dolby Digital Amp. How to Connect with Stereo Unit such as Audio Use in COMPONENT In jack attached in TV or amp supporting Dolby Digital. REAR PANEL OF STEREO UNIT REAR PANEL OF DVD-VIDEO How to Connect REAR PANEL OF DVD-VIDEO... -
Page 11: Initial Installation
Initial Installation Switch the TV on. You can also start "AUTO SEARCH" in the SETUP "PR PRESET" "AUTO SEARCH". To tune in new stations (manual tuning) and to enter station names see page 27-28. If other stations are positioned on near the current RF OUTPUT Setting up the player RF OUTPUT SET CH, the guide message appears automatically. -
Page 12: Output Select
Setting time and date Output Select Setting time and date To Select DVD Press [DVD] button. Press [VCR] button on the remote control to change into VCR Mode and follow the procedure below. If DVD mode is correctly selected, DVD on the operation display window is lit. -
Page 13: Dvd Playback
VCR Playback DVD Playback Press [ ] button to power on. Press [ ] button to power on. Press [VCR] button of remote control to change into VCR mode. Press [DVD] button of REMOTE to change into DVD mode. Insert the desired tape. Press [OPEN/CLOSE] button to open the disc tray. -
Page 14: Recording
Recording Recording To Record With VCR To Copy From DVD To Videotape Press [ ] button to power on. • Press [VCR] button of remote control to change into VCR mode. Insert the desired DVD disc. When it is a DVD disc with copy protect function, you can’t copy it. Insert a recordable tape. -
Page 15: Tuning In New Stations
Recording Tuning in New Stations The TV and player are switched on. To see the picture from your player, press the input or AV (Audio/Video) button on the TV. One Touch timer Recording (OTR) Tuning When your urgent business happens suddenly in watching TV or you want to record the current TV program for the desired time, follow the procedures below. - Page 16 Tuning in New Stations Tuning in New Stations Station names Sorting programme locations If the location numbers used for programmes stored in your TV and player are different, you can change them on If your player is showing no station name or is showing a station name incorrectly, you can correct the player.
-
Page 17: Timer Recording
Timer Recording Timer Recording For timer recordings, clock, date, and stations must be set correctly. Load a cassette with its safety tab in place and with sufficient free space for the recording. Normal timer recording Timer Review – changing and erasing Press "SETUP", choose "TIMER PROGRAM". -
Page 18: More Functions
More Functions More Functions The counter counts in real time from the point you load the cassette. This does not have to be its Resetting the counter to zero beginning! The counter does not count unrecorded parts of the tape. If you rewind beyond the zero position, the counter counts in negative values (e.g. -
Page 19: Connections And Assembling
More Functions Connections and Assembling The player machine records the complete sound signal transmitted by the TV station. If you are using a RCA cable, select the AV input on the TV to see the picture from the player. On the mono VCR, you will hear the normal mono sound. If you are not using a RCA cable, select the button number on the TV reserved for video input to see the picture from the player. -
Page 20: Playing A Desired Scene
Connections and Assembling Playing a desired scene To skip scenes in a disc Assembling Should you wish to assemble your own film, from camcorder footage for example, use the assembly technique To move to next chapter (or track), press [√√ NEXT] button. for smooth edit points: The current chapter (or track) moves to the next chapter (or track). -
Page 21: Repeating A Defined Period From A To B
Playing desired scene Playing desired scene Repeating a defined period Searching DVD with a title number, chapter number or a time If you want to search with a title number or Each time you press [REPEAT] button in playback mode, repeat playback starts as below. TT 01/02 CH chapter number, press the [SEARCH] button once. -
Page 22: Confirming The Current Playing Time
Playing desired scene Confirming the current PLAYING TIME Searching VCD with a track number, disc time or track time Confirming the current playing time of DVD disc If you want to search wth a disc time, press D I S C G O T O : - -: - - While in playing, press [DISPLAY] button. -
Page 23: Selecting An Audio Language And Subtitle Language
Confirming the current PLAYING TIME Selecting an AUDIO language and SUBTITLE language Confirming the current playing time of VCD disc While in playing, press [DISPLAY] button. Selecting an audio language It shows the current playing time. The user may select an audio language and subtitle language if a disc includes Multi-language. Each time you press [DISPLAY] button in playback mode, DISPLAY is change as below. -
Page 24: Selecting Zoom And Multi Angle
Selecting ZOOM and Multi Angle About MP3 and JPG discs Using a zoom function Playing a disc containing MP3 files The user can enlarge the current screen about 2 , 3 or 4 times. This unit will play MP3 files recorded on CD-R and CD-RW discs. Keep pressing [ZOOM] button till the preferred zoom appears. - Page 25 About MP3 and JPG discs About MP3 and JPG discs Playing a disc containing JPG (PHOTO) files The ability of this unit to read MP3 discs is dependent on the followings: This unit will play JPG files recorded on CD-R and CD-RW discs. •...
-
Page 26: Mode
Language Setup Displaying menus in a disc To display menus in a disc A user can set OSD language, Audio, Subtitle and Disc Menu. If a disc includes menus, the user may use them. While STOP or RESUME STOP, press [SETUP] OSD LANGUAGE ENGLISH LANGUAGE... -
Page 27: Video Setup
Language Setup Video Setup A user can set up a connected TV condition and screen. Selecting Disc Menu language. OSD LANGUAGE ENGLISH LANGUAGE FRENCH AUDIO While STOP or RESUME STOP, press Set your preferred DISC MENU language with SPANISH SUBTITLE TV ASPECT 4:3 LB VIDEO... -
Page 28: Audio Setup
Audio Setup Others Setup A user may select audio menu according to a user’s speaker set. While STOP or RESUME STOP, press [SETUP] LANGUAGE button. SCREEN SAVER While STOP or Resume STOP, press RESET DEFAULTS VIDEO DIGITAL OUT BITSTREAM LANGUAGE 8 ADULT [SETUP] button. -
Page 29: About Dvd
Others Setup About DVD Playable Disc Changing a password. • DVD, Video CD(Version 1.1, 2.0), S-VCD and Audio CD LANGUAGE To change your password, move the cursor SCREEN SAVER DEFAULTS to “PASSWORD” and press [√]. VIDEO Disc type Playable Restriction PARENTAL PASSWORD CHANGE... -
Page 30: Basic Information About Vcr And Videotape
Basic information about VCR and Videotape About DVD This is recorded on a Video CD 2.0, Video CD 3.0 and SVCD. The scenes or information to be viewed (or listened to) can be selected interactively with the TV monitor by looking at the menu shown on the TV Terms related with VCR monitor. -
Page 31: Trouble Shooting (Vcr)
Trouble Shooting (VCR) Trouble Shooting (VCR) Symptom Checks Symptom Checks • “Power On” does not work. Please check whether a power plug is inserted in an electric outlet. • Recording a TV program is For recording, you should use videotape with a tab. impossible. -
Page 32: Trouble Shooting (Dvd)
Trouble Shooting (DVD) Specifications Power 200~240V, 50/60Hz Symptom Checks Consumed electricity Weight 4.6kg • The recorder does not play. If a DVD is from overseas, it may not be played. Please check a DVD’s region code whether it has the relative region code 2 or All. Dimension (W x H x D) 435mmx93mmx255mm(Without Foot), 435mmx98mmx255mm(With Foot) Please check whether a DVD is inserted in a right direction. - Page 33 QUICK START GUIDE FOR SORTING CHANNELS ON THE DVD COMBO Once the ‘Auto Set’ function has been completed the On Screen Display will show a list of the channels which it has found, displayed in the order it found them. It is unlikely, that they will be in the correct oder ie.
Need help?
Do you have a question about the NDVD1073VR and is the answer not in the manual?
Questions and answers