Table of Contents

Related Manuals for Oki C5450


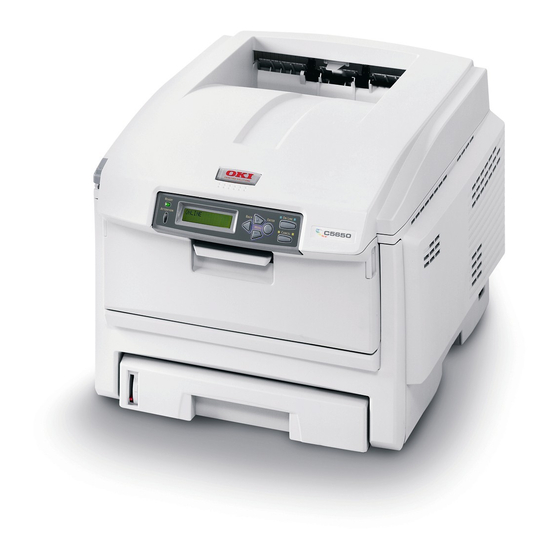
Summary of Contents for Oki C5450
- Page 1 C5450 User’s Guide...
-
Page 2: Preface
While all reasonable efforts have been made to make this document as accurate and helpful as possible, we make no warranty of any kind, expressed or implied, as to the accuracy or completeness of the information contained herein. The most up-to-date drivers and manuals are available from the Oki Europe website: http://www.okieurope.com Copyright ©... -
Page 3: Table Of Contents
ONTENTS Preface ........2 Notes, Cautions and Warnings ....6 Introduction . - Page 4 Colour Printing ......38 Choosing a colour matching method..38 Matching photographic images .
- Page 5 Index ....... . . 135 Oki contact details ..... . . 137...
-
Page 6: Notes, Cautions And Warnings
OTES AUTIONS AND ARNINGS NOTE A note appears in this manual like this. A note provides additional information to supplement the main text which may help you to use and understand the product. CAUTION! A caution appears in this manual like this. A caution provides additional information which, if ignored, may result in equipment malfunction or damage. -
Page 7: Introduction
Photo Enhance mode to improve printouts of photographic images (PCL driver only); > “Ask Oki” – a brand new, user-friendly function that gives a direct link from your printer driver screen to a dedicated web site specific to the exact model you are using. This is where you’ll find all the advice, assistance and support... -
Page 8: Printer Overview
> Additional paper tray for loading a further 530 sheets to minimise operator intervention, or different paper stocks for letterhead stationery, alternative paper sizes or other print media. > Additional memory allows printing of more complex pages, including two-sided and booklet pages with the optional duplex unit. -
Page 9: Rear View
The LCD display language can be changed to show any of 14 different languages. (See “Changing the display language” on page 10.) EAR VIEW This view shows the connection panel, the rear output stacker and the location of the optional duplex (two-sided printing) unit. 5. -
Page 10: Changing The Display Language
HANGING THE DISPLAY LANGUAGE The language used by your printer for display messages and for report printing can be changed quickly and easily as follows: ON LINE READY ENTER BACK ATTENTION MENU CANCEL Press the + key repeatedly to access the System Configuration Menu. -
Page 11: Paper Recommendations
Window envelopes are not suitable. Transparencies should be of the type designed for use in copiers and laser printers. We strongly recommend Oki Printing Solutions transparencies (Order No. 01074101). In particular, avoid office transparencies designed for use by hand with marker pens. -
Page 12: Cassette Trays
ASSETTE TRAYS SIZE DIMENSIONS WEIGHT (G/M²) A6 (Tray 1 105 x 148mm only) Light 64-74g/m² 148 x 210mm Medium 75-90g/m² 182 x 257mm Heavy 91-120g/ Executive 184.2 x 266.7mm m² 210 x 297mm Ultra heavy121-176g/ Letter 215.9 x 279.4mm m² Legal 13in. -
Page 13: Face Down Stacker
ACE DOWN STACKER The face down stacker on the top of the printer can hold up to 250 sheets of 80g/m² standard paper, and can handle paper stocks up to 176g/m². Pages printed in reading order (page 1 first) will be sorted in reading order (last page on top, facing down). -
Page 14: Loading Paper
OADING PAPER ASSETTE TRAYS Remove the paper tray from the printer. Fan the paper to be loaded at the edges (1) and in the middle (2) to ensure that all sheets are properly separated, then tap the edges of the stack on a flat surface to make it flush again (3). - Page 15 Load letter headed paper face down and top edge towards the front of the printer, as shown. Adjust the rear stopper (1) and paper guides (2) to the size of paper being used. To prevent paper jams: • Do not leave space between the paper and the guides and rear stopper.
- Page 16 printer). Stacking capacity is approximately 250 sheets, depending on paper weight. For face up printing, make sure the face up (rear) stacker (3) is open and the paper support (4) is extended. Paper is stacked in reverse order and tray capacity is approximately 100 sheets, depending on paper weight.
-
Page 17: Multi Purpose Tray
ULTI PURPOSE TRAY Open the multi purpose tray and press gently down on the paper platform (1) to ensure it is latched down. Load the paper and adjust the paper guides (2) to the size of paper being used. • For single-sided printing on headed paper load the paper into the multi purpose tray with pre-printed side up and top edge into the printer. -
Page 18: Printer Settings In Windows
RINTER SETTINGS IN INDOWS Your printer’s operator panel menus provide access to many options. The Windows printer driver also contains settings for many of these items. Where items in the printer driver are the same as those in the operator panel menus, and you print documents from Windows, the settings in the Windows printer driver will override those items in the operator panel menus. -
Page 19: Postscript Emulation
CRIPT EMULATION Page orientation sets portrait (tall) or landscape (wide) page orientation. The “rotated” rotates the paper through 90 degrees anti-clockwise. When printing double sided pages (duplex unit required). You can flip the paper either on its long edge or short edge. Pages can be printed in forward or reverse order. -
Page 20: Pcl Emulation
EMULATION When you click the Properties button from your application’s Print dialogue, the driver window opens to allow you to specify your printing preferences for this document. Paper size should be the same as the page size of your document (unless you wish to scale the printout to fit another size), and should also be the same as the size... -
Page 21: Secure Printing Feature
ECURE PRINTING FEATURE With this feature you can send confidential documents to print and have them stored in the printer until you are ready to print them. Documents sent in this way are protected by a PIN (personal identification number), which must be entered before they will print. -
Page 22: Printing Secure Documents
The document will be sent to the printer’s hard disk but will not print until you request it. RINTING SECURE DOCUMENTS Secure documents stored on the printer’s hard disk may be printed in either of two ways: • From the printer’s operator panel; or…... - Page 23 Printing from your PC desktop If you have installed the Storage Device Manager software from the supplied CD, you can also print secure documents directly from your PC desktop. You might do this, perhaps, when the office is empty and your confidential documents can safely be printed remotely.
-
Page 24: Proof And Print Feature
ROOF AND PRINT FEATURE This feature allows you to send multiple copies of a document to print but only print the first copy so that you can check the output quality before printing the rest. NOTE This feature requires the optional internal hard disk in the printer. -
Page 25: Printing The Remaining Copies
RINTING THE REMAINING COPIES Documents stored on the printer’s hard disk may be printed in either of two ways: • From the printer’s operator panel; or… • From your PC desktop, using the Storage Device Manager utility supplied on CD1 (Drivers and Utilities) with the printer. - Page 26 Printing from your PC desktop If you have installed the Storage Device Manager software from the supplied CD, you can also print the remaining copies directly from your PC desktop. From the Windows Start menu, run Storage Device Manager. If necessary, use the SDM Printer Discovery window to find all available printers on your network or connected to your computer.
-
Page 27: Permanent Print Documents
ERMANENT PRINT DOCUMENTS With this feature you can create standard documents that you often need to print and store them on your printer’s internal hard disk. You can then print them at any time without having to send them again from your computer. NOTE This feature requires the optional internal hard disk. -
Page 28: Printing Stored Documents
RINTING STORED DOCUMENTS Documents stored on the printer’s hard disk may be printed in either of two ways: • From the printer’s operator panel; or… • From your PC desktop, using the Storage Device Manager utility supplied on CD1 (Drivers and Utilities) with the printer. - Page 29 From the Windows Start menu, run Storage Device Manager. If necessary, use the SDM Printer Discovery window to find all available printers on your network or connected to your computer. Select the icon for the printer holding your secure documents. From the Printers menu, choose HDD Print Jobs.
-
Page 30: Windows 9X/Me Differences> 30
INDOWS IFFERENCES Screen presentations of Windows 9x/Me, together with some procedures, are significantly different from other versions of Windows (2000/XP etc.). This Chapter deals mainly with these variations. If necessary, reference should be made to the relevant subject or on-line help for more information. RINTER SETTINGS IN INDOWS CRIPT... - Page 31 The window which opens when you click Properties depends on which printer driver has been installed. The PostScript driver offers different choices to the PCL driver. PostScript Emulation Paper size should be the same as the page size of your document (unless you wish to scale the printout to fit another size), and...
- Page 32 PCL Emulation When you click the Properties button from your application’s Print dialogue, the driver window opens to allow you to specify your printing preferences for this document. Paper size should be the same as the page size of your document (unless you wish to scale the printout to fit another...
-
Page 33: Secure Printing Feature
ECURE PRINTING FEATURE With this feature you can send confidential documents to print and have them stored in the printer until you are ready to print them. Documents sent in this way are protected by a PIN (personal identification number), which must be entered before they will print. - Page 34 PostScript Emulation In the driver window, on the Device Options tab, select Secure Print (1). In Printer Features, select Password 1 and select a number from 0 - 9 in the Change Setting for: drop-down box. Repeat for passwords 2 - 4. Click OK again to close the driver window, and again to close your application’s Print dialogue.
-
Page 35: Proof And Print Feature
ROOF AND PRINT FEATURE This feature allows you to send multiple copies of a document to print but only print the first copy so that you can check the output quality before printing the rest. NOTE With both PS and PCL drivers, this feature requires the optional internal hard disk to be fitted and enabled in the Start/Settings/Printers/Properties/Device options dialogue. -
Page 36: Store To Hard Disk
TORE TO HARD DISK With this feature you can create standard documents that you often need to print and store them on your printer’s internal hard disk. You can then print them at any time without having to send them again from your computer. NOTE With both PS and PCL drivers, this feature requires the optional internal hard disk to be fitted and enabled in the... - Page 37 PostScript Emulation In the driver window, on the Device Options tab, select Store to HDD (1). In Printer Features, select Password 1 (1 above) and select a number from 0 - 9 in the Change Setting for: drop-down box (2 above). Repeat for passwords 2 - 4. NOTE A “Password”...
-
Page 38: Colour Printing
RGB. Typically CMYK documents are only supported in professional Desktop Publishing and Graphics applications. ATCHING PHOTOGRAPHIC IMAGES RGB only Oki Colour Matching is a generally a good choice. Select a matching method appropriate to your monitor. Windows 9x/Me Differences> 38... -
Page 39: Matching Specific Colours
Adobe Photoshop, you may be able to use Soft-Proofing to simulate the printed image on your monitor. To do this, you can use the ICC-Profiles provided by Oki, and then print using the ICC profiles as the Print Space (or Output space). -
Page 40: Pcl Driver
PCL D RIVER CCESSING THE COLOUR MATCHING OPTIONS The Colour Matching options in the printer driver can be used to help match your printed colours to the ones displayed on your monitor or from some other source, such as a digital camera. The PCL driver’s colour options are only designed to work with RGB data. -
Page 41: Setting The Colour Matching Options
ETTING THE COLOUR MATCHING OPTIONS On the Colour tab select Advanced (1) colour mode. Select Manual (2) for Colour Matching. Choose from the available options: Monitor (6500k) Perceptual Optimised for printing daylight photographs. Monitor (6500k) Vivid Optimised for printing bright colours. Good for office graphics. -
Page 42: Using The Colour Swatch Feature
SING THE COLOUR SWATCH FEATURE The Colour Swatch function prints charts which contain a range of sample colours. Note that this is not the full range of colours that the printer can produce. Listed on each sample colour are the corresponding RGB (Red, Green, Blue) values. -
Page 43: Postscript Driver
DATA Oki Colour Matching PostScript Colour Matching CMYK Ink Simulation Windows ICM Matching Oki Colour Matching This is Oki’s proprietary colour matching system, and affects RGB data only. > Perceptual settings are best for printing photographic images. > Vivid or Digital Camera settings produce brightest colours. -
Page 44: Postscript Colour Matching
Digital Camera Optimised for printing photographs taken with a digital camera. This tends to produce prints with lighter and brighter colours. For some photographs, other settings may be better depending on the subjects and the conditions under which they were taken. sRGB Optimised for matching specific colours, such as a company logo colour. -
Page 45: Cmyk Ink Simulation
Best for printing solid colours and tints, such as Company logos etc. Matches colours common to both devices exactly, and clips the “out of gamut” colours to their nearest printed equivalent. Tries to print white as it appears on screen. The white of a monitor is often very different from paper white, so this may result in colour casts, especially in the lighter areas of an image. - Page 46 Under “Colour Profiles currently associated with this printer”, you should see the names of profiles that match your printer model. If you do not see any profiles associated with the driver, click “Add…” and locate the ICC profiles for your printer. Windows ICM uses the information in these profiles to convert colours in your documents to colours that the printer can reproduce.
-
Page 47: Overlays And Macros
VERLAYS AND MACROS NOTE PostScript overlays are not available for Windows 95/98/Me. REATING OVERLAYS Three steps are required to create an overlay: Create the form data using your own application software and print it to a printer (.PRN) file. Use the Storage Device Manager utility software supplied on CD with your printer to create a “project file,”... - Page 48 Click OK, and when prompted for a print file name, enter a meaningful name with the extension .PRN. Close your application. Step 2: Create and download macros NOTE Ensure that the Storage Device Manager has been installed (on the Printer Drivers CD, “Software Utilities”). From the Windows Start/Programs/Okidata menu, start Storage Device Manager (SDM) and allow SDM to discover the printer.
- Page 49 The project window will display one .BIN file for each printer file added. Make a careful note of the name and ID number for each of the files. You will need them later. If you wish to edit the names or ID numbers, double-click the file entry and edit the details.
- Page 50 Step 3: Defining overlays This is the final step before the new overlays are ready for use. Open the Printers window via the Start menu or the Windows Control Panel. Right-click on the relevant PCL printer icon and choose Printing Preferences from the pop-up menu. On the Job Options tab, click the Overlay button.
-
Page 51: Installing Upgrades
The new overlays will now appear in the Defined Overlays list in the printer properties window. When done, click OK to close the printing preferences window. Your new overlays are now ready and available to be used for any future documents you wish. NSTALLING UPGRADES DJUSTING INDOWS PRINTER DRIVERS... - Page 52 PostScript driver This driver must be adjusted for any upgrade just installed. Open the Printers window via the Start Menu or from the Windows Control Panel. Right-click the printer icon for this printer, and choose Properties from the pop-up menu. On the Device Settings tab, select the upgrade you have just installed from the list of...
-
Page 53: Colour Printing
OLOUR RINTING The printer drivers supplied with your printer provide several controls for changing the colour output. For general use the automatic settings will suffice, providing reasonable default settings that will produce good results for most documents. Many applications have their own colour settings, and these may override the settings in the printer driver. - Page 54 viewed standing next to a sunlit window, compared to how they look under standard office fluorescent lighting. Printer driver colour settings The driver settings for manual colour can change the appearance of a print. There are several options available to help match the printed colours with those displayed on screen.
-
Page 55: Tips For Printing In Colour
IPS FOR PRINTING IN COLOUR Your printer driver contains several different ways to help match the colour on your screen to the colour produced by your printer. You will get best results by choosing a colour matching method appropriate to the type of document you are printing. Please note that these tips are for guidance only. - Page 56 Printing specific colours (for example a company logo) Use the sRGB setting. If you are having problems with specific Office palette colours, the Colour Correct Utility or Colour Swatch Utility may help. Adjusting the brightness or intensity of a print If the print is too light/dark, you can use the Brightness control to adjust it.
-
Page 57: Postscript Driver
The PostScript driver is designed to work with either RGB or CMYK data. Printing photographic images RGB images: Select Oki Colour Matching and use the Monitor (6500k) Perceptual setting. If the colours look too dull, try the Monitor (6500k) Vivid or Digital Camera settings. -
Page 58: Pcl Driver
PCL D RIVER CCESSING THE COLOUR MATCHING OPTIONS The Colour Matching options in the printer driver can be used to help match your printed colours to the ones displayed on your monitor or from some other source, such as a digital camera. The PCL driver’s colour options are only designed to work with RGB data. -
Page 59: Setting The Colour Matching Options
ETTING THE COLOUR MATCHING OPTIONS On the Colour tab select Advanced for colour matching. Select Manual and choose from the available options: Monitor (6500k) Perceptual Optimised for printing photographs. Colours are printed with emphasis on saturation. Monitor (6500k) Vivid Optimised for printing photographs, but with even more saturated colours than the Monitor (6500k) Perceptual setting. -
Page 60: Using The Colour Swatch Feature
SING THE COLOUR SWATCH FEATURE To use the Colour Swatch feature, you must install the Colour Swatch Utility. This is supplied on the CD-ROM that was supplied with your printer. The colour swatch function prints charts which contain a range of sample colours. -
Page 61: Postscript Driver
Windows ICM Matching Using ICC Profiles 1. Not Windows NT 4. 2. Not Windows 95/98/Me Oki Colour Matching This is Oki’s proprietary colour matching system, and affects RGB data only. > Perceptual settings are best for printing photographic images. >... -
Page 62: Postscript Colour Matching
Monitor (9300k) Optimised for printing graphics from applications such as Microsoft Office. Colours are printed with emphasis on Lightness. Digital Camera Optimised for printing photographs taken with a digital camera. Your results will vary depending on the subject and the conditions under which the photograph was taken. -
Page 63: Cmyk Ink Simulation
The rendering intents that the printer driver provides are listed below: > Perceptual Best choice for printing photographs. Compresses the source gamut into the printer's gamut whilst maintaining the overall appearance of an image. This may change the overall appearance of an image as all the colours are shifted together. -
Page 64: Windows Icm Colour Matching
INDOWS COLOUR MATCHING Windows 98, Me, 2000 and XP only. Affects RGB data only. ICM is the colour management system built into Windows. Windows ICM uses ICC profiles for your monitor and printer; these profiles describe the colours that your device is capable of reproducing. -
Page 65: Using The Colour Correct Utility
SING THE OLOUR ORRECT TILITY The Oki Colour Correct Utility is provided on your printer driver CD-ROM. You must install it separately since it is not installed along with the printer driver. The Colour Correct utility has the following features: >... -
Page 66: Menu Functions
ENU FUNCTIONS This sections lists the menus accessed via the controls on the printer’s operator panel and displayed in the LCD window. It should be noted that many of these settings can be, and often are, overridden by settings in the Windows printer drivers. However, several of the driver settings can be left at “Printer Setting”, which will then default to the settings entered in these printer menus. -
Page 67: Print Jobs Menu
RINT JOBS MENU This menu only appears when the hard disk drive is installed. It is used for printing of documents stored on the internal hard disk. These will be stored using either the secure printing feature or the proof and print feature. Please refer to these features elsewhere in this manual for instructions on how to use. -
Page 68: Shutdown Menu
HUTDOWN MENU This menu only appears if the hard disk drive is installed. This item should always be selected before switching the printer off, to ensure that no hard disk data is lost. SHUTDOWN MENU ITEM SETTIN EXPLANATION SHUTDOWN EXECUTE Performs controlled shutdown of the printer, START ensuring that all files on the internal hard disk are closed before power is turned off. - Page 69 PRINT MENU ITEM SETTINGS EXPLANATION MP TRAY USAGE DO NOT USE If a document to be printed demands WHEN a paper size not installed in the MISMATCH selected tray, the printer can automatically feed from the multi purpose tray instead. If this function is not enabled, the printer will stop and request the correct size of paper to be loaded.
- Page 70 PRINT MENU ITEM SETTINGS EXPLANATION MONO-PRINT AUTO SPEED If the first page of a print job is black SPEED and white, the printer runs at 20ppm (pages per minute). When a colour page is detected the printer slows down to 16ppm for the rest of that job.
- Page 71 PRINT MENU ITEM SETTINGS EXPLANATION LINES PER PAGE 5-64-128 Sets the number of lines of text per page when raw text is received from systems other than Windows. The default for A4 portrait is 65, and for Letter is 60. EDIT SIZE Sets the size of the printable page CASSETTE SIZE...
-
Page 72: Media Menu
EDIA MENU This menu provides adjustment to suit a wide range of print media. MEDIA MENU ITEM SETTINGS EXPLANATION TRAY1 A4 / A5 / A6 / Selects the size of paper loaded in PAPERSIZE Tray 1 (upper tray if both trays LEGAL14 installed). - Page 73 MEDIA MENU ITEM SETTINGS EXPLANATION TRAY2 LIGHT (64-74g/ Adjusts the printer for the weight of MEDIAWEIGHT m²) paper stock loaded in thus tray. MEDIUM (75- 90g/m²) HEAVY (91- 176g/m²) MPT PAPERSIZE LETTER Selects the size of paper to be fed EXECUTIVE from the multi purpose tray.
- Page 74 MEDIA MENU ITEM SETTINGS EXPLANATION Y-DIMENSION 148-297-1200 Selects the length of paper defined MILLIMETRE by the “Custom” settings referred to in the foregoing PAPER SIZE settings. Note that media of up to 1200mm in length can be fed from the multi purpose tray for banner printing.
-
Page 75: Colour Menu
OLOUR MENU The printer automatically adjusts colour balance and density at appropriate intervals, optimising the printed output for bright white paper viewed in natural daylight conditions. The items on this menu provide a means of changing the default settings for special or particularly difficult print jobs. - Page 76 COLOUR MENU ITEM SETTINGS EXPLANATION C DARKNESS -3~0~+3 Adjusts darkness of each colour M DARKNESS -3~0~+3 component (cyan, magenta, yellow Y DARKNESS -3~0~+3 and black). Normal setting is 0. K DARKNESS -3~0~+3 AUTO EXECUTE Performs automatic colour REGISTRATION registration adjustment. Normally this is done on power on and when the top cover is opened and then closed.
-
Page 77: System Configuration Menu
YSTEM CONFIGURATION MENU This menu adjusts general printer settings to suit the way you prefer to work. SYSTEM CONFIGURATION MENU ITEMS SETTINGS EXPLANATION POW SAVE TIME 5 Adjusts the idling time before the printer automatically switches into power saving mode. In this mode power consumption is reduced to a low level required to just keep the printer operating and ready to... - Page 78 SYSTEM CONFIGURATION MENU ITEMS SETTINGS EXPLANATION WAIT TIMEOUT 5~40~300 Specifies how many seconds the printer will wait when received data pauses before forcing a page eject. In PostScript Emulation mode the job will be cancelled if timeout occurs. LOW TONER Specifies whether the printer should CONTINUE STOP...
-
Page 79: Pcl Emulation
EMULATION This menu controls settings effective when the printer is operating in PCL emulation mode. PCL EMULATION ITEM SETTINGS EXPLANATION Font Source RESIDENT / DIMM0 / Specifies the location of the PCL DIMM1 / default font. Normally this will be DOWNLOADED INTERNAL unless additional fonts are installed in the expansion ROM... - Page 80 PCL EMULATION ITEM SETTINGS EXPLANATION SYMBOL SET PC-8 / PC-8 Dan/Nor PCL symbol set. If the font source / PC-8 TK / PC-775 and number are changed to one / PC-850 / PC-852 / which does not support the PC-855 / PC-857 TK selected symbol set, this must be / PC-858 / PC-866 / changed to an available symbol set...
- Page 81 PCL EMULATION ITEM SETTINGS EXPLANATION SYMBOL SET Math-8 / MC Text / (continued) MS Publish / PC Ext D/N / PC Ext US / PC Set1 / PC Set2 D/N / PC Set2 US / USPSZIP / Bulgarian / CWI Hung / DeskTop / German / Greek- 437 / Greek-437 Cy...
-
Page 82: Parallel Menu
ARALLEL MENU This menu controls the operation of the printer’s Centronics compatible (IEEE-1284) data interface. PARALLEL MENU ITEM SETTINGS EXPLANATION PARALLEL ENABLE / Enables or disables operation of this DISABLE port. BI-DIRECTION ENABLE / Enables or disables bidirectional DISABLE functionality of this port. ENABLE / Enables or disables ECP mode. -
Page 83: Network Menu
ETWORK MENU This menu controls the operation of the printer’s 10Base-T/ 100Base-TX network interface. NETWORK MENU ITEM SETTINGS EXPLANATION TCP/IP ENABLE / Enables or disables this network DISABLE protocol. NETBEUI ENABLE / Enables or disables this network DISABLE protocol. NETWARE ENABLE / Enables or disables this network DISABLE... -
Page 84: Maintenance Menu
NETWORK MENU ITEM SETTINGS EXPLANATION NORMAL / SMALL Selects network size. HUB LINK Sets full or half duplex for AUTO NEGOTIATE SETTING 100BASE-TX communication via a network hub. FULL 100BASE-TX HALF 10BASE-T FULL 10BASE-T HALF AINTENANCE MENU This menu provides access to various printer maintenance functions. -
Page 85: Usage Menu
SAGE MENU This menu is for information only, and provides an indication of total usage of the printer and the expected life left in its consumable items. This is particularly useful if you do not have a full set of replacement consumables to hand and you need to know how soon you will need them. -
Page 86: Overlays And Macros
VERLAYS AND ACROS HAT ARE OVERLAYS AND MACROS If you would like to print on special stationery, such as forms and letterhead, but do not want to use pre-printed stationery, you can create your own using these advanced features. You can use PostScript overlays to generate all your special stationery and store it in the printer for use whenever you need it. -
Page 87: Creating Postscript Overlays
REATING CRIPT OVERLAYS Three steps are required to create an overlay: Create the form data using your own application software and print it to a printer (.PRN) file. Use the Storage Device Manager utility software supplied on CD with your printer to create a “project file,” import the .PRN file(s), and download the generated filter (.HST) file to the printer. -
Page 88: Create And Download The Project
On the Overlay tab, choose Create Form from the drop-down list (4). Click OK to close the Document Properties window. Click OK again to close the Print dialogue. When prompted for a print file name, enter a meaningful name with the extension .PRN. Close your application. -
Page 89: Test Printing The Overlay
Choose Projects→Save Project and enter a meaningful name (e.g. “Letter Stationery”) so that you can recognise it later if you want to modify it. Choose Projects→Send Project Files to Printer to download the project to the printer. If you have a hard disk in the printer, SDM will automatically download files to it. - Page 90 In the Define Overlays window, enter a suitable name (2) for this overlay and choose which page(s) (3) of your documents will use this overlay. Enter the name of the overlay file (4) exactly as it appeared in the Storage Device Manager project window.
-
Page 91: Printing With Postscript Overlays
RINTING WITH CRIPT OVERLAYS Once you have defined your overlays you are ready to use them for any documents you wish. The example illustrated here uses two overlays for business letters. The first prints on just the top page, and the second prints on any or all subsequent pages. Prepare your document in the normal way using your own application software. -
Page 92: Creating Pcl Overlays
PCL O REATING VERLAYS Three steps are required to create an overlay: Create the form data using your own application software and print it to a printer (.PRN) file. Use the Storage Device Manager utility software supplied on CD with your printer to create a “project file,” import the .PRN file, and download the generated filter (.BIN) files to the printer. - Page 93 Choose Printers→Filter Macro File. The Filter Printer Patterns dialogue box appears. Make any adjustments in the settings that you need and then click OK. Example: If you create a black oval in MS Paint and leave all the colour command filters checked, the black oval will print as a black rectangle when the overlay is used.
-
Page 94: Test Printing The Macro
Choose Projects→Send Project Files to Printer to download the project to the printer. When the message “Command Issued” appears confirming that the download is complete, click OK to clear the message. EST PRINTING THE MACRO Choose Printers→Test Macro. In the Test Macro window, enter its ID number and click OK. - Page 95 In the Define Overlays window, enter the name (a) and ID (b) of the required overlay, and define which page(s) (c) of your documents will use this overlay. Then click the Add button (3) to add this overlay to the list of defined overlays.
-
Page 96: Printing With Pcl Overlays
RINTING WITH OVERLAYS Once you have defined your overlays you are ready to use them for any documents you wish. The example illustrated here uses two overlays for business letters. The first prints on just the top page, and the second prints on any or all subsequent pages. Prepare your document in the normal way using your own application software. -
Page 97: Replacing Consumable Items
EPLACING CONSUMABLE ITEMS This section explains how to replace consumable items when due. As a guide, the life expectancy of these items is: > Toner — 3,000 (standard capacity) or 5,000 (high capacity) A4 pages at 5% coverage, which means that 5% of the addressable print area is printed with this colour. -
Page 98: Consumable Order Details
Average life: 20% pages at continuous print, 50% pages at 3 pages per job and 30% pages at 1 page per job. Only use genuine Oki Original consumables to ensure the best quality and performance from your hardware. Non Oki Original products may damage your printer's performance and invalidate your warranty. -
Page 99: Toner Cartridge Replacement
ONER CARTRIDGE REPLACEMENT CAUTION! To avoid toner wastage and possible toner sensor errors, do not change the toner cartridge(s) until “TONER EMPTY” is displayed. The toner used in this printer is a very fine dry powder. It is contained in four cartridges: one each for cyan, magenta, yellow and black. - Page 100 Press the cover release and open the printer’s top cover fully. WARNING! If the printer has been powered on, the fuser may be hot. This area is clearly labelled. Do not touch. Note the positions of the four cartridges. 1. Cyan cartridge 2.
- Page 101 Carry out one of the following: If you are replacing a toner cartridge that has been supplied with your printer (lever has 3 positions), pull the coloured toner release lever on the cartridge to be replaced towards the front of the printer, in the direction of the arrow, but stop at the central (upright) position (1).
- Page 102 Lift the right-hand end of the cartridge and then draw the cartridge to the right to release the left-hand end as shown, and withdraw the toner cartridge out of the printer. Put the cartridge down gently onto a piece of paper to prevent toner from marking your furniture.
- Page 103 Gently shake the new cartridge from end to end several times to loosen and distribute the toner evenly inside the cartridge. Remove the wrapping material and peel off the adhesive tape from the underside of the cartridge. Holding the cartridge by its top centre with the coloured lever to the right, lower it into the printer over the image drum unit from which the old cartridge was removed.
-
Page 104: Image Drum Replacement
Pressing gently down on the cartridge to ensure that it is firmly seated, push the coloured lever (1) towards the rear of the printer. This will lock the cartridge into place and release toner into the image drum unit. Finally, close the top cover and press down firmly at both sides so that the cover latches closed. - Page 105 Press the cover release and open the printer’s top cover fully. WARNING! If the printer has been powered on, the fuser will be hot. This area is clearly labelled. Do not touch. Note the positions of the four cartridges. 1. Cyan cartridge 2.
- Page 106 Holding it by its top centre, lift the image drum, complete with its toner cartridge, up and out of the printer. Put the cartridge down gently onto a piece of paper to prevent toner from marking your furniture and to avoid damaging the green drum surface.
- Page 107 With the coloured toner release lever (1) to the right, pull the lever towards you. This will release the bond between the toner cartridge and the image drum cartridge. Lift the right-hand end of the cartridge and then draw the cartridge to the right to release the left-hand end as shown, and withdraw the toner cartridge out of the image drum cartridge.
- Page 108 toner cartridge at this time unless the remaining toner level is very low.) Push the coloured release lever (1) away from you to lock the toner cartridge onto the new image drum unit and release toner into it. Replacing consumable items> 108...
- Page 109 Holding the complete assembly by its top centre, lower it into place in the printer, locating the pegs at each end into their slots in the sides of the printer cavity. Finally, close the top cover and press down firmly at both sides so that the cover latches closed.
-
Page 110: Replacing The Belt Unit
EPLACING THE BELT UNIT The belt unit is located under the four image drums. This unit requires replacement approximately every 50,000 pages. Switch off the printer and allow the fuser to cool for about 10 minutes before opening the cover. Press the cover release and open the printer’s top cover fully. - Page 111 Lift each of the image drum units out of the printer and place them in a safe place away from direct sources of heat and light. CAUTION! The green image drum surface at the base of each cartridge is very delicate and light sensitive. Do not touch it and do not expose it to normal room light for more than 5 minutes.
- Page 112 Lower the new belt unit into place, with the lifting bar at the front and the drive gear towards the rear of the printer. Locate the drive gear into the gear inside the printer by the rear left corner of the unit, and lower the belt unit flat inside the printer.
-
Page 113: Fuser Replacement
USER REPLACEMENT The fuser is located inside the printer just behind the four image drum units. WARNING! If the printer has recently been powered on, some fuser components will be very hot. Handle the fuser with extreme care, holding it only by its handle, which will only be mildly warm to the touch. - Page 114 Identify the fuser handle (1) on the top of the fuser unit. Pull the two fuser retaining levers (2) towards the front of the printer so that they are fully upright. Holding the fuser by its handle (1), lift the fuser straight up and out of the printer.
- Page 115 Lower the fuser into the printer, locating the two lugs (3) into their slots in the metal partition which separates the fuser area from the image drums. Push the two retaining levers (2) towards the rear of the printer to lock the fuser in place. Finally, close the top cover and press down firmly at both sides so that the cover latches closed.
-
Page 116: Cleaning The Led Head
LEANING THE HEAD Clean the LED head when printing does not come out clearly, has white lines or when text is blurred. Switch off the printer and open the top cover. Gently wipe the LED head surface with LED lens cleaner or soft tissue. -
Page 117: Installing Upgrades> 117
NSTALLING UPGRADES This section explains how to install optional equipment into your printer. This includes: • duplex (two-sided printing) unit; • additional RAM memory; • 20GB hard disk drive. UPLEX UNIT The duplex unit adds the function of two-sided printing, using less paper and making large documents easier to handle. - Page 118 Switch the printer on and wait for it to warm up (about 1 minute). Print a menu map as follows: Press the + button to access the Information Menu. Press ENTER once for the menu map. Press ENTER again to print the menu map. When the menu map is printed, press ON LINE to exit the menu system.
-
Page 119: Memory Upgrade
EMORY UPGRADE The basic printer model has 128MB standard memory. This can be upgraded by changing the 64MB memory module for an optional memory module of either 128MB or 256MB, giving a maximum memory capacity of 320MB. Installation takes a few minutes, and requires a medium size cross-head (philips type) screwdriver. - Page 120 Carefully remove the new memory board from its wrapping. Try to handle the board only by its short edges, avoiding contact with any metal parts as far as possible. In particular, avoid touching the edge connector. Notice that the memory board has a small cutout in the edge connector, which is closer to one end than the other.
- Page 121 Hold the new memory board by its short edges, so that the edge connector faces in towards the RAM expansion slot, and the small cutout is closer to the rear of the printer. Gently push the board into the RAM expansion slot until it latches in and will not go any further.
-
Page 122: Hard Disk Drive
ARD DISK DRIVE The optional 20GB internal hard disk drive (HDD) enables collating of printed pages and can be used to store overlays and macros, fonts, and secure or proof documents waiting to be printed. Installation takes a few minutes, and requires a medium size cross-head (philips type) screwdriver. - Page 123 top. Lift the cover slightly to detach it from the printer. Place it safely to one side. Identify the six locating holes indicated in the illustration, which will be used to locate the disk unit onto the side of the printer. With the component side of the disk unit facing the printer, and the connector cable towards the rear, lift the disk unit handle away from the disk body.
- Page 124 When the printer is ready, print a menu map as follows: Press the + button to access the Information Menu. Press ENTER once for the menu map. Press ENTER again to print the menu map. When the menu map is printed, press ON LINE to exit the menu system.
-
Page 125: Adjusting Windows Printer Drivers
DJUSTING INDOWS PRINTER DRIVERS Once your new upgrade has been installed, you may need to update the Windows printer driver so that the additional features are available to your Windows applications. Remember that if your printer is shared between users on different computers, the driver must be adjusted on each user’s machine. -
Page 126: Postscript Driver
CRIPT DRIVER This driver must be adjusted for any upgrade just installed. Open the Printers window (called “Printers and Faxes” in Windows XP) via the Start Menu or from the Windows Control Panel. Right-click the printer icon for this printer, and choose Properties from the pop-up menu. -
Page 127: Clearing Paper Jams
LEARING PAPER JAMS Provided that you follow the recommendations in this guide on use of print media, and you keep the media in good condition prior to use, your printer should give years of reliable service. However, paper jams occasionally do occur, and this section explains how to clear them quickly and simply. - Page 128 Note the positions of the four cartridges. 1. Cyan cartridge 2. Magenta cartridge 3. Yellow cartridge 4. Black cartridge It will be necessary to remove the four image drums to gain access to the paper path. Holding it by its top centre, lift the cyan image drum, complete with its toner cartridge, up and out of the printer.
- Page 129 Put the cartridge down gently onto a piece of paper to prevent toner from marking your furniture and to avoid damaging the green drum surface. CAUTION! The green image drum surface at the base of the cartridge is very delicate and light sensitive. Do not touch it and do not expose it to normal room light for more than 5 minutes.
- Page 130 • To remove a sheet from the central area of the belt (2), carefully separate the sheet from the belt surface and withdraw the sheet. • To remove a sheet just entering the fuser (3), separate the trailing edge of the sheet from the belt, push the fuser pressure release lever (4) towards the front and down to release the fuser’s grip on the sheet, and withdraw the sheet through the drum cavity area.
- Page 131 Starting with the cyan image drum unit nearest the fuser, replace the four image drums into the drum cavity, making sure to locate them in the correct order. 1. Cyan cartridge 2. Magenta cartridge 3. Yellow cartridge 4. Black cartridge •...
- Page 132 Lower the top cover but do not press down to latch it closed yet. This will protect the drums from excessive exposure to room lighting while you check the remaining areas for jammed sheets. Open the rear exit tray (5) and check for a sheet of paper in the rear path area (6).
- Page 133 Lift the front cover release and pull open the front cover. Check inside the cover for sheets in this area and remove any that you find, then close the cover. Clearing paper jams> 133...
- Page 134 Pull out the paper tray and ensure that all paper is stacked properly, is undamaged, and that the paper guidesareproperly positioned against the edges of the paper stack. When satisfied, replace the tray. Finally, close the top cover and press down firmly at both sides so that the cover latches closed.
-
Page 135: Specifications
PECIFICATIONS ITEM SPECIFICATION Dimensions 425 x 561 x 345mm (W x D x H) Weight 25Kg Print speeds 16 pages per minute colour / 24 pages per minute monochrome Resolution 600dpi or 1200 x 600dpi Emulations PostScript 3 PCL 5c, HP-GL, PCL XL Epson FX IBM Pro Printer III XL Auto Features Auto registration... -
Page 136: Index
NDEX Belt Hard disk drive how to replace.......110 how to install ......122 life expectancy ......97 life remaining ......85 Booklet printing Image drum PCL emulation ....20 how to replace.......104 PostScript emulation ..19 life expectancy ......97 Image drums current usage state....85 Colour adjusting.........75 Colour matching... - Page 137 paper metrics ......12 enabling or disabling....84 Print order face down stacker....15 Network addresses face up stacker ......16 face up/down stacker ....19 setting ........83 Print quality Network protocols adjusting.........84 enabling or disabling....83 Print settings how to save ...... 20 Overlays Printing confidential printing a list......67 documents ......
-
Page 138: Oki Contact Details
KI CONTACT DETAILS Oki Systems (UK) Limited Oki Data (Singapore) Pte. Ltd. 550 Dundee Road 78 Shenton Way, #09-01, Slough Trading Estate Singapore 079120 Slough, SL1 4LE Tel: (65) 221 3722 Tel:44 (0) 1753 819819 Fax: (65)421 1688 Fax:44 (0) 1753 819899 http://www.okidata.com.sg... - Page 139 OKI Europe Limited Central House Balfour Road, Hounslow TW3 1HY, United Kingdom Tel: +44 (0) 20 8219 2190 Fax: +44 (0) 20 8219 2199 www.okiprintingsolutions.com 07067801 iss.03...
Need help?
Do you have a question about the C5450 and is the answer not in the manual?
Questions and answers