
Related Manuals for Eaget M7

Summary of Contents for Eaget M7
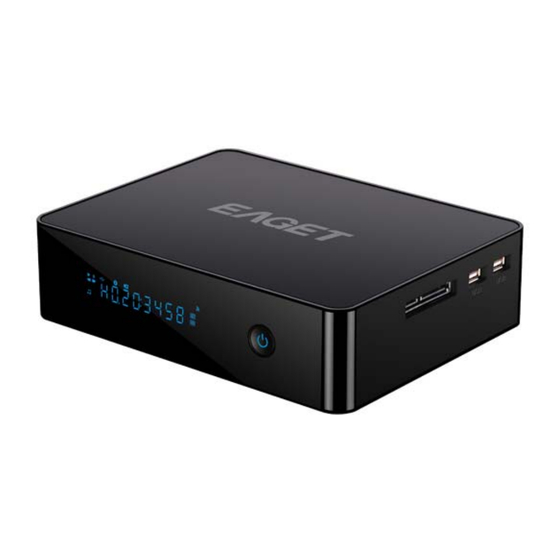
- Page 1 1080P High Definition 3.5” HDD Network Multimedia Player User Manual www.eaget.com.cn...
-
Page 2: Introduction Of Product
1. Introduction of Product 1.1 Preface The M7 is an innovative digital media player which supports 1080P movie. You can now enjoy various multimedia files such as high definition movies, digital photos and music by different kinds of output sources from the player. -
Page 3: Packing List
1.2 Packing List TTEM Quantity EAGET M7 Player 1 Piece Power Adapter 1 Piece Remote Control 1 Piece AA Battery 2 Pieces AV Cable 1 Piece USB Data Cable(A to Mini B) 1 Piece HDMI Cable 1 Piece (optional) User Manual... -
Page 4: Connection Instruction
1.3.5 Disposing of the Player When you dispose of the player, be sure to dispose it appropriately. Some countries may regulate disposal of electrical device, please consult with your local authority. 1.3.6 Hard Disk Cautions The player uses an internal hard disk for data storage. Physical impact may create bad sector in the hard disk, you can use CHKDSK to fix the problem. - Page 5 2.2 HDMI OUT (1) Follow the picture and plug one connector on your HDMI cable to the player’s HDMI jack; (2) Follow the picture and plug the other connector on your HDMI cable to the TV’s HDMI jack. 2.3 A/V OUT (1) Follow the picture and plug in the 3 color connector to the player’s A/V OUT jack;...
-
Page 6: Connecting To An Digital Amplifier
Audio Connection while using Y/Pb/Pr Video out: First method: use the audio output from the A/V OUT jack; Second method: use the audio output from the S/PDIF Coaxial or Optical fiber jack. 2.5 Connecting to an Digital Amplifier (1) Follow the picture and plug one end of coaxial/ Optical fiber cable to the coaxial/ Optical fiber output port of this product. -
Page 7: Connecting To A Lan
2.6 Connecting to a LAN To connect to a LAN (Local Area Network) you require a router or switch (not supplied). (1) Connect one of the crystal plugs on the cable to the player’s LAN socket; (2) Connect the other crystal plug on the cable to LAN port on your router, switch, or hub devices. 2.7 Connecting to a WLAN (1) Make sure the player is powered on;... - Page 8 2.9 Connecting SATA HDD (1) Follow the picture and plug on end of the SATA cable to the player’s SATA jack; (2) Follow the picture and plug another end to the SATA HDD. Then you can through Brower-HDD to browse. 2.10 Connecting to a PC (1) Make sure the player is powered on;...
- Page 9 Help tips: 1. Open “My Computer” and a new disk symbol will appear and In this way, you can manage the content on the built-in HDD of the player on your local PC. 2. Please refer to the computer instructions to format the hard disk. (It’s not recommended the user to use other software to partition the hard disk of this player).
-
Page 10: About The Player
3. About the Player 3.1 Remote Control 1.Remote 2.Stand by Indicator 3.TV System 4.Home 5.Confirm 6.Select 7.Subtitle 8.Audio 9.Music 10.Movie 11.A-B 12.Zoom 13.Mute 14.Eject 15.Edit 16.Repeat 17.Photo 18.File 19.Step 20.Play/Pause 21.FR/FF 22.Stop 23.Setup 24.Previous/Next 25.Slow 26.Return 27.OK 28.Navigation keys 29.Vol+/- 30.Numeral Keys 31.Goto 32.Info... - Page 11 Remote Control Description: Item FUNCTION Remote Indicator Remote indicator. Stand by Press to enter standby mode or wake up. TV System Switch the output mode into video signals. Home Return to the Main Interface. Confirm Press to confirm and add the selects to the play list. Press it in copy menu to select the file to be copied and in Select browse menu to select the file to be added into the Play List...
-
Page 12: Front View
3.2 Front View 1. IR Receiver Window 2. Stand by Switch(indicator) 3. VFD Screen Description: Item Description IR Receiver Receive the signal from remote control. Display the playback status and progress and VFD Screen other information for the operation. Press the bottom to enter into standby mode; Stand by Switch&... -
Page 13: Side View
LAN: Connect to wire network by LAN jack Connecting to the video device and output HDMI audio HDMI and video signals by this jack. SPDIF Coaxial/Optical fiber output digital audio. (The Coaxial/ SPDIF coaxial/optical cables are not including in Optical Fiber attachment). -
Page 14: Install Hdd
3.5 Install HDD 3.5.1 Loosen the screws and open the top cover. 3.5.2. Install the HDD (Put the 3.5” HDD into the bottom cover and tight it by the screws). 3.5.3 Connect the player’s data cable and power cable to the HDD. - Page 15 3.5.4 Install the bottom cover as following picture: 3.5.5 Lock the screws on the bottom of player. Then HDD installation is completed, as shown below:...
-
Page 16: Power On/Off
4. Power On/Off 4.1 Power On Connecting the power cable and Video cable and switches on, then press the stand by key on the remote controller or press the power key on the front panel of the player, power on the TV and select the input signal by the connecting way, the player will soon enter into the home menu. -
Page 17: Browsing Music
or backward for a file; Press it during IFO file play to select Previous /Next Chapter. Select the chapter when playing the file Number keys has the chapters. Press it during video play to select a time Goto period to be played back. Play video in slow motion.(slow ratio: 1X, SLOW 3/4X, 1/2X, 1/4X, 1/8X, 1/16X)Press... -
Page 18: Browsing Photos
Browsing Music Instructions of Operations Press the Left/Right keys on the remote controller to select MUSIC interface. Press Up/Down keys to select the device to be previewed and press Ok key to access; Press Up/Down keys to select the folder or music you want to preview and press Ok key to play state. -
Page 19: Browsing All
Browsing Photos Instructions of Operations Press the Left/Right keys on the remote controller to select photo interface. Press Up/Down keys to select the device to be previewed and press Ok key to access; Press Up/Down keys to select the folder or music you want to preview and press Ok key to full screen plan state. - Page 20 5.5.1 Browsing through My_Shortcuts My Shortcuts: enter by inputting IP address, users’ name and the password directly. 1. Share a file on computer and set access permissions for this folder, it needs read permissions at least. 2. Close the windows firewall. My_Shortcuts Instructions of Operations Press the Up/Down keys on the remote...
- Page 21 Press OK key to select the dialog box, it will pop up a visual key board.Use the navigation key to input the characters for setting Net User ID, Net Password. If there is no Net User ID, Net Password for the shared pc, please input the IP adress in Specific File Server IP directly.
- Page 22 bridge to connect Net Media Player and PC. Install transcode Server: Double click the Transcode Server and finish the installation. Please execute the Transcode server as installation completed. And the icon will appear on right of the status bar. Click the icon or tap Start-Program-Transcode Server to enter the Transcode server interface.
- Page 23 3)Setting: In the setting interface, select the Auto Run on system startup option, click Apply to confirm, the software will running automatically when the computer boots up. 4)Event log: In the Event log interface to display PC and Media player communication information.
- Page 24 5)About: In the about interface view the software’s version information. 5.5.3 Browsing through WORKGROUP The system will automatically search the network computer. If the computer is found, the player will display the computer name in the list for users’ choice. WORKGROUP Instructions of Operations Press Up/Down keys on the remote...
- Page 25 5.6 Browsing from DVD When you connect an external DVD ROM, the system will be finding the device automatically, then you can select DVD item in browser and find the file to play. Set the Setup-System-R/RW auto-play as on, and then when the system detects the DVD-ROM, it will be playing backs the disc automatically.
- Page 26 Select allow to making the device (the HD player) is customized. 3). Select library->add to library.
- Page 27 4).On Add to library-Add to add the share files. Then the UPNP server configures on computer is completed. Note: you need to close the windows firewall, or you will not achieve the function of the media file sharing.
-
Page 28: Play List
Then you can enter the system and select UPNP in Browser access. 5.8 Play list With Play List function, you can add your favorite media files into the list to play. 5.8.1 Add Music to the Play List: Add Music to the Play List Instructions of Operations Select HDD in browser column for entrance. -
Page 29: Renaming/Deleting Files
When you selected the files in playlist, then press Return, it will be prompt as “do you want to leave without save to playlist” and select Confirm or Cancel to set it. Helpful tips: 1. To use the Play List, you must format you internal HDD in “setup” mode first. 2. -
Page 30: File Copy Menu
Delete the files Instructions of Operations Press the UP/DOWN keys to select the files which you want to delete. Press the Edit keys to select delete item. 7. File Copy Menu Select the File Copy item on the main menu or press the file key on the remote controller to enter into the File Copy menu, which allows you to copy files between Removable Devices (Card, USB), HDD, and Network ect. -
Page 31: Setup Menu
In the source device, select the files which you want to copy. Press select key on the remote controller to select files. Press the Left key to cancel and press the Right key to execute the next step. Step 3: Select the destination folder Select the folder you want to save the copied file in the targeted device. -
Page 32: Changing Video Settings
Select the Setup icon on the main menu or press the Setup key on the remote control to enter into the setup menu. There are five Setup options, including Audio, Video, Network, System, and MISC. 8.1 Changing Audio Settings Use this menu to configure audio settings. Night Mode: Choose between Off /On/Comfort. -
Page 33: Changing Network Settings
Video Settings Instructions of Operations Pan Scan 4:3: Display a wide picture on the entire screen and cuts off the redundant portions. Select when a standard 4:3 TV is connected. Letter Box 4:3: Display a wide picture with two black borders on the top and bottom of 4:3 screens. - Page 34 8.3.1 Wire LAN Setup Wire LAN Setup a.DHCP Select to obtain IP address automatically. b. FIX IP (MANUAL) Select to manually input the IP Address, Subnet Mask, Default Gateway, and DNS Server IP Address. In case of any questions about the settings, please go to the network administrator for help.
- Page 35 2). Get Connection Mode Choose among Infrastructure (AP) and Peer to Peer (Ad Hoc). Press ENTER to go to next step, and press RETURN to cancel. The following detailed description of these three kinds of connection settings. 8.3.2.1 Infrastructure (AP) Infrastructure mode is used to connect computers with wireless network adapters, also known as wireless clients, to an existing wired network with the help from wireless router or access point.
- Page 36 After set up ok, the system will display the set result in Test OK and Show Net info interface. The information of wireless base station is recorded here, such as SSID, safety mode, IP address, subnet mask and preinstall gateway. Press the enter key to complete the setting.
- Page 37 c. Host IP After the setting is finished, press Play key to enter system setting. Step 2: If the setting is successfully finished, the system will display the set result in Test OK and Show Net info interface. The information of Ad-Hoc is recorded here, such as SSID, safety mode, IP address, subnet mask and preinstall gateway.
- Page 38 The Wireless Network Card for USB is an optional and not all wireless Network cards sold on the market can be used for this player. It only support the model as Realtek RTL8187B and Realtek RTL8191SU, Please consult with the sales when you wish to make the best use of this product.
- Page 39 Select to turn on/off the password protect for BT and SAMBA. Default user ID:admin Default password:123 Login Control If you select off login control, you can go to the BT and SAMBA without input a password. BT and Select to turn on/off the BT and SAMBA. SAMBA More detail update method please see the Chapter 11.
- Page 40 After success format the HDD, then you can use you player normally. Note: HDD format will remove all data stored on the hard disk drive. Please take care and backup your data in advance! 8.5 MISC Use this menu to configure s MISC settings. Resume play Whether or not to continue to play from the point interrupted last time.
- Page 41 8.5.1 Auto play the media files function. Only support for used in an external USB storage device. 1. Create three new folders as photo, music, video under the root of the external USB device, and create a photo.txt, music.txt and video.txt file in the corresponding file folder, Copy the files which you wish to automatically playback into the corresponding folder.
- Page 42 Note: if the settings -> System -> Login control is set to on, the password to take effect. The default user name is' admin ', default password is '123'. If the login control is off, it will not need to enter a password and come into the main interface directly, the main interface showing as follows: 10.1.2 Account Management At Home page, select “Account Management”...
- Page 43 Login password can be modified at here. Please setting password according your favorite. Please input password twice and click “Enter” to confirm. 10.1.3 Visit Neighbor Click Visit Neighbor on the home page of Neighbor Web. All the devices are display here and you can click to visit. 10.1.4 BT Download The BitTorrent client btpd is running in daemon (a process running in the background)
- Page 44 mode and you can manipulate the process via the Web server. Click BitTorrent Download on the home page of Neighbor Web, then you will enter the BitTorrent Download page. 10.1.5 Add new torrent Click Add new torrent on the BitTorrent Download page. Click Browse to upload a torrent file, and click Yes to confirm.
- Page 45 priorities for torrents, as well as view the status of current torrents. Click Start to begin download. Click Stop to stop download. Click Delete to delete the selected torrent. Click Refresh to refresh the current status. Click Down arrow to decrease the priority for the selected torrent. Click Up arrow to increase the priority for the selected torrent.
-
Page 46: Network Attached Storage
In the BitTorrent Setting page, you can configure the following settings: Set the maximum download rate. Set the maximum upload rate. Set the idle hours to start the next download automatically. Set the seeding hours. Set to delete the finished torrent files automatically or not. Set the maximum number of simultaneous download tasks. -
Page 47: Specifications
Step1: Please extract the downloaded firmware programs with the updated version to the root directory of external storage devices. (Such as SD card/removable HDD/U-disk ect. but only support FAT32 and FAT16 formats) Step 2: Connect the external storage devices onto the USB HOST port of the player. Step 3: Unplug the power cable, hold down the standby button. - Page 48 Subtitle formats supported: SRT, SMI, SSA,SUB, IDX+SUB Network 10/100Mbps Auto-Negotiation Ethernet Ethernet/ IEEE 802.11b/g/n WLAN, at maximum 300Mbps (supported by Wireless optional WLAN USB Adapter) network Note: The Company has the right to changes the specifications of his products or designs without further notification.
- Page 49 Question 6: Why do some support's form picture can't display in picture browser? Answer: E.g., the JPEG format include many different models, and our product does not support the gradual mode images, so you need for modify it to display it. (1) Open the picture with Photoshop.
-
Page 50: Copyrights And Trademarks
Answer: First make sure it is installed correctly, and do not delete any partitions on computer. If there is a bad area of you HDD, you need to back up the data first and re-install the driver for the system. Question 11: Why the subtitles my added can not come out? Answer:...
Need help?
Do you have a question about the M7 and is the answer not in the manual?
Questions and answers