SanDisk Sansa e200 User Manual
Media players
Hide thumbs
Also See for Sansa e200:
- Manual manual (244 pages) ,
- User manual (54 pages) ,
- Brochure (1 page)
Table of Contents
Advertisement
Quick Links
Advertisement
Table of Contents

Subscribe to Our Youtube Channel
Related Manuals for SanDisk Sansa e200


Summary of Contents for SanDisk Sansa e200
- Page 1 SanDisk Sansa™ e200 User Guide...
-
Page 2: Table Of Contents
Delete Photos and Video ............. Transfer Music ................Transfer Playlists ................. Delete Music Files ............... Synchronize Files ................ Safely Removing Sansa e200 from the Computer ...... Basic Usage ..................Power On ..................Using Thumbwheel ..............Main Menu .................. Using Navigation Buttons ............ - Page 3 Tips, FAQ, and Troubleshooting ............Service and Warranty Information ............. Getting Technical Support ............Learn More .................. 1-YEAR SanDisk Limited Warranty ............ USER NOTICE ..................End User License Agreement ............. FCC Regulation ..................Important - Safe Hearing Level Info ...........
-
Page 4: Safety Instructions
Safety Instructions Read the safety instructions carefully before using your Sansa. Read this entire manual to ensure proper usage. Keep this User Guide for future reference. Do not use HeadPhones/Earphones while driving, cycling, or opera- ting any motorized vehicle. This may create a traffic hazard and may be illegal in some areas. -
Page 5: Introduction
1.8” TFT color screen, voice recorder, microSD™ card expansi- on slot, and a replaceable and rechargeable Lithium Ion battery. The Sansa e200 enables users to play MP3, WMA, and secure WMA audio files. It also plays video, and displays photos that are transferred to the pla- yer through the Sansa Media Converter and has a voice recorder function. -
Page 6: Package Contents
Internal Memory – allows users to store data on the internal memory Package Contents Please unpack your Sansa e200 and check that the following were included. Earphones USB 2.0 Travel Cable Installation CD (User’s Manual and Sansa Media Converter included) -
Page 7: Getting Started
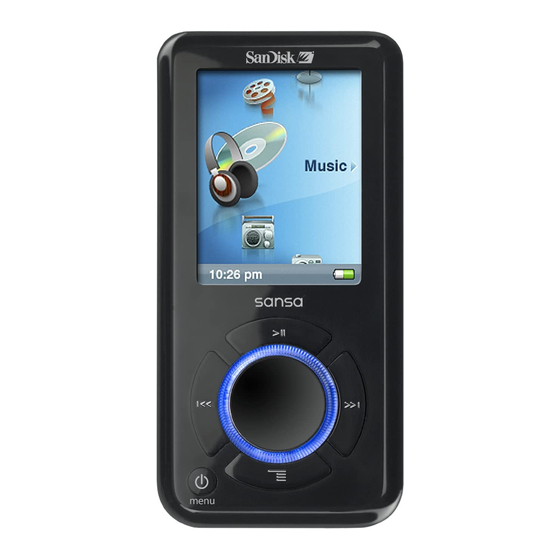
Getting Started Overview Of Features Record Voice Record Button. Strap Eyelet Lanyard connection. Internal Microphone. Hold Factory set to locked position (shows Orange Color). Slide to unlock controls. When locked all controls are disabled. Lock to prevent accidental activation of controls. Earphone Port Connect earphones here to listen to player. -
Page 8: Music Screen Features
Music Screen Features Menu Title Displays the title of the current menu. Items Displays items for selection. Time Indicates the current time. Battery Indicates the Battery Charge Status. Playback Screen Features Track Number Display the current track number and the total num- ber of sound tracks. -
Page 9: Li-Ion Battery Charge
Connect the small connector of the USB Cable to the USB port on the computer, and then plug the larger end in to the Sansa e200 Dock Connector. The computer must be on for most USB ports to charge your battery. -
Page 10: Battery Level Indicator
fire, injury, burns or other hazards. Hold Switch (Factory set to the locked position) The Sansa e200 Hold Switch is located on the top of the device, and is used to prevent any accidental operati- on. -
Page 11: Minimum System Requirements
USB 2.0 port required for hi-speed transfer Firmware Upgradeable SanDisk occasionally releases firmware updates, which includes bug fixes and performance enhancements. To make sure your Sansa e200 series player has the latest firmware, please visit http://www.sandisk.com/e200se- ries/fwupgrade and follow the instructions... -
Page 12: Connecting To Your Computer
Note: The MTP mode supports Windows Media Player 10. You must use the MTP mode to synchronize music files using Windows Media Player 10. In MTP mode the device will show up as “Sansa e200” and no microSD card will be displayed. MTP is needed when using your device with monthly music subscription services such as Rhapsody, Napster and Yahoo !Music. -
Page 13: Transferring Files
You will need to use Sansa Media Converter to transfer photos and video to your Sansa e200. Insert your SanDisk CD and select Sansa Media Con- verter to install it to your PC. Then you can load your personal photos and video onto your Sansa e200 by using Sansa Media Converter. -
Page 14: Transfer Photos And Video
Open Sansa Media Converter on your PC Connect Sansa e200 to the computer. The detected Sansa e200 will list the available space and total space on the device. If more than one device is inserted, only the first device will be supported. -
Page 15: Transfer Music
To delete a video in MSC mode, go to My Computer and delete the video stored in Removable Disk/Video. To delete a photo in MTP mode, connect your Sansa to your computer and go to My Computer and delete the photo stored in Sansa e200/ Data/Photo/My Album and Sansa e200/Data/Photo/Thumbnail/My Album To delete a video in MTP mode go to My Computer and delete the video stored in Sansae200/Data/Video. -
Page 16: Delete Music Files
Please refer to the specific software package instructions. Safely Removing Sansa e200 from the Computer Disconnect the USB cable from the Sansa e200 after you have completed charging, transferring, firmware upgrade, or synchronizing files. MSC mode provides some additional steps to safety remove the Sansa e200: On your computer’s task bar (usually bottom right corner of your... -
Page 17: Basic Usage
Basic Usage Power On For initial power-up you must unlocked the controls by moving the HOLD switch to the un-locked position (No Orange Color visible). Press the Power button once. The Thumbwheel will light up and the main menu will appear. Using Thumbwheel Turn the wheel clockwise to scroll down though menu items rapidly or increase the... -
Page 18: Main Menu
Using Submenu Button When submenu is available, the submenu icon will display on the left bottom of the Sansa e200 screen. Press the Submenu to enter subme- Power Off Press the Power button and hold for two seconds or until “Goodbye” is displayed. -
Page 19: Music Mode
Music Mode Music/Voice To play music stored in the internal memory or microSD card, recorded FM or Voice recording, select Music in Main Menu. Select Artists, Albums, Songs, Genres, Play- lists, Recordings (FM/Voice), My Top Rated, and Music Options. Highlight and Select the desired track or file to play. -
Page 20: Setting Shuffle Mode
Shuffle to On. Press |<< button for previous screen. Setting Music EQ Sansa e200 provides various EQ modes, such as Classical, Pop, and Rock. In playback mode, press submenu Scroll and Select the Music EQ item. Scroll and Select a Music EQ mode. -
Page 21: Remove Songs From Playlist
In playback mode, press submenu Select the Add to Go List. Remove Songs from Playlist Select Playlist and play a song. In playback mode, press submenu Select the Remove Song from Go List. Scan Through Song In playback mode, enter submenu. Select the Scan Through Song item. -
Page 22: Rate This Song
Rate This Song 1. In playback mode, press submenu 2. Select the Rate This Song item. 3. Use Thumbwheel to rate the song (1 to 5 stars) and press |<< button to exit back to Music Opti- ons menu. My Top Rated Songs can be viewed in MUSIC menu. -
Page 23: Slideshow
Select PhotoList or Thumbnails. If you selected Thumbnails you will see the brow- ser screen. Scroll through the photos and select the one of interest. Use the |<< and >>| buttons to backup or advan- ce to another photo. Slideshow To play slideshow, Press Select button while viewing one of your slideshow photos. -
Page 24: Video Mode
Personalize your Slideshow Options. Select the Shuffle: Select On for random order. Select Loop: Select On to set nonstop slide- show. Select the Slide time each photo view time. Select the Music for background music and select CurrentSong or GoList in the Music submenu. -
Page 25: Recording Mode
Video list Recording Mode Voice Recording Use your Sansa e200 for Microphone Recording. You can record your own voice, an interview, or a speech via internal microphone. Press the Record button to start recording. To pause recording, select Pause in Record mode. -
Page 26: Settings Mode
Press |<< button to return to the Record, Listen, or Delete Recording Menu. Settings Mode You can personalize your Sansa e200 settings by selecting Settings in the main menu. Scroll the Settings Menu and make a selection. Set Backlight Backlight timer program can adjust the backlight setting from the default, turn off backlight after 2 seconds idle time. -
Page 27: Language
Set Language Select Settings in Main Menu. Select the Language item. Select a language you want to use. Set Date and Time Select Settings in Main Menu. Select the Time item. Set the time or date. Press the |<< button for the previous screen. Set Brightness Select Settings in Main Menu. -
Page 28: Reset To Original Setting
Reset to Original Setting Select Settings in Main Menu. Select the Reset item. Select the Yes item. Device Information Select Settings in Main Menu. Select the Info item. You can read device information on the screen. Set Auto Shut-Off Select Settings in Main Menu. Select the Auto Shut-Off item. -
Page 29: Reset All
Note: MTP Media Player (MTP) mode The MTP mode supports Windows Media Player 10 only. You must use the MTP mode to synchronize music files using Windows Media Player 10. Reset All NOTE: THIS IS AN ADVANCED OPERATION AND RESTORES ALL SETTINGS TO THE FACTORY DEFAULTS. -
Page 30: Tips, Faq, And Troubleshooting
file may need to be located in the same folder. See preloaded content as an example. Question: What music file formats does the Sansa e200 support? Answer: The Sansa MP3 Player will support MP3, WMA, secure WMA. Any other formats need to be converted to these formats using the Sansa Media Converter. - Page 31 older CD and converted to MP3 format. If you can play that song, but not the song that will not play, then you need to purchase the rights to play the song. Question: Why doesn’t my photos display in full screen? Answer: Try cropping your pictures to 128x64 with a photo editing software package prior to converting if you wish to display in full screen.
-
Page 32: Service And Warranty Information
This will allow us to help you more quickly. Learn More You also can visit us on the web at http://www.sandisk.com to learn more about your player as well as other SanDisk products. -
Page 33: 1-Year Sandisk Limited Warranty
SanDisk. You must obtain a tracking confirmation number, which you may be required to provi- de to SanDisk. SanDisk will, at its option, repair or replace the product with new or refurbished product of equal or greater capacity and functionality, or refund the purchase price. - Page 34 TION MAY NOT APPLY TO YOU. IN NO EVENT SHALL SANDISK OR ANY AFFILIATED OR SUBSIDIARY COMPANY BE LIABLE UNDER ANY CIRCUMSTANCES FOR ANY DIRECT, INDIRECT, OR CONSEQUENTIAL DAMAGES, ANY FINANCIAL LOSS OR ANY LOST DATA OR IMAGE, EVEN IF SANDISK HAS BEEN ADVISED OF THE POSSIBILITY OF SUCH DAMAGE.
-
Page 35: User Notice
USER NOTICE This product is protected by certain intellectual property rights of Microsoft Corporation. Use or distribution of such technology outside of this product is prohibited without a license from Microsoft or an authorized Microsoft subsi- diary. Content providers are using the digital rights management technology for Windows Media contained in this device (“WM-DRM”) to protect the integrity of their content (“Secure Content”) so that their intellectual property, inclu- ding copyright, in such content is not misappropriated. -
Page 36: End User License Agreement
End User License Agreement between SanDisk Corporation (“SanDisk,” “we,” or “us”) and each person who downloads, installs or uses the Software (“you” or “your”). The Software is owned by SanDisk or by others including Portal Player Inc. (“Licensors”) who permit SanDisk to distri- bute their Software. - Page 37 Software, or re-create or discover the source code version of the Software. The Software contains proprietary and confidential information of SanDisk or its Licensors, which you agree not to discover or reveal to others. Any and all permitted copies of the Software that you make or distribute must be unmodified, must contain...
- Page 38 FAR 52.227-14 and DFARS 252.227-7013 et seq. Use of the Software by the Government constitutes acknowledgement of SanDisk’s proprietary rights therein. Contractor or Manufacturer is SanDisk Corporation, 140 Caspian Court, Sunnyvale, CA 94089. 6. Termination. We may terminate this Agreement and the license if you violate this Agreement at any time.
- Page 39 an authorized representative of each party. The provisions of Sections 3, 4, 5, 6, 7 and 8 shall survive the termination or expiration of this Agree- ment.
-
Page 40: Fcc Regulation
FCC Regulation This device complies with part 15 of the FCC Rules. Operation is subject to the following two conditions: 1. This device may not cause harmful interference, and 2. This device must accept any interference received, including interference that may cause undesired operation. This equipment has been tested and found to comply with the limits for a Class B digital device, pursuant to Part 15 of the FCC Rules. -
Page 41: Important - Safe Hearing Level Info
Your media player is equipped with a variety of features. To help you maximi- ze your listening pleasure, SanDisk would like to advise you that it is impor- tant to use your headphones with your media player at a safe hearing level. - Page 42 FOR YOUR SAFETY! • Your hearing may adapt to higher volumes of sound. In order to prevent any harmful impact to your hearing, you must control the sound emanating from your headphones and set the media player volume to a low setting where you can hear it clearly and comfortably.
Need help?
Do you have a question about the Sansa e200 and is the answer not in the manual?
Questions and answers