Table of Contents
Advertisement
Advertisement
Table of Contents

Related Manuals for Rena Systems Rena Envelope Imager


Summary of Contents for Rena Systems Rena Envelope Imager
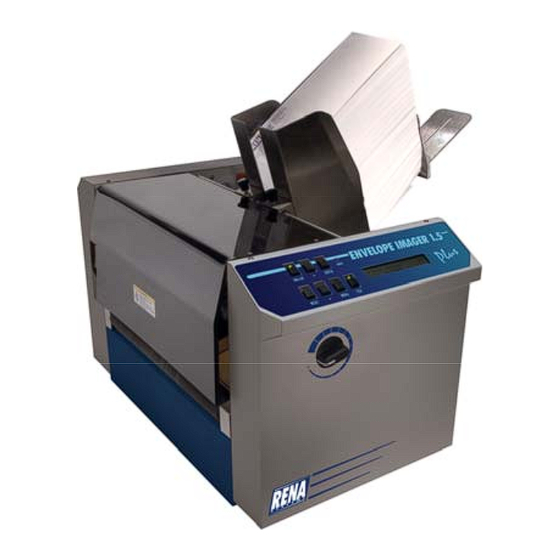
- Page 1 Envelope Imager 1.5 Envelope Imager 1.5 Plus OPERATIONS MANUAL Revised: 6-7-07 Part #: M-3410 RENA SYSTEMS INC. 136 Green Tree Road STE 140 Oaks, PA 19456-1069 Phone: (610) 650-9170 Fax: (610) 650-9171 E-Mail: support@renausa.com Web Site: www.renausa.com...
- Page 2 RENA Systems Inc. would like to Thank You for investing in our quality built products. Please record the following information for future reference: Model: Serial Number: Purchase Date: Purchased From: Dealer Name: Contact Name: Address: Address: Phone Number: Please take this opportunity to register your product. Use the following “Warranty Registration”...
-
Page 3: Table Of Contents
Rear Media Guide Adjustment ______________________________________________________ 17 RINT OSITIONING ERTICAL APER EDIA RANSPORT TEST P _______________________________________________________________________ 18 RINT SECTION 3 – OPERATING THE PRINTER ____________________________________________ 19 & MENU F RINTER ONTROL ANEL ________________________________________________________ 21 RINT ECOVERY FTER A NSTALLING THE RINTER... - Page 4 EPLACING THE HEET EPARATORS ______________________________________________________________ 42 LEANING THE RINTER Cleaning Rubber Rollers ___________________________________________________________ 42 Cleaning the Media Sensor _________________________________________________________ 42 SECTION 5 – TROUBLESHOOTING GUIDE ___________________________________________ 43 HP I ________________________________________________________ 43 NKJET RINT ARTRIDGES ______________________________________________________________________ 44 RINTER _________________________________________________________ 45 RINTER...
-
Page 5: Section 1 - Getting Acquainted
Section 1 – Getting Acquainted Safety Precautions THIS EQUIPMENT PRESENTS NO PROBLEM WHEN USED PROPERLY. HOWEVER, CERTAIN SAFETY RULES SHOULD BE OBSERVED WHEN OPERATING THE PRINTER. BEFORE USING THE PRINTER, YOU SHOULD READ THIS MANUAL CAREFULLY AND FOLLOW THE RECOMMENDED PROCEDURES, SAFETY WARNINGS, AND INSTRUCTIONS: Keep hands, hair, and clothing clear of rollers and other moving parts. -
Page 6: Packaging/Shipping
80%. Exposure to conditions that are not permissible may lead to damage which is not externally visible. Please save the packaging for future use! It will be required if you ever need to ship the printer. Contents... -
Page 7: Initial Assembly
Then using the screws supplied, attach the upper portion of the paper support to the deck of the printer. Now secure the lower screw. Note: The screws are shipped; attached to paper support and the printer. -
Page 8: Attach The Rear Media Guide To The Rear Paper Support
Attach the Rear Media Guide to the Rear Paper Support Using the thumb screw and washer supplied; attach the Rear Media Guide to the Rear Paper Support. Note: The thumb screw and washer are shipped; attached to Rear Media Guide. System Requirements •... -
Page 9: Operator View
PRINT-CARRIAGE COVER – The Print-Carriage Cover encloses the printhead carriage and media transport rollers. MEDIA SIDE GUIDES – Used to center the media in the printer and provide straight feeding of media. REAR MEDIA GUIDE – Allows for adjustments in stack angle, based on media type and length. -
Page 10: Rear View
SHEET SEPARATORS (four) – Used to separate a single piece of media from the stack. USB PORT – Connects the printer to the USB port on your computer. PARALLEL PORT – Connects the printer to the parallel printer port on your computer. -
Page 11: Print Carriage View
SECTION 1 GETTING ACQUAINTED Print Carriage View PRINT UNIT – One holds 3 ink cartridges (cartridges 1, 2, 3). Can be moved to adjust the vertical print position. INK CARTRIDGE LATCH LEVERS – Used to secure the inkjet cartridge in to the Pen Stall. -
Page 12: Printer Control Panel
ENTER key – This key is used to start/stop media feed. When the printer is placed in any of the menu modes, the ENTER key is used to select the options available. When the printer is off-line this key is used to start the Paper Feed function. - Page 13 SECTION 1 GETTING ACQUAINTED Notes Envelope Imager 1.5/1.5 Plus Operations (Rev.6/7/2007)
-
Page 14: Section 2 - Installation And Setup
Position the Print Unit Choose a Location The printer should be placed on a sturdy worktable or cabinet at least 12 inches from any walls. Protect the printer from excessive heat, dust, and moisture – avoid placing it in direct sunlight. -
Page 15: Installing The Ink Cartridges
When the level is calculated as being low (~5% ink remaining in the cartridge) the printer will stop and display “Head # Low. Press Enter.”. After you press Enter, you can choose to ignore the warning or you can check the cartridge. If the cartridge is almost empty, you should replace the cartridge and reset the Ink Level Monitor using the flowing procedure. -
Page 16: Setting Up The Feed System
Setting up the Feed System The printer is equipped with four sheet separators, two media side guides, a rear media guide, and a media thickness adjustment knob. Sheet Separation Adjustment The sheet separators are adjusted individually as follows: 1. Move the side guides so that the separator locking knobs are accessible. -
Page 17: Media Thickness Adjustment
IMPORTANT! To help avoid ink wicking (ink leakage; caused when cartridge nozzles come in contact with an absorbent material) and to help avoid developing flat spots on the transport rollers; always raise the printhead carriage to the highest position, when the printer is not in use. Loading Media When placing media into the printer, it is important to follow these steps. -
Page 18: Rear Media Guide Adjustment
Rear Media Guide Adjustment Position the Rear Media Guide so it raises the back end (trailing edge) of the stack about 0.5 to 1 inch, as shown in Figure 1. Loosen the thumb screw. 2. Slide the Media Guide to the desired position and secure the thumb screw. -
Page 19: Paper Feed (Media Transport) Test
Test for proper media transport. If the printer is setup properly, it should feed the media without hesitation, skewing or jamming. 1. With the printer off-line, press the ENTER key, to start the Paper Feed feature (feeds material without printing). -
Page 20: Section 3 - Operating The Printer
ENTER again. To restore the printer to the normal ready mode press the ON LINE key to take the printer off line and then press and hold the RESET key until the LED on the TEST key blinks. The printer is then restored to its normal ready state. -
Page 21: Reset Key
Pressing the ON LINE key will cause the printer to change from the on-line state, to the off-line state, or vice-versa. The LED on this key will slowly flash when there is power present and the printer is off- line. -
Page 22: Print Recovery After A Jam
Print Recovery After a Jam If the media should jam in the printer during the run it is possible to recover up to 9 pieces (records) that might be lost. If a jam occurs, the printer control panel will display “Jam: Reprint Lost Pieces” and “MENU To Continue”.. -
Page 23: Installing The Printer Driver
Satori Bulk Mailer 5.0 CD. If not, the Bulk Mailer software may not function properly with the printer. A dedicated printer driver is included on CD, with the printer. It must be installed on your computer before you will be able to print from your software. Follow the steps below to install the driver: NOTE: A “Launch Menu”... -
Page 24: Printer Driver Properties
Printer Driver Properties The printer driver describes to the printer how to print your job. It controls the operation of the printer and allows you to send fixed and variable text and graphics to the printer. The following describes the printer driver properties windows for the Envelope Imager 1.5/1.5+ and how to use them to customize the output... -
Page 25: Features Tab/Advanced Options
Windows 98: When the properties window opens, you are presented with several tabs. The Graphics, Fonts, and Device Options are standard Windows 98 printer driver functions and should be left at their defaults. The Features and Print Heads tabs are used to setup, change, and adjust the printer. - Page 26 3. Click on Features and then click on Overlay. 4. Select “Contains overlay” from the box, then click on Apply and OK. 5. Next click OK on the “Print” window. The overlay will download to the printer. 6. Now open the job that contains the variable data.
-
Page 27: Print Heads Tab (Head Adjustment)
To adjust the printhead alignment toward the leading edge; decrease (▼) the value. • To adjust the printhead alignment toward the trailing edge; increase (▲) the value. When the printer is turned off the changes that you make in this manner go back to the original settings. Envelope Imager Windows 98 Paper Tab (Invert Printing) The Paper tab contains one element that is used to invert (reverse) the printing on the printer. -
Page 28: Software Setup Examples
FlexMail3 is a powerful “Envelope Design Program” that has been developed to work seamlessly with your Rena Systems printer. The following is a brief description of how to setup and print from FlexMail3. Printer Drivers: You may find newer driver versions on your FlexMail3 CD. However; Rena Systems suggests using the printer drivers distributed with the printer, or drivers downloaded from www.renausa.com. - Page 29 Designing Your Layout 1. Click on the “Designer” view tab (located at the bottom of the screen). 2. Click on File then Print Setup. Select your Rena printer model from the pull down list. Then click on Close. Envelope Imager 1.5/1.5 Plus Operations (Rev.6/7/2007)
- Page 30 The separation between adjacent cartridges is represented by a dashed line. Envelope Imager 1.5/1.5+ Operations Rev. 6/7/2007 SECTION 3 OPERATING THE PRINTER...
- Page 31 1. Click on File then Print. The Print Dialog box will open. 2. Verify that the correct printer model (Name) is selected. 3. Click on the “Properties” button, if you want to change printer properties such as quality (resolution), orientation, etc…...
-
Page 32: Printing From Satori Bulk Mailer® 5.0
Printer Drivers: Satori has developed their own printer drivers for use with their software product. Therefore, Satori recommends that you load and use the printer drivers available to you on the Satori Bulk Mailer 5.0 CD. If not, the Bulk Mailer software may not function properly with the printer. - Page 33 - Make sure the corresponding Rena Systems printer driver is selected as your "Printer:". - Use the "Advance Settings..." button to select the desired print quality and or orientation. - Use the features under "Print Range" to select the range of addresses you want to send to the printer. 5. Print.
-
Page 34: Printing From Desktop Mailer
Engine” activate the “Disable Label Toolbox” option. Then click OK. Next click Close. Edit Form It is necessary to set up the layout form to match the printer that you are using. The steps below will help you to accomplish this: 1. -
Page 35: Create Layout
5. Name the form in the Form name box and click OK. Create Layout Once the Barcode font supplied with the Printer Driver Disk is installed on your computer and the form is setup, the layout that you are using in DeskTop Mailer®... - Page 36 Printing To make the Printer the default printer for this application click on Print, then select Printing Options... When the “Printing Options” window opens select the Printers tab and highlight Labels: Non-Presorted Labels or Labels: Presorted Labels, then click on the Change Printer button. Select the Printer from your printer menu.
-
Page 37: Printing From Microsoft Word
To begin open a new page and turn on the tool bar for Mail Merge. Under Print select the Envelope Imager 1.5/1.5+ as the default printer. Go to Page Setup in the File menu. Set all of the margins to “0”. - Page 38 Clicking on Merge will start the process of merging the documents. If you chose to send the merge directly to the printer and the printer is connected to the computer and turned ON, the printer will start. Pressing the ENTER key will start the printing process.
- Page 39 SECTION 3 OPERATING THE PRINTER Notes Envelope Imager 1.5/1.5 Plus Operations (Rev.6/7/2007)
-
Page 40: Section 4 - Maintenance
The inkjet cartridges must be replaced when out of ink, when print quality is poor, or when purging and cleaning have not helped the image quality. The Approximate life of the HP 51645A Inkjet cartridges based on three lines of 20 characters at 10-point size per address is:... -
Page 41: Inkjet Cartridge Storage
The cartridge can be left in the Printer, for short periods of time. • The next time that the Printer is used, the cartridge nozzles may have to be cleaned and purged Long-term Cartridge Storage (More than 8 hours or more than 2 hours in hot/dry environments.) •... -
Page 42: Jam In The Printer
In order to obtain better print quality, these ink plugs need to be forced out or purged. A Purge routine is built into the printer. It can be accessed from the LCD panel on the Printer from the MENU key. If this does not solve the problem then proceed as follows: 1. -
Page 43: Cleaning The Printer
ANY MAINTENANCE DISCONNECT THE MACHINE FROM ITS POWER SOURCE! The Printer must be cleaned regularly of accumulated paper dust and ink. Depending on the types of media that are run, paper dust may accumulate within the printer and on the transport. To properly clean the printer, unplug it from the power receptacle and remove the covers. -
Page 44: Section 5 - Troubleshooting Guide
The following troubleshooting guides are provided to assist you in solving any problems that might occur with the Printer or its software. We have tried to make them as complete as possible. The best advice we can offer is to make sure that the system is setup properly, plugged in, that it has an adequate supply of ink before attempting to trouble shoot any problem. -
Page 45: The Printer
The Envelope Imager 1.5+ has variable belt speeds; however the standard 1.5 only has one belt speed (low). Wrong printer driver or wrong belt speed selected. Motor circuit breaker tripped. Wrong printer driver selected. If using the 1.5 Plus driver with the standard 1.5;... -
Page 46: Printer Display Messages
Envelope Imager 1.5/1.5+ Operations Rev. 6/7/2007 DESCRIPTION SOLUTION Pressing the ENTER key will This feature can be used to put printer into the Paper Feed check for proper media transport mode. setup/adjustment. Printer is online, but has not Send data to printer via received any data to print. - Page 47 Error in Download Font Error in Download Char Error in ESC Sequence Ignore Unknown ESC Comnd If empty, replace cartridge and Printer’s ink level monitor has reset ink level monitor. calculated that cartridge # is If not empty, you may ignore almost empty.
-
Page 48: Appendix A - Envelope Imager 1.5/1.5+ Specifications
Up to 300 #10 envelopes (Envelope Imager 1.5 Plus: Up to 500 #10 env.) FEEDER CAPACITY 12 MB MEMORY HP 45A Style: Black, Versatile Black, RENA EasyInk, RENA EasyInk PRINT CARTRIDGES Aqueous, Fast Dry, Red, Blue, Green, and Yellow Windows... -
Page 49: Appendix B - Supplies, Service And Support
(option for some conveyors) Obtaining Supplies, Service and Support Please contact your local Rena dealer to obtain supplies, service and support for your printer. To locate a Rena dealer in your area, please click on the following link and fill out the form. -
Page 50: Index
Print Unit Positioning ... 17 Print Unit Securing Knob... 10 Print-Carriage Cover... 5, 8 Printer Control Panel... 8, 19 printer driver...5, 22, 27, 31, 33 Printhead Carriage ... 16 Purge... 19, 20, 41 Rear Media Guide ... 5, 8 Rear Paper Support... 5, 8 RESET key... - Page 51 Safety Precautions ...4 sensor...42 Separator Locking Knob ...9 Service and Support ...48 Service Menu ...19 Setup Menu ...20 Sheet Separators ...9, 41 Specifications...47 speeds...24 Supplies...48 Systems Requirements...7 TEST key ...11, 18, 19 test print ... 11, 18, 19 total count ... 20 Troubleshooting ...
Need help?
Do you have a question about the Rena Envelope Imager and is the answer not in the manual?
Questions and answers