Table of Contents
Advertisement
Quick Links
Advertisement
Table of Contents

Related Manuals for TN’G TN’G Low Boy


Summary of Contents for TN’G TN’G Low Boy
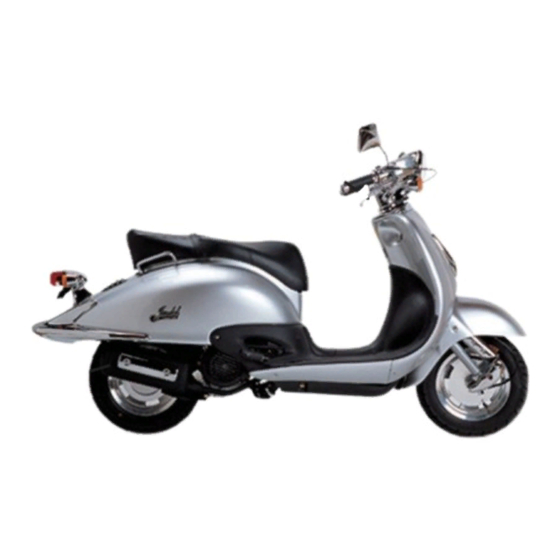
- Page 1 Low Boy Owner’s Manual 150cc Rev2006-3...
-
Page 2: A: Introduction
A: INTRODUCTION Thank you for purchasing a CMSI Manufactured TN’G motor scooter. CMSI has invested over 10 years in establishing the facilities, technical infrastructure and nationwide sales and service network that exists today as TN’G Scooters, a trademark of CMSI. TN’G Scooters is growing rapidly due to its reputation in quality research, styling &... - Page 3 This Owner’s Manual contains important information on safety, operation, and maintenance. Anyone who operates a TN’G Scooter should carefully read and understand the contents of this manual before use. TN’G Scooters are street legal vehicles in all 50 states. You need to check with your state requirements on license and registration to ride this scooter legally on public roads.
- Page 4 important information for operation and maintenance of the scooter. It should remain with the scooter at all times. This Owner Manual contains the most current product information at the time of approval for printing. TN’G Scooters reserves the right to make changes at any time without notice and without incurring any obligation.
-
Page 5: Table Of Contents
B: TABLE OF CONTENTS A: INTRODUCTION.....................Page 2 B: TABLE OF CONTENTS...................Page 5 C: SAFETY INSTRUCTIONS................Page 6 D: SPECIFICATIONS....................Page 13 E: COMPONENT DESCRIPTIONS & FUNCTIONS...........Page 14 F: PRE-RIDE CHECKLIST...................Page 21 G: PROPER OPERATION..................Page 24 H: ROUTINE CHECKS & MAINTENANCE............Page 31 TROUBLESHOOTING..................Page 42 J: WARRANTY......................Appendix... -
Page 6: C: Safety Instructions
C: SAFETY INSTRUCTIONS RIDING SCOOTERS IS FUN ONLY IF YOU PUT SAFETY AS YOUR TOP PRIORITY. WARNING: Before you start operating your scooter: • Be sure you read this owner manual completely and understand all operating features. • Take sufficient time training with safe and proper riding technique. •... - Page 7 An approved helmet needs to: • Meet U.S. Department of Transportation (DOT) and state standards. In addition with labels from the Safety Helmet Council of America, the American National Standard Institute (ANSI), or the Snell Memorial Foundation to assure the integrity of the product.
- Page 8 • Leather or heavy denim clothing is preferred as these materials help to prevent or reduce abrasion. • Boots or shoes should be high enough to cover your ankles and sturdy enough to provide support. • Gloves give you a better grip and help protect your hands from the elements. Safe Riding •...
- Page 9 • Test your brakes after operation in wet conditions. If necessary, apply the brakes several times to let friction dry out the linings. • Never attempt wheelies, jumps and other stunts, as these could cause damage to the scooter and loss of control. •...
- Page 10 Carrying Passengers & Loading WARNING: • This scooter is rated for 2 passengers; total weight of the rider and the passenger must not exceed 330 lbs. • • • • • Do not exceed 17.5 lbs of cargo. • • • • • Attach the load securely since a loose load can catch in the wheel or rack causing skidding.
- Page 11 2. Adjust your riding technique with passenger • Go slower • Start slowing earlier as you approach a stop. • Maintain a larger cushion of space ahead and to the sides. • Wait for larger gaps when you want to cross, enter, or merge with traffic. A scooter is not really designed to carry cargo.
- Page 12 • If you swallow gasoline, inhale gasoline vapor or spill gasoline into your eyes, see doctor immediately or call American Association of Poison Control Centers at 1- 800-222-1222 for assistance. • If you spill gasoline on your clothes, change and wash the affected area immediately with soap.
-
Page 13: D: Specifications
D: SPECIFICATIONS Model Low Boy 150 Idle RPM 1500 Exhaust Vale Gap (Cold) 0.10 mm Model Number LB150T-L Spark Plug Type A7RTC Length 75 inches Battery Type 12V 7Ah Width 36 inches Height 42 inches Headlight (Hi / Lo Beam) 12V 35W/20W x 2 Dry Weight (No fuel) 225 lbs... -
Page 14: E: Component Descriptions & Functions
E: COMPONENT DESCRIPTIONS & FUNCTIONS 9. Tail light 1. Head light 5. Kick starter 10. Front brake 2. Rear brake 6. Center stand 3. Gas cap 7. Side stand 4. Seat lock 8. Muffler... - Page 15 Controls 1. Hi/Lo beam switch 1. Headlight switch 2. Turn Signal Switch 2. Starter button 3. Horn button 3. Throttle control...
- Page 16 ! WARNING DO NOT CHANGE THE KEY POSTION WHILE THE SCOOTER IS IN MOTION. IT MAY RESULT IN LOSS OF CONTROL OR AN ACCIDENT. Instrument Panel 1. Speedometer 2. Odometer 3. Battery Gauge 4. Fuel Gauge Turn Signal Switch and Indicator (see page 15 for switch location) •...
- Page 17 Lo / Hi Beam Switch and Hi Beam Indicator - When illuminated high beam is selected. See page 16 for Lo/Hi beam switch location. See page 15 for indicator location. CAUTION: Be sure to always use LO BEAM light when facing oncoming traffic. Speedometer - Indicates the operating speed.
- Page 18 Engine Stop Switch – Set the switch to on before starting the engine. Set the switch to off for EMERGENCY STOP. For example, if the scooter overturns or you cannot decrease speed with the throttle. Rear Brake Lever/ Front Brake Lever – To decrease speed and stop the scooter from moving.
- Page 19 Fuel Tank Cap • Use the key to open plastic cover (1), then remove the gas cap (2) by turning it counter-clockwise. • Fill the tank up to the bottom of the filler tube. Do not fill past that point. •...
- Page 20 WARNING: • Always turn the engine off prior to refueling the scooter. • Ensure the fuel tank cap is properly installed before riding. • Do not overfill the tank as it may overflow when the fuel warms up and expands. •...
-
Page 21: F: Pre-Ride Checklist
F: PRE-RIDE CHECKLIST 1. CHECK THE FUEL LEVEL. Check the fuel gauge. If fuel is needed refer to directions on page 19 of this manual NOTE: Always turn the engine off prior to refueling the scooter. Always use 90 octane gaso- line or higher to refuel the scooter. - Page 22 4. CHECK THE TIRES. Measure the pressure in each tire. The correct pressures are: Front 29 PSI Rear 33 PSI Visually inspect the tires for damage and wear. Look for nails, glass or stones what are cutting into the tire casing. Look for partial or abnormal tread wear.
- Page 23 Rear Brake Adjustment (See Page 31 in Section H). Check the Brake Fluid Level. (See Page 32 in Section H) 6. CHECK THE SPARK PLUG The spark plug will need to be checked if you find the scooter hard to start. The gap should be between 0.023 &...
-
Page 24: G: Proper Operation
G: PROPER OPERATIONS & TECHNIQUES WARNING: • Be sure you have read this owner manual completely and understand all operating features. • Do not start the engine or operate the scooter in closed areas , as the exhaust fumes are poisonous and inhaling them can cause loss of consciousness and /or even death shortly. - Page 25 NOTE: It is recommended to always “prime” the fuel system by kick-starter when starting the scooter in the following situation (DO NOT ADVANCE THE THROTTLE WHILE KICK STARTING): • Cold or wet weather • If the fuel has run dry •...
-
Page 26: Riding Position
• To maximize the engine life, warm up the engine for 2 to 3 minutes prior to riding. No fast acceleration when the engine is still cold. NOTE: The engine will not start unless either the front or rear brake is activated and the side stand is in the up position. - Page 27 4. ACCELERATION & DECELERATION Speed can be adjusted by twisting the throttle control. Twist the throttle slowly towards you to increase speed and twist the throttle away from you quickly to decrease speed. CAUTION: Fast acceleration when the engine is cold can damage transmission. 5.
- Page 28 WARNING: • Do not apply the brakes too quickly or while in a turn as this may result in loss of traction and control. • • • • • Wet conditions will affect braking. Give twice the normal braking distance in wet or slippery conditions.
- Page 29 WARNING: Do not touch the engine and the exhaust system as they can become very hot. CAUTION: • If the scooter will be parked for an extended period of time, use the center stand instead. • Do not park on a slope or soft ground as the scooter may overturn. •...
-
Page 30: H: Routine Checks & Maintenance
H: ROUTINE CHECKS & MAINTENANCE... -
Page 31: Rear Brake Adjustment
NOTE: * If regular driving is in arid or coastal conditions, air filter and engine oil may need replaced more frequently. RECOMMENDED: To insure warranty and quality performance have a TN’G dealer perform regular maintenance. TIRE PRESSURE / TREAD Measure the pressure of each tire. The correct pressures are: Front 29 PSI / Rear 23 PSI. Visually inspect the tires for damage and wear or abnormal tread wear. - Page 32 HYDRAULIC BRAKE FLUID LEVEL - Front Brake 1. Check the fluid level by looking at the reservoir. The fluid level must be between the two lines. If it is below the lower line, check the brake line and cylinder for a possible leak. 2.
- Page 33 • Always replace the brake fluid with type DOT 3 brake fluid. RECOMMENDATION: An authorized TN’G Dealer or Service Center should complete all brake fluid adjustments. SPARK PLUG REPLACEMENT Check spark plug if scooter is hard to start. 1. The gap should be between 0.023 & 0.032 inches. 2.
- Page 34 RECOMMENDATION: Most spark plugs are self-cleaning. After replacing its best to ride the scooter for a minimum of 10 min. CHECKING ENGINE OIL LEVEL When the scooter is new, the oil will need to be changed after the first 300 Km. (please review regular maintenance schedule) The oil level should be checked every 500 km and oil added as needed.
- Page 35 CHECK THE TRANSMISSION OIL Inspect the transmission oil after the first 300 km and then after every 3000 km or six months which ever comes first. NOTE: Recommend use SAE 10W40 oil in the transmission. 1. Place the scooter on its center stand on a level surface. Let the engine warm up for three minutes and then shut the engine off.
- Page 36 WARNING: Use caution when changing oil to avoid burns! CAUTION: • If the scooter is used in excessively wet areas, or used in severe conditions replace the transmission oil more often than recommended. • Make sure that the fill and drain plugs are tight and not leaking. •...
-
Page 37: Battery Maintenance
CAUTION • If riding in an excessively dusty location, the air filter should be replaced more often than the recommended. • When remounting the air cleaner cover components onto the scooter. Be careful to fit all pieces into their correct place. Failure to achieve proper fit will cause leaks in the air intake system that can cause engine damage. -
Page 38: Battery Replacement
of 6 hours. Additionally, it is important that your scooter be stored in a dry area and protected from extreme temperatures. BATTERY REPLACEMENT The scooter battery is self-sustained by electric current generated by the alternator within the scooter. It’s a good idea to replace the battery every three years. 1. - Page 39 NOTE: Check fuse for good tight contact within fuse housing. WARNING: Always turn the ignition off before inspecting the fuses. CAUTION: • When removing the fuse from the fuse box do not squeeze the fuse puller or it will release the fuse. •...
- Page 40 • Always replace the open fuse with another of the same type! • When washing your scooter, be sure not to get water into the fuse box as this could cause electrical problem. • Do not use a fuse of higher amperage than recommended; this will cause extensive damage to the electrical system and possibly a fire.
-
Page 41: I: Troubleshooting
I: TROUBLESHOOTING ENGINE IS DIFFICULT TO START 1. Check for Fuel in Carburetor i. If No Fuel a. Out of gas – Fill fuel tank b. Fuel cap air hole blocked – Unblock air hole c. Fuel filter or petcock blocked – Clean or replace ii. - Page 42 ii. Spark Plug OK – Check Carburetor 4. Carburetor i. Carburetor Defective a. Blocked idle jet – Clean jet b. Dirty float bowl – Clean bowl c. Low fuel in bowl – Adjust bowl ii. Carburetor OK a. Engine overheated – Check & replace lubricating b.
- Page 43 LOW POWER OUTPUT FROM ENGINE Causes Solutions 1. Air Cleaner Blocked Clean Air Filter 2. Fuel Line In Carburetor Blocked Remove Residue 3. Excessive Carbon Deposit On Piston Remove Carbon Build-Up In Cylinder & Exhaust System 4. Piston & Cylinder Excessively Worn Replace Piston &...
- Page 44 POOR FUEL ECONOMY Causes Solutions 1. Fuel System Leaks Repair Leak 2. Air Cleaner Blocked Clean Air Filter 3. Idle Speed Too High Adjust Idle Speed 4. Riding At Excessive Speeds Ride At More Economical Speeds FUEL DRAINING FROM CARBURETOR OVERFLOW TUBE Causes Solutions 1.
-
Page 45: J: Warranty
WARRANTY CMSI, Inc., warrants to the first retail purchaser of all TN’G vehicles from an Authorized CMSI Dealer and each subsequent owner that the vehicle is free from defects in materials and workman- ship for the period stated in this warranty section. - Page 46 • The repair or replacement of defective parts under this limited warranty must be made by an Authorized CMSI Dealer or service center. Warranty repairs will be made at no charge to you for parts or labor.
- Page 47 An authorized CMSI dealer is your best source for scheduled maintenance on your vehicle. Regardless of who performs your maintenance, if warranty repairs are needed, your dealer may ask you for documentation which may consist of one or more of the following: •...
- Page 48 • Copies of repair orders or other receipts for required maintenance that include the odometer mileage and service date. NOTE: All maintenance receipts should be kept by the owner. Warranty Coverage Table...
- Page 49 The date the motorcycle is delivered to the first retail purchaser Warranty CMSI shall repair or replace, at its option, any part (including parts of the emission control system) that is found defective in material or workmanship under normal use for the applicable time period.
- Page 50 Duration of Implied Warranties Any Implied Warranties, including the implied warranty of merchantability and fitness for a particular purpose are limited to the duration of this written warranty. State Laws May Vary The previously listed limitations or exclusions may not apply to a motor scooter because of state laws.
- Page 51 • Normal wear • Neglect • Improper installation • Unsuitable use in an application for which the part was not designed • The incorporation or use of unsuitable attachments or parts • The unauthorized alteration of any part • The incorporation or use of unsuitable attachments or parts •...
- Page 52 Replacement parts refer to Distributors Limited Warranties – Replacement Parts DISTRIBUTORS LIMITED WARRANTY – NEW MOTORCYCLE CMSI warrants to the first retail purchaser and subsequent purchasers of this vehicle that the motor- cycle is free from defects in materials ands workmanship for the period stated in “Warranty Time Table”.
- Page 53 Tires distributed and sold by CMSI which are either • Original equipment on CMSI vehicles, or • Specified by CMSI for the model the tire is installed on and purchased from an Authorized Dealer for replacement use. To qualify for this warranty...
- Page 54 The replacement of a defective tire under this warranty must be made by an Authorized CMSI Inc Dealer. Replacement Charges – up to 50% tread wear Tire :No charge for a new direct replacement tire.
- Page 55 Labor : 50% charge for mounting and balancing. This Warranty Does Not Cover • Tires installed on non-CMSI vehicles • Tires worn beyond the service limit specified in the appropriate Owners Manual. • Tires rendered unserviceable by road hazard damage, such as impact breaks, punctures, cuts, or snags.
- Page 56 • Must have been used in an application for which it was designed. Warranty Coverage • CMSI Inc will repair or replace, at its option, any genuine CMSI part that is defective in material or workmanship under normal use. • Proof of date of purchase is required.
- Page 57 For this reason it is very important for you to notify CMSI of any change of address or ownership. NHTSA cannot become involved in individual problems between you, your dealer or CMSI.
-
Page 58: Emission Control System Warranty
WARRANTY and NOISE CONTROL SYSTEM WARRANTY. CMSI Inc. warrants to the first owner and each subsequent owner that his vehicle is designed and built so as to conform at the time of sale with applicable regulations of the US Federal Environmen-... - Page 59 RECOMMENDATIONS FOR REQUIRED MAINTENANCE IT IS RECOMMENDED THAT ANY EMISSION SYSTEM MAINTENANCE BE PER- FORMED BY AN AUTHORIZED CMSI DEALER USING GENUINE CMSI REPLACE- MENT PARTS. THE MAINTENANCE, REPLACEMENT OR REPAIR OF THE EMISSION CONTROL SYSTEM MAY BE PERFORMED BY ANY OTHER QUALIFIED SERVICE OUTLET OR INDIVIDUAL.
- Page 60 State’s stringent anti-smog standards. CMSI must warrant the emission control system on your motorcycle for the periods of time listed below provided there has been no abuse, neglect or improper maintenance of your motorcycle.
- Page 61 You are responsible for presenting your motorcycle to a CMSI dealer as soon as a problem exists. The warranty repairs should be completed in a reasonable amount of time, not to exceed 30 days.
- Page 62 CMSI, Inc., 8146 304 Ave SE, Preston, WA 98050, (hereinafter “ CMSI”) warrants that each new CMSI motorcycle includes as standard equipment a headlight, taillight and stoplight, and is street legal: is designed, built and equipped so as to conform at the time of initial retail purchase with all applicable regulations of the United States Environmental Protection Agency, and the California Air Resources Board;...
- Page 63 30 days, or a repair is not completed within 30 days. Any replacement part can used in an emergency repair. CMSI will reimburse the owner for the expenses, including diagnosis, not to exceed CMSI suggested retail price for all warranted parts replaced and labor charges based on CMSI recommended time allowance for the warranty repair and the geographically appropriate hourly labor rate.
- Page 64 CMSI, Inc. specifications which adversely affect performance and/or use in competitive racing or related events. B. Inspections, replacement of parts and other services and adjustments required for required maintenance.
- Page 65 A. The liability of CMSI under this Emission Control System Warranty is limited solely to the remedying of defects in material or workmanship by an authorized CMSI motorcycle dealer at its place of business during customary business hours. This warranty does not cover inconvenience or loss of use of the motorcycle or trans- portation of the motorcycle to or from the CMSI dealer.
- Page 66 However, CMSI is not liable for these parts. The owner is responsible for the performance of all required maintenance. Any individual or service establishment may perform such maintenance. The...
- Page 67 8146 304th Ave SE Preston, WA 98050 www.cmsiinc.com WarrantyRev2006-2...
Need help?
Do you have a question about the TN’G Low Boy and is the answer not in the manual?
Questions and answers