Table of Contents
Advertisement
Quick Links
Advertisement
Table of Contents

Subscribe to Our Youtube Channel
Related Manuals for LevelOne WAP-0003


Summary of Contents for LevelOne WAP-0003
- Page 1 LevelOne WAP-0003 11g Wireless Access Point User’s Manual...
-
Page 2: Table Of Contents
Contents Overview........................3 Product Feature ..................3 System Requirements................3 Getting Start ......................4 Know the WAP-0003 11g Wireless Network Access Point ....4 Connect to the 11g Wireless Network Access Point ......4 Quick Setup with Wizard ...............5 2.3.1 Access the Setting Menu..............5 2.3.2 Setup with Wizard................7 Configuration through WEB Browser ..............12... -
Page 3: Overview
1. Overview LevelOne WAP-0003 11g Wireless Access Point is designed to meet the needs of wireless clients who use 2.4GHz 802.11b/g compliant wireless networking devices such as PC Card. With the Dual-Standard capability, not only seamless but also simultaneous wireless data transmission between AP and all wireless clients using both 802.11b and g can be sustained. -
Page 4: Getting Start
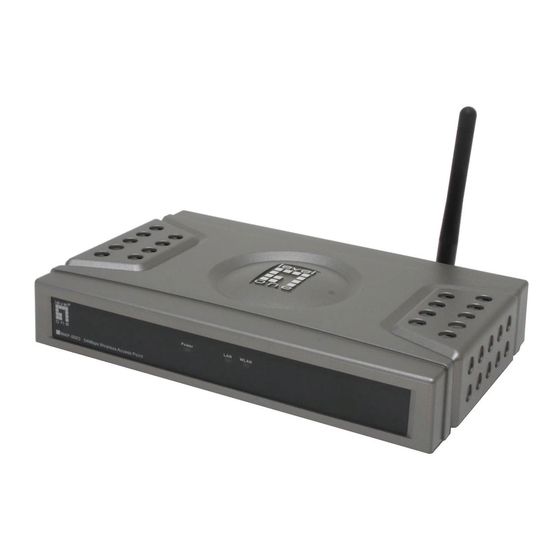
2. Getting Start 2.1 Know the WAP-0003 11g Wireless Network Access Point Ports: ● Power Receptor ● Reset Button ● RJ-45 Ethernet Port Straight through cable is required to connect with router or switch Cross-over cable is required to connect to computer directly LEDs: ●... -
Page 5: Quick Setup With Wizard
1. A broadband Internet connection. 2. ADSL or Cable modem provided by your ISP as part of the broadband connection installation. 3. A Router that connects to the ADSL/Cable modem for Internet connection sharing. 4. An Access Point to connect with the Router to form a wireless infrastructure network. - Page 6 Now, the main menu screen is popup.
-
Page 7: Setup With Wizard
2.3.2 Setup with Wizard Setup wizard is provided as the part of the web configuration utility. You can simply follow the step-by-step process to get your Access Point configuration ready to run in 4 easy steps by clicking on the “Wizard” button on the function menu. The following screen will appear. - Page 8 Step 1: Set Password You can change the password as you like and then click “Next” to continue.
- Page 9 Step2: Set WLAN Connection Please type the name of SSID you like and select the channel. Then, click “Next” to continue.
- Page 10 Step 3: Set WEP Encryption If you like to enable WEP, please click “Enabled”. Then, select the key size of WEP encryption and enter the key value in the key text box. Please click “Next” to continue.
- Page 11 Step 4: Restart The Setup wizard is now completed. The new settings will be effective after the Access Point restarted. Please click “Restart” to reboot the Access Point. If you do not want to make any changes, please click “exit” to quit without any changes. You also can go back to modify the setting by clicking “Back”.
-
Page 12: Configuration Through Web Browser
3. Configuration through WEB Browser 3.1 Status This page as below shows you the following information. Firmware Version: Shows the current firmware version. LAN: Shows the Mac address, IP address (default: 192.168.1.1), Subnet Mask, Gateway Address. The current LAN traffic calculated in terms of number of packets sent and received by AP through wired connection is also displayed. - Page 13 You may clear the entries recorded in the log by clicking the “ Clear Log ” button, and refresh the screen to show the latest log entries by clicking the “ Refresh ” button.
-
Page 14: Basic Setting
3.2 Basic Setting This is the page allow you to change the access point. AP Name: The name of the AP, which can be used to identify the Access Point among the all the Access Points in the wireless network. SSID: Service Set Identifier, which is a unique name shared among all clients and nodes in a wireless network. - Page 15 WEP Key: To disable WEP security, click on the “Disable” option. To enable WEP security, there are 2 types to select – 64bits and 128 bits. When it is selected, the key value must be entered in ASCII or HEX format. Note: When WEP security is enabled, all the wireless clients that wish to connect to the Access Point must also have WEP enabled with the identical WEP Key value...
-
Page 16: Ip Setting
3.3 IP Setting This page allows you to configure the IP and DHCP settings of the Access Point. -
Page 17: Advanced Setting
The default IP address of this access point is 192.168.1.1 with the subnet mask of 255.255.255.0. You can type in other values for IP Address, Subnet Mask and Gateway and click “ Apply ” button for the changes to be effective. You can also set the Access Point to obtain the IP from a DHCP server, but it is not recommended. - Page 18 AP Mode: Select one of the AP operating modes for different application of Access Point. 1. AP – The normal Access Point operating mode which forms a wireless ESS network with its wireless clients. 2. AP Client – Acts as an Ethernet-to-Wireless Bridge, which allows a LAN or a single computer station to join a wireless ESS network through it.
- Page 19 Bridge network. Beacon Interval: To set the period of time in milliseconds that AP sends out a beacon. Default is 100 milliseconds. RTS Threshold: To set the size of RTS/CTS packet size. Default is 2432 bytes. Fragmentation Threshold : To set the number of bytes used for the fragmentation boundary for directed messages.
-
Page 20: Security
3.5 Security This page is where you configure the security features supported by this Access Point. Password: Allow you to change the new login password. Here are the necessary steps: 1. Enter the new password in the “ AP Password New: ” field. 2. - Page 21 3.6 802.1x There are three essential components to the 802.1x infrastructure: (1) Supplicant, (2) Authenticator and (3) Server. The Access Point serves as an Authenticator, and the EAP methods used must be supported by the backend Radius Server. The 802.1x security supports MD5 and TLS Extensive Authentication Protocol (EAP).
-
Page 22: Tools
6. Click “ Apply ” button for the 802.1x settings to take effect after Access Point reboots itself. Note: As soon as 802.1x security is enabled, all the wireless client stations that are connect to the Access Point currently will be disconnected. The wireless clients must be configured manually to authenticate themselves with the Radius server to be reconnected. -
Page 23: Configuration Through Ap Utility
Firmware Upgrade: Click on the “ Browse ” button to open a FileOpen Dialog box, where you get to select the firmware file, which you download from the web for the latest version. Upon selecting the firmware file, click “ Upgrade ” and complete the firmware upgrade process when the Access Point re-operates after it restarts. -
Page 24: Ap Settings
4.2 AP Settings Basic Setting: ESSID: It is used by all wireless devices within the wireless network. Channel: Select the appropriate channel from the dropping list. All wireless devices with the same ESSID will automatically use this channel to communicate with this access point. - Page 25 sure SSID and Channel is set the same as that AP you wish to connect. Wireless Bridge: A pair of APs operating under Bridge mode to act as the bridge that connect two Ethernet networks or Ethernet enabled clients together. You must make sure that the SSID and Channel is set the same as that AP you wish to connect.
- Page 26 boundary for directed messages. Default is 2436 bytes. DTIM Interval: This value indicates the interval of the Delivery Traffic Indication Message (DTIM). A DTIM field is a countdown field informing clients of the next window for listening to broadcast and multicast messages. When the access point has buffered broadcast or multicast messages for associated clients, it sends the next DTIM with a DTIM interval value.
-
Page 27: Ip Setting
4.3 IP Setting Fixed IP Address : Users can assign a fixed IP address to this AP manually. DHCP Client : Enable the DHCP server function by clicking the radio button if you have the DHCP server running in your LAN network. It is not recommended because it probably will cause possible the conflict of IP assignment. -
Page 28: Security
4.4 Security Data Encryption: please tick it if you like to have WEP key as the encryption mechanism. Authentication Type: There are four options: Open System; Shared Key; WPA; WPA-PKS. You may want to set to Shared Key when the clients and AP in the same wireless network enable the WEP encryption. -
Page 29: 802.1X Settings
as the below screen. If the authentication type is WPA, users need to set the 802.1X in the following setting. 4.5 802.1X Settings If users like to set 802.1X or the authentication type is set to WPA, please enable 802.1X function by ticking it. Encryption Key: Select the Encryption Key Length Size ranging from 64 to 128 Bits that you would like to use. -
Page 30: Glossary
Note: As soon as 802.1X security is enabled, all the wireless client stations that are connected to the Router currently will be disconnected. The wireless clients must be configured manually to authenticate themselves with the Radius server to be reconnected. 5. - Page 31 network protocol model. Browser: An application program that enables one to read the content and interact in the World Wide Web or Intranet. BSS: BSS stands for “Basic Service Set”. It is an Access Point and all the LAN PCs that associated with it.
- Page 32 become Extended Service Set. LAN mobile users can roam between different BSSs in an ESS. ESSID: The unique identifier that identifies the ESS. In infrastructure association, the stations use the same ESSID as AP’s to get connected. Ethernet: A popular local area data communications network, originally developed by Xerox Corp., that accepts transmission from computers and terminals.
- Page 33 connect two or more Ethernet networks or Ethernet enabled clients together. The way that multiple bridge setups is based on the topology of Ad-Hoc mode. Node: A network junction or connection point, typically a computer or workstation. Packet: A unit of data routed between an origin and a destination in a network. PLCP: Physical layer convergence protocol PPDU: PLCP protocol data unit Preamble Type: During transmission, the PSDU shall be appended to a PLCP...
- Page 34 in a given period of time. WEP: Wired Equivalent Privacy (WEP) is an encryption scheme used to protect wireless data communication. To enable the icon will prevent other stations without the same WEP key from linking with the AP. Wireless Bridge – One of the additional AP operating modes offered by 54mpbs Access Point, which allows a pair of APs to act as the bridge that connects two Ethernet networks or Ethernet enabled clients together.
Need help?
Do you have a question about the WAP-0003 and is the answer not in the manual?
Questions and answers