Table of Contents
Advertisement
Quick Links
Advertisement
Table of Contents

Related Manuals for 360 Vision H Series


Summary of Contents for 360 Vision H Series
- Page 1 AVALON H User Manual...
- Page 2 AVALON H...
-
Page 3: Preface
Vision Technology in accordance with copyright policy. AVALON H 5004/5008/5016 is 360 Vision Technology's trade mark. The logo of the AVALON H series and that of Avalon is a trademark of 360 Vision Technology Company limited. Ethernet is a trade mark of Xerox Corporation. - Page 4 AVALON H User Manual...
-
Page 5: Avalon H User Manual
Caution AVALON H User Manual This is an operating manual for use with the Avalon H product. All graphical and technical descriptions are given on the basis of Avalon H Caution We strongly recommend that users read all safety cautions carefully before operating the product, and operate the product appropriately. - Page 6 AVALON H User Manual Non-compliance may result in death or serious injury. These messages contain the highest degree of importance. Please connect the power cord only to the Do not expose the product to moisture type of AC outlet indicated in the manual and dampness.
- Page 7 Caution Do not modify the product in any way. In case of lightning, immediately turn off Doing so may lead to fire and electric the power switch and remove the power shock. cord from the power outlet. Failure to do so may result in fire and electric shock.
- Page 8 AVALON H User Manual Non-compliance may result in a serious or lesser degree of injury. It may also cause damage to the product or to property. Do not leave the power cord or other Avoid contact with water or beverages.
- Page 9 Caution Non-compliance may result in minor injury or damage If a foreign substance is stuck to the Do not place credit cards/telephone product, remove it using a soft cloth or cards/bank account books/tickets and tissue. Do not use chemical agents other objects with magnetic properties near (thinner, solvent, etc.) to remove the the product.
- Page 10 AVALON H User Manual Denotes requirements and limitations in operation. Users are recommended to read the relevant details carefully so as to Important operate the product properly and without harm. The product may not work properly if the The product is designed to be proof power source is unstable or/and if electric against electric power failures;...
-
Page 11: Table Of Contents
AVALON H User Manual ....................ii Caution ..........................ii Table of contents ......................vi Chapter 1 Introduction and Installation of AVALON H ..........1-1 1. About AVALON H .................. 1-3 2. AVALON H Specification ............... 1-4 3. System Diagram ..................1-5 4. - Page 12 (6) Jump to Last saved data ............... 3-16 (7) DST (Daylight Saving Time) ............3-17 (8) System log ..................3-18 Chapter 4 AVALON H SETUP ..................4-1 1. Setup Menu .................... 4-3 (1) About Setup ..................4-3 2. System Setup ..................4-4 (1) System configuration ..............
- Page 13 6. Information ..................4-33 (1) System Log ................... 4-33 (2) System status ................4-34 (3) Version ..................4-36 7. Quick Setup ..................4-37 8. Backup ....................4-39 (1) Backup ..................4-39 (2) Auto USB backup ................ 4-41 (3) Backupviewer ................4-42 (3) Backupviewer options ..............
- Page 15 This guide based on the model AVALON H5016...
- Page 16 AVALON H User Manual...
-
Page 17: About Avalon H
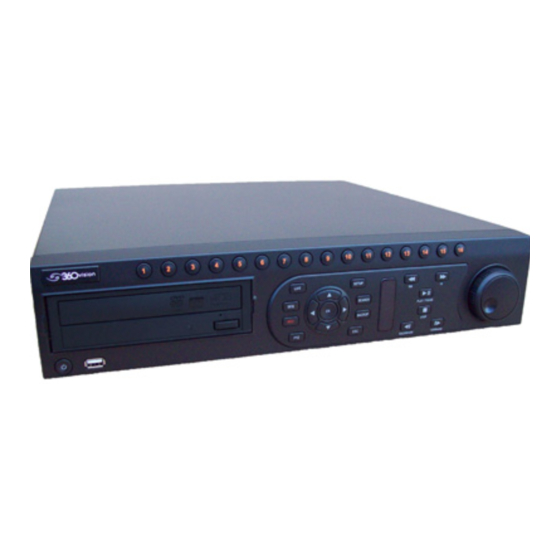
Chapter 1. Introduction About AVALON H AVALON H is Digital Video recorder which uses the leading codec compression (H.264) for its image storage and networking. There are 3 different models ( available within the Avalon H5000 series. Main Features H.264 codec compression. -
Page 18: Avalon H Specification
AVALON H User Manual AVALON H Specification Description AVALON H 5004 AVALON H 5008 AVALON H 5016 Inputs 4 CH Composite 8 CH Composite 16 CH Composite VGA Monitor (NTSC/PAL) CCTV (VGA) Monitor Outputs 1 Spot CCTV Monitor (NTSC/PAL) 4CH/8CH /16CH Loop Composite Videos Screen split 1/4 Split &... -
Page 19: System Diagram
Chapter 1. Introduction System Diagram AVALON H can be connected with the following devices. For more detail on the connection, see each chapter’s explanation in the manual. -
Page 20: Components
AVALON H User Manual Components Following components are included in the box with AVALON H 1 AVALON H Main unit 2 DC Adapter 3 AVALON H (CD) 4 Remote controller 5. User’s Guide 6 Loopback Cable (optional) 7 Rack Mount Kit... - Page 21 Read this chapter before installation. It contains mandatory items you should know Start AVALON H...
- Page 22 AVALON H User Manual...
-
Page 23: Chapter 2 Start Avalon H
Backup recorded data on to your DVD-RW (if installed) and playback the recordings with the provided backup viewer. Notice AVALON H provides many detailed options that user can define. Caution Must connect power adapter to unit first then connect power cord. If not, the unit will... - Page 24 AVALON H User Manual 3. Power button / USB 2.0 port Power button: Turn on/off the DVR unit. USB 2.0 port: Connect mouse to control DVR unit Can be used to perform a Firmware upgrade Make a backup of recorded data 4.
- Page 25 Chapter 2. START AVALON H 4 split display mode sequences in 4 channel groups as shown below. 9 split display mode sequences in 9 channel splits as shown below. PIP (Picture in Picture) mode sequences a single channel within a single screen.
- Page 26 AVALON H User Manual : Press this button to execute the instant recording function : Press this button to enter PTZ mode, ZOOM and Focus buttons only work when the DVR is set in PTZ mode. : Press this button to enter the setup mode...
- Page 27 Chapter 2. START AVALON H 6. Status display POWER LED This LED turns on when the power is on. HDD LED This LED turns on when system is writing data to the HDDs Network LED This LED turns on when the system is connected to the network...
- Page 28 AVALON H User Manual 7. Search buttons The below buttons are used in the search mode and live mode 1ch search. REWIND FASTFOWARD In Search mode In Search mode Move backward from current search Move forward from current search position...
- Page 29 Chapter 2. START AVALON H 8. Other Search Tools The Jog shuttle Dial is another convenient way to search images Jog: inner circle dial Clockwise movement: Move forward from the current search position frame by frame. Counter-Clockwise movement: Move backward from the current search position frame by frame.
-
Page 30: Rear Panel And Connection Locations
AVALON H User Manual (2) rear panel and connection locations H 5004 H 5008/5016 Power supply connector Connect the power supply to the DVR unit. Video Input Connect camera co-axial cable output to the BNC connector Channels locate in the order 1 to 8 from left to right. - Page 31 Chapter 2. START AVALON H MAIN Video Output Connect to the main CCTV monitor on this port. SPOT Monitor Output Displays single channel and event triggered channels on a connected SPOT monitor for more intensive monitoring. Audio In/Out Connect up to 4channels of audio for recording and playback. To record sound,...
-
Page 32: Remote Controller
AVALON H User Manual (3) Remote controller Live Display mode PLAY/PAUSE POWER Set Controller ID SEARCH BACKUP Switch to LIVE SETUP: ROTATE : Auto rotate in Navigation Key : Move menu in normal single display mode mode, PTZ control in PTZ mode... - Page 33 Chapter 2. START AVALON H PLAY/PAUSE Fast forward playback Reverse playback Switch to live mode Navigation key to move menu, Enter to select EXIT 3 : Enter 3 to display channel 3 1 : Enter 1 to display channel 1...
-
Page 34: How To Install
AVALON H User Manual How to Install. (1) Installation To install AVALON H, you must prepare and then connect the Monitor, Camera and Power cables. See following steps on how to make the installation. 1) Pre caution -No impacts or heavy loads should be applied on the product. - Page 35 Chapter 2. START AVALON H 3) Connect to a monitor (VGA Monitor or CCTV Monitor) Connect to the VGA port or/and the TV-OUT Port on rear panel of the product 4) Connection of Audio Devices Connect to the Speaker to Audio OUT and Microphone to the Audio IN (use separate amplifiers)
- Page 36 AVALON H User Manual Caution Use shielded audio cable to prevent system damage in the instance of a lighting strike. 5) Sensor & Other device connection (examples) 2-16...
- Page 37 Chapter 2. START AVALON H - Sensor and Alarm connection 8CH/16CH a. Connection to the RS-485 Port RS485 port is used for PTZ camera connection. Check your PTZ camera and if it has RS422 option, use the TX+,- and RX+,-. In case of RS485 option, just use TX+,- port.
- Page 38 AVALON H User Manual a. Connection to the RS-485 Port RS485 port is used for PTZ camera connection. Check your PTZ camera and if it has RS422 option, use the TX+,- and RX+,-. In case of RS485 option, just use TX+,- port. (Connection may differ by each camera manufacturer, please check the PTZ manual before connection) b.
- Page 39 Chapter 2. START AVALON H 6) Connecting a HDD When connecting a HDD the user must follow the connection details and diagram below. *Disconnect the Power cable from the DVR* a. Remove the top cover. To open the cover, remove screws on both sides and rear.
-
Page 40: Replace Cmos Battery
AVALON H User Manual (2) Replace CMOS battery CMOS battery supplies power to the main board clock when the power is off. Specification Voltage : 3V Capacity : 220mAh Standard load: 0.2mA Operation Temp. : -30 C ~ +60 Warning Wrong battery replacement might cause the battery to explode. - Page 42 AVALON H User’s guide...
-
Page 43: Log In
Chapter 3. Use AVALON H Log in Log in When system starts it will show a ‘log in’ message. There will be no access to the DVR controls until you have logged in. To log in, select the TOOL’ button from the task bar and then select ‘USER’ as in the... -
Page 44: Live Mode
AVALON H User’s guide Live Mode Select a channel You can change the live display mode simply by pressing the front panel or remote controller buttons. Live display can be changed from 1,4,9,16,PiP displays. To change display options, press the ‘Live’ button on front panel. The following illustrations are examples of the live display modes. -
Page 45: Icon
Chapter 3. Use AVALON H ICON In live display the following icons are used to show the system status. Icons on Right Top Full Screen(bottom of right) No HDD, Smart Alarm & HDD Continuous Recording Failure Motion Detection Recording Emergency Recording On... -
Page 46: Pop Up Menu
AVALON H User’s guide In the Task Bar menu the follow icons have these functions. Instant recording function. Once this is started all channels will be changed to CIF resolution and record at full frame rate. PTZ mode function. The user can turn on and off the PTZ features when clicking on this icon. - Page 47 Chapter 3. Use AVALON H Clicking on the right mouse button in the live screen will make the pop up menu appear, as in following picture. Popup Menu Options. HIDE LIVE VIEW : Hide(Covert) selected live channel. RECORD CHANGE : Change the selected channels recording setting directly.
- Page 48 AVALON H User’s guide The ‘NO SIGNAL’ message appears when no camera is connected or there is no signal detected. The Administrator’ can authorize or restrict the user’s permissions this included the live...
-
Page 49: Ptz
Chapter 3. Use AVALON H display and search modes. If the user does not have permission or allowed access to a channel it shows the ‘NO PERMISSION’ message. step 01 Enter the setup Menu step 02 Enter the system/User step 03... - Page 50 AVALON H User’s guide clicking the PTZ icon on menu bar. step 01 Right Click the Mouse Button step2 Click on the PTZ Option step3 PTZ can be controlled by USB mouse. Click and hold the left mouse button and drag it in the desired direction. The PTZ is then moved in the same direction as the mouse.
-
Page 51: Search
Chapter 3. Use AVALON H With the ‘PRESET TOUR’ feature, you can make a PTZ camera move automatic by preset positions. The User can select the ‘PRESET TOUR’ in the PTZ Setup and then record a path for the PTZ camera to follow. -
Page 52: Quick Backup In Playback
AVALON H User’s guide Use the buttons front panel or the JOGSHUTLE to control the playback. The user can control Playback speed in forward and reverse directions with increments of 1,2,4,8,16,32x The button on task bar menu also starts the playback from the most recent recorded file. -
Page 53: Calendar Search
Chapter 3. Use AVALON H After setting the time the Export menu will appear from which the user can selecting a device CD/USB/DVD which the data will be transferred. step1 Press backup button on front panel Display starting time step2... -
Page 54: Event Log
AVALON H User’s guide Move the ‘Blue bar’ in time line to select the time to search the recordings. The color of time bar differs by its recording status (the recording colors explained above). The dates that contain recorded data are marked with a ‘*’ on calendar. -
Page 55: Jump To First Saved Data
Chapter 3. Use AVALON H To review or select a specific event, you can use the navigation keys on the front panel or on the remote controller to move the cursor. Then one the event is highlighted click the play button. -
Page 56: Dst (Daylight Saving Time)
AVALON H User’s guide DST (Daylight Saving Time) The DVR system will change its time according to the configured DST zone setting. This depends on your DST setting if you use this DVR in a country with DST changes, please turn this option on. -
Page 57: System Log
Chapter 3. Use AVALON H DST’ to ON and set the local time zone of the DVR. USE DST When the user enters to the ‘SEARCH> DAYLIGHT SAVING SEARCH’, it marks with the DST recorded data with a ‘*’, to then playback, click the play button. - Page 58 AVALON H User’s guide Enter the system log menu to see all saved log information. Below is any example of an exported log file, file name is ‘system.log’. The system log is displayed as 5 lines per page. You can move to next or previous page with ‘<’,’>’...
- Page 60 AVALON H User’s Guide...
-
Page 61: Chapter 4 Avalon H Setup
Chapter 4. AVALON H SETUP Setup menu About Setup Menu Classification Sub Menu Classification SYSTEM CONFIGURATION DISK CONFIGURATION SYSTEM USER CONFIGURATION CONFIGURATION SHUTDOWN CAMERA CONFIGURATION PTZ CONFIGURATION CAMERA SPOT/SEQUENCE CONFIGURATION MONITOR CONFIGURATION RECORD CONFIGURATION RECORD MOTION/EVENT CONFIGURATION NETWORK CONFIGURATION NETWORK... -
Page 62: System Setup
AVALON H User’s Guide System Setup To enter the setup menu the user can press the ‘SETUP’ button on the front panel or use the mouse and task bar menu via Tool > Setup as below. Step 01 Use the mouse click on Tool then select Setup. -
Page 63: System Configuration
Chapter 4. AVALON H SETUP System configuration This menu shows the whole system status and can be used for setting up the general configurations on the system. To convert between NTSC/PAL, use the switch on rear side of this product. After switching between video formats you must restart system. - Page 64 AVALON H User’s Guide TIME & DATE: When you click on the time and date areas you can change the time and date settings of the DVR. If you are using the NTP function the time and date options will not be available.
- Page 65 Chapter 4. AVALON H SETUP Clicking the TIMEZONE option will show the following pictures. Select the local timezone where the system is located and then click ‘Ok’. The System will automatically update for DST if selected area is in a DST timezone. (DST: DAY LIGHT SAVING TIME).
- Page 66 AVALON H User’s Guide Also the user can set the ‘DATE/TIME’ by connecting to an NTP server for automatic time synchronization. Select the NTP Type box and the menu below will appear. NTP Setup (NTP SERVER) There are two options for time synchronization.
- Page 67 Chapter 4. AVALON H SETUP Clicking on the S/W Upgrade box allows the user to upgrade system. The ‘UPGRADE FIRMWARE’ will appear and the user should select which device the software upgrade files are located - DVD/CD/USB/FTP. Upgrade with USB memory.
-
Page 68: Disk Configuration
AVALON H User’s Guide Disk Configuration This menu displays the information about the HDD installed on the DVR. The user can define ‘overwrite’ function on/off when HDD is full and format HDD, check S.M.A.R.T verification. The number of Built in HDD’s can vary according to its model. -
Page 69: User Configuration
Chapter 4. AVALON H SETUP User configuration In user configuration, you can add, delete and change each user’s permission or login authorization. To add a new user 1.Click on the ‘ADD/CHANGE’ 2.Enter the username and password for the new account. - Page 70 AVALON H User’s Guide To change a Users permissions: 1.Decide which user to change from the users list. 2.Click the ‘ADD/CHANGE’ button. 3.Then the ‘USER ADD/CHANGE’ menu will be displayed as above. 4.Change permissions for the user and then click ‘OK’ to save.
-
Page 71: Configuration
Chapter 4. AVALON H SETUP Configuration The System configuration file can be export/import in this menu. Export means save current DVR setup file on to an external devices such as USB Import means load a saved setup file from an external device such as CD/DVD/USB to the DVR system. -
Page 72: Camera
AVALON H User’s Guide Camera Camera configuration This menu is for setting up the camera configuration with the DVR. The Hidden feature is to select hide (covert) channel on live and search screens. Press ‘ADJUST’ to change image settings. The image settings that can be changed for each channel and are selectable for Brightness, Contrast and Color. -
Page 73: Ptz Configuration
Chapter 4. AVALON H SETUP PTZ Configuration This menu is used to configure any connected PTZ cameras. PROTOCOL Select the camera protocol that is used for the connected PTZ camera. Enter the ID number the same as the connected PTZ camera’s ID. -
Page 74: Spot/Sequence Configuration
AVALON H User’s Guide BAUD RATE The Baud Rate can be set from 2,400bps to 57,600bps. SPOT/SEQUENCE Configuration In this menu the user can set the options for Spot and Sequence control on the DVR, SPOT: Configuration for the Spot monitor output of the DVR. (The time can be configured from 1... -
Page 75: Monitor Configuration
Chapter 4. AVALON H SETUP MONITOR CONFIGURATION Configure the monitor output and display settings. Transparency Setup: Sets the transparency of the setup menu, so the user can still monitor the live screen when in setup. ‘0’ means no transparency and this is selectable in a range of 0-30. -
Page 76: Record Configuration
AVALON H User’s Guide RECORD CONFIGURATION FRAME There is an option to switch On/Off which channels are recording. If the user does not want to record a selected channel, set it ‘off’. Then the system will not record that channel regardless of its input. - Page 77 Chapter 4. AVALON H SETUP ‘POST ALARM’ this is the time that the record continues after an event is triggered. This can be set up to a Max. 30 seconds. SCHEDULE Use to set the recording schedule on each camera individually or to all channels. The user can define the schedule by a single hour interval.
- Page 78 AVALON H User’s Guide though it detects motion. Pink – Motion detection (MOT) + Sensor detection (SENS) Recording The unit does not record unless there is a motion event detected or a sensor triggered. If the ‘motion/event menu configuration is set to ‘OFF’ the DVR system doesn’t record at any time nor trigger any event even if there is motion or a sensor event.
- Page 79 Chapter 4. AVALON H SETUP Set ‘Date’ that you want then unit to use the recording schedule and then input a Description for the holiday. Click the ‘Add’ button to then save on list and recording schedule. AUDIO In the Audio menu the user can select 4 audio input and 1 audio output. To listen to live audio, you must set the audio channel on to a correspondent camera channel.
- Page 80 AVALON H User’s Guide The Two way audio feature is available which allows live streaming of audio from DVR to remote and vice versa. Audio sound is available in both live & playback mode by your configuration. To get live audio streamed to a remote client, you need to use the remote client software supplied with the DVR.
-
Page 81: Motion/Event Configuration
Chapter 4. AVALON H SETUP instant recording setting configuration whenever the button is pressed, this function is usually used for alarm or emergency scenarios. Setup configuration for Instant recording. FPS: Set the fps to be used: Tip Instant Recording (Emergency Recording) If ‘Instant recording’... - Page 82 AVALON H User’s Guide INPUT Used to setup the MOTION/SENSOR events which will be applied on each channel. Motion: Use this option to toggle on/off the motion detection for the channel Size: Use to select the level of motion detection sensitivity to movements. This can...
- Page 83 Chapter 4. AVALON H SETUP Sensor: On a 16 channel DVR there are up to 16 sensor inputs. Use the menu to set the sensor type which will either be N/O (Normal Open) and N/C (Normal Close). Alarm: On the DVR there are 4 outputs for alarm, set if the alarm requires a signal On/Off.
- Page 84 AVALON H User’s Guide Alarm: Select which Alarm output to activate with the sensor/motion channel number. Delay: The user can set the delay time between ‘0~100’seconds. The delay means time between that sensor/motion event and the triggering of the alarm output. The default value is [OFF].
-
Page 85: Network
Chapter 4. AVALON H SETUP In this menu the user can select how the DVR reports an event to remote clients. Send to Alarm Monitor: This option is to toggle on/off the sending of alarms to a remote client over the network. - Page 86 AVALON H User’s Guide Input the details for the type of network that the DVR is connected. Network Type: Select network type as either STATIC IP or DHCP. Subnet Mask / Gateway: Enter the IP address of Router and Gateway. This information is necessary when you are connecting to a network via router.
-
Page 87: Serial Configuration
Chapter 4. AVALON H SETUP The DDNS function allows the user to enter a fixed DDNS name when the DVR is using a dynamic ip address. This service is useful for when connecting over the WAN, as most ISP companies will charge extra for a line with static IP. -
Page 88: E-Mail Server
AVALON H User’s Guide name for external devices connected to the RS 232 and RS 485 ports. The serial ports can be used to connect to external device such as keyboard controller. Both the RS-232 and RS-485 have the same setup menu, the user should use the appropriate transmission type based on the product. -
Page 89: Information
Chapter 4. AVALON H SETUP The Email configuration is for setting up the DVR as an Email server. This is so the user can receive an email message to their account for when changes or alarms happen on the DVR. -
Page 90: System Status
AVALON H User’s Guide The system log can be used to display information about the DVR unit. Date: Click on the date to select which day you wish to review the system log. Search Options: The system log can be searched by 3 different categories, System, Setup and Network. - Page 91 Chapter 4. AVALON H SETUP This menu contains all the information about the connected HDD and can be used to check the usage of currently installed internal storage. Recording Start: This shows the oldest data of recorded data on the DVR.
-
Page 92: Version
AVALON H User’s Guide Audio This menu displays the current activation audio status. Version The version menu displays all the general system information. 4-34... -
Page 93: Quick Setup
Chapter 4. AVALON H SETUP Here the user can also check which Video format is set on the DVR – NTSC or PAL. If you have any issue with the product you may be asked by your distributor to supply them with the firmware version installed on the DVR. - Page 94 AVALON H User’s Guide In the quick setup menu there are options for adjusting the recording Resolution, FPS, and Recording mode. These settings are applied to all the channels on the DVR. There is a display to show the recording duration when the changes are made. This is so the user can adjust the recording and at the same time the recording retention.
-
Page 95: Backup
Chapter 4. AVALON H SETUP Average Picture quality: Select the picture quality for recording. Average Days to record: This will display estimated number of days/hours the DVR will record with the settings applied. Caution: When using the Quick setup your current recording settings will be overwritten as the Quick setup take top priority, export/save your configuration if they are to be used again in the future. - Page 96 AVALON H User’s Guide 2.The ‘export’ screen will then be shown as below. 3.Click the ‘SCAN’ option to search the DVR for connected (installed) backup devices. One the scan is complete select a device to export the recordings 4.Select which channels are to be exported for the backup...
-
Page 97: Auto Usb Backup
Chapter 4. AVALON H SETUP 5.Enter the start/end times of the recording. 6.Click the ‘ESTIMATE’ button to display an estimate of the required space. 7.To copy viewer together with the backup select the ‘EXPORT VIEWER’ option. 8.Once all the settings have been make click the ‘Export’ option. -
Page 98: Backupviewer
AVALON H User’s Guide 3. System displays the ‘Export’ page. 4. Click on the ‘AUTO USB BACKUP’ tab on the bottom right of the screen. 5. Click the ‘SCAN’ button and select the USB media to save. 6. Check ‘Overwrite’ if you plan to overwrite the existing data. - Page 99 Chapter 4. AVALON H SETUP 1. To playback using the backupviewer 2. Press button Backup search browser will be displayed 3. Select a backup folder to open (folders are assigned by date) 4. Then select the backup file In the folder (backup files are assigned by the time) 5.
-
Page 100: Backupviewer Options
AVALON H User’s Guide Backup Viewer Options Convert to avi format Zoom in / out Save a still image Print a still image Above are the functions of the buttons on the backup viewer. Backupviewer options Backup viewer has several convenient options. - Page 101 Chapter 4. AVALON H SETUP DirectDraw This is for a PC which doesn’t support ‘Direct Draw’. The user must restart backupviewer after changing this option. De-Interlace Improve playback picture quality when playing back D1 (704x480) data. Following pictures shows the difference between interlaced and de-interlaced images.
-
Page 102: Chapter 5 Troubleshooting Guide And Glossary
Troubleshooting Guide and Glossary... - Page 103 AVALON H User Manual...
- Page 104 Troubleshooting Guide (FAQ) Problem with Startup Problem Possible Causes Possible action Please check whether power cable is correctly connected. It doesn’t work or Power may not be supplied to switch on. the unit. Please check whether power source has the recommended power capacity.
- Page 105 AVALON H User Manual Display Startup Problem Possible Causes Possible Action Camera may not have been Check whether the camera is installed properly installed properly Slow image display Camera image is projected Connect the camera directly to another unevenly or is not...
- Page 106 Sensor/Alarm Detection Problems Possible causes Actions Set the recording mode to sensor recording Sensor/Alarm is not set and then select the alarm output port. There is no reaction from the alarm even You may have used the Use an A Type sensor if the sensor has wrong type of sensor detected an event.
- Page 107 AVALON H User Manual Recording Mode: Motion Detection There is a movement, but The sensitivity is set Set a higher sensitivity value in the recording the recording is not too low setting. initiated The sensitivity is set Set a lower sensitivity value in the recording setting...
- Page 108 You may use successfully cross cable or direct cable executed, but not properly connected Test connecting the PC and Avalon H directly, using There is an error in the cross cable. If it works then start checking the network environment network environment.
-
Page 110: Glossary
AVALON H User Manual Glossary DVR (Digital Video Recorder) A DVR is a video storage device that compresses and stores camera data processed in a digital signal format. This system integrates a screen conversion switch, screen divider, VCR, sensor and alarm controller, into a single digital recording system. DVRs use technology based on video algorithm H.264, MPEG, MJPEG etc. - Page 111 USB (Universal Serial Bus) USB is a kind of serial port for connecting computer peripheral devices. USB has the function to control several peripheral devices (HDD, CD-ROM drive, keyboard, printer, etc.) and is an interface supporting Plug & Play technology. SMTP (Simple Mail Transfer Protocol) SMTP is a standard protocol used in Internet e-mail transmission.
-
Page 112: Product Warranty Card
Product Warranty Card Product name: Date of purchase: Serial NO: Place of purchase: Guarantee Clauses The high quality of the product is guaranteed by strict quality control. The warranty period of the product is for one year from the purchase date. Within the warranty period, malfunctions occurring without apparent cause during normal operation will be given A/S service free of charge. - Page 113 360 Vision Technology Ltd Registered Office: Unit 7 Seymour Court Manor Park Runcorn Cheshire WA7 1SY tel: +44 (0)870 903 360 1 fax: +44 (0)870 903 360 2 Web: www.360visiontechnology.com...
Need help?
Do you have a question about the H Series and is the answer not in the manual?
Questions and answers