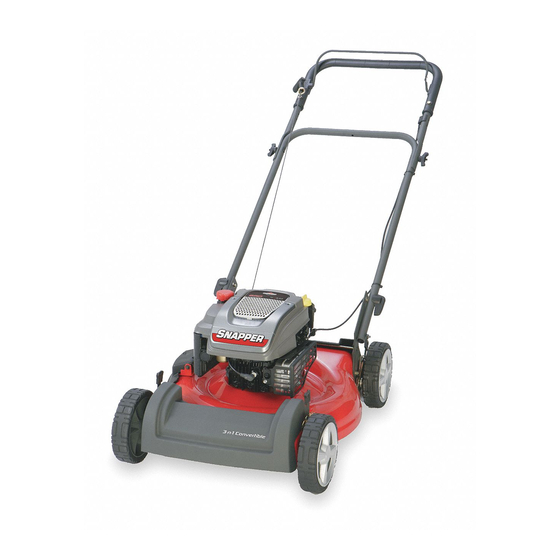
Snapper NSPV22675HW Operator's Manual
22" walk behind mowers
Hide thumbs
Also See for NSPV22675HW:
- Safety instructions & operator's manual (24 pages) ,
- Safety instructions & operator's manual (24 pages) ,
- Parts manual (20 pages)
Table of Contents
Advertisement
Available languages
Available languages
NOTE: Specifications are correct at time of printing and are subject to change without notice.
* Actual sustained engine power will likely be lower due to operating limitations and environmental factors. Please refer to 'Engine Power Rating Information' for
further details.
Safety Instructions & Operator's Manual for
22" WALK BEHIND
S2265 (7800189)
SP2265 (7800165)
SPV22675HW (7800190)
NS2265 (7800228)
NSP2265 (7800229)
NSPV22675HW (7800230)
Manual No. 7102320 (I.R. 1/15/2008)
MOWERS
Models
TP 100-5333-IR-WB-N
Advertisement
Chapters
Table of Contents

Related Manuals for Snapper NSPV22675HW


Summary of Contents for Snapper NSPV22675HW
- Page 1 NS2265 (7800228) NSP2265 (7800229) NSPV22675HW (7800230) NOTE: Specifications are correct at time of printing and are subject to change without notice. * Actual sustained engine power will likely be lower due to operating limitations and environmental factors. Please refer to ‘Engine Power Rating Information’ for further details.
- Page 2 Serial Number ______________________________________________________________ Engine Model_________________________Type__________________Trim___________________ It is very important that you register your purchase with Snapper to ensure warranty coverage. Please mail your product registration card to: Snapper at P.O. Box 777, McDonough, Georgia 30253. Or you may register online at www.snapper.com.
-
Page 3: Table Of Contents
Table of Contents Operator Safety ..........2 Important Operator Safety Instructions . -
Page 4: Operator Safety
If you have any questions pertaining to your machine which your dealer cannot answer to your satisfaction, call or write the Customer Service Department at SNAPPER, McDonough, Georgia 30253. Phone: (1-800-317-7833). Protection for Children... - Page 5 12. STOP engine and wait until the blade comes to com- 11. Have machine serviced by an authorized SNAPPER plete STOP before removing grass bag and/or clearing dealer at least once a year and have the dealer install any grass.
-
Page 6: Preparation
‘Engine Stop Lever’.) Slowly pull the recoil-start grip (A, Figure 3). To attach the recoil-start grip to the rope guide (B), twist the rope through the rope guide mounted on the right side of the handle. Figure 3: Attaching the recoil-start grip www.snapper.com... -
Page 7: Handle Height
Preparation (Continued) Handle Height 1. Turn the knobs (A, Figure 4) on either side of the lower handle (B) to retract the locking pins. Align the lower handle with the desired set of holes in the handle brackets (C). Turn the knobs to release the locking pins and secure the lower handle. -
Page 8: Grass Bag
2. Make sure the handle (A, Figure 6) is on the outside of the grass bag. 3. First, attach the clips (B, Figure 6) to the side of the frame assembly (C). Next, attach the clips to the top and bottom of the frame assembly. Figure 6: Installing the bag clips www.snapper.com... - Page 9 Preparation (Continued) Mounting the Grass Bag 1. To mount the grass bag on the mower, raise the rear door (A, Figure 7). Holding the grass bag by the handle (B), mount the hooks (C) on either end of the grass bag frame assembly onto the rear door pivot rod (D).
-
Page 10: Side Discharge Deflector
Figure 9) goes through the slot in the side deflector. Figure 9: Side discharge deflector locking tabs 4. Lower the mulcher cover (A, Figure 10). 5. Attach the wire to the spark plug. Figure 8: Installing the side discharge deflector Figure 10: Releasing the mulcher cover www.snapper.com... -
Page 11: Mulching Tips
Preparation (Continued) Mulching Tips Keep a sharp edge on the blade. A blade that is not sharp will cause the ends of the grass to become brown. Clean the underside of the mower housing. Grass and Mulching finely cuts the grass so that the grass can be easily other debris can keep the mower from working recycled. -
Page 12: Operation
Figure 12) completely back. The drive system is now unit, replace a bent or damaged engine stop cable. engaged. Models SPV22675HW & NSPV22675HW: Slowly pull the drive lever back. The drive system is now engaged. To increase ground speed, slowly pull the drive lever far- ther back. -
Page 13: Starting The Engine
Operation (Continued) Starting the Engine WARNING: The blade will rotate when the engine runs. IMPORTANT: Before you start the engine, operate the engine stop lever several times. Make sure the engine stop cable moves freely. Note: The engine design does not include a throttle control or an engine speed adjustment. -
Page 14: Maintenance
2. To lubricate the engine, refer to the “Engine Instruction Book”. Note: Do not lubricate the engine stop cable. Lubricants will damage the cable and prevent the cable from moving freely. Replace the cable if bent or damaged. Figure 16: Adjusting the height of cut www.snapper.com... -
Page 15: Removing The Drive Belt
3. (SP2265 & NSP2265 Only): Loosen the belt tension bolt (A, Figure 18). Note: Models SPV22675HW & NSPV22675HW have a belt guide on the transmission that must be removed prior to belt removal. Be sure to replace after belt installation. -
Page 16: Adjusting The Drive Cable
IMPORTANT: Before you start the engine, operate the engine stop lever several times. Make sure the engine stop cable moves freely. Figure 21: Adjusting the drive cable www.snapper.com... -
Page 17: Blade Service
Maintenance (Continued) Blade Service WARNING: Before you inspect the blade or the blade adapter, disconnect the wire to the spark plug. If the blade hits an object, stop the engine. Disconnect the wire to the spark plug. Check the unit for damage. Frequently check the blade for wear or damage such as cracks. -
Page 18: Preparing The Mower For Storage
Slowly pull the recoil-start grip so that the oil will protect the cylinder. Install a new 10. Put the unit in a building that has good ventilation. spark plug in the cylinder. www.snapper.com... -
Page 19: Troubleshooting
Troubleshooting The engine will not start. 1. Make sure the fuel tank is filled with clean gasoline. Do not use old gasoline. 2. On a cold engine, push the primer button (optional on some models). For the number of times required to push the primer button, see the engine manufacturer’s instructions. -
Page 20: Warranty
For ninety (90) days from purchase date for the original purchaser’s commercial, rental, or other non-residential use, SNAP- PER, through any authorized SNAPPER dealer will replace, free of charge, any part or parts found upon examination by the factory at McDonough, Georgia, to be defective in material or workmanship or both. - Page 21 Slope Guide...
- Page 22 Notes www.snapper.com...
- Page 23 Notes...
- Page 24 Part Number Blade Control Cable 7101395 (All) Wheel Drive Cable 7101401 (SP2265 & NSP2265 Only) Wheel Drive Cable 7101396 (SPV22675HW & NSPV22675HW Only) Cutter Blade 7100851 (All) Drive Belt 7101193 (SP2265 & NSP2265 Only) Drive Belt 7100913 (SPV22675HW & NSPV22675HW Only) Engine Power Rating Information: The gross power rating for individual gas engine models is labeled in accordance with SAE (Society of Automotive Engineers) code J1940 (Small Engine Power &...
- Page 25 Instrucciones de seguridad y Manual del operador de las CORTADORAS DE CÉSPED CON CONDUCTOR A PIE SNAPPER ® DE 55.9 cm (22") Modelos S2265 (7800189) SP2265 (7800165) SPV22675HW (7800190) NS2265 (7800228) NSP2265 (7800229) NSPV22675HW (7800230) NOTA: las especificaciones son correctas a la fecha de impresión, y están sujetas a cambios sin aviso previo.
- Page 26 Gracias por comprar este producto de calidad Snapper. Nos complace que haya puesto su confianza en la marca Snapper. Cuando se maneja y mantiene de acuerdo a las instrucciones que aparecen en este manual, su producto Snapper brindará muchos años de servicio seguro.
- Page 27 Índice Seguridad del operador ..........2 Instrucciones importantees de seguridad del operador .
-
Page 28: Seguridad Del Operador
Ante cualquier duda respecto a su máquina que su concesionario no pueda solucionar para su satisfacción, llame o escriba al Customer Service Department, SNAPPER, McDonough, Georgia 30253. Phone: (1-800-317-7833). Protección para los niños Preparación... - Page 29 11. Solicite un servicio de mantenimiento para la máquina por están DETENIDAS. Desconecte el cable de la bujía y átelo lejos de parte de un distribuidor SNAPPER autorizado al menos una vez al la bujía para evitar el arranque accidental.
-
Page 30: Preparación
Para sujetar el mango del cable retráctil de arranque a la guía (B) del cable, entrelace el cable a través de la guía de cable montada en el lado derecho del asidero. Figura 3: Sujeción del mango del cable retráctil de arranque www.snapper.com... - Page 31 Preparación (Continuación) Altura de la manija (excepto los modelos de ruedas altas) 1. Gire las perillas (A, Figura 4) de los lados de la manija inferior (B) para retraer los pasadores de sujeción. Alinee la manija inferior con el juego de agujeros correspondiente de los soportes de manija (C).
-
Page 32: Bolsa De Césped
2. Verifique que la manija (A, Figura 6) está en el lado exterior de la bolsa de césped. 3. Primero, sujete los ganchos (B, Figura 6) al costado del armazón (C). Luego, sujete los ganchos a la parte superior e inferior del armazón. Figura 6: Instalación de los ganchos de la bolsa www.snapper.com... - Page 33 Preparación (Continuación) Montaje de la bolsa de césped (No todos los modelos) 1. Para montar la bolsa de césped en el cortacésped, levante la puerta trasera (A, Figura 7). Sosteniendo la bolsa de césped mediante la manija (B), monte los ganchos (C) de ambos extremos del armazón de la bolsa de césped sobre la barra- pivote (D) de la puerta trasera.
-
Page 34: Placa Para El Modo De Triturado
4. Baje la cubierta del triturador (A, Figura 10). 5. Conecte el cable a la bujía. Figura 9: Lengüetas de enganche del deflector de descarga lateral Figura 8: Instalación del deflector de descarga lateral Figura 10: Liberación de la cubierta del triturador www.snapper.com... -
Page 35: Recomendaciones Acerca Del Triturado
Preparación (Continuación) Recomendaciones acerca del triturado Mantenga afilada la cuchilla. Una cuchilla que no está afilada provocará que los extremos del césped se vuelvan de color marrón. El triturador corta en trozos pequeños el césped para que el césped Limpie el lado de abajo de la cubierta del cortacésped. El pueda reciclarse fácilmente. -
Page 36: Manejo
Modelos SPV22675HW y NSPV22675HW: tire lentamente de la palanca de tracción hacia atrás. El sistema de transmisión está ahora acoplado. Para aumentar la velocidad de tierra, tire lentamente de la palanca de tracción más hacia atrás. -
Page 37: Arranque Del Motor
Manejo (Continuación) Encendido del motor ADVERTENCIA: La cuchilla girará cuando el motor se ponga en funcionamiento. IMPORTANTE: Antes de arrancar el motor, accione varias veces la palanca de parada del motor. Verifique que el cable de parada del motor se mueve libremente. Nota: El diseño del motor no incluye un control del acelerador o un ajuste de la velocidad del motor. -
Page 38: Mantenimiento
Motor". Nota: No lubrique el cable de parada del motor. Los lubricantes dañarán el cable y evitarán que el cable se mueva libremente. Reemplace el cable si está doblado o dañado. Figura 16: Ajuste de la altura de corte www.snapper.com... -
Page 39: Desmontaje De La Correa De Transmisión
3. (SP2265 y NSP2265 únicamente): afloje el perno de tensión de la correa (A, Figura 18). Nota: los modelos SPV22675HW y NSPV22675HW tienen en la transmisión una guía de correa, que debe quitarse antes de desmontar la correa. Asegúrese de volver a colocarla después de instalar la correa. -
Page 40: Ajuste Del Cable Del Sistema De Tracción De Las Ruedas
IMPORTANTE: Antes de arrancar el motor, accione varias veces la palanca de parada del motor. Verifique que el cable de parada del motor se mueve libremente. Figura 21: Ajuste del cable del sistema de tracción de las ruedas www.snapper.com... -
Page 41: Servicio De Mantenimiento De La Cuchilla
Mantenimiento (Continuación) Servicio de mantenimiento de la cuchilla ADVERTENCIA: Antes de inspeccionar la cuchilla o el adaptador de cuchilla, desconecte el cable de la bujía. Si la cuchilla golpea un objeto, detenga el motor. Desconecte el cable de la bujía. Revise la unidad en busca de daños. -
Page 42: Preparación Del Cortacésped Para Almacenamiento
4. Remueva la bujía del cilindro. Vierta una onza de aceite dentro del cilindro. Hale lentamente el mango del cable retráctil de 10. Coloque la unidad en una edificación que tenga buena venti- arranque para que el aceite proteja el cilindro. Instale una bujía www.snapper.com... -
Page 43: Solución De Problemas
Solución de problemas El motor no arranca. 1. Verifique que el tanque de combustible está lleno con gasolina limpia. No utilice gasolina vieja. 2. En un motor frío, oprima el botón cebador (opcional en algunos modelos). Para averiguar el número de veces requerido para oprimir el botón cebador, vea las instrucciones del fabricante del motor. -
Page 44: Garantía
GARANTÍA LIMITADA DE 2 AÑOS Por dos (2) años a contar de la fecha de compra de este producto para ser usado por el comprador original, SNAPPER, por inter- medio de cualquier concesionario autorizado SNAPPER reemplazará, gratuitamente (con la excepción de impuestos donde sean aplicables), cualquier pieza o piezas que después de ser examinadas por la fábrica en McDonough, Georgia, EE.UU., mostrara tener... - Page 45 Guía para manejar en pendientes...
- Page 46 Notas www.snapper.com...
- Page 47 Notas...
- Page 48 Cable para el control de cuchilla (Todos) 7101395 Cable de tracción de ruedas (SP2265 y NSP2265 únicamente) 7101401 Cable de tracción de ruedas (SPV22675HW y NSPV22675HW únicamente) 7101396 Cuchilla de corte (Todos) 7100851 Correa de transmisión (SP2265 y NSP2265 únicamente) 7101193 Correa de transmisión (SPV22675HW y NSPV22675HW únicamente)
Need help?
Do you have a question about the NSPV22675HW and is the answer not in the manual?
Questions and answers