Table of Contents
Advertisement
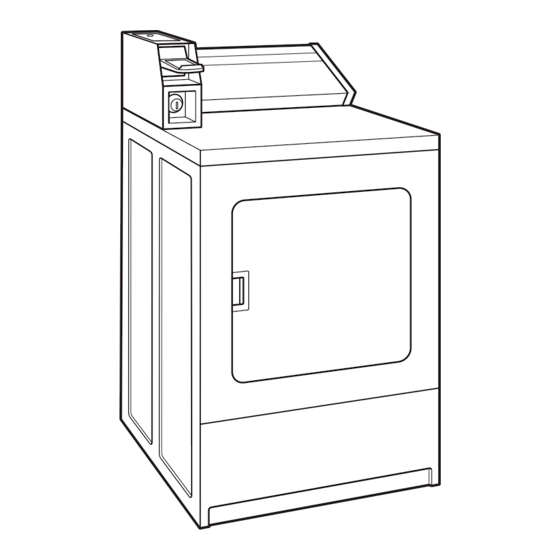
INSTALLATION INSTRUCTIONS
Commercial Dryer
Gas (120-Volt, 60-Hz) or
Electric (120/240-Volt, 60-Hz)
TABLE OF CONTENTS
Page
Dryer Safety ......................................................................... 2
Tools & Parts ........................................................................ 5
Dimensions/Clearances ...................................................... 6
Location Requirements ....................................................... 8
Gas Dryer Electrical Requirements ...................................... 9
Gas Requirements ............................................................ 10
Electric Dryer Electrical Requirements .............................. 11
Dryer Venting Requirements ............................................. 13
Gas Supply Connection ..................................................... 15
Installing Leveling Legs, Coin Slide, and Coin Box ............... 17
Electric Dryer Electrical Connections ................................. 18
Leveling ............................................................................. 22
Complete Installation ........................................................ 23
Changing to a 30- or 60-Minute Timing Cam ...................... 24
Maintenance Instructions .................................................. 25
If You Need Assistance ....................................................... 25
8563800D
www.whirlpoolcommerciallaundry.com
Advertisement
Table of Contents

Related Manuals for Whirlpool Commercial Dryer


Summary of Contents for Whirlpool Commercial Dryer
-
Page 1: Table Of Contents
INSTALLATION INSTRUCTIONS Commercial Dryer Gas (120-Volt, 60-Hz) or Electric (120/240-Volt, 60-Hz) TABLE OF CONTENTS Page Dryer Safety ................. 2 Tools & Parts ................ 5 Dimensions/Clearances ............6 Location Requirements ............8 Gas Dryer Electrical Requirements ........9 Gas Requirements ............10 Electric Dryer Electrical Requirements ...... -
Page 2: Dryer Safety
DRYER SAFETY It is recommended that the owner post, in a prominent location, instructions for the customer’s use in the event the customer ■ smells gas. This information should be obtained from your gas supplier. Post the following warning in a prominent location. ■... - Page 3 DRYER SAFETY IMPORTANT: When discarding or storing your old clothes dryer, remove the door.
-
Page 4: Important Safety Instructions
DRYER SAFETY IMPORTANT SAFETY INSTRUCTIONS WARNING: To reduce the risk of fire, electric shock, or injury to persons when using the dryer, follow basic precautions, including the following: Read all instructions before using the dryer. Clean dryer lint screen before or after each load. ■... -
Page 5: Tools & Parts
TOOLS & PARTS Tools Needed: 8" (200 mm) 8" (200 mm) or 10" (250 mm) flat-blade screwdriver phillips screwdriver or 10" (250 mm) adjustable wrench pipe wrench that opens to 1" (25 mm) Torx®† T-20 security 1" (25 mm) hex-head 5⁄16"... -
Page 6: Dimensions/Clearances
DIMENSIONS/CLEARANCES Dimensions – 29" (737 mm) model Front View Side View 29" " (737 mm) (648 mm) Non-coin-operated models: " (181 mm) Coin-operated models: " (200 mm) " (1089 mm) 35" (889 mm) " (83 mm) 1" 1" " (25 mm) (25 mm) (260 mm) Back View... -
Page 7: Back View
DIMENSIONS/CLEARANCES Dimensions – 27" (686 mm) model Front View Side View 27" " (737 mm) (673 mm) Non-coin-operated models: " (181 mm) Coin-operated models: " (200 mm) " (1089 mm) 35" (889 mm) " (83 mm) 1" 1" " (25 mm) (25 mm) (260 mm) Back View... -
Page 8: Location Requirements
LOCATION REQUIREMENTS Recessed Area and Closet Installation Instructions This dryer may be installed in a recessed area or closet. For recessed area and closet installations, minimum clearances can be found on the warning label on the rear of the dryer or in “Dimensions/Clearances.”... -
Page 9: Gas Dryer Electrical Requirements
GAS DRYER ELECTRICAL REQUIREMENTS Gas Dryer Grounding IMPORTANT: The dryer must be electrically grounded in accordance with local codes and ordinances or, in the absence of local codes, with the National Electrical Code, ANSI/NFPA 70, latest edition, or Canadian Electrical Code, CSA C22.1. If codes permit and a separate ground wire is used, it is recommended that a qualified electrical installer determine that the ground path is adequate. -
Page 10: Gas Requirements
GAS REQUIREMENTS Gas Supply IMPORTANT: Observe all governing codes and ordinances. This installation must conform with all local codes and ordinances. In the absence of local codes, installation must conform with American National Standard, National Fuel Gas Code ANSI Z223.1/NFPA 54 or CAN/CSA B149. A copy of the above code standards can be obtained from: National Fire Protection Association One Batterymarch Park, Quincy, MA 02269... -
Page 11: Electric Dryer Electrical Requirements
ELECTRIC DRYER ELECTRICAL REQUIREMENTS Electric Dryer Grounding It is your responsibility: To contact a qualified electrical installer. ■ To be sure that the electrical connection is adequate and in ■ conformance with the National Electrical Code, ANSI/NFPA 70-latest edition and all local codes and ordinances. The National Electrical Code requires a 4-wire power ■... - Page 12 ELECTRIC DRYER ELECTRICAL REQUIREMENTS Electric Dryer Power Supply Cord Direct Wire If connecting by direct wire: If using a power supply cord: Power supply cable must match power supply (4-wire or Use a UL listed power supply cord kit marked for use with 3-wire) and be: clothes dryers.
-
Page 13: Dryer Venting Requirements
DRYER VENTING REQUIREMENTS Elbows: 45° elbows provide better airflow than 90° elbows. ■ Good Better Clamps: Use clamps to seal all joints. ■ Exhaust vent must not be connected or secured with screws ■ WARNING: To reduce the risk of fire, this dryer MUST BE or other fastening devices that extend into interior EXHAUSTED OUTDOORS. - Page 14 DRYER VENTING REQUIREMENTS Vent Hoods 4" (102 mm) Diameter Exhaust Hoods Exhaust hood must be at least 12" (305 mm) from the ground or any object that may be in the path of the exhaust (such as flowers, rocks, bushes, or snow). box hood louvered hood angled hood...
-
Page 15: Gas Supply Connection
DRYER VENTING REQUIREMENTS If an Exhaust Hood Cannot be Used Multiple Dryer Venting The outside end of main vent should have a sweep elbow A main vent can be used for venting a group of dryers. The directed downward. main vent should be sized to remove 5663 l/min. (200 CFM) of air per dryer. - Page 16 GAS SUPPLY CONNECTION Type of Gas This dryer is equipped for use with natural gas. It is design- certified by CSA International for LP (propane and butane) gases with appropriate conversion. No attempt shall be made to convert dryer from gas specified on serial/rating plate for use with a different gas without consulting the serving gas supplier.
-
Page 17: Installing Leveling Legs, Coin Slide, And Coin Box
INSTALLING LEVELING LEGS, COIN SLIDE, AND COIN BOX The console houses the factory-installed accumulator timer 3. Install coin slide and coin box with actuating arm and button. Remove the service door of the meter case by lifting it up The factory-installed timer is set to provide 45 minutes (4 pins) at the back. -
Page 18: Electric Dryer Electrical Connections
ELECTRIC DRYER ELECTRICAL CONNECTIONS Strain Relief Remove Terminal Block Cover Power Supply Cord Strain Relief 1. Insert strain relief. 2. Insert power cord into strain relief. Strain Relief Direct Wire Strain Relief 1. Insert strain relief. 2. Insert conduit into strain relief and tighten clamp. - Page 19 ELECTRIC DRYER ELECTRICAL CONNECTIONS Connection Options Power Cord Direct Wire 4-wire receptacle (NEMA Type 14-30R) 4-wire direct 3-wire receptacle (NEMA Type 10-30R) 3-wire direct Connecting 4-Wire Connection: Power Supply Cord IMPORTANT: A 4-wire connection is required for mobile homes and where local codes do not permit the use of 3-wire connections.
- Page 20 ELECTRIC DRYER ELECTRICAL CONNECTIONS Connecting 3-Wire Connection: Power Supply Cord Standard Power Cord Connectors 2. Connect neutral wire to center terminal block. Flanged spade connector Ring Connector Connecting Neutral Wire 1. Loosen or remove center terminal block screw. 3. Connect remaining wires with outer terminal block screws. Connecting 4-Wire Connection: Direct Wire IMPORTANT: A 4-wire connection is required for mobile Connecting Ground and Neutral Wires...
- Page 21 ELECTRIC DRYER ELECTRICAL CONNECTIONS Connecting 4-Wire Connection: Direct Wire Connecting Ground and Neutral Wires (cont.) Connecting Remaining Wires 2. Connect ground and neutral wire to center terminal block. 4. Connect remaining wires to outer terminal block. Connecting Direct Wire Ground 3.
-
Page 22: Leveling
ELECTRIC DRYER ELECTRICAL CONNECTIONS Connecting 3-Wire Connection: Optional Use for direct wire or power supply cord where local codes do not permit connecting cabinet-ground conductor to neutral wire. Connecting Neutral Wire 1. Remove center terminal block screw. Also remove neutral 3. -
Page 23: Complete Installation
LEVELING 2. Grip dryer from top and rock back and forth, making sure all HELPFUL TIP: You may want to prop up front of dryer about 4" four legs are firmly on floor. Repeat, rocking dryer from side (102 mm) with a wood block or similar object that will support to side. -
Page 24: Changing To A 30- Or 60-Minute Timing Cam
CHANGING TO A 30- OR 60-MINUTE TIMING CAM 5. Place new cam (hub side down) over clock shaft. Line up flat WARNING side of shaft with flat side of cam hole. Check that drive lug is in place. Electrical Shock Hazard Disconnect power before making cam changes. -
Page 25: Maintenance Instructions
MAINTENANCE INSTRUCTIONS Clean lint screen before and after each cycle. If dryer does not operate, check the following: ■ Removing accumulated lint: Electrical supply is connected. ■ ■ From inside the dryer cabinet: Circuit breaker is not tripped or house fuse is not blown. ■... - Page 26 NOTES...
- Page 27 NOTES...
- Page 28 8563800D © 2011 12/2011 All rights reserved. Printed in U.S.A.
Need help?
Do you have a question about the Commercial Dryer and is the answer not in the manual?
Questions and answers
I’ve been asked to remove the coin box so the tenants don’t have to deal with quarters, but I need to change the wiring so it will still start. How can I do that?
To remove the coin box and still allow a Whirlpool dryer to start, you can bypass the switch that is activated by the coin tray. One suggested method is to install a pushbutton switch to replace the coin mechanism wiring. You must access the section where the coin tray switch is located, taking care not to damage the wiring. Once bypassed with a pushbutton or similar switch, the dryer can be started without needing the coin box.
This answer is automatically generated