Table of Contents
Advertisement
Quick Links
FireGL™ X1-256p
FireGL™ Z1-128p
User's Guide
P/N: 137-50004-30
© Copyright 2003, by ATI Technologies Inc.
All rights reserved. Reproduction of this manual, or parts thereof, in any form, without the
express written permission of ATI Technologies Inc. is strictly prohibited.
ATI and all ATI product and product feature names are trademarks and/or registered trademarks
of ATI Technologies Inc. All other company and/or product names are trademarks and/or
registered trademarks of their respective owners. Features, performance and specifications are
subject to change without notice. Product may not be exactly as shown in the diagrams.
FireGL, FIRE GL, HYDRAVISION – ATI Technologies Inc.; Athlon – Advanced Micro
Devices. Inc.; Fire Wire – Apple Computer Inc.; Direct3D, Windows 2000, Windows XP –
Microsoft Corp.; IEEE – The Institute of Electrical and Electronic Engineers, Inc.; AGP
(Accelerated Graphics Port), Celeron, Pentium Pro, Pentium II, Pentium III – Intel Corporation;
VGA – International Business Machines Corp.; OpenGL - Silicon Graphics Inc.; VESA – Video
Electronics Standards Association.
Adobe and Acrobat are trademarks of Adobe Systems Incorporated, which may be registered in
certain jurisdictions.
i
Advertisement
Table of Contents

Related Manuals for ATI Technologies FireGL X1-256p


Summary of Contents for ATI Technologies FireGL X1-256p
- Page 1 Product may not be exactly as shown in the diagrams. FireGL, FIRE GL, HYDRAVISION – ATI Technologies Inc.; Athlon – Advanced Micro Devices. Inc.; Fire Wire – Apple Computer Inc.; Direct3D, Windows 2000, Windows XP –...
- Page 2 Disclaimer While every precaution has been taken in the preparation of this document, ATI Technologies Inc. assumes no liability with respect to the operation or use of ATI hardware, software or other products and documentation described herein, for any act or omission of ATI concerning such products or this documentation, for any interruption of service, loss or interruption of business, loss of anticipatory profits, or for punitive, incidental or consequential damages in connection with...
-
Page 3: Table Of Contents
Installing the Software................. 22 Before you Start: Information, Tips, and Hints........23 Software Installation for Windows 2000 and Windows XP ....24 Using Your FireGL Card..........26 Using Two Monitors..................28 Using the DualScreen Tab ..............29 Operating Stereo Glasses................30 Changing the Video Settings ............... - Page 4 Reference ..............41 Removing the FireGL Drivers..............41 Troubleshooting................... 43 Technical Details ..................46 Product Specifications ................46 Pin Assignments ................... 48 Video Modes ..................50 Customer Care and Warranty Service ............52 Compliance Information................55...
-
Page 5: Getting Started
C HA P T E R 1 Getting Started Your ATI FireGL card is an advanced workstation 3D graphics accelerator based on a high-bandwidth, parallel pipeline geometry and rendering architecture. The card delivers workstation-class performance to designers, engineers and animators, running the leading OpenGL and DirectX... -
Page 6: Using This Guide
Using Your FireGL Card on page 26 explains how you can take advantage of the advanced features of your FireGL card. Reference on page 41 provides troubleshooting tips and regulatory compliance information for your card. -
Page 7: Viewing The User's Guide Online
Getting Started Viewing the User's Guide Online You can easily read the User's Guide online - important hypertext links, such as Table of Contents entries, World Wide Web, and E-mail addresses are active. Place your mouse cursor over Table of Contents entries or main headings. -
Page 8: Firegl Card Features
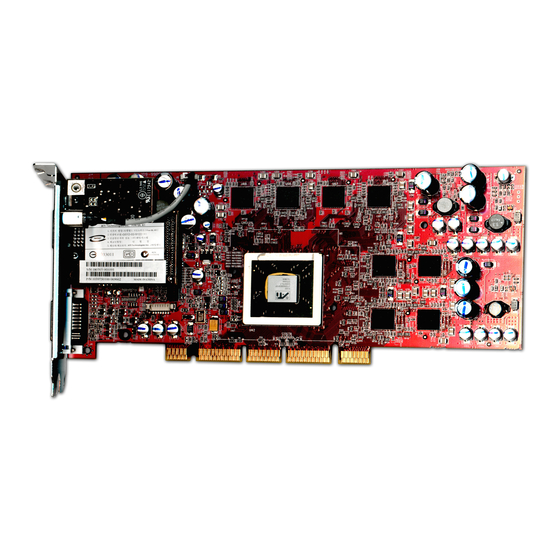
Getting Started FireGL Card Features FireGL X1-256p pictured Video Rendering FireGL Memory Pipelines FireGL X1-256p FGL 9700 256 MB FireGL Z1-128p FGL 9500 128 MB VPU: Visual Processing Unit • Video memory: DDR SDRAM - unified frame buffer, Z-buffer, texture storage - 128-bit floating point precision frame buffer for photo-realistic renderings. - Page 9 Getting Started • Supports AGP 3.0 standard (AGP 4X/8X), providing a two way high-speed interface between the graphics subsystem and the workstation • OpenGL 1.3 with 1.4 extensions DirectX® 9.0 functionality in OpenGL® • Full DirectX® 9.0 support • DDC1/2b/2b+ monitor support on all operating system platforms •...
-
Page 10: System Requirements And Tools
128 MB of system memory 256 MB or more for best performance • Motherboard with free AGP Pro slot and correct AGP chipset-driver Note: The bracket of the FireGL™ card also covers the expansion slot next to the AGP Pro slot. • CD-ROM drive Operating •... -
Page 11: Quick Installation
Getting Started Quick Installation • Brief instructions on how to get to work with the FireGL card in the shortest possible time. • Recommended for experienced users and system administrators only. • For more detailed information on installation and operation of your graphics accelerator, please refer to Chapter 2 and Chapter 3. -
Page 12: Installing The Hardware And Software
C HA P T E R 2 Installing the Hardware and Software IN THIS CHAPTER... Installing the Hardware page 8 Installing the Software page 22 Installing the Hardware The hardware installation includes the following steps: • Preparing your Computer • Installing the Card •... -
Page 13: Preparing Your Computer
• Each motherboard requires the installation of a custom-built virtual GART (AGP) driver. This chipset driver is required by your FireGL card to function correctly with your motherboard. • You must install the correct AGP chipset driver before installing the FireGL card in your system. - Page 14 System Requirements and Tools need to use your • Motherboard with free AGP Pro slot FireGL card? Note: The bracket of the FireGL™ card also covers the expansion slot next to the AGP Pro slot. • Correct AGP GART chipset driver installed for your motherboard.
- Page 15 Installing the Hardware and Software What monitors do Your FireGL card is configured to be combined with you need? digital flat-panel (DFP) displays and digital CRT displays. Note: Your DFP monitor must have a data cable with digital-only DVI plug (DVI-D) - but not with integrated analog/digital DVI plug (DVI-I).
- Page 16 Note the serial number and the part number of your FireGL card before installing it in your computer. You need these numbers for the product warranty registration. You will find the numbers on the product...
-
Page 17: Installing The Card
Installing the Hardware and Software Installing the Card To install your graphics accelerator card, follow these steps: Switch off your computer and all external options (monitor, printer, and others). Then disconnect all cables from the back of your computer. Unplug all power cables from the electrical source. - Page 18 Installing the Hardware and Software Remove the computer cover. If necessary, consult your computer system manual about removing the cover. 1 Power Supply. Remember to discharge your body's static electricity by touching the power supply or the metal surface of the computer chassis.
- Page 19 Installing the Hardware and Software Remove any existing graphics card from your computer. • Unscrew the screw attached to your existing graphics card. Then pull the card straight out. • If the old graphics card sticks rock it gently from end to end.
- Page 20 Installing the Hardware and Software Insert the card into the AGP slot. Note: The FireGL card fits in an AGP Pro 50 slot. • Locate the AGP Pro slot. Refer to your computer's manual for more information. • If necessary, remove the metal slot cover from the AGP Pro slot and the adjacent slot.
- Page 21 Installing the Hardware and Software Replace the screws to fasten the card in place. • Align the slot in the mounting bracket of the card with the screw holes in the rear panel of the computer case. • Use the screws you removed from the expansion slot cover or a previously installed graphics card to secure the card in place.
-
Page 22: Connecting The Cables And Completing The Installation
Connecting the Monitor Cables You may connect one or two monitors, either DFP/digital CRT or analog VGA to the FireGL™ card. Use the provided DVI-to- VGA adapters to connect monitors with VGA connector. If you connect only one monitor, make sure to connect it to DVI connector (1) on the card. - Page 23 Connecting analog VGA Monitors to DVI connectors If the data cable connector on your VGA monitor does not fit into the DVI connector on the card, use the DVI-to-VGA adapters provided with your FireGL card.. a Monitor cable c VGA connector from monitor...
- Page 24 Please note that stereo glasses and stereo shutter devices are optional equipment not included in the FireGL™ card package. Connect your stereo glasses or stereo shutter device to the 3 pin Mini-DIN stereo sync connector (3) on the card. Connect only stereo glasses or stereo shutter devices with shielded cable and ferrite cylinder to the FireGL™...
- Page 25 Higher refresh rates are not available at this stage of the installation. After you have successfully installed the FireGL drivers you can use the tabs in the Display Properties menu to adjust the video settings and set up a multi-monitor configuration.
-
Page 26: Installing The Software
• Before you Start: Information, Tips, and Hints • Software Installation for Windows 2000 and Windows XP You will need to install the FireGL drivers and software in the following cases: • After you have installed the card in your system. -
Page 27: Before You Start: Information, Tips, And Hints
Installing the Hardware and Software Before you Start: Information, Tips, and Hints Before you install the drivers for your FireGL card, make sure your monitor cable is properly attached to the card. Do you need a special driver installation? The software installation procedure later in this chapter... -
Page 28: Software Installation For Windows 2000 And Windows Xp
Installing the Hardware and Software HYDRAVISION™ Multi-monitor Management The HYDRAVISION™ multi-monitor and desktop management software will install automatically with the Express driver installation of the ATISETUP utility. If you do not want to install HYDRAVISION™ select the Custom driver installation and clear the HYDRAVISION™ check box. Driver installation dialog The installation dialog will display in English if your operating system’s language is not supported. - Page 29 Click the Advanced button and select the Monitor tab. Set the refresh rate for the monitor connected to the FireGL card in your system. Click OK until you are on the Windows desktop.
-
Page 30: Using Your Firegl Card
30 Changing the Video Settings page 30 Using Application Profiles and Advanced Functions on page 36 As part of its Windows drivers, FireGL installs additional tabs to your Display Properties control panel. They are named as follows. Information Adjustment DualScreen... - Page 31 Using Your FireGL Card DualScreen Use the tab to enable the following functions: • duplicate the display of the primary monitor on the second monitor • special video mode for high-resolution monitors Configuration Use the tab to customize application profiles for individual application settings.
-
Page 32: Using Two Monitors
Using Your FireGL Card Using Two Monitors You can set resolutions, refresh rates, and display adjustment independently for any two connected displays. For two-monitor configuration settings you need the following: • Two monitors connected to the card • Both monitors switched on when you start your computer •... -
Page 33: Using The Dualscreen Tab
Using Your FireGL Card Using the DualScreen Tab To see the DualScreen tab displayed, you need the following: • Two monitors connected to the card • Both monitors switched on when you start your computer Select the DualScreen tab via Display Properties >... -
Page 34: Operating Stereo Glasses
Using Your FireGL Card Select Clone Mode if you want the display of the primary monitor duplicated on the second monitor. Click the Apply or OK button to enable your DualScreen setting. Operating Stereo Glasses For operating LCD shutter glasses or other stereo shutter devices you need your stereo shutter device connected to the stereo output connector when you start your computer. -
Page 35: Setting Resolution, Color Depth And Refresh Rate
Using Your FireGL Card Double-click the Display icon. The Display Properties window appears. 1 You can also display the Display Properties window by right-clicking the Windows Desktop background and then selecting the Properties option from the pop-up menu. 2 Click the Advanced button in the Settings tab... - Page 36 Using Your FireGL Card 1 Check the documentation of your monitor(s) and make sure that each monitor supports the planned resolution and refresh rate and color depth settings. Warning! Selecting a resolution or refresh rate that your monitor does not support can permanently damage the monitor.
-
Page 37: Adjusting The Monitor Display
Using Your FireGL Card Adjusting the Monitor Display Using this tab you can adjust the display of the connected monitor. For more information on adjusting the monitor's display refer to the context sensitive online help. Select the Adjustment tab via Display Properties >... - Page 38 Using Your FireGL Card Monitor Tuning - available only for VGA monitors • With the buttons in the Move and Size sections you can tune the position and size of the monitor's display for the indicated resolution and refresh rate...
- Page 39 Using Your FireGL Card Gamma Correction Adjustment: Adjust the monitor's gamma correction for optimal brightness with the red, green and blue slider bars. When these sliders are changed the gamma correction table modifies each pixel's color value. The brightness produced at the face of the display is proportional to the input voltage raised to the power gamma.
-
Page 40: Using Application Profiles And Advanced Functions
Using Your FireGL Card Using Application Profiles and Advanced Functions Use the Configuration tab to customize application profiles for individual application settings. Use the Advanced Settings tab to enable the following functions. - SMOOTHVISION™ for enhanced image quality - Stereo glasses... - Page 41 Using Your FireGL Card Adding a new application profile Click the Add button in the Configuration Profiles section and enter the new application for which you want to set the configuration parameters. Modifying the configuration parameters To change the configuration settings of a specific application, for example, CATIA, select the application from the list in the Configuration Profiles section and click the Modify button.
-
Page 42: Default Settings
Using Your FireGL Card If you add or modify a configuration profile, select or clear the checkboxes in the Settings section according to your requirements. Default Settings Enable 8-Bit double-buffered Overlay Planes Use 8 bits of each 32-bit frame buffer pixel as double-buffered overlay planes. -
Page 43: Setting Advanced Functions
Using Your FireGL Card Setting Advanced Functions Switching to Advanced Settings Select Display Properties > Settings > Advanced > Advanced Settings. SMOOTHVISION™ SMOOTHVISION improves image quality by removing jagged edges (Anti-Aliasing) from 3D images, resulting in smoother, more natural looking objects. - Page 44 Using Your FireGL Card Always on: You can apply anti-aliasing using different sample patterns and sample points such as 2X or 4X. Moving the slider to the right increases sampling to provide the most realistic 3D image, at the cost of some 3D performance.
-
Page 45: Reference
2 To install or uninstall the FireGL drivers, you need administrator rights or you must be logged on as a user with administrator rights under Windows. - Page 46 Reference Click Add/Remove Programs. Select ATI Display Driver from the list of software programs. Click Change/Remove button. The ATI uninstall dialog appears. Click Yes to remove the ATI Display Driver. Click Yes to restart your computer. After you have removed the software according to the instructions, you may remove the hardware.
-
Page 47: Troubleshooting
Do not attempt to change or repair any parts of this product as doing so will void your warranty. If you experience a problem using the FireGL card, check the following sections for advice on how to solve your problem. - Page 48 For more card is not information, please see Installing the Software. configured • Re-install the FireGL drivers. Please refer to Installing properly on page 22 the Software • How to enable You need two monitors connected to the card.
- Page 49 Memory Addresses: Video RAM: A000-BFFF Video ROM: C000-C7FF Note: You cannot change the addresses of your FireGL card. In case of an address conflict, try to modify the I/O address of the add-on card that causes the conflict. Resolving To support the special graphics processor on the FireGL...
-
Page 50: Technical Details
Reference Technical Details Product Specifications page 46 Pin Assignments on page 48 Video Modes on page 50 Product Specifications Operating Windows® 2000, Windows® XP, Linux environment System Intel® Pentium® 3, Pentium® 4, Xeon®; requirements AMD® Athlon® XP/MP/Opteron or compatible Certifications FCC/DOC, ICES-003, CE/DOC, SMA C-Tick, MIC, BSMI, VCCI Dimensions... - Page 51 H/V Sync Separate horizontal and vertical sync at output signals TTL levels FireGL card The FireGL card is 100% IBM VGA addresses compatible and occupies the same memory area and specific addresses in the I/O range. The memory range above...
-
Page 52: Pin Assignments
Reference Pin Assignments DVI Output Connector Function T.M.D.S. Data2- T.M.D.S. Data2+ T.M.D.S. Data2/4 Shield T.M.D.S. Data4- T.M.D.S. Data4+ DDC Clock DVI: Digital Visual Interface DDC Data DDC: Display Data Channel Analog Vertical Sync T.M.D.S: Transition Minimized Differential Signal T.M.D.S. Data1- T.M.D.S. - Page 53 Reference Stereo Sync Output Function Connector + 5 V DC (fused 750 mA) ground StereoSync...
-
Page 54: Video Modes
All video modes comply with VESA DMT (Discrete Monitor Timing) or VESA GTF (General Timing Format) standards. The FireGL card supports HiColor, 16-bit modes and TrueColor, 32- bit (24 color, 8 alpha) modes. There is no support for 8-bit modes. - Page 55 Reference Digital Monitors with DVI connector Resolution Refresh Rate (Hz) Color Depth (Bits) 640 x 480 60, 75 16 / 32 800 x 600 60, 75 16 / 32 1024 x 768 60, 75 16 / 32 1152 x 864 60, 75 16 / 32 1280 x 1024...
-
Page 56: Customer Care And Warranty Service
• Online: For product information, video drivers, Frequently Asked Questions and Email support visit: http://www.ati.com and select C USTOMER • FireGL Workstation dedicated support line: *905-882-2600 Available Monday through Friday, 9:00 AM - 7:00 PM EST. *Access to Telephone Support is available to workstation users at no additional cost. -
Page 57: Warranty Information
ATI for repair. Advanced Parts Replacement Service FireGL customers have the option of Advanced Parts Replacement to minimize downtime for design professionals. For Advanced Parts Replacement service instructions contact one of our Customer Care Representatives using one of the aforementioned means. - Page 58 Reference Limitations • All warranties for this product, expressed or implied, will expire three (3) years* from date of original purchase. *All accompanying cables and accessories are warranted for 90 days. • No warranties for this product, expressed or implied, shall extend to any person who purchases the product in a used condition.
-
Page 59: Compliance Information
Reference Compliance Information FCC Compliance Information The FireGL family of products complies with FCC Rules art 15. Operation is subject to the following two conditions • This device may not cause harmful interference, and • This device must accept any interference received, including interference that may cause undesired operation. - Page 60 Reference CE Compliance Information EMC Directive 89/336/EEC and amendments 91/263/EEC, 92/31/EEC and 93/68/EEC, Class B Digital Device EN 55022:1998/CISPR 22 Class B, Limits and Methods of Measurement of Radio Interference Characteristics Information Technology Equipment. EN 55024:1998, Immunity of Information Technology Equipment (ITE), including EN 61000-4-2, EN 61000-4-3, EN 61000-4-4, EN 61000-4-5, EN 61000-4-6, EN 61000-4-11...
-
Page 61: Mic Certification Information
4 Mount Royal Avenue, Marlborough, MA 01752-1978 Phone: (508) 303-3900 MIC Certification Information FireGL X1-256p Product Name / Model: Fire GL X1 Holder: ATI Technologies Inc. Date: 2002-12-20 Manufacturer / Country of origin: ATI Technologies Inc. / China FireGL Z1-128p Product Name / Model: Fire GL Z1 Holder: ATI Technologies Inc.
Need help?
Do you have a question about the FireGL X1-256p and is the answer not in the manual?
Questions and answers