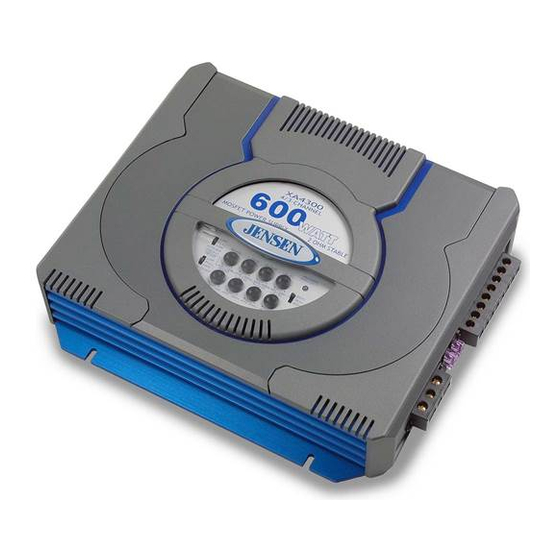
Jensen A400HLX Installation And Operation Manual

Jensen A400HLX Installation And Operation Manual

Jensen hlx series amplifier installation and operation

Advertisement

A400HLX
A600HLX
REC002_A4n600HLX_E
Amplifier Installation and Operation
Introduction
Thank you for purchasing a Jensen amplifier. The HLX series
amplifiers offer extreme value and performance. Proper
installation is essential for optimal performance and long-term
reliability. Please read through this manual first to familiarize
yourself with your amplifier and its functions.
Warranty Service
If your Jensen amplifier should ever require service, you will
need to have the original dated receipt. If you ever need to
return the unit for any reason, always include the receipt with the
product.
Installation Assistance
1.800.323.0221
1
400
MOSFET Power Supply
4
channel bridgeable
HPF
POWER
FULL
BASS
R-CHX
LEVEL
L-CHX
LPF
3
5
60
125 60
125
2
4
FRONT
PROTECT
REAR
2CH
HPF
0dB
12dB
40Hz
400Hz
40Hz
400Hz
8V
.3V
3CH
FULL
BASS
R-CHX
LEVEL
L-CHX
4CH
LPF
3
5
60
125 60
125
2
4
MODE
0dB
12dB
40Hz
400Hz
40Hz
400Hz
8V
.3V
1/9/02, 4:13 PM
®

Advertisement

Table of Contents
loading

Summary of Contents for Jensen A400HLX

  • Page 1 400Hz 40Hz 400Hz Introduction Thank you for purchasing a Jensen amplifier. The HLX series amplifiers offer extreme value and performance. Proper installation is essential for optimal performance and long-term reliability. Please read through this manual first to familiarize yourself with your amplifier and its functions.
  • Page 2: Table Of Contents

    ® A400HLX, A600HLX Contents Features ......... 3 Installation........3 Before You Begin ......... 3 Disconnect Battery ........3 Supplies and Tools Needed ......3 Location and Mounting ........4 Routing Wires..........4 Wiring ..........5 Power ............5 Power Terminal (+12V) ......... 5 Ground Terminal (GND) ........
  • Page 3: Features

    ® A400HLX, A600HLX Features A400HLX/A600HLX 4-channel amplifiers include: • Traditional input circuitry – low and high level • Easy access top mounted controls inputs • Continuously variable high pass/low pass crossover • Pre-amp output for installation flexibility • Dual status LED diagnostic indicator •...
  • Page 4: Location And Mounting

    ® A400HLX, A600HLX Routing Wires Location and Mounting Battery The A400HLX/A600HLX amplifier’s compact design allows greater flexibility in mounting. It Battery Connector can be mounted under a seat or in the trunk. When selecting a location, remember that Fuse or Circuit amplifiers generate heat.
  • Page 5: Wiring

    Connect to a good chassis ground. The ground connection should be to clean, unpainted metal to provide a good electrical connection. Use only blade-type fuses. + 12V Fuse: A400HLX 2 x 25 AMP A600HLX 2 x 35 AMP FUSE Spade Connector Sheet Metal...
  • Page 6: Inputs, Rca Output, Remote Level Control

    ® A400HLX, A600HLX Inputs, RCA Output, Remote Level Control INPUT OUTPUT INPUT OUTPUT REAR FRONT A400HLX HI-LEVEL HI-LEVEL INPUT OUTPUT INPUT OUTPUT A600HLX REMOTE REAR FRONT BASS HI-LEVEL HI-LEVEL Input Wiring Radio Low Level Input (RCA Input) Low level (RCA) input is preferred for best performance.
  • Page 7: Remote Level Control (A600Hlx)

    ® A400HLX, A600HLX Remote Level Control – Rear Connecting other Amps Amplifier (A600HLX) INPUT OUTPUT INPUT OUTPUT RCA Output The “output” signal allows you to conveniently REMOTE BASS connect other amplifiers to each other. Remote level control allows the input level to be adjusted for the rear speakers from an alternate location.
  • Page 8: Speaker Wiring Options

    REAR REAR FULL FULL BRIDGE BRIDGE BRIDGE BRIDGE – – – – 2Ω minimum 2Ω minimum 2Ω minimum 4Ω minimum 2 Subwoofers/Bridged Mono (A400HLX) FULL FRONT REAR FULL BRIDGE BRIDGE – – 4Ω 4Ω minimum minimum REC002_A4n600HLX_E 1/9/02, 4:13 PM...
  • Page 9 ® A400HLX, A600HLX Tri-mode (A400HLX) BRIDGE BRIDGE – – FULL FRONT REAR FULL Important When running a subwoofer and two full-range speakers together (Tri- mode operation), high and low pass filters must be used. Failure to install 2Ω 2Ω these filters may damage your amp and/or speakers.
  • Page 10: Indicators And Controls

    In other words, when you want drive a complete FULL subwoofers. system with one amp. Your Jensen amplifier is FRONT • FULL–Crossover is not active, capable of tri-mode operation. amplifier is in “full range”...
  • Page 11: 2Ch / 3Ch / 4Ch

    A400HLX, A600HLX 2CH / 3CH / 4CH 2 Channel (A400HLX) When the input selector is set The A400HLX/A600HLX can be configured for to 2CH, the amplifier is three different input modes: 4 channel, 3 channel configured for bridged stereo or 2 channel.
  • Page 12: Level

    ® A400HLX, A600HLX Level Bass BASS LEVEL BASS increases the volume of the The input level control matches the bass at 45Hz by up to 12 db. output of your radio to the input of the amplifier. After the installation is...
  • Page 13: Troubleshooting

    ® A400HLX, A600HLX Troubleshooting Problem Possible Cause Corrective Action Amplifier does not operate No power to +12V terminal Repair wire or connections. (power LED not on) when vehicle and radio are on No power to remote wire with Check connections to radio with test light.
  • Page 14: Specifications

    ® A400HLX, A600HLX Specifications A400HLX/A600HLX 4-Channel Amplifiers Frequency Response ..................20 Hz-20 kHz ± 0.5 dB Signal to Noise Ratio @ Rated Power ..................>100 dB Channel Separation @ Ref. Power ................>65 dB, 1 kHz THD & IMD @ Ref. Power into 2 ohms ..................<0.8% Speaker Impedance ......................
  • Page 15: Warranty

    Jensen will pay the return shipping charges if the product is supplied with the product; damage occurring during returned to an address inside the USA or Canada.

This manual is also suitable for:

A600hlx

Table of Contents