HP h2200 Series User Manual
Ipaq pocket pc
Hide thumbs
Also See for h2200 Series:
- Reference manual (73 pages) ,
- Product overview (14 pages) ,
- Quickspecs (9 pages)

Related Manuals for HP h2200 Series


Summary of Contents for HP h2200 Series
- Page 1 User’s Guide hp iPAQ Pocket PC h2200 series Document Part Number: 293146-001 May 2003...
- Page 2 The warranties for HP products are set forth in the express limited warranty statements accompanying such products. Nothing herein should be construed as constituting an additional warranty.
-
Page 3: Table Of Contents
1 Getting to Know Your iPAQ Pocket PC Using the Stylus ....... . 1–5 Setting the Date and Time . - Page 4 Contents 3 Managing the Battery Installing the Battery ......3–1 Removing the Battery ......3–5 Charging.
- Page 5 5 Learning Input Methods Changing Word Suggestion Options ....5–2 Using the On-Screen Keyboard ....5–4 Writing with the Stylus and the Letter Recognizer .
- Page 6 Contents Working with Bluetooth Manager ....8–15 Opening Bluetooth Manager ....8–16 Locating and Selecting a Device .
- Page 7 A Regulatory Notices Federal Communications Commission Notice..A–1 Declaration of Conformity for products marked with the FCC logo—United States only ..A–2 Canadian Notice ....... . A–3 Avis Canadien .
-
Page 8: Getting To Know Your Ipaq Pocket Pc
Getting to Know Your iPAQ Congratulations on purchasing an HP iPAQ h2200 Series Pocket PC. Use this guide to find out about setting up your Pocket PC and to learn about how it works. Your iPAQ Pocket PC already includes all the software you need and more to fully operate your device. - Page 9 Getting to Know Your iPAQ Pocket PC hp iPAQ Software iTask iPAQ Image Viewer Diagnostic ToolKit Asset Viewer Bluetooth Nevo 1–2 Functions Manage tasks that are running, and functions as a shortcut to launch or close programs. Assigned, by default, to the fourth Application Button on the Pocket PC.
- Page 10 Microsoft Pocket PC Software ActiveSync Calculator Calendar Connections ClearType Tuner Contacts Inbox MSN Messenger Notes User’s Guide Getting to Know Your iPAQ Pocket PC Functions Synchronize the information between your Pocket PC and computer so you have the latest information in both locations. Be sure you install ActiveSync on both your Pocket PC and personal computer.
- Page 11 Getting to Know Your iPAQ Pocket PC Microsoft Pocket PC Software Pictures Pocket Excel Pocket Internet Explorer Pocket Word Settings Tasks Terminal Services Client Windows Media Player 9 Series 1–4 Functions View individual pictures, run a slide show, or set a picture as the background on the Today screen.
-
Page 12: Using The Stylus
Pocket PC or an approved replacement to tap or write on the screen. If you lose or break your stylus, you can order extras at www.hp.com/products/pocketpc/options. You can perform three basic actions using the stylus: Tap—Lightly touch the screen to select or open an item. Lift the stylus after you tap an item. -
Page 13: Setting The Date And Time
Getting to Know Your iPAQ Pocket PC Setting the Date and Time When you turn on your iPAQ Pocket PC for the first time, you are requested to select your time zone. After setting the time zone, you still need to set the time and date on your unit. All three settings are located in the Clock Settings screen and can be set at the same time. -
Page 14: Setting The Date
Setting the Date 1. From the Start menu, tap Settings > System tab > Clock icon. SHORTCUT: From the Today screen, tap the Clock icon to set the date. 2. Tap the down arrow by the date. 3. Tap the left or right arrow to select a month and year. 4. -
Page 15: Resetting The Unit
Getting to Know Your iPAQ Pocket PC 3. Tap the Tab key on the keyboard to move the cursor to the next field. 4. Continue entering whatever information you want to include. 5. To display owner information at startup, tap in the Show information when device is turned on checkbox. -
Page 16: Performing A Full Reset
Performing a Full Reset A full reset is sometimes referred to as a “hard reset.” Perform a full reset when you want to clear all settings, programs, and data from RAM. A full reset deactivates the battery. The power button does not function until the battery is reactivated. -
Page 17: Aligning The Screen
Getting to Know Your iPAQ Pocket PC 3. Release the Application Buttons and stylus. ✎ To verify a full reset, press the Power button. If the iPAQ Pocket PC has been fully reset, it does not power on. 4. Reactivate the battery by: ❏... -
Page 18: Routine Care
Routine Care To keep your iPAQ Pocket PC in good condition and working properly, follow these guidelines: ■ Keep your Pocket PC away from excessive moisture and temperature extremes. ■ Do not expose your Pocket PC to liquids or precipitation. ■... -
Page 19: Using Activesync
You can use Microsoft ActiveSync to: ■ Synchronize information between your iPAQ Pocket PC and your personal computer or server so that you have the latest information in all locations. ■ Change synchronization settings and the synchronization schedule. ■ Copy files between your device and personal computer. ■... -
Page 20: Connecting To A Computer
Using ActiveSync Connecting to a Computer Connect your iPAQ Pocket PC to your computer using Microsoft ActiveSync and the USB Synchronization Cradle/Charger, a wireless infrared connection, or Bluetooth. For more information on using ActiveSync with Bluetooth, refer to Chapter 8, “Using Bluetooth.”... -
Page 21: Using The Serial Infrared (Ir) Connection
✎ If you select to synchronize files, you can drag and drop the selected files from your computer to the synchronized folder on your iPAQ Pocket PC. If you named your device “PC1” when you created your partnership, then the synchronized folder is named “PC1.”... -
Page 22: Changing Synchronization Settings
Using ActiveSync To set up an infrared connection to a computer: 1. Synchronize your iPAQ Pocket PC with your computer using the USB Synchronization Cradle/Charger. 2. Follow your computer manufacturer’s instructions to install and set up an infrared port. 3. Remove the iPAQ Pocket PC from the cradle and line up the infrared port with the computer infrared port so they are unobstructed and within 12 inches (30.5 cm) of each other. -
Page 23: Copying Files
To change synchronization settings: 1. From the Start menu on your computer, click Programs > Microsoft ActiveSync > Tools > Options. a. On the Sync Options tab, select the files and information to synchronize with your computer. b. On the Schedule tab, select when your iPAQ Pocket PC synchronizes with your computer. -
Page 24: Installing Applications
Using ActiveSync 5. Locate the file to be moved. 6. Drag and drop your files between your iPAQ Pocket PC and your computer. ActiveSync converts the files so that they can be used by the Pocket Office applications, if necessary. ✎... -
Page 25: Synchronizing Links
Synchronizing Links You can synchronize links to Web sites from your Favorites list on your computer to view them offline with Pocket Internet Explorer. 1. From the Start menu on your computer, click Programs > Internet Explorer icon. 2. Click Favorites to see the list of links to your favorite Web sites. -
Page 26: Managing The Battery
Installing the Battery If you remove the main battery from your iPAQ Pocket PC, your device does not operate even if you try to use AC power. However, the Pocket PC has a small internal backup battery that allows you to change the main battery without losing RAM data (user-installed programs and data) as long as it is replaced within 10 minutes. - Page 27 Managing the Battery To install the removable/rechargeable battery: 1. Locate the battery. 2. On the back of the iPAQ Pocket PC, slide the latch to the left 1 to open the battery door, then pull the door out 2 and away from the unit 3.
- Page 28 Managing the Battery 3. Insert the battery into the battery slot so that the connectors on the right side of the battery are seated on the pins 1, then push the left side of the battery in place 2. User’s Guide 3–3...
- Page 29 Managing the Battery 4. Replace the battery door by inserting it back into the tabs on the battery door area 1, then close and latch it 2. Ä CAUTION: The battery door must be tightly latched to power the battery. ✎...
-
Page 30: Removing The Battery
The standard AC Adapter works in any household outlet. You can also purchase one that works in your vehicle’s cigarette lighter or a 12-volt power outlet. Ä CAUTION: Use only HP recommended AC adapters. User’s Guide Managing the Battery 3–5... - Page 31 Managing the Battery To charge the iPAQ Pocket PC using the AC Adapter: 1. Insert the Charger Adapter 1 into the charging port on the bottom of the iPAQ Pocket PC. 2. Plug one end of the AC Adapter into an electrical outlet 2 and plug the other end into the Charger Adapter 3 on the bottom of the iPAQ Pocket PC.
-
Page 32: Charging With The Usb Synchronization Cradle/Charger And Ac Adapter
Charging with the USB Synchronization Cradle/Charger and AC Adapter Use the USB Synchronization Cradle/Charger to: ■ Charge the iPAQ Pocket PC ■ Synchronize the Pocket PC with your computer. (For information on synchronizing, refer to Chapter 2, “Using ActiveSync.”) ■ Recharge an additional battery if you have purchased one To charge the iPAQ Pocket PC using the USB Synchronization Cradle/Charger:... -
Page 33: Preserving Battery Time
Managing the Battery ✎ The amber charge light blinks while the battery is recharging and turns solid (nonblinking) when the battery is fully charged. ✎ To charge an optional battery at the same time as the iPAQ Pocket PC, insert the battery into the cradle, then insert the iPAQ Pocket PC in front of the battery. - Page 34 Managing the Battery To adjust the Standby setting: 1. From the Start menu, tap Settings > System tab > Power icon. 2. Tap the Standby tab. 3. Drag the pointer to adjust the standby period. User’s Guide 3–9...
-
Page 35: Changing The Backlight Settings
Managing the Battery Changing the Backlight Settings To change the backlight settings in order to conserve more battery power: 1. From the Start menu, tap Settings > System tab > Backlight. ✎ Backlight settings can also be accessed from the iTask button. Press Application Button 4 (iTask), then tap Settings >... -
Page 36: Manually Monitoring The Battery
Manually Monitoring the Battery To manually monitor the battery power: 1. From the Start menu, tap Settings > System tab > Power icon. 2. Tap OK. User’s Guide Managing the Battery 3–11... -
Page 37: Learning The Basics
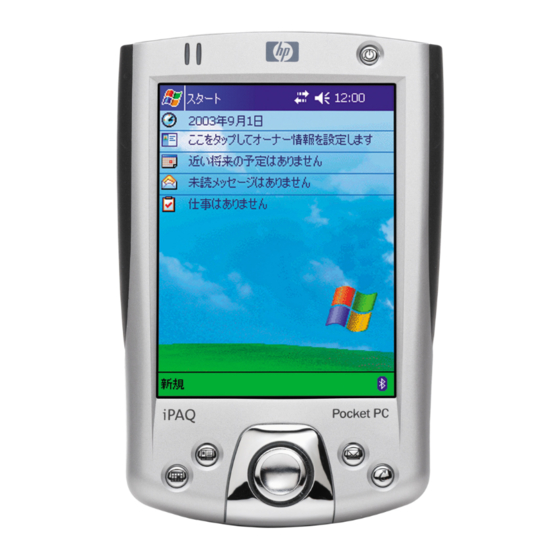
Using the Today Screen When you first turn on your iPAQ Pocket PC, the Today screen displays. You can also display it by tapping Start, then Today. Use the Today screen to view: ■ Owner information ■ Upcoming appointments ■ Unread and unsent messages ■... -
Page 38: Navigation Bar And Command Bar
Learning the Basics Navigation Bar and Command Bar The Navigation bar is located at the top of the screen. It displays the active program and current time, and allows you to close screens. Use the Start menu to select your application. Tap to view online Help Within each program, use the Command bar located at the bottom of the screen to perform tasks. -
Page 39: Status Icons
Status Icons You may see the following status icons displayed on the Navigation bar or Command bar. Tap the icon on the screen to view more information related to the item. Active connection to personal computer. Inactive connection to personal computer. Microsoft ActiveSync is synchronizing. -
Page 40: Pop-Up Menus
Learning the Basics Pop-Up Menus Pop-up menus quickly perform an action for an item. Use the pop-up menu to cut, copy, rename, and delete an item, also send an e-mail or beam a file to another device. To access a pop-up menu, tap and hold the stylus on the name of the item on which you want to perform the action. -
Page 41: Creating Information
Creating information From the Today screen, create new information, including: ■ Appointments ■ Contacts ■ E-mail ■ Excel Workbook Information ■ Notes ■ Tasks ■ Word documents 1. Tap 2. Tap an option to create a new item. 3. Tap OK when finished creating a new item. User’s Guide , or from the Start menu, tap Today >... -
Page 42: Customizing The Today Screen
Learning the Basics Customizing the Today Screen From the Settings Today screen, you can: ■ Add a picture as the background ■ Select the information you see ■ Set the order of the information ■ Decide when to see the Today screen 1. - Page 43 4. Tap the Items tab to select or reorder the information on the Today screen. 5. Tap an item to highlight it. 6. Tap Move Up or Move Down to change the order of items on the Today screen. ✎ You cannot change the placement of the Date on the Today screen.
-
Page 44: Using Applications
Learning the Basics Using Applications Opening Applications Open any application on your iPAQ Pocket PC from the Start menu. ✎ You can also open an application by assigning it to an application button. To open an application: 1. Tap Start > Programs. 2. -
Page 45: Closing Applications
Closing Applications Applications automatically close based on available memory. However, if your iPAQ Pocket PC is running slowly, you can close applications using iTask or by manually closing them. Closing with iTask 1. Press the iTask button (Application Button 4 on the lower right side of your unit). -
Page 46: Installing Applications
Learning the Basics Installing Applications Install applications on your iPAQ Pocket PC from your: ■ Computer by using Microsoft ActiveSync ■ iPAQ Pocket PC if the application file has a .cab extension ■ iPAQ Pocket PC or your computer by copying an application file that has an .exe or .cef extension When installing applications, look for the correct version for your iPAQ model or Pocket PC 2003. -
Page 47: Viewing Image Information
Locating an Image 1. From the Start menu, tap Programs > iPAQ Image Viewer. 2. Tap the File tab, then Look In. 3. Select a file, then tap OK. Viewing Image Information You can view the image size and type, date taken and modified, color, and file size of an image. -
Page 48: Creating A Slide Show
Learning the Basics You can change the view to full screen by: ■ Double-tapping a thumbnail ■ Tapping View, then Full Screen ■ Tapping the View Full Screen icon Creating a Slide Show You can put images together to create a slide show and control display options like: ■... - Page 49 To create a slide show: 1. From the Start menu, tap Programs > iPAQ Image Viewer. 2. Tap Show, then Set up Show..3. Select images for the show and modify any image settings. ✎ To change settings for all images in the show, tap the Select All button.
-
Page 50: Saving A Slide Show
Learning the Basics Saving a Slide Show To save a slide show: 1. From the Start menu, tap Programs > iPAQ Image Viewer. 2. Create a slide show. 3. Tap File, then Save Show Settings or Save Show Settings As..4. -
Page 51: Opening A Slide Show
Opening a Slide Show To open a slide show: 1. From the Start menu, tap Programs > iPAQ Image Viewer. 2. Tap File, then Open Show Settings..3. Select the show setting. Sorting Image Files To sort image files: 1. -
Page 52: Viewing A Slide Show
Learning the Basics Viewing a Slide Show 1. From the Start menu, tap Programs > iPAQ Image Viewer. 2. Create or open an existing slide show. 3. Tap the Show tab, then View Show. 4. Select a method for advancing the images in the show, (Manual Advance, Automatic Advance, or Automatic Advance [Loop]). -
Page 53: Backing Up Information
Backing Up Information Use iPAQ Backup or Microsoft ActiveSync Backup to back up and restore information on your iPAQ Pocket PC. ✎ iPAQ Backup is already installed on the iPAQ Pocket PC. You must install ActiveSync on your personal computer before using ActiveSync Backup. -
Page 54: Backup/Restore Using Activesync
Learning the Basics Backup/Restore Using ActiveSync Close all applications on your iPAQ Pocket PC before backing up or restoring your information. Ä CAUTION: Restoring your information replaces the current information on your iPAQ Pocket PC with the information saved in your backup. To backup/restore using ActiveSync: 1. - Page 55 To save to iPAQ File Store: 1. Copy the files to be saved to the iPAQ File Store folder. 2. From the Start menu, tap Programs > File Explorer > My Device > iPAQ File Store. 3. Paste the selected files. ✎...
-
Page 56: Learning Input Methods
Learning Input Methods Ä CAUTION: To avoid damaging your iPAQ Pocket PC screen, always use a stylus. Never use a pen or any type of metal pointer on the screen. You can tap the keyboard or write with the Letter Recognizer, Microsoft Transcriber, or Block Recognizer in any application. -
Page 57: Changing Word Suggestion Options
Learning Input Methods Changing Word Suggestion Options You determine: ■ If words are suggested ■ The number of letters you enter before a word is suggested ■ The number of words that are suggested per entry ■ If you do not want any words suggested, remove the checkmark by tapping the check box next to “Suggest Words When Entering Text.”... - Page 58 3. Determine the number of letters to type before a suggestion is made, then tap the down arrow associated with letters and select the number. 4. Determine the number of words to be suggested, then tap the down arrow associated with words and select the number. 5.
-
Page 59: Using The On-Screen Keyboard
Learning Input Methods Using the On-Screen Keyboard Use the stylus to tap letters, numbers, and symbols on the on-screen keyboard to enter typed text directly on the screen. ✎ To see the symbols, tap the 1. From any application, tap the up arrow next to the Input Panel icon. -
Page 60: Writing With The Stylus And The Letter Recognizer
Writing with the Stylus and the Letter Recognizer Use the stylus and Letter Recognizer to write letters, numbers, and symbols on the screen. Create words and sentences by writing in upper case (ABC), lower case (abc), and symbols (123) in specific areas. To write with the stylus and Letter Recognizer: 1. - Page 61 Learning Input Methods ✎ For the character recognizer to work effectively, write characters between the dashed line and baseline. ■ If you are writing a letter like “p,” write the top portion within the dashed line and baseline, and the tail portion below the baseline.
-
Page 62: Writing With The Stylus And Microsoft Transcriber
Writing with the Stylus and Microsoft Transcriber Use the stylus and Microsoft Transcriber to write words, letters, numbers, and symbols anywhere on the screen. 1. From any application, tap the up arrow next to the Input Panel icon. 2. Tap Transcriber to display the Transcriber Intro screen. 3. -
Page 63: Writing With The Stylus And Block Recognizer
Learning Input Methods Writing with the Stylus and Block Recognizer Write letters, numbers, and symbols using the stylus and Block Recognizer. Create words and sentences by writing letters and numbers in specific areas. 1. From any application, tap the up arrow next to the Input Panel button. -
Page 64: Drawing And Writing On The Screen
Drawing and Writing on the Screen Use the stylus as a pen to draw and write on the screen in the Notes application or from the Notes tab in Calendar, Contacts, or Tasks. 1. From the Start menu, tap Notes > New. 2. -
Page 65: Expansion Cards
Expansion cards must be purchased separately and are not included with your iPAQ Pocket PC. To locate information about expansion cards, visit the following HP Web site: www.hp.com/products/pocketpc/options Installing an Expansion Card To install a CompactFlash (CF) or Secure Digital (SD) card into an expansion slot on the iPAQ Pocket PC: 1. - Page 66 Expansion Cards 2. Before inserting a CompactFlash (CF) card into the CF expansion slot, pull the plastic slot cover from the CF slot. 3. Insert the expansion card into the appropriate expansion slot and push the connection edge of the card firmly into the expansion slot.
-
Page 67: Removing A Compactflash (Cf) Expansion Card
Removing a CompactFlash (CF) Expansion Card 1. Close all applications using the expansion card. 2. Remove a card from the CompactFlash expansion slot by using the finger slot on the back side and pulling out the card. 3. Replace the plastic slot cover into the CompactFlash expansion slot. -
Page 68: Viewing The Content Of Memory Cards
Expansion Cards Viewing the Content of Memory Cards Use File Explorer to view the files that are located on your optional CompactFlash or Secure Digital card. 1. From the Start menu, tap Programs > File Explorer. 2. Tap the root directory of My Device, and select the appropriate Storage Card folder (CF, SD, etc.) to see a list of files and folders. -
Page 69: Connecting To The Internet
Connecting to the Internet Use your iPAQ Pocket PC to connect to the Internet or your Work network. To send and receive e-mail with Inbox and to view Web sites with Pocket Internet Explorer, you must set up a remote connection with devices such as a CompactFlash (CF) modem card, Secure Digital Input/Output (SDIO) modem card, ethernet card, or a wireless 802.11x card. -
Page 70: Using A Modem Card
Connecting to the Internet Using a Modem Card To connect to the Internet with a modem card, you need a phone line, a dial-up Internet Service Provider (ISP) or a Work Internet connection, and a CompactFlash (CF) Expansion card. You must also obtain the following information from your ISP or your network administrator: telephone number, user name, password, domain name, and TCP/IP settings. - Page 71 5. Under My ISP or My Work Network, tap Add a new modem connection. ✎ To view additional information on any screen or while changing settings, tap the 6. Enter a name for the connection, select the modem type, then tap Next.
- Page 72 Connecting to the Internet 7. Enter the phone number exactly as it is dialed, then tap Next. 8. Enter your user name, password, and domain. 9. If you need to enter the specific TCP/IP settings, tap Advanced, then tap the TCP/IP tab. 10.
-
Page 73: Connecting To A Private Network
✎ If your private network does not use dynamically-assigned IP addresses, ask your network administrator for the address. 12. Tap OK > Finish. 13. Tap OK twice to return to the Today screen. Connecting to a Private Network 1. Before you start, be sure to have your server phone number, user name, and password. -
Page 74: Synchronizing Links
Connecting to the Internet Synchronizing Links You can synchronize links to Web sites from your Favorites list on your computer to view them offline with Pocket Internet Explorer. 1. From the Start menu on your computer, click the Internet Explorer icon. 2. -
Page 75: Using A Favorites List
To enter an Internet address on your iPAQ Pocket PC: 1. From the Start menu, tap Internet Explorer > Address Bar. ✎ If the Address Bar is not turned on, tap the View tab > Address Bar to turn it on. 2. -
Page 76: Using Bluetooth
This iPAQ Pocket PC comes with built-in Bluetooth technology that allows short-range connections and provides fast, reliable, and secure wireless communication. With Bluetooth powered on, you can send information or perform the following tasks wirelessly between two Bluetooth devices, within a range of approximately 10 meters (30 feet): ■... -
Page 77: Getting Acquainted With Bluetooth
Using Bluetooth ✎ Use of dial-up and wireless Internet, e-mail, corporate networks, and other wireless communications, such as Bluetooth-enabled devices, may require separately purchased additional hardware and other compatible equipment, in addition to a standard Wireless LAN (WLAN) infrastructure and a separately purchased service contract. -
Page 78: Understanding Terms
Understanding Terms The following Bluetooth terms are used throughout this chapter. The Term... Authentication Authorization Bluetooth neighborhood or device group Bonding (Paired devices) Device address Device discovery Device name Encryption Link key Passkey Personal Information Manager (PIM) Profiles Service discovery User’s Guide Means... -
Page 79: Supported Services
Using Bluetooth Supported Services The functions that Bluetooth supports are called services. You can only communicate with Bluetooth devices that support at least one of the following services: ■ BPP (Basic Printer profile) ■ DUN (Dial-up Networking profile) ■ ■ FTP (File Transfer profile) ■... -
Page 80: Working With Bluetooth Settings
Working with Bluetooth Settings From the tabs in Bluetooth Settings, you can: ■ Turn Bluetooth on and off ■ Enter or change your iPAQ Pocket PC Bluetooth name ■ Set your connection preferences ■ Enable Bluetooth services ■ Specify security settings ■... -
Page 81: Turning On Bluetooth
Using Bluetooth Turning ON Bluetooth To turn on Bluetooth from Bluetooth Settings: 1. From the Today screen, tap the Bluetooth icon. 2. From the pop-up menu, tap Bluetooth Settings. 3. Tap the Turn on button to enable. SHORTCUTS: There are two shortcuts for turning on Bluetooth. ■... -
Page 82: Setting Accessibility Properties
Setting Accessibility Properties You may want to enter or change accessibility properties to define how your iPAQ Pocket PC interacts with other Bluetooth devices. Entering a Device Name The device name is what other devices see when they locate your device. - Page 83 Using Bluetooth Allowing Paired Devices to Connect Paired devices share and exchange an internally generated Link Key prior to each connection. The Link Key is derived from a unique Bluetooth device address, a random number, and user-defined password. This feature allows only devices that you trust to connect to your iPAQ Pocket PC.
-
Page 84: Enabling Bluetooth Services
Enabling Bluetooth Services You can select to enable certain services: ■ Automatically when Bluetooth is activated ■ When you permit the connection ■ When a passkey or link key is correctly entered You can use any of these security options when transferring files, creating a serial port connection, exchanging business card information, configuring dial-up networking, and joining a personal network. - Page 85 Using Bluetooth Requiring Authorization to Access Services If you elect to require authorization to access services, you must authorize each connection. Your iPAQ Pocket PC will ask you if the connection should be permitted. To require authorization to access services: 1.
-
Page 86: Setting A Shared Folder
Setting a Shared Folder You can determine the folder that other devices access when they connect to your iPAQ Pocket PC. To set a shared folder: 1. From the Today screen, tap the Bluetooth icon > Bluetooth Settings. 2. Tap the File Transfer tab. 3. -
Page 87: Understanding Profiles
Using Bluetooth Understanding Profiles Use profiles to quickly enable selected personal settings in multiple environments. Creating a Profile A new profile does not automatically become active. You must select it from the Current Profile list to activate it. To create a profile: 1. -
Page 88: Activating A Profile
3. Enter a descriptive name. 4. Select an existing profile to use as a template. 5. Tap OK. Activating a Profile When a new profile is created, you will need to activate it. To activate a profile: 1. Create a profile. 2. -
Page 89: Renaming A Profile
Using Bluetooth Saving Configuration Settings in a Profile To save the iPAQ Pocket PC Bluetooth configuration settings to any profile: 1. From the Today screen, tap the Bluetooth icon > Bluetooth Settings. 2. From the 3. Select a profile from the Add/Delete Profiles list or create a new one. -
Page 90: Deleting A Profile
Deleting a Profile 1. From the Today screen, tap the Bluetooth icon > Bluetooth Settings. 2. From the General tab, tap the Profile icon. 3. Select a profile from the Add/Delete Profiles list. 4. Tap the Delete button. 5. Tap Yes to confirm you want to delete the profile. 6. -
Page 91: Opening Bluetooth Manager
Using Bluetooth Opening Bluetooth Manager From the Today screen, tap Start > Bluetooth Manager. The first screen that displays is My Shortcuts. ✎ Bluetooth Manager can also be accessed from the Today screen by tapping the Bluetooth icon, then from the pop-up menu, tap Bluetooth Manager. - Page 92 To pair devices: 1. From the Today screen, tap Start > Bluetooth Manager. 2. Tap Tools, then Paired devices. 3. Tap Add. 4. Tap the Lookup 5. Tap a device. 6. Enter a password in the Passkey field. 7. Tap OK. 8.
-
Page 93: Unpairing Devices
Using Bluetooth Unpairing Devices You can remove a paired relationship between devices. 1. From the Today screen, tap Start > Bluetooth Manager. 2. Tap Tools, then Paired devices. 3. Tap a device name. 4. Tap Remove. 5. Tap Yes to remove the pairing. Connecting to Other Devices Use ActiveSync, serial and dial-up connections to communicate with other Bluetooth devices. -
Page 94: Establishing An Activesync Connection
Establishing an ActiveSync Connection You can set up an ActiveSync partnership with a Bluetooth- enabled computer. To establish an ActiveSync connection: 1. From the Today screen, tap Start > Bluetooth Manager. 2. Tap New, then Connect. 3. Tap “ActiveSync via Bluetooth,” then tap Next. 4. -
Page 95: Establishing A Serial Connection
Using Bluetooth Establishing a Serial Connection Use the wireless Bluetooth serial port connection just as you would a physical serial cable connection. You must configure the application that will use the connection to the correct serial port. To establish a serial connection: 1. - Page 96 ✎ Once you have created the dial-up networking shortcut with a device, tap and hold the shortcut icon in the My Shortcuts tab of the Bluetooth Manager, then tap Connect. 5. Tap New Connection. 6. Tap OK. 7. Enter a name in the Connection Name field. 8.
-
Page 97: Join A Personal Area Network
Using Bluetooth Join a Personal Area Network Connect two or more Bluetooth devices to share files, collaborate or play multiplayer games. To establish a Personal Area Network connection: 1. From the Today screen, tap Start > Bluetooth Manager. 2. Tap New, then Connect. 3. -
Page 98: Creating A File Transfer Connection
Creating a File Transfer Connection 1. From the Today screen, tap Start > Bluetooth Manager. 2. Tap New, then Connect. 3. Tap “Browse files on a remote device,” then tap Next. 4. Follow the Connection Wizard instructions. Sending Files 1. Tap and hold a file transfer shortcut icon, then tap Connect. 2. -
Page 99: Receiving A File From A Remote Device
Using Bluetooth Receiving a File from a Remote Device 1. Tap and hold a file transfer shortcut icon, then tap Connect. 2. Navigate to the file location on the remote device. 3. Tap the file. 4. Tap File, then tap Get. 5. -
Page 100: Using Business Cards
4. Tap the My business card (vCard) icon. 5. Choose your contact from the list. 6. Tap OK. SHORTCUT: Tap the New Contact icon to enter a new contact. Using Business Cards Using the business card exchange, you can: ■ Send a business card to one or more devices ■... -
Page 101: Requesting Business Cards
Using Bluetooth Sending Business Cards 1. From the Today screen, tap Start > Bluetooth Manager. 2. Tap the Business card icon. ✎ You can open the business card exchange by tapping Tools, Business Card Exchange in the Bluetooth Manager. 3. Tap the Send icon. 4. -
Page 102: Exchanging Business Cards
Exchanging Business Cards You can exchange business card information with another device. If available, the device’s information will be sent directly into your Contacts list in Pocket Outlook. To exchange business cards: 1. From the Today screen, tap Start > Bluetooth Manager. 2. -
Page 103: Closing A Connection
Using Bluetooth To view the connection status: 1. From the Today screen, tap Start > Bluetooth Manager. 2. Tap and hold an active connection icon or list name, then tap Status. 3. Tap OK. Closing a Connection 1. From the Today screen, tap Start > Bluetooth Manager. 2. -
Page 104: Deleting A Shortcut
To create a shortcut: 1. From the Today screen, tap Start > Bluetooth Manager. 2. Tap New, then Connect. 3. Select a type of service, then tap Next. 4. Follow the connection wizard instructions. ✎ Paired devices are designated by a checkmark. Deleting a Shortcut 1. -
Page 105: Troubleshooting
Use the following suggestions to troubleshoot problems with the iPAQ Pocket PC. Problem I cannot see anything on the screen. I cannot keep my battery charged. The backlight keeps turning off. I want to travel with my iPAQ Pocket PC. User’s Guide Troubleshooting •... - Page 106 Troubleshooting Problem I want to travel Be sure you have the modem, cable, and plug adapter internationally appropriate for the country you are visiting. with my iPAQ Pocket PC. I want to ship my iPAQ Pocket PC to a repair facility.
- Page 107 Problem I want to see the current date. I cannot Be sure the appointment you created is in the selected see all my category. appointments. I cannot find Pocket Word and Excel only recognize and display the document documents in one folder below My Documents. For example, or workbook if you created another folder in the Personal folder in I saved.
-
Page 108: Activesync
Troubleshooting ActiveSync For more information on Microsoft ActiveSync, refer to Chapter 2, “Using ActiveSync.” Problem I cannot connect to my computer using the cable or the USB Synchronization Cradle/Charger. I connected my iPAQ Pocket PC before installing Microsoft ActiveSync. 9–4 •... - Page 109 Problem Microsoft ActiveSync cannot locate my iPAQ Pocket PC when I synchronize. I cannot open It may be necessary to synchronize your iPAQ Pocket PC with e-mail in the your computer again with Microsoft ActiveSync to link your Inbox after I e-mail from your Pocket PC to your personal computer.
-
Page 110: Bluetooth
Troubleshooting Bluetooth For more information on Bluetooth, refer to Chapter 8, “Using Bluetooth.” Problem I cannot discover another device. I can see other devices, but I cannot connect or exchange data with them. Other devices cannot find or connect to my device. -
Page 111: Expansion Cards
Expansion Cards For more information on expansion cards, refer to Chapter 6, “Using Expansion Cards.” Problem I cannot get my iPAQ Pocket PC to recognize the expansion card. I cannot insert my card. I cannot remove Push the SD card in to release the locking mechanism. The my SD card. -
Page 112: A Regulatory Notices
Federal Communications Commission Notice This equipment has been tested and found to comply with the limits for a Class B digital device, pursuant to Part 15 of the FCC Rules. These limits are designed to provide reasonable protection against harmful interference in a residential installation. -
Page 113: Declaration Of Conformity For Products Marked With The Fcc Logo-United States Only
Regulatory Notices Modifications The FCC requires the user to be notified that any changes or modifications made to this device that are not expressly approved by Hewlett-Packard Company may void the authority to operate the equipment. Cables Connections to this device must be made with shielded cables with metallic RFI/EMI connector hoods in order to maintain compliance with FCC Rules and Regulations. -
Page 114: Canadian Notice
Canadian Notice This Class B digital apparatus meets all requirements of the Canadian Interference-Causing Equipment Regulations. Avis Canadien Cet appareil numérique de la classe B respecte toutes les exigences du Règlement sur le matériel brouilleur du Canada. Japanese Notice User’s Guide Regulatory Notices A–3... -
Page 115: European Union Notice
Regulatory Notices European Union Notice 0682 Products bearing the CE marking comply with the R&TTE Directive (1999/5/EC), EMC Directive (89/336/EEC), and the Low Voltage Directive (73/23/EEC) issued by the Commission of the European Community. Compliance with these directives implies conformity to the following European Norms (in parentheses are the equivalent international standards and regulations): ■... -
Page 116: Battery Warning
Dispose of used batteries according to the manufacturer’s instructions. Because of the type of battery used in your h2200 Series, follow local regulations regarding the safe disposal of the battery. Your vendor can advise you on local regulations, and/or the existence of any battery disposal programs in operation. -
Page 117: Airline Travel Notice
Regulatory Notices Airline Travel Notice Use of electronic equipment aboard commercial aircraft is at the discretion of the airline. Wireless Notices In some situations or environments, the use of wireless devices may be restricted. Such restrictions may apply aboard airplanes, in hospitals, near explosives, in hazardous locations, etc. -
Page 118: Japanese Regulatory Wireless Notice
Japanese Regulatory Wireless Notice Brazilian Regulatory Wireless Notice Este equipamento opera em caráter secundário, isto é, não tem direito a proteção contra interferência prejudicial, mesmo de estações do mesmo tipo, e não pode causar interferência a sistemas operando em caráter primário. User’s Guide Regulatory Notices A–7... -
Page 119: System Specifications
System Specifications System Feature Description Processor Intel® XScale 400 MHz RAM (Random 64 MB SDRAM (56 MB main memory) Access Memory) ROM (Read Only 32 MB ROM Memory) SD I/O slot SD memory and SD I/O card support CF Type II slot CompactFlash Type I and II card support Display Transflective color TFT, 240 x 320 pixels, 64K-color support,... -
Page 120: Physical Specifications
Charged: solid amber LED Bluetooth active: flashing blue LED Battery Removable/rechargeable 900mAh Lithium ion battery with internal 10-minute bridge battery to maintain data during main battery replacement. Physical Specifications hp iPAQ h2200 Series Length Width Depth Weight Operating Environment Environment... - Page 121 AC Adapter 3–4 charging with 3–5 ActiveSync 1–3 4–17 backing up 2–6 backing up/restoring 4–18 connecting 2–2 Explore 2–5 installing 2–3 restoring 2–6 troubleshooting 9–4 uses 2–1 aligning the screen 1–10 Application Buttons 1–2 applications closing 4–9 installing 2–6 4–10 opening 4–8 Asset Viewer 1–2 Auto Power On...
- Page 122 Index Bluetooth 1–2 2–2 ActiveSync connection 8–19 business card information 8–24 creating shortcuts 8–28 dial-up networking 8–20 pairing devices 8–7 properties 8–7 sending files 8–23 settings 8–5 shared folder 8–11 specifications B–2 supported services 8–4 terms 8–3 troubleshooting 9–6 turning on 8–5 8–6 using 8–1 Bluetooth Manager 8–15...
- Page 123 Favorites list 7–7 full reset 1–9 1–10 hard reset 1–9 headphone 1–1 Help accessing 1–1 icons 4–3 infrared 2–2 2–3 specifications B–1 input methods Block Recognizer 5–1 keyboard 5–1 Letter Recognizer 5–1 Microsoft Transcriber 5–1 installing applications 4–10 installing ActiveSync 2–3 installing applications 2–6 installing the battery 3–1 Internet...
- Page 124 Index Terminal Services Client 1–4 Transcriber 5–1 Windows Media Player 9 Series 1–4 Mobile Favorites 2–7 modem card using 7–2 monitoring the battery 3–11 MP3 1–4 Navigation bar 4–2 network, connecting 7–1 Nevo 1–2 normal reset 1–8 on-screen keyboard 5–4 options spare battery 3–1 owner information 1–7...
- Page 125 synchronization cradle 2–2 3–1 3–7 synchronizing 1–3 changing settings 2–4 e-mail 2–2 links to Web sites 2–7 with your computer 2–2 time set for home location 1–6 set for visiting location 1–6 Today screen 1–3 1–4 creating new information 4–5 customizing 4–6 using 4–1 Transcriber 5–7...
Need help?
Do you have a question about the h2200 Series and is the answer not in the manual?
Questions and answers