Table of Contents
Advertisement
Advertisement
Table of Contents

Related Manuals for Amicroe AMI-TT2C


Summary of Contents for Amicroe AMI-TT2C
- Page 1 USER MANUAL Model: AMI-TT2C...
- Page 2 This manual contains instructions and notes on the operation and use of this device. For your safety and benefit, read this manual carefully before using the device. Keep this manual in a handy place for quick reference. 1. DO NOT place the product in hot, wet or dusty environment. 2.
-
Page 3: Specifications
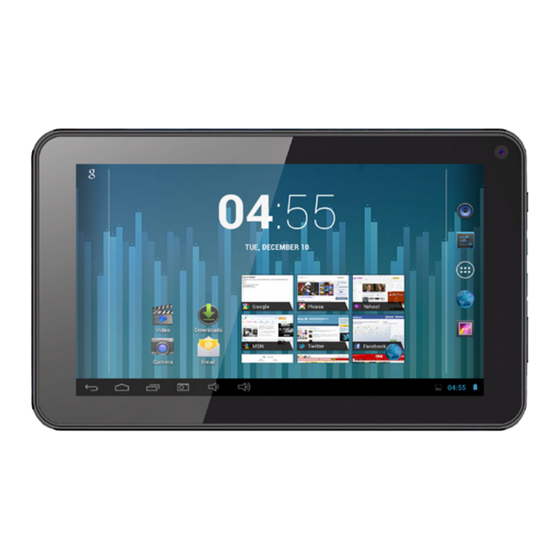
Specifications Hardware Software Rockchip 3026 Cortex-A9 dual-core Processor Android 4.2.2 – Jelly Bean GPU400Mhz, DDR3 512MB RAM Google Browser 7” TFT LCD(800 x 480) 5 Point Capacitive 16:9 eBook format – TXT, EPUB, PDF, WORD, Touch Screen EXCEL, PowerPoint (All e-book formats ... -
Page 4: Important Notice
Important Notice - If the device is unresponsive, press and hold the reset button (back of unit, Fig.1) for 7 seconds. - If the device is running slow, it is recommended to close all applications not in use. This can be done through “Settings/ Apps/ Running”. -
Page 5: Power On/Off
1. Power On/Off To turn the device on. Press and hold the Power button for 5 seconds, the device may take a minute to boot. To place the device in “Standby” mode. Press the power button for 1 second. To turn off the device. Press and hold the Power button until the “power off" confirmation message appears, touch OK to turn off the tablet. - Page 6 3. Lock Screen/ Standby (power save mode) When the device is powered on, the lock screen will appear. Touch and slide the “Padlock” icon in order to unlock the screen. In “standby” mode, press the power button once to activate the screen and then slide the padlock icon to access the Home Screen.
-
Page 7: System Settings
4. System settings Method 1. On the desktop, touch the settings icon to go directly into the settings options. Method 2, On the desktop, touch on the right hand bottom corner, slide up and select system settings. Page 76... - Page 8 System Settings 1. Wi-Fi - Press “Wi-Fi” to turn ON/ OFF. The device will automatically scan for available networks. Search and select the network that you would like to connect with. Page 7...
-
Page 9: Data Usage
2. Data Usage 3. More - Here you can view your current usage, or In this section you will find additional information monitor which applications use the most data. on mobile data, including By moving the white markers, you can select - Airplane mode. - Page 10 4. Sound 5. Display - Press “Sound” to access. - Press “Display” to access display options - Volumes. - Brightness - Silent Mode. - Wallpaper - Ringtone & Notifications. - Sleep Options - System Sounds. - Font size Page 9...
- Page 11 6. Storage 7. Battery Fig 1 - Select “Storage” to access the device memory - Touch the battery icon to check the battery usage and MicroSD status. status. - To safely remove external storage items such as MicroSD (TF) Cards & external USB Flash Drives, scroll down to “Unmount Storage”...
- Page 12 8. Apps Touch the application that you want to manage. To view and manage installed Applications, press -Select the “Force Stop” button to stop an “Apps” to access options and then slide between: application running in the background. - “Downloads” - Select the “Uninstall”...
-
Page 13: Location Services
9. Location services Google’s location service – enables Apps to use data from sources such as Wi-Fi and Mobile Networks to determine your approximate location. Page 12... - Page 14 10. Security Screen lock – Protect your device from unauthorized use by creating a personal screen unlock option. Make Passwords Visible – Show the password on screen as you type. Unknown Sources - If you want to allow installation of non-Market Applications, press Unknown Sources and press OK.
-
Page 15: Language And Input
11. Language & Input Language – Choose your preferable on-screen language. Spell Checker – Enable onboard spelling correction. Add “Personal Dictionary” words to the onboard Dictionary. Keyboard & Input Methods – Change Keyboard/ Keyboard settings. Turn Google “Voice Typing” ON/ OFF. Language &... -
Page 16: Backup And Reset
12. Backup & Reset 13. Add Account Create your account. After connecting to a Wi-Fi Here you can back-up your data, or if required, network, add your GMAIL account or enter your completely erase the device to clear all contents Exchange/ POP/ IMAP to install another email and restore the device to the original factory account. -
Page 17: Date And Time
14. Date & Time 15. Accessibility Select the accessibility options to suit your needs. Adjust the Date & Time according to your time zone. Touch the “Tick” beside “Automatic Time Zone” to un-tick/ un-lock and set the Time and Region to your local settings. Once set, re-tick “Automatic Date &... -
Page 18: Developer Options
16. Developer options 17. About Tablet Identify model, software version and general Set options for application development. information about your device. Page 17... - Page 19 How to enable USB storage mode/ connection with your Personal Computer. When connected via USB to your PC, on the Tablet Desktop (Home Page) touch the USB symbol located in the bottom right hand corner of the screen. To enable the USB storage mode, touch the “USB Connected”...
- Page 20 How to disconnect the device from your PC (USB storage continued) To disconnect the USB device, touch the “Turn off USB Storage” to disconnect the connection between the devices and then unplug and remove the drive. Important note: *Mass storage mode must be enabled to connect to a PC.
- Page 21 How to install Applications (.apk files) onto the device Play Store Button / Icon Method 1. Connect the device to the internet. See “System Settings” 1. (Wi-Fi] in order to establish an internet connection. Touch “Google Play”, set up your account and search for the applications that you’d like to install.
- Page 22 How to create Desktop icons & Shortcuts On the Desktop, touch on the Apps Drawer icon (fig 1) to access pre-loaded applications (see next page). Fig 1 You can scroll (swipe) left or right to access and personalize additional screens. Page 21...
-
Page 23: How To Make Desktop Icons
How to make Desktop icons (continued) In the “Apps” drawer, press and hold the desired “App” icon and the Home (Desktop) Screen will appear. You can now move the “App” to your desired location. Shortcuts Widgets Within the “Apps” drawer, select Widgets at Momentarily touch and hold on the desired APK icon and move it to the desired location. - Page 24 How to change your Home Screen (Desktop) Wallpaper/ background Momentarily touch and hold on the desktop, Once you’ve selected your new Wallpaper, Wallpapers options will load, select from one of the galleries to choose a different Wallpaper. select “Set Wallpaper”. Page 23...
- Page 25 How to change Keyboard input options 1. With the Keyboard on-screen, press the 2. Now you can change settings to suit your needs. Keyboard icon to select Keyboard settings. Page 24...
-
Page 26: Hardware Specifications
Hardware Specifications Operating System Android 4.2.2 – Jelly Bean Rockchip 3026 Cortex-A9 dual-core Processor SDRAM DDR3 512MB RAM Display 7” TFT LCD(800 x 480) 5 Point Capacitive 16:9 Touch Screen Screen 5 point Capacitive Touch Screen Storage 4GB onboard storage Audio port 3.5mm Stereo socket USB port... -
Page 27: Warranty
Warranty Page 26...
Need help?
Do you have a question about the AMI-TT2C and is the answer not in the manual?
Questions and answers