Table of Contents
Advertisement
Sno-Thro
Owner/Operator Manual
Models
932035 - 724
932503 - 724
932101 - 824
932309 - 824
Transfer
Coller l'autocollant du
model &
modèle et du numéro de
serial number
série dans cet encadré.
label from
Transferir aquí la etiqueta
product
del modelo y número de
registration
serie del registro del
here.
producto.
®
ENGLISH
FRANÇAIS
ESPAÑOL
Supercedes 03245600,A,B,C
03245600D 4/02
Printed in USA
Advertisement
Table of Contents

Related Manuals for Ariens 932035-724


Summary of Contents for Ariens 932035-724
- Page 1 Sno-Thro ® Owner/Operator Manual Models 932035 - 724 932503 - 724 932101 - 824 932309 - 824 ENGLISH FRANÇAIS ESPAÑOL Transfer Coller l’autocollant du model & modèle et du numéro de serial number série dans cet encadré. label from Transferir aquí la etiqueta product del modelo y número de registration...
- Page 2 - El abajo firmante - Undertegnede, - Undertecknaren av detta dokument, - Me, allekirjoittaneet, ARIENS COMPANY, certify that the Snow Thrower - certifie que le chasse-neige - bestätigen daß die Schneefräse, verklaren dat de sneeuwschüiver - certifica che lo spazzavere - certifica que el quita nieves - attesterer at sneslynger - bevitner at snøfreseren - försäkrar att...
- Page 3 Representative Measured Sound Power Level Guaranteed Sound Power Level - Niveau de puissance acoustique représentatif Niveau garanti de puissance acoustique Repräsentativer gemessener Geräuschpegel Garantierter Geräuschpegel Livello di potenza sonora rappresentativo rilevato Livello di potenza sonora garantito Nivel de potencia acústica representativo medido Nivel de potencia acústica garantizado Representativt målt lydeffektnivå...
-
Page 4: Controls And Features
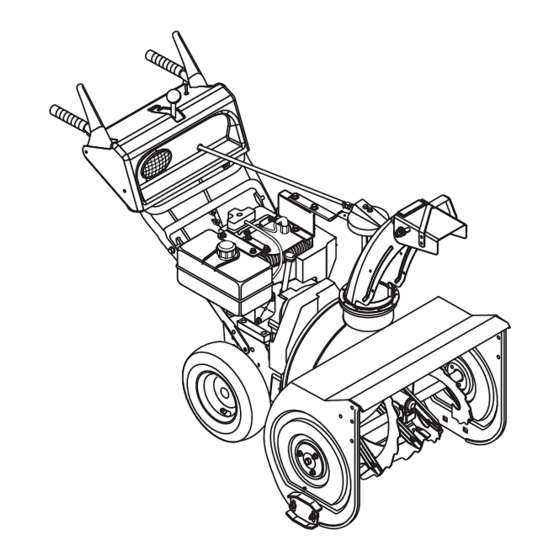
CONTROLS AND FEATURES ENGLISH FRANÇAIS ESPAÑOL 1. Traction Drive Clutch 1. Levier d’embrayage de 1. Palanca del embrague Lever l’entraînement de la de la transmisión de la 2. Ignition Switch, push-pull traction tracción 3. Choke 2. Clé de contact, 2. Interruptor de encendido, 4. - Page 5 OS0502 Figure 1 OS2100...
-
Page 6: Table Of Contents
Numbers are located on the product and may void the warranty. Ariens disclaims registration form in the unit literature package. liability for any claims or damages, whether... -
Page 7: Safety
5. Review Limited Warranty Policy. Dealer for assistance. Make sure all 6. Fill out Original Purchaser Registration assembly has been properly completed. Card and return the card to Ariens NOTE: To locate your nearest Ariens Dealer, Company. call 1-800-678-5443 or go to www.ariens.com on the internet. -
Page 8: Safety Decals And Locations
SAFETY DECALS AND LOCATIONS ALWAYS replace missing or damaged Safety Decals. Refer to figure below for Safety Decal locations. DANGER / PELIGRO ROTATING PARTS Stop engine & remove ignition key before clearing. PIECES EN ROTATION Arreter le moteur et retirer la clé de contact avant le débourrage. - Page 9 Keep children and people away. Keep children Stop engine, remove key, read out of work area and under watchful care of a manual before making any responsible adult. repairs, adjustments. NEVER allow children to operate or play on or near unit. Be alert and shut off unit if children OL4010 enter area.
- Page 10 Never direct discharge towards persons or Abnormal Vibrations are a warning of trouble. property that may be injured or damaged by Striking a foreign object can damage unit. thrown objects. Use extreme caution on gravel Immediately stop unit and engine. Remove surfaces.
- Page 11 Spark Arrester Fumes from engine exhaust can cause injury or death. DO NOT run engine in an enclosed This product is equipped with an internal area. Always provide good ventilation. combustion type engine. DO NOT use unit on ALWAYS maintain unit in safe operating or near any unimproved, forest-covered or condition.
-
Page 12: Assembly
ASSEMBLY 7. Install wing nut and bolt removed in step 2 onto shift rod and tighten hardware. WARNING: AVOID INJURY. Read and understand Assembly and Fuel Install Discharge Chute and Crank Safety Rules before proceeding. Figures 5 and 6. 1. Grease discharge chute ring on blower housing (if not already greased). - Page 13 DS0123 DS0112 1. Pinion Bracket 7. Mounting Nut 2. Gear Strap 8. Flat Gear 3. Chute Bracket 9. Pinion 4. Retainer Clip 10.Chute Strap 5. Lower Ring 11.Universal Joint 6. Chute Ring 12.Spring Clip Figure 6 Check Function of Dual Handle OS1751 Interlock (932101, 309) 1.
-
Page 14: Operation
Run in Attachment Belt 3. Stop unit, wait for all moving parts to stop, and remove spark plug wire. 1. Start unit in a well-ventilated area according to Starting and Shut-Off in 4. Adjust clutch according to Attachment Operation. Clutch/Brake Adjustment in Service and 2. -
Page 15: Filling Fuel Tank
Choke Control Knob Chute Crank 1. Choke Closed position: IMPORTANT: If chute does not stay in set position, adjust as directed in Service and chokes off air to engine for Adjustments, or repair before operation. easier start. Rotate the Chute with Discharge Chute Crank 2. - Page 16 PRE-START STARTING AND SHUT OFF 1. Frozen Impeller WARNING: FAILURE TO FOLLOW IMPORTANT: Before starting engine, check INSTRUCTIONS could result in impeller to be sure it is not frozen. personal injury and/or damage to To check impeller: unit. DO NOT attempt to start your 1.
-
Page 17: Snow Removal
Electric Start (120V or 240V) SNOW REMOVAL (932035, 101, optional on 309, 503) IMPORTANT: Allow unit and engine to adjust to the outdoor temperatures before clearing 1. Connect extension cord to prongs on snow. starter. NOTE: Attachment clutch should be engaged IMPORTANT: Prevent damage to unit. -
Page 18: Maintenance
MAINTENANCE Ariens Dealers will provide any service or adjustments which may be required to keep MAINTENANCE SCHEDULE your unit operating at peak efficiency. Should engine service be required, contact an Ariens Service Each Every Every Yearly Performed 5 hrs. dealer or an authorized engine manufacturer's hrs. -
Page 19: General Lubrication
filler hole with unit resting on a level- surface. 2. Add lubricant if required. Allow oil to drain to level of plug and replace plug. IMPORTANT: Use only Ariens special gear lubricant L-2 (Part Number 00008000). GB - 19... -
Page 20: Service And Adjustments
OS1731 Grease OS1373 Figure 8 SERVICE AND ADJUSTMENTS Adjusting WARNING: AVOID INJURY. Read Hardware and understand Maintenance and Service Safety Rules in Safety section before attempting service or adjustments. DISCHARGE CHUTE DEFLECTOR Deflector must stay in selected position while Discharge Chute throwing snow. -
Page 21: Scraper Blade
2. Chute Gear SHEAR BOLTS 3. Carriage Bolt 4. Spring IMPORTANT: Use only Ariens shear bolts for replacement. Use of any other type of shear bolt may result in severe damage to unit. Figure 10 Occasionally a foreign object may enter the... -
Page 22: Speed Selector Adjustment
SPEED SELECTOR ADJUSTMENT f. Engage traction clutch. Unit should move backward. g. Shut off unit. 9. Adjust pivot pin as needed so unit travels forward when speed selector lever is in first forward position and backward when 3 turns up the speed selector lever is in first reverse shift rod position. -
Page 23: Replace Attachment Drive Belt
Replace Attachment Drive Belt 1. Place new belt onto lower pulley and while holding brake out of way, tip unit together. 2. Secure blower housing to frame with cap screws. 3. Place belt onto engine sheave. 4. Make sure engine sheave and attachment pulley align. -
Page 24: Traction Drive Belt Replacement
TRACTION DRIVE BELT To align, move engine sheave: REPLACEMENT a.Loosen set screws. b. Slide sheave and key to desired NOTE: Housing and frame must be tipped apart and attachment drive belt removed from position. engine sheave in order to change traction c.Tighten set screws. -
Page 25: Traction Drive Clutch Adjustment
8. Check belt finger clearance. TRACTION DRIVE CLUTCH ADJUSTMENT With clutch lever engaged, belt fingers should be 1/16–1/8 in (1.6-3 mm) from If drive slips, adjust traction clutch to belt. Adjust belt fingers as necessary. compensate for friction disc wear. 9. -
Page 26: Friction Disc Replacement
FRICTION DISC REPLACEMENT 8. Reinstall one nut to keep the inside bearing cap in place. (932035, 503) 9. Remove bearing cap/bushing and washer from right side of unit. 1 2 3 10. Reinstall nuts on screws through side frame to keep screws in place. 11. - Page 27 FRICTION DISC REPLACEMENT 10. Carefully tap roll pins out of hex shaft. (932101, 309) 11. Remove three (3) hex bolts and nuts holding friction disc to shift carrier. Remove Friction Disc 12. Tap hex shaft on left side to loosen from (Figure 20): shift carrier.
-
Page 28: Storage
9. Reinstall tires with clip pins. 11. Replace spark plug wire on spark plug. 10. Set unit upright. STORAGE LONG TERM WARNING: AVOID INJURY. Read Clean unit thoroughly with mild soap and low and understand Storage Safety pressure water and lubricate (see Rules in Safety section before Maintenance). -
Page 29: Service Parts
3. Replace attachment drive belt (see Attachment Clutch/Brake Adjustment ). SERVICE PARTS ACCESSORIES Order the following parts through your See your authorized Ariens dealer to add the Dealer: additional accessories available to your Sno-Thro. Part No. Description Part No. -
Page 30: Specifications
SPECIFICATIONS Model Number 932309 932101 932503 932035 Description Engine - Tecumseh HMSK80- HMSK80- OHSK70- OHSK70- 155700W 155699W 72507E 72517E 8 (5.97) 7 (5.22) Power Max - HP (Kw/min 3600 ± 150 Fast Idle Speed-RPM (min Displacement - in. (cc) 19.43 (318.3) 11.88 (195) Electric Start Optional... -
Page 31: Warranty
Ariens Company warrants to the original purchaser that consumer products manufactured by Ariens Company will be free from defects in material and workmanship for a period of three (3) years after the date of purchase, and will repair any defect in material or... - Page 32 Ariens Company 655 West Ryan Street P.O. Box 157 Brillion, WI 54110-0157 920-756-2141 Fax 920-756-2407 www.ariens.com...
Need help?
Do you have a question about the 932035-724 and is the answer not in the manual?
Questions and answers
price for ariens 724 snowblower. I believe it was purchased back in 2012