
Related Manuals for Ariens 891003


Summary of Contents for Ariens 891003
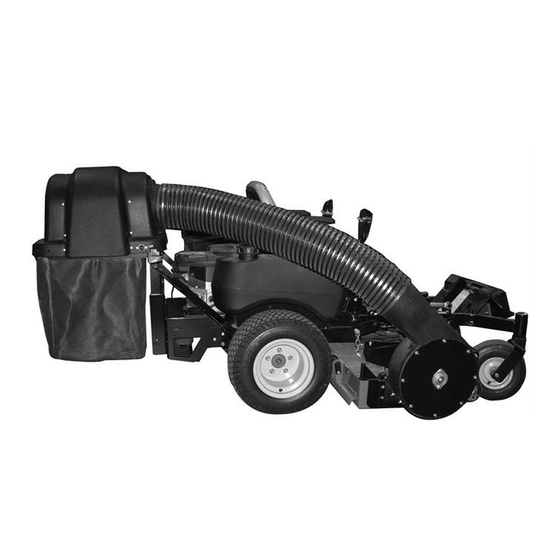
- Page 1 HD Series Bagger Owner/Operator & Parts Manual Model 891003 – HD Series Three-Bag Bagger 03776000B 5/10 Printed in USA...
-
Page 2: Table Of Contents
The Manual Product Registration Before operation of unit, carefully and completely read The Ariens or Gravely dealer must register the product at this Manual and the unit’s Owner/Operator Manual. The the time of purchase. Registering the product will help the... -
Page 3: Safety
3. Review control functions and operation of the unit. Disclaimer Do not operate the unit unless all controls function Ariens reserves the right to discontinue, change, and as described in this manual. improve its products at any time without notice or 4. - Page 4 2. DANGER ROTATING PARTS 5. DANGER ROTATING PARTS Avoid Injury – Stay clear of rotating parts. Always keep feet and hands away from rotating parts. OL3030 6. DANGER! HOT SURFACES Never direct discharge towards persons or DO NOT TOUCH parts which are hot from property that may be injured or damaged by operation.
- Page 5 ALWAYS check overhead and side clearances carefully DO NOT touch parts which are hot. Allow parts to cool. before operation. ALWAYS be aware of traffic when ALWAYS keep hands and feet away from all pinch operating along streets or curbs. points.
- Page 6 Stop and inspect equipment if you strike an object or if This product is equipped with an internal combustion there is an unusual vibration. Repair, if necessary, before type engine. DO NOT use unit on or near any restarting. Never make adjustments or repairs with the unimproved, forest-covered or brush covered land unless engine running.
- Page 7 ALWAYS block wheels and know all jack stands are NEVER store unit with fuel in fuel tank, inside a building strong and secure and will hold weight of unit during where any ignition sources are present. maintenance. Shut off fuel and allow engine to cool completely before Release pressure slowly from components with stored storing in closed area or covering unit.
-
Page 8: Assembly
ASSEMBLY Package Contents: WARNING: AVOID INJURY. Read and Check the contents of your kit for the parts listed in understand the entire Safety section before Figure 3: proceeding. Item Description Qty Part Number NOTE: The complete blower assembly installs with a Cast Iron Weight 3 00172000 combination of parts provided in a separate blower mount... - Page 9 Figure 3 ODD0182...
-
Page 10: Bagger Mount Weldment 1
INSTALL COUNTERWEIGHTS 2. Remove the hardware connecting the lower heat shield to the rear bumper and remove the lock nuts connecting the heat shield to the main frame. See CAUTION: Always install counterweights on the Figure 5. front axle before operating unit with bagger NOTE: Do not remove the heat shield or the hex bolts attached. -
Page 11: Heat Deflection Shield 1
Connect existing lower heat shield to bagger mount with hardware removed in step 2. Tighten existing tapping screw. Figure 7 9. Install the bagger cover assembly (item 9) on the Figure 6 bagger mount weldment (item 4) with two 9/16 x 1-3/8 flat steel washers (item 13) and two 5/16-18 clamping knobs (item 14). - Page 12 Thread zoom bag frame (item 16) through sleeve in mesh xl bagger bag (item 15). Install vinyl hose (item 17) on each end of frame and push the ends together. Figure 8 INSTALL BAG ON FRAME (FIGURE 9) 1. Thread the zoom bag frames (item 16) through the sleeve on the open end of the mesh xl bagger bags (item 15).
- Page 13 INSTALL BAGS 3. Install the blower assembly (item 19) on the deck and secure it with the knob supplied in the blower Install Bags on Catcher Frame mount kit. CAUTION: Make sure the heat resistant side Blower assembly and (smooth side) of the mesh bags faces the unit. mounting bracket.
-
Page 14: Clamping Knob 2
INSTALL HOSE 52-inch deck shown. Note belt twist here. 1. Install 7 x 63 hose (item 18) on blower Other decks similar. assembly (item 19) and on the inlet adapter. Make sure the thumb latch on the inlet adapter captures one rib on the hose. -
Page 15: Removal
REMOVAL Removing Bagger Kit 1. Lift thumb latch and remove hose from blower assembly and bagger assembly (see figure 14 on page 14). 2. Remove belt guard. 3. Remove V-belt from double pulley (see figure 12 on page 14). 4. Remove blower assembly (see figure 11 on page 13). -
Page 16: Operation
OPERATION Unclogging Bagger WARNING: AVOID INJURY. Read and understand the entire Safety section before WARNING: MOVING PARTS can cut or proceeding. amputate body parts. NEVER attempt to clear blower assembly while Before Each Use engine is running. 1. Check bagger parts for wear, deterioration or ALWAYS stop engine, remove key, and wait for damage. -
Page 17: Maintenance
MAINTENANCE Ariens and Gravely Dealers will provide any service or Replacing Bagger Belt (Figure 15) adjustments that may be required to keep your unit 1. Remove belt guard. operating at peak efficiency. 2. Remove old or damaged belt. 3. Install new belt on blower assembly pulley and the WARNING: AVOID INJURY. -
Page 18: Storage
Blower Assembly stops 1. Worn or damaged V-belt. 1. See Replacing Bagger Belt (Figure 15) on or slows. page 17. SPECIFICATIONS Model Number 891003 Description HD Series Bagger Added Length to Unit 27 inches Bagger Capacity 8 Bushels Added Width to Mower Deck... -
Page 19: Parts List
PARTS LIST SAFETY DECALS OEe002 Item Part No. Qty. Description 05359700 Bagger Cover Decal 07731400 Mower Pan Danger Decal 07742300 Warning Decal 08088200 Grass Pump Caution Decal 07754100 Decal, Hot Surface 07735200 Decal, Belt Pinch Point... - Page 20 BLOWER ASSEMBLY TO MOWER DECK OAe005...
- Page 21 BLOWER ASSEMBLY TO MOWER DECK (CONT.) Item Part No. Qty. Description 00166000 Housing, Blower 06439300 Washer, Flat Steel .38 x 1.50 x .062 07534800 Knob, Clamping .312-18 03395000 Belt Cover (with 52" and 60" Adapter Kits) 03398000 Belt Cover (with 44" and 48" Adapter Kits) 06200007 Bolt, Round Head Square Neck .31-18 x 1 Grade 5 (with 60"...
- Page 22 BLOWER ASSEMBLY OEe006...
- Page 23 BLOWER ASSEMBLY (CONT.) Item Part No. Qty. Description 00166000 Housing, Blower 05900008 Bolt, Hex .25-20 x .50 00169951 Plate, Skid 06543500 Nut, Locking Top Flange .25-20 03720951 Plate, Mounting Bolt Reinforcing 00168051 Plate, Bearing Mount 06114400 Screw, Machine .25-20 x .75 06500012 Nut, .25-20 Nyloc Flange 06446300...
- Page 24 MOUNTING ASSEMBLY...
- Page 25 MOUNTING ASSEMBLY (CONT.) Item Part No. Qty. Description 03735551 Weldment, Bagger Head Mount 05948700 Bolt, Hex .38-16 x 1.00 Grade 5 06545500 Nut, .38-16 Nyloc Flange 03735651 Weldment, Left Bagger Support 03735751 Weldment, Right Bagger Support 06714800 Pin, Hair #25 03735851 Shield, Heat Deflection 07412900...
-
Page 26: Bagger Cover Assembly Diagram
BAGGER COVER ASSEMBLY... - Page 27 BAGGER COVER ASSEMBLY (CONT.) Item Part No. Qty. Description 06802500 Rivet, Pop .187 x .402 00165800 Cover, Bagger with Decal 03803800 Rivet, Pop .187 x .527 00548400 Retainer, .38 Push-On 06714800 Pin, Hair 06436200 Washer, Flat-Steel .046 x .812 x .065 00292600 Prop Rod, Bagger 07534100...
- Page 28 COUNTERWEIGHT ASSEMBLY OEe007 Item Part No. Qty. Description 03400051 Counterweight Bracket 07415400 Screw, .38-16 x .75 Self-Tapping 06224100 Bolt, Round Head Square Neck .38-16 x 1.25, Grade 5 06542000 Nut, Locking Top Flange .38-16 06200113 Bolt, Round Head Square Neck .50-13 x 7.00 06500010 Nut, Locking Top Flange .50-13 00172000...
-
Page 29: Warranty
Ariens and designated or labeled commercial products by Ariens will be free from defects in material and workmanship for a period of two years after the date of purchase or 1000 hours of use, whichever comes first. An authorized Ariens dealer (Ariens brand products) or Gravely dealer (Gravely brand products) will repair any defect in material or workmanship, and repair or replace any defective part, subject to the conditions, limitations and exclusions set forth herein. - Page 30 If the applicable warranty period is more than 90 days, Ariens will cover the prorated cost of any defective battery, for up to 12 months after the date of purchase.
- Page 31 Com_Lawn_2010 ARIENS COMPANY 31 of 31 ® ® ® ® ® ® ® GRAVELY | STENS | LOCKE | NATIONAL | BYNORM | EVERRIDE | GREAT DANE...
- Page 32 Ariens Company GRAVELY 655 West Ryan Street Brillion, WI 54110-1072 920-756-2141 Fax 920-756-2407 www.ariens.com or www.gravely.com...
Need help?
Do you have a question about the 891003 and is the answer not in the manual?
Questions and answers