Table of Contents
Advertisement
Quick Links
Advertisement
Table of Contents

Related Manuals for AOC V27M


Summary of Contents for AOC V27M
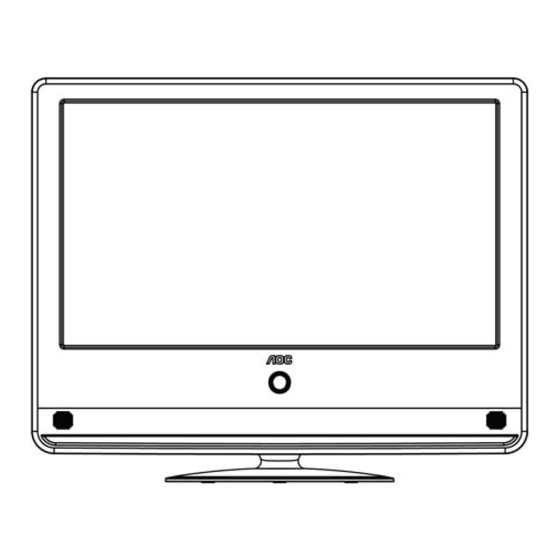
- Page 1 V27m 27” Multimedia Function Display Operating Instructions...
- Page 2 Thank you for choosing an AOC LCD Monitor. It is recomme nded that you read the contents of this manual carefully before installing and turning on the monitor. Please keep this manual for future reference. Note: Our products are under continuous development and are subj ect to change without notice.
-
Page 3: Table Of Contents
Operating Instructions Content Important safety notes ..............5 Read these notes before operating the device....5 nection and preparation of the monitor.......7 Parts list................7 Installation of the base............8 Disassembly of the base............8 Stand the monitor on a stable surface.......9 Installing the monitor on the wall ........10 Power connection ............10 Turning the LCD Monitor On or Off.........11 Control Panel and Interface ............12... - Page 4 Tips..................21 Product Specifications ............22 Supported Resolution .............23 Troubleshooting ..............25 Glossary .................26 China RoHS Regulation Marking Requirements.....27...
-
Page 5: Important Safety Notes
Important safety notes Read these notes before operating the device. Read these notes. Follow these notes. Heed all warnings. Operate as per instructions. Do not use this apparatus near water (for example, near the bathtub, kitchen sink, washbasin, washing machine, in a humid basement, or near the swimming pool). - Page 6 All servicing must be carried out by professional service personnel. Servic ing is required if the device does not work normally, or has been damaged in some way. For example, if the power cord has been damaged, if liquid has been spilled on it, it has been exposed to r ain or moisture, or it has been dropped.
-
Page 7: Con Nection And Preparation Of The Monitor
Connect ion and preparation of the monitor Parts list AOC V27m Bracket Base + Screws Cleaning cloth Power cord VGA cable Operating Instructions Warran card Quick Installation Guide CD-ROM HDMI cable Audio cable Screws... -
Page 8: Installation Of The Base
Connection and prep aration of the monitor Installation of the bas Take the monitor and the base out of the carton and assemble them, as shown in the figure below: 1. Place the monitor face down on a soft cloth or pad on the table. -
Page 9: Stand The Monitor On A Stable Surface
Connection and preparation of the monitor Stand the monitor on a stable surface. 1. Choose a position for the monitor that has good ventilation and make sure the ventilation holes on the cover are clear of obstruction. 2. Ensure the LCD monitor has 15cm of clearance on all sides to provide proper ventilation. -
Page 10: Installing The Monitor On The Wall
Connection and preparation o f the monitor Installing the monitor on the wall The monitor conforms to the wall-mounted VESA standard. Please refer to the instructions for product specifications and details. To ensure your own safe ty and that of the monitor, use only the specified wall-mounting bracket. -
Page 11: Turning The Lcd Monitor On Or Off
Turning the LCD Monitor On or Off 1. To turn on: Connect the AC power to th e monitor. Press the power button on the control panel, and the indicator lig ht will turn blue . After a few seconds the monitor will be operating normally. -
Page 12: Control Panel And Interface
Control Pa nel and Interface Side panel Volume + Volume - Menu Source Press button to enter the interface of signal source Signal Source: selections and press again to select the source needed. when menu is unavailable on display.Once menu occur, this key is used for confirmation purpose and select to confirm target you needed. -
Page 13: Source Interface
Source Interface A device with multiple sources can be connected to your monitor. The figure below shows how to connect. Tip: If you want to wall mount your monitor, all cables must be connected the monitor connectors first. Whenever an external device is connected to your monitor, please make sure the monitor is tu rned off. -
Page 14: Video/S-Video Input
Source Interface Video/S-Video Input: Connect the Video or S-Video cable to the DVD player, CD player, Video Recorder, or Camcorder, etc. Audio Input: Connect the audio sources (e.g., com puter, DVD player, CD player, Video Recorder, or Camcorder) to the Audio Input connector. Tip: Audio is shared between S-Video and Video. -
Page 15: Auxiliary Component Input
Source Interface Auxiliary Component Input: Connect the auxiliary source audio and video (e.g., computer, DVD player, CD player, Video Recorder, or Camcorder) to the Component Input connector. HDMI Input: Connect the HDMI source (e.g., computer, DVD player, CD player, Video Recorder, or Camcorder) to the HDMI Input connector. -
Page 16: Pc Signal And Pc Audio Input
Source Interface PC Signal and PC Audio Input: Connect the PC to the PC input conne ctor on the back of the monitor with a A cable. Also connect the audio cable between PC Audio Input of the monitor and the PC a udio connector. -
Page 17: Using The Menu
Using the Menu 1. Press the Menu button to display the menu. 2. Select the menu option to be adjusted using the Up or Down key. 3. Enter the submenu by pres sing the VOL Up key. Enable or adjust the function selected by pressing the VOL Up and D own key. -
Page 18: Video Settings
Using the Men Video Settings Brightness This adjusts the brightness of the screen backlight. The adjustment range is b etween 0 and 100. Contrast This adjusts the screen contrast. The adjustment range is between 0 and 100. Color Saturatio This adjusts the scree n color intensity. -
Page 19: Audio Settings (Applicable To All Modes)
Using the Menu Audio Settings (applicable to all modes) Sound Q uality Switches between the five audio modes. Bass This is used to adjust the bass strength. Treble This is used to adjust the treble strength. Equalizer The sound adjustment range is 0 to 60. During adjustment from 30 to 0, the sound from the right channel will gr adually decrease until it... -
Page 20: Function Settings
Using the Menu Function settings Menu Language This sets the language used for the OSD. There are 24 availa ble languages including English and Simplified Chinese. Aspect Ratio 16:9 Movie (This control is not available in PC mode.) Panorama (This control is not available in PC mode.) Sleep Timer This sets the interval before your monitor will automatically enter standby mode. -
Page 21: Tips
Tips Do not use any hard object to wipe the screen as this may cause permanent damage. Unplug the monitor before cleaning the screen. Clean the screen and casing with a clean soft cloth to remove dust. Do not use liquid cleaning agents or aerosols. -
Page 22: Product Specifications
Prod uct Specifications Model V27m Panel Size (Diagonal) 686mm (27”) Native Resolution 1920 x 1080 Viewing Angle Horizontal 1 70° / Vertical 160° (Typ.) Brightness 300cd/m Contrast Ratio 60000:1 Speaker Output 3W x 2 Available Voltage Range AC100~240V 50/60Hz ≦ 60W... -
Page 23: Supported Resolution
Supported R esolution Default PC Mode Standard Resolution H. Freque ncy(kHz) V. Frequenc y(kHz) 640×480 @60Hz DMT 31.469 59.940 640×480 @67Hz MAC 35.000 66.667 640×480 @72Hz DMT 37.861 72.809 640×480 @75Hz DMT 37.500 75.000 Dos-mode 720×400 @70Hz DOS 31.469 70.087 SVGA 800×600 @56Hz DMT 35.156... - Page 24 Supported Res olution Standard Resolution H. Frequency(kHz) V. Frequency(kHz) WSXGA 1680X1050 @60Hz CVT16:10 65.290 59.954 1680X1050 @60Hz WSXGA 64.674 59.883 CVT16:10 1920×1080@60Hz 67.500 60.000 480P@60Hz for SDTV Digital 31.469 59.94 only 576P@50Hz for SDTV Digital 31.250 50.000 only 720P@60Hz for HDTV Digital 45.000 60.000 only...
-
Page 25: Troubleshooting
Troubleshooting Before callin g our Cus tomer Service, check this troubleshooting list to understand th e sympt oms and solutions to your problems. Symptoms Items to be inspected and measures to be taken Check whether the power cord of the monitor is plugged int the outlet. -
Page 26: Glossary
Glossary Audio/video input These connectors (RCA-type plug) are located on the back of the monitor. It is specially designe d to be used with a video recorder (or other accessories) to receive higher im age resolution and sound. S-Video input Connects directly to high resolution vide o sources, such as a Super VHS recorder, disc player etc. -
Page 27: China Rohs Regulation Marking Requirements
China RoHS Regulation Marking Requirements According to China's "Management Methods for Controlling Pollution by Electronic Information Products" or co mmonly referred to as China RoHS, the following lists the names and content of the toxic or hazar dous substances or elements that may be contained in this product.
Need help?
Do you have a question about the V27M and is the answer not in the manual?
Questions and answers