Table of Contents
Advertisement
Quick Links
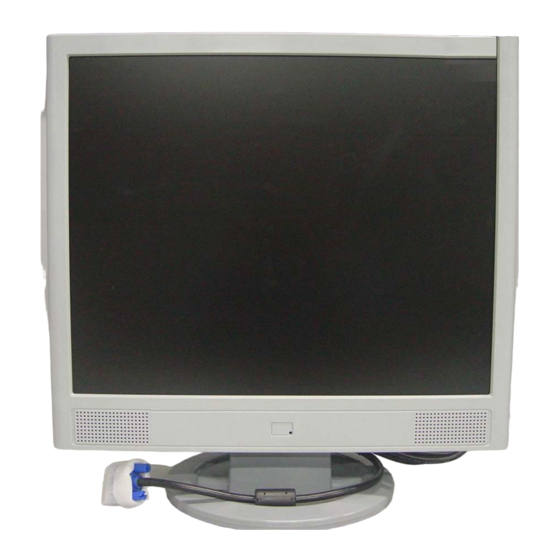
HP VS19X Service Manual
SERVICE MANUAL
19" LCD Monitor
VS19X Series
THESE DOCUMENTS ARE FOR REPAIR SERVICE INFORMATION ONLY. EVERY
REASONABLE EFFORT HAS BEEN MADE TO ENSURE THE ACCURACY OF THIS MANUAL; WE
CANNOT GUARANTEE THE ACCURACY OF THIS INFORMATION AFTER THE DATE OF
PUBLICATION AND DISCLAIMS RELIABILITY FOR CHANGES, ERRORS OR OMISSIONS.
Advertisement
Table of Contents

Related Manuals for AOC VS19X Series


Summary of Contents for AOC VS19X Series
- Page 1 HP VS19X Service Manual SERVICE MANUAL 19” LCD Monitor VS19X Series THESE DOCUMENTS ARE FOR REPAIR SERVICE INFORMATION ONLY. EVERY REASONABLE EFFORT HAS BEEN MADE TO ENSURE THE ACCURACY OF THIS MANUAL; WE CANNOT GUARANTEE THE ACCURACY OF THIS INFORMATION AFTER THE DATE OF...
-
Page 2: Table Of Contents
HP VS19X Service Manual Table of Contents Table of Contents ---------------------------------------------------------------------------------- 02 Revision List ---------------------------------------------------------------------------------------- 1.Product Feature -------------------------------------------------------------------------------- 2.LCD Monitor Description ----------------------------------------------------------------------- 3.Operation Instructions -------------------------------------------------------------------------- 3.1 General Instructions ----------------------------------------------------------------------- 3.2 Control Button ------------------------------------------------------------------------------- 3.3 Adjusting The Picture ------------------------------------------------------------------------ 4. Input/Output Specification ---------------- --------------------------------------------------- 4.1 Input Signal Connector -------------------------------------------------------------------10 4.2 Factory Preset Display Modes ----------------------------------------------------------11 4.3 Power Supply Requirements ------------------------------------------------------------11... - Page 3 HP VS19X Service Manual 7.1 Main Board -----------------------------------------------------------------------20 7. 2 Audio Board ----------------------------------------------------------------------27 7. 3 Power Board ---------------------------------------------------------------------28 8. PCB Layout ---------------------------------------------------------------------------------------31 8.1 Main Board -----------------------------------------------------------------------------------31 8.2 Power Board ---------------------------------------------------------------------------------32 8.3 Keypad Board -------------------------------------------------------------------------------33 9. Maintainability ------------------------------------------------------------------------------------33 9.1 Equipments and Tools Requirements -------------------------------------------------33 9.2 Trouble Shooting ---------------------------------------------------------------------------34 9.2.1 Main Board...
-
Page 4: Revision List
HP VS19X Service Manual Revision List Revision Date Change Description Nov-20-05 Initial release... -
Page 5: Product Feature
HP VS19X Service Manual Product Feature Driving system TFT Color LCD Panel M190EN04 V5 Size 48.3cm(19.0") Pixel pitch 0.294mm( H )x 0.294mm( V ) Viewable angle 140˚ (H) 130˚ (V) LCD Panel Response time (typ.) 16 ms Brightness Contrast 400:1 Video Analog /Digital Sync. -
Page 6: Lcd Monitor Description
HP VS19X Service Manual 2. LCD Monitor Description The LCD Monitor will contain main board, power board, key board, Audio board and which house the flat panel control logic, brightness control logic and DDC. The power board will provide AC to DC Inverter voltage to drive the backlight of panel and the main board chips each voltage. -
Page 7: Operation Instructions
HP VS19X Service Manual 3. OPERATION INSTRUCTIONS 3.1 General Instructions The control buttons are located at the left side of monitor, and press the power button to turn the monitor on or off. By changing these settings, the picture can be adjusted to your personal performance. The power cord should be connected and insert to adaptor. - Page 8 HP VS19X Service Manual...
-
Page 9: Adjusting The Picture
HP VS19X Service Manual 3.3 Adjust The Picture Brightness Adjust the brightness. Contrast Adjust the contrast Adjust the: Auto Adjustment: Adjusts the main settings and produces a stable, centered image. Image Control H-Position: horizontal position of the screen image. V-Position: vertical position of the screen image. Clock: frequency of the pixel clock to minimize vertical bar. -
Page 10: Input/Output Specification
HP VS19X Service Manual 4. Input/Output Specification 4.1 Input Signal Connector MNEMONIC SIGNAL Red Video Green Video Blue Video PC Connect detection Ground (DDC Return) Red GND Green GND Blue GND +5 V +5 V (from PC) Sync Ground None DDC Data Horizontal Sync Vertical Sync... -
Page 11: Factory Preset Display Modes
HP VS19X Service Manual 4.2 Factory Preset Display Modes Prese Pixel Horz Freq Horz Vert Freq Vert Pixel Clk Format (KHz) Polarity (Hz) Polarity (MHz) Source 640 x 480 31.469 59.940 25.175 640 x 480 37.861 72.809 31.500 VESA 640 x 480 37.500 75.000 31.500... -
Page 12: Panel Specification
HP VS19X Service Manual 5 PANEL SPECIFICATION 5.1 General Feature The following items are characteristics summary on the table under 25 condition: ℃ ITEMS Unit SPECIFICATIONS 480 (19.0" ) Screen Diagonal [mm] 376.32 (H) x 301.06 (V) Active Area [mm] 1280(x3) x 1024 Pixels H x V 0.294 (per one triad) x 0.294... -
Page 13: Optical Characteristics
HP VS19X Service Manual 5.2 Optical Characteristics The optical characteristics are measured under stable conditions at 25 (Room Temperature): ℃ Item Unit Conditions Min. Typ. Max. Viewing Angle [degree] Horizontal (Right) 65 65 70 70 [degree] CR = 10 (Left) [degree] Vertical (Up) -
Page 14: Block Diagram
HP VS19X Service Manual 6. Block Diagram 6.1 Monitor Exploded View... -
Page 15: Software Flow Chart
HP VS19X Service Manual 6.2 Software Flow Chart MCU initialize. Is the eeprom blank? Program the eeprom by default values. Get the PWM value of brightness from eeprom. Check the pin PANEL1 and PANEL2 to tell which panel to get with it. Is the power key pressed? Clear all global flags. -
Page 16: Electrical Block Diagram
HP VS19X Service Manual 6.3 Electrical Block Diagram 6.3.1 Scalar Board Block Diagram LCD Interface (CN503) EEPROM 24C16 (U602) EPR_SDA MST8116B EPR_SCL (Include SCALAR, ADC, OSD) W78E65P-40 (U401) (U601) OSD Control H sync Interface V sync (CN602) D-Sub Connector (CN301) DB15_SDA, DB15_SCL EEPROM... -
Page 17: Inverter/Power Board
HP VS19X Service Manual 6.3.2 Inverter / Power Board Block Diagram Inverter Block Diagram... - Page 18 HP VS19X Service Manual Power Block Diagram...
-
Page 20: Schematic
VAA4 VLCD_12V onPanel_12V onBACKLITE GPO[0..4] onPanel_5V/3.3V GPO[0..4] GPO[0..4] VCPU VCC5V VCC3.3 5.PANEL INTERFACE VCC1.8 AdjBACKLITE AdjBACKLITE VAA1 VLCD_12V VLCD VAA2 VAA3 VAA4 VLCD_12V Title 4.SCALER VLCD AOC SCHEMATIC FOR HPQ2005 Size Document Number 2.POWER Date: Monday, September 13, 2004 Sheet... - Page 21 R215 1/16W Q206 AO3407 R214 4.7K 1/16W Q205 onPanel_12V VCC12V PMBS3904 C217 C218 R216 Title AOC SCHEMATIC FOR HPQ2005 4.7K 1/16W H8D3.5-2LX 0.1uF 10uF/16V H8D3.5-2LX H8D3.5-2LX H8D3.5-2LX Size Document Number POWER Date: Thursday, November 18, 2004 Sheet...
- Page 22 R316 1/16W AT24C02N-10SC D321 D318 DDC_DAT MLL5232B 5.6V MLL5232B 5.6V DDC_CLK modify ddc_wp circuit Q301 R319 PMBS3904 1/16W C314 DDC_WP 6 R329 0.1uF/16V Title AOC SCHEMATIC FOR HPQ2005 Size Document Number INPUT Date: Friday, October 22, 2004 Sheet...
- Page 23 600 OHM GPO1 PMBS3904 GPO2 GPO2 R409 Q401 C404 0.1uF GPO3 C427 BYPASS GPO3 GPO4 1/16W 10uF/16V AVSS_LPLL GPO4 VOLUME C428 0.1uF C429 C430 Title AOC SCHEMATIC FOR HPQ2005 100pF Size Document Number SCALER Date: Monday, December 06, 2004 Sheet...
- Page 24 R512 R513 R514 AU 17 QDI 17 3.3V CPT 17 3.3V 3.3V INNOLUX 15 HannStar 15 3.3V 3.3V CPT 15 3.3V 3.3V LG 15 Title AOC SCHEMATIC FOR HPQ2005 Size Document Number PANEL INTERFACE Date: Friday, August 13, 2004 Sheet...
- Page 25 K_LEFT R624 1/16W LEFT POWER K_POWER R621 1/16W C608 C606 C607 C610 C609 0.001uF 0.001uF 0.001uF 0.001uF 0.001uF CON16A Title AOC SCHEMATIC FOR HPQ2005 Size Document Number LOUT+1 ROUT+1 OUT-L- OUT-R- Date: Wednesday, November 10, 2004 Sheet...
- Page 26 1/16W AGND modify headhone sound to small 1015 L705 +5VA VCC5V VCC5V 2,3,4,5,6 L706 600 OHM VCC5V 2,3,4 Title AGND VS19 VS17/VS15 AOC SCHEMATIC FOR HPQ2005 L708 600 OHM Size Document Number AUDIO Date: Monday, November 29, 2004 Sheet...
-
Page 27: Audio Board
HP VS19X Service Manual 7.2. Audio Board CN701 300 OHM 1/16W R701 U701 300 OHM 1/16W R702 C701 0.1uF/16V C702 0.1uF/16V LINN RINN C728 C729 C703 0.1uF/16V C704 0.1uF/16V LINP RINP LINE IN GREEN AGND 470pF 470pF AGND AUDIO_SD SHUTDOWN BYPASS... -
Page 28: Power Board
HP VS19X Service Manual 7.3 Power Board (include power and inverter) L907 L909 L903 +13VCC Q904 BEAD 73L253151-L(45uH) BEAD R901 MOSFET P R902 1/16W C927 1/16W C926 1000uF/25V C923 Q902 D901 1000uF/16V C911 L904 PMBS3904 0.1uF/25V AUDIO SM340A 0.1uF/25V R943 Q903... - Page 29 HP VS19X Service Manual R701 INV1 1/8W Q712 CN701 DTA144WKA C701 PT701 470uF/25V Q713 Q701 R702 DTC144WKA R704 C702 ON/OFF 100 (1206) 1/4W C703 R750 22pF/3KV 1/4W 0.0033uF R705 C704 R707 6.2M 1/2W CONN 1/4W ...
- Page 30 HP VS19X Service Manual R942 R912 1/8W 665K 1/8W INV1 C904 R915 C912 150uF/400V R914 R913 POWER X'FMR 1/8W C913 100K L912 BD901 R916 1500P/2KV 0.001uF BEAD U4KB80R 665K 1/8W T901 L911 BEAD L905 INV2 C934 R917 0.0033uF/250V...
-
Page 31: Pcb Layout
HP VS19X Service Manual 8. PCB Layout 8.1 Main Board 715G1403-1A-2... -
Page 32: Power Board
HP VS19X Service Manual 8.2 Power Board 715G1421-3... -
Page 33: Keypad Board
HP VS19X Service Manual 8.3 Key Board 715G1404-1 9. Maintainability 9.1 Equipments and Tools Requirement 1.) Multi-meter. 2.) Oscilloscope. 3.) Pattern Generator. 4.) DDC Tool with an IBM Compatible Computer. 5.) Alignment Tool. 6.) LCD Color Analyzer. 7.) Service Manual. 8.) User Manual. -
Page 34: Trouble Shooting
HP VS19X Service Manual 9.2 Trouble Shooting 9.2.1 Main Board No power No power Press power key and look if the picture is normal Please reinsert and make sure the AC of 100-240 is normal Reinsert or check the power section Measure CN201 PIN5/6=12V? Measure CN201 PIN7/8=5V? Check power section... - Page 35 HP VS19X Service Manual No picture (LED is orange) No picture Y601 oscillate waveforms Key is under control? are normal Replace Y601 X401 oscillate waveforms are normal Replace U601 Replace X401 Replace U401 Check if the sync signal from computer is output and video cable is connected normally Input the sync signal of computer, or change the cable...
- Page 36 HP VS19X Service Manual Panel Power Circuit Measure Q204 base is high level? Y601 oscillate waveforms are normal Check Q204 and Q203 Replace Y601 are broken or CN503 Replace U601 Check Correspondent component. Replace U401 Replace PANEL...
-
Page 37: Power/Inverter Board
HP VS19X Service Manual 9.2.2 Power Board No Power No power Check AC line volt 110V or 220V Check AC line Check the voltage of C904(+) Check F901, bridge rectified circuit Check start voltage for the pin3 of IC901 Check R912, R916, R918, IC901 Check the auxiliary voltage is between 10V-16V Check IC90 (CN503) - Page 38 HP VS19X Service Manual No Backlight Check CN903 Pin1/3 =12V Check adapter Check ON/OFF signal Check Interface board Check IC701 PIN6=5V+0.25V Check Q713,Q712, Q702, ZD701 circuit Check IC701 PIN1=5V Check Q707, Q706 circuit Check IC701 PIN 2 triangular wave is normal Check C720, C719, IC201 circuit Check IC701 PIN4, 5...
-
Page 39: Keypad Board
HP VS19X Service Manual 9.2.3 Keypad Board OSD is unstable or not working Is Keypad board connecting normally Connect Keypad Board Replace Button Switch Is Button Switch normally Replace Keypad Board Is Keypad board normally Check main board... -
Page 40: White-Balance, Luminance Adjustment
HP VS19X Service Manual 10. WHITE- BALANCE, LUMINANCE ADJUSTMENT Approximately 30 minutes should be allowed for warm up before proceeding White-Balance adjustment. 1.How to do the Chroma-7120 MEM .Channel setting A. Reference to chroma 7120 user guide B. Use “ SC” key and “ NEXT” key to modify xyY value and use “ID” key to modify the TEXT description Following is the procedure to do white-balance adjust 2.Setting the color temp. -
Page 41: Check List After Replacing Lcd Main Board
(Center). The exact brightness values are confirmed by the checking-regulations of different customers and different models. 11.2 Steps of white-balance adjustment for LCD:(Take 17” AOC LCD for example) 1. Required instruments: Chroma7120、Chroma2325(BGA265A) 。 2. First connect the instruments together and turn on the LCD power, then warm up for 30 minutes under full white... - Page 42 HP VS19X Service Manual 3. Set Chroma2325 at round-windows mode and make the detecting-head of Chroma7120 aim at the cross in the middle, the distance between the detecting-head and the cross is 20cm. 4. Set Chroma2325(BGA265A)to be T144(1280*1024/60HZ)and P105 of full white screen. Test if the white-balance value is within the specs.
- Page 43 Serial No.:"after dual-click the document to be ready for DDC-writing. 3.Input the serial number of the product (For instance: AOC LM729 is 13 bits), then press ENTER to start writing 4.Check the indication of DDC-writing program at the end. When you see the picture as the schematic picture above, the “Data compare...
- Page 44 HP VS19X Service Manual 5.You can exit the program by pressing Ctrl plus C, then cut the signal cable and the power. 6.The following picture is taking Acer AL1721 EDID for example. Notes: 1、Make sure the system time of PC is in accordance with the real time before writing. 2、The schematic picture is just as an example for description, the exact content of the DDC is dependent on the serial number of the BARCORD of this model.
-
Page 45: Edid Content
HP VS19X Service Manual 12. EDID CONTENT... -
Page 46: Bom List
HP VS19X Service Manual 13. BOM LIST T982KHH4DBHHAA Location Part NO. for TPV Description Quantity Unit CBPC980KH4HPA CONVERSION BOARD KEPC980KD4 KEY BOARD PWPC1942HSH2 POWER BOARD 15G8126 5 MAIN FRAME 23G3178690 6A LOGO 33G4788 PC L STAND-CAP 34G1469CPC B BEZEL 40G 19N690 4A RATING LABEL 40G 45769020A CARTON/PALLET LABEL... - Page 47 HP VS19X Service Manual CBPC980KH4HPA AIC980KH4HPA MAIN BOARD 40G 45762412B CBPC LABEL C204 67G215L221 4R LOW E.S.R 220UF +/-20% C209 67G309V470 3 47UF 16V 85C C211 67G309V470 3 47UF 16V 85C C213 67G309V470 3 47UF 16V 85C C215 67G309V470 3 47UF 16V 85C C219 67G215L221 4R...
- Page 48 HP VS19X Service Manual C216 65G0603104 32 CHIP 0.1UF 50V X7R C220 65G0603104 37 CHIP 0.1UF 50V/Y5V C221 65G0603104 37 CHIP 0.1UF 50V/Y5V C230 65G0603474 17 CHIP CAP.CER 0.47UF -20 C304 65G0603473 32 CHIP 0.047UF 50V X7R C305 65G0603473 32 CHIP 0.047UF 50V X7R C306 65G0603473 32...
- Page 49 HP VS19X Service Manual C428 65G0603104 32 CHIP 0.1UF 50V X7R C429 65G0805225 17 CHIP 2.2UF 16V Y5V C511 65G0603104 32 CHIP 0.1UF 50V X7R C601 65G0603104 32 CHIP 0.1UF 50V X7R C602 65G0603220 31 CER1 0603 NP0 50V 22P P C604 65G0603220 31 CER1 0603 NP0 50V 22P P...
- Page 50 HP VS19X Service Manual D202 93G1020 1 S GS1D D301 93G 6433P BAV99 D302 93G 6433P BAV99 D303 93G 6433P BAV99 D304 93G 64 42 P BAV70 SOT-23 D317 93G 39147SEM ZMM5V6ST D318 93G 39147SEM ZMM5V6ST D319 93G 39147SEM ZMM5V6ST D320 93G 39147SEM ZMM5V6ST...
- Page 51 HP VS19X Service Manual R205 61L0603472 RST SM 0603 RC0603 4K7 R207 61L0603472 RST SM 0603 RC0603 4K7 R208 61L0603103 RST SM 0603 RC0603 10K R209 61L0603000 RST SM 0603 JUMP MAX 0R R211 61L0603103 RST SM 0603 RC0603 10K R212 61L0603472 RST SM 0603 RC0603 4K7...
- Page 52 HP VS19X Service Manual R501 61L0603000 RST SM 0603 JUMP MAX 0R R502 61L0603000 RST SM 0603 JUMP MAX 0R R503 61L0603000 RST SM 0603 JUMP MAX 0R R504 61L0603000 RST SM 0603 JUMP MAX 0R R505 61L0603000 RST SM 0603 JUMP MAX 0R R507 61L0603000 RST SM 0603 JUMP MAX 0R...
- Page 53 HP VS19X Service Manual R705 61L0603101 RST SM 0603 RC0603 100R R706 61L0603200 2F CHIPR 20KOHM +-1% 1/10W R707 61L0603101 RST SM 0603 RC0603 100R R708 61L0603200 2F CHIPR 20KOHM +-1% 1/10W R709 61L0603101 RST SM 0603 RC0603 100R R710 61L0603103 RST SM 0603 RC0603 10K R711...
- Page 54 65G0603121 31 CHIP 120PF 50V NPO C105 65G0603471 31 CAP:CER 470PF 5%50V SMT C106 65G0603471 31 CAP:CER 470PF 5%50V SMT 81G0603 B KB KP-1608QBC-C-AOC 5MA 81G0603 Y KB KP-1608SYCK-5MAV-AOC FB101 71G 59G301 CHIP BEAD 300OHM FB102 71G 59G301 CHIP BEAD 300OHM...
- Page 55 HP VS19X Service Manual C722 65G 3J2206ET 22PF 5% SL 3KV TDK C723 65G 3J5096ET 5PF 5% SL 3KV C724 67G215L471 4N GP KY25VB470M-L10*16 C725 65G 3J5096ET 5PF 5% SL 3KV C903 63G107K474 US 0.47UF +-10% C904 67G215S15115K EC105C 150UF 450V C905 67G215C102 4K LOW&E.S.RE.C 105 ...
- Page 56 HP VS19X Service Manual C702 65G0603332 32 CHIP 0.0033UF 50V X7R 0 C704 65G0603332 32 CHIP 0.0033UF 50V X7R 0 C707 65G0603104 22 CHIP 0.1UF +80-20% 50V C708 65G1206225 17 1206 2.2UF -20%~+80% 16 C710 65G0603333 32 0.033UF/50V C711 65G0603103 32 0.01UF +-10% 50V X7R C712 65G0805332 31...
- Page 57 HP VS19X Service Manual C944 65G0603104 32 CHIP 0.1UF 50V X7R C945 65G0603104 32 CHIP 0.1UF 50V X7R C946 65G0603104 32 CHIP 0.1UF 50V X7R D702 93G 6433P BAV99 D703 93G 6432V LL4148-GS08 D704 93G 6433P BAV99 D705 93G 6432V LL4148-GS08 D706 93G 6433P...
- Page 58 HP VS19X Service Manual Q902 57G 417 4 PMBS3904/PHILIPS-SMT(04 Q903 57G 417 6 PMBS3906/PHILIPS-SMT(06 Q904 57G 763 7 A0D405L Q905 57G 417 6 PMBS3906/PHILIPS-SMT(06 Q906 57G 417 4 PMBS3904/PHILIPS-SMT(04 R701 61L1206000 RST SM 1206 JUMP MAX 0R R702 61L1206330 CHIP 33 OHM 5% 1/4W R703 61L0603102 RST SM 0603 RC0603 1K P...
- Page 59 HP VS19X Service Manual R739 61L0603431 CHIP 430OHM5% 1/10W R740 61L0603105 RST SM 0603 RC0603 1M P R741 61L0603750 1F RES 7K5 1/10W 1% SMT 06 R742 61L0805102 CHIPR 1K OHM +-5% 1/8W R743 61L0805102 CHIPR 1K OHM +-5% 1/8W R744 61L0603203 CHIPR 20K OHM+-5% 1/10W...
- Page 60 HP VS19X Service Manual R932 61L0805100 2F CHIP 10K OHM 1/8W 1% R933 61L0805472 CHIRP 4.7K OHM +-5% 1/8 R934 61L0805102 CHIPR 1K OHM +-5% 1/8W R935 61L0805472 CHIRP 4.7K OHM +-5% 1/8 R936 61L0805240 1F CHIPR 2.4KOHM +-1% 1/8W R937 61L0805222 CHIP 2.2KOHM 5% 0805 1/...
- Page 61 HP VS19X Service Manual T901 6G 31502 1.5MM RIVET 90G 412 1 HEAT SINK M1G1730 8128 SCREW M3x8 Q901 57G 600 35 STP8NK80ZFP 95G205S354083 HARNESS 96G 29 6 SHRINK TUBE UL/CSA CN901 87G 501 12 CJ AC SOCKET 90G6081 2 HEAT SINK M1G1730 8128 SCREW M3x8...
Need help?
Do you have a question about the VS19X Series and is the answer not in the manual?
Questions and answers