Table of Contents
Advertisement
Available languages
Available languages
Quick Links
Advertisement
Chapters
Table of Contents

Related Manuals for Remington RM40BST


Summary of Contents for Remington RM40BST
- Page 1 ® 18VOLT CORDLESS TRIMMER/EDGER OWNER’S MANUAL MODELS: RM40BST IMPORTANT: Read and understand this manual before assembling or operating this tool. Improper use of this tool can cause severe injury or death. Keep this manual for future reference. PART NO. 769-05191...
- Page 2 DO NOT RETURN THIS PRODUCT NO DEVUELVA ESTE PRODUCTO NE RAMENEZ PAS CET APPAREIL AU MAGASIN Please call the Customer Support Department or visit our website for assistance: Llame al Departamento de Atención al Cliente o visite nuestro sitio Web para solicitar asistencia: Pour obtenir de l’aide, veuillez appeler le service à...
-
Page 3: Table Of Contents
CONTENTS IMPORTANT SAFETY INFORMATION ..............4 Before Operating Trimmer ....................4 While Operating Trimmer ....................4 Maintenance and Storage of Trimmer................4 PRODUCT IDENTIFICATION ................5 RECHARGEABLE BATTERY ................6 Protective Battery Terminal Cap ..................6 Charging Battery........................7 TRIMMER/EDGER ASSEMBLY ................8 Cutting Guard/Edging Wheel .................... -
Page 4: Important Safety Information
IMPORTANT SAFETY INFORMATION READ ALL INSTRUCTIONS BEFORE OPERATING TRIMMER. SAFETY WARNINGS WHILE OPERATING TRIMMER/ MAINTENANCE AND STORAGE EDGER OF TRIMMER/EDGER WARNING Stay alert. Watch what you are doing. Use Maintain trimmer/edger with care. common sense. • Inspect trimmer/edger periodically, When using electric gardening and if damaged, call the Customer Avoid unintentional starting. -
Page 5: Product Identification
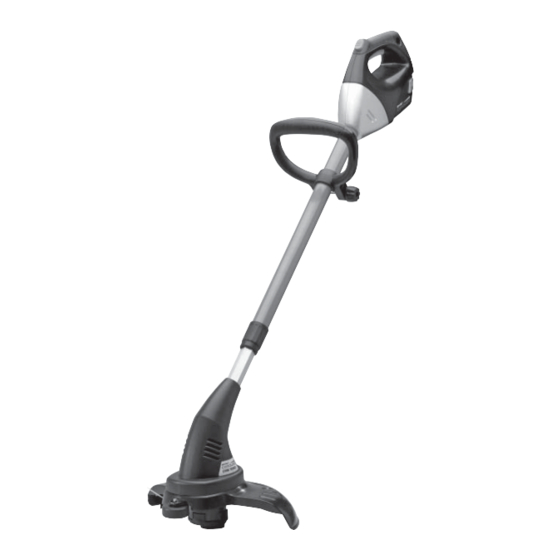
G. Trigger Switch H. Trigger Lockout Button Telescoping Shaft Battery K. Battery Release Buttons Line Advance Button Battery Charger N. Charger Base SPECIFICATIONS RM40BST Input 18VDC No Load Speed 9600 rpm Cutting Width 12 inches (45.7cm) Net Weight 7.35 lbs. (3.33 Kg) Line Diameter 0.065 inch... -
Page 6: Rechargeable Battery
RECHARGEABLE BATTERY PROTECTIVE BATTERY CHARGING BATTERY b. An extension cord must have adequate wire size (AWG or American Wire TERMINAL CAP The battery pack is not fully Gauge) for safety, and to prevent loss of charged at the factory. Before power and overheating. -
Page 7: Important Charging Notes
RECHARGEABLE BATTERY IMPORTANT CHARGING NOTES After normal usage, your battery pack While charging, the charger may hum and The battery pack should be recharged should be fully charged in 3 to 9 hours. If become warm to touch. This is a normal when it fails to produce suffi... -
Page 8: Trimmer/Edger Assembly
TRIMMER ASSEMBLY ASSEMBLING TRIMMER/ ATTACHING ADJUSTABLE EDGER FRONT HANDLE WARNING: Remove the knob and bolt from front handle (see Figure 10). Do not operate trimmer/edger Place the handle on the trimmer/edger without guard or handle in shaft between the rear handle and shaft place. -
Page 9: Trimmer Operation
TRIMMER/EDGER OPERATION OPERATING THE TRIMMER/ COUNTER CLOCKWISE. While grasping the rear handle, with the EDGER other hand, depress the trigger lockout When desired pole height is reached, button. (See fi gure 18) TWIST motor houusing 90º CLOCK- WISE to lock in place. Squeeze trigger, the trimmer will start WARNING: NOTE: Shaft has internal limits to stop... -
Page 10: Advance Trimmer Line
TRIMMER/EDGER OPERATION ADVANCING TRIMMER LINE Cut the line. Keep tension on line so line does not unwind. WARNING: Insert cut end through eyelet in spool housing. (See Figure 27) Blade is sharp. To prevent seri- Replace spring and spool into spool hous- ous injury, do not touch blade. -
Page 11: Edger
TRIMMER/EDGER MAINTENANCE CLEANING AND WARNING: MAINTENANCE Use of non-Remington parts or WARNING: accessories may cause personal BATTERY DISPOSAL AND injury or damage to the unit. RECYCLING Remove battery before cleaning or servicing. Severe injury or This product uses nickel-cadnium batteries. death could occur from fi... -
Page 12: Troubleshooting
TROUBLESHOOTING WARNING: Remove battery before servicing. Severe injury or death could occur from fi re, elec- trical shock or rotating line. Note: For additional help, visit www.remingtonpowertools.com. OBSERVED FAULT POSSIBLE CAUSE REMEDY Trimmer/Edger does not start wen you 1. Battery not installed properly. 1. -
Page 13: Warranty Information
WARRANTY INFORMATION MANUFACTURER’S LIMITED WARRANTY FOR: The limited warranty set forth below is given by Remington LLC (“Remington”) with respect with new merchandise purchased and used in the United States, its possessions and territories. Remington warrants this product against defects in material and workmanship for a period of two (2) years commencing on the date of original purchase and will, at its option, repair or replace, free of charge, any part found to be defective in material or workmanship. - Page 14 NOTES/NOTAS ___________________________ ________________________________________ ________________________________________ ________________________________________ ________________________________________ ________________________________________ ________________________________________ ________________________________________ ________________________________________ ________________________________________ ________________________________________ ________________________________________ ________________________________________ ________________________________________ ________________________________________ ________________________________________ ________________________________________ ________________________________________ ________________________________________ ________________________________________ ________________________________________ ________________________________________ ________________________________________...
- Page 15 PODADORA/RECORTABORDES INALÁMBRICA DE 18 VOLTIOS MANUAL PARA EL USUARIO MODELO: RM40BST IMPORTANTE: Lea y entienda este manual antes de ensamblar u operar esta podadora. El uso incorrecto de esta podadora puede causar una lesión severa o la muerte. Guarde este manual como referencia para el futuro.
- Page 16 CONTENTS IMPORTANTE INFORMACIÓN SOBRE LA SEGURIDAD ........ 17 Antes de Operar la Podadora/Recortabordes..............17 Mientras Opre la Podadora/Recortabordes ..............17 Mamtenimiento Y Almacenamiento de la Podadora/Recortabordes ......17 IDENTIFICAIÓN DEL PRODUCTO ..............18 BATERÍA RECARGABLE .................. 19 Tapa protectora del terminal de la batería ..............19 Carga de batería......................20 ENSAMBLE DE LA PODADORA/RECORTABORDES ........
-
Page 17: Importante Información Sobre La Seguridad
IMPORTANTE INFORMACIÓN SOBRE LA SEGURIDAD LEA TODAS LAS INSTRUCCIONES ANTES DE USAR LA PODADORA/RECORTABORDES MANTENIMIENTO Y ADVERTENCIAS DE Vístase correctamente cuando opere la podadora/recortabordes. ALMACENAMIENTO SEGURIDAD • No use ropa fl oja ni joyería que pueda DE LA PODADORA/ agarrarse en las piezas móviles de la ADVERTENCIA RECORTABORDES podadora/recortabordes. -
Page 18: Identificaión Del Producto
J. Batería K. Botóns de desenganche de la batería L. Botón de avance del hilo M Cargador de la batería N. Base del cargador ESPECIFICACIONES RM40BST Alimentación 18VDC Velocidad sin carga 9600 rpm Anchura de corte 12 inches (45.7cm) Peso neto 7.35 lbs. -
Page 19: Batería Recargable
BATERÍA RECARGABLE TAPA PROTECTORA DEL No se debería usar un cable de extensión 12. Puede haber un pequeño goteo de líquido TERMINAL DE LA BATERÍA a no ser que sea muy necesario. El uso de las celdas del paquete de baterías bajo de un cordón de extensión inadecuado condiciones extremas de uso, recargo o puede representar un peligro de incendio,... -
Page 20: Carga De Batería
BATERÍA RECARGABLE CARGA DE BATERÍA NOTAS IMPORTANTES DE CARGADO El paquete de baterías no vi- Luego de un uso normal, su paquete de ene completamente cargado baterías debe ser completamente cargado de fábrica. Antes de intentar en 3-9 horas. Si el paquete de baterías está cargar el paquete de baterías, completamente agotado, puede necesitar hasta 9 horas para cargarse completamen-... -
Page 21: Ensamble De La Podadora/Recortabordes
ENSAMBLE DE LA PODADORA/RECORTABORDES SUJECIÓN DEL ASA FRONTAL ENSAMBLE DE LA PODADORA/ REGULABLE RECORTABORDES Retire la perilla y el perno del asa frontal (vea la Figura 10). ADVERTENCIA Coloque el asa en el eje de la podado- ra/recortabordes entre el asa posterior y No opere la podadora/recorta- el botón de desenganche del telescópico. -
Page 22: Operación De La Podadora/Recortabordes
OPERACIÓN DE LA PODADORA/RECORTABORDES OPERACIÓN DE LA REGULACIÓN DE LA PODADORA/RECORTABORDES LONGITUD DEL EJE Mientras agarra del mango posterior, con CONVERSIÓN la otra mano presione el botón de bloqueo RECORTABORDES/ ADVERTENCIA del gatillo.. (vea la Figura 18) PODADORA Apriete el gatillo, la podadora arrancará Lea y entienda este manual an- Los arreglos tanto del largo como de la inmediatamente. -
Page 23: Corte
OPERACIÓN DE LA PODADORA/RECORTABORDES CORTE AVANCE DE LA CUERDA DE LA PODADORA Para reducir el desgaste excesivo de la cuerda y mejorar el desempeño de la podadora, siga ADVERTENCIA los siguientes pasos para podar el césped y hierbajos. La hoja está afi lada. Para evitar graves lesiones, no toque la Retire de la zona de podadura cualquier cordel, alambre u otro material que podría... -
Page 24: Cambio De La Cuerda De La Podadora/Recortabordes
OPERACIÓN DE LA PODADORA/RECORTABORDES CAMBIO DE LA CUERDA DE LA PODADORA/ Alinee las orejetas de la tapa del carrete RECORTABORDES con las ranuras de la carcasa del carrete. Vuelva a colocar la tapa del carrete en la ADVERTENCIA carcasa y únalos a presión en su sitio. (Vea la Figura 29) Para evitar lesiones graves, nunca use cuerdas con refuerzo metálico,... -
Page 25: Mantenimiento De La Podadora/Recortabordes
MANTENIMIENTO DE LA PODADORA/RECORTABORDES LIMPIEZA Y MANTENIMIENTO ADVERTENCIA ADVERTENCIA El uso de repuestos o ac- Retire la batería de la motosi- ELIMINACIÓN Y RECICLAJE cesorios que no son de erra antes de dar servicio. Una DE BATERÍAS Remington pueden provocar lesión severa o la muerte pu- lesiones personales o daños eden ocurrir debido al fuego,... -
Page 26: Análisis De Averĺas
ANÁLISIS DE AVERÍAS ADVERTENCIA: Retire la batería antes de limpiarla o darle servicio. Una lesión severa o la muerte pueden ocurrir debido al fuego, sacudida eléctrica o por una cuerda en movimiento. Nota: Para más ayuda visite www.remingtonpowertools.com. FALLA OBSREVADA CAUSA POSIBLE SOLUCIÓN La podadora/recortabordes no arranca... -
Page 27: Información Sobre La Garantía
INFORMACIÓN DE GARANTÍA GARANTÍA LIMITADA DEL FABRICANTE PARA: Remington LLC concede la garantía limitada establecida debajo para mercancías nuevas que sean compradas y usadas en los Estados Unidos, sus posesiones y territorios. Remington LLC garantiza este producto contra defectos en el material y la mano de obra durante un período de dos (2) años, a partir de la fecha de compra original y a su entera discreción, arreglará... - Page 28 NOTES/NOTAS ____________________________ _________________________________________ _________________________________________ _________________________________________ _________________________________________ _________________________________________ _________________________________________ _________________________________________ _________________________________________ _________________________________________ _________________________________________ _________________________________________ _________________________________________ _________________________________________ _________________________________________ _________________________________________ _________________________________________ _________________________________________ _________________________________________ _________________________________________ _________________________________________ _________________________________________ _________________________________________...
- Page 29 ® TAILLE-HAIE/COUPE-BORDURES SANS FIL DE 18 V GUIDE DU PROPRIÉTAIRE MODÈLE: RM40BST IMPORTANTE: Vous devez bien lire et comprendre ce guide avant de débuter l’assem- blage ou l’utilisation de cet outil. Toute utilisation non appropriée de l’outil pourrait entraîner de graves blessures, voire le décès. Conservez ce guide à titre de référence.
- Page 30 TABLE DES MATIÈRES IMPORTANTS RENSEIGNEMENTS DE SÉCURITÉ ......... 31 Avant l’utilisation du taille-haie ..................31 Pendant l’utilisation du taille-haie..................31 Entretien et entreposage du taille-haier ................31 IDENTIFICATION DU PRODUIT ................. 32 RECHARGEABLE BATTERY ................33 Capuchon de protection des bornes de la pile............... 33 Recharge de la pile ......................34 ASSEMBLAGE DU TAILLE-BORDURES / COUPE-BORDURES ....
-
Page 31: Importants Renseignements De Sécurité
IMPORTANTS RENSEIGNEMENTS SUR LA SÉCURITÉ LISEZ TOUTES LES DIRECTIVES AVANT D’UTILISER LE TAILLE-BORDURES / COUPE-BORDURES. ENTRETIEN ET ENTREPOSAGE MISES EN GARDE DE DU TAILLE-BORDURES / SÉCURITÉ • On recommande de porter des gants de COUPE-BORDURES caoutchouc et de solides chaussures Entretenez avec soin le taille-bordures / lorsque vous travaillez à... -
Page 32: Identification Du Produit
Arbre téléscopique J. Pile K. Bouton de déclenchement de la pile L. Bouton d’avance du fi l M. Chargeur de pile N. Socle du chargeur FICHE TECHNIQUE RM40BST Alimentation 18VDC Vitesse hors charge 9600 rpm Largeur de coup 12 inches (45.7cm) Poids net 7.35 lbs. -
Page 33: Rechargeable Battery
PILE RECHARGEABLE CAPUCHON DE PROTECTION DES BORNES DE LA PILE par les Underwriters Laboratories • Si le liquide de la pile éclabousse les (U.L.). Si la rallonge doit être utilisée yeux, rincez-les à grande eau pendant MISE EN GARDE à l’extérieur, elle doit être conçue à cet au moins 10 minutes, puis consultez effet. -
Page 34: Recharge De La Pile
PILE RECHARGEABLE RECHARGE DE LA PILE REMARQUES IMPORTANTE SUR LA RECHARGE La pile doit être rechargée lorsqu’elle ne La pile n’est pas complète- donne pas suffi samment de puissance lors ment chargée à l’usine. Avant des travaux, qui pouvaient être facilement Après une utilisation normale, votre pile de tenter de recharger la pile, effectués auparavant. -
Page 35: Assemblage Du Taille-Bordures / Coupe-Bordures
ASSEMBLAGE DU TAILLE-BORDURES ASSEMBLAGE DU TAILLE- BORDURES / COUPE- MISE EN PLACE DE LA BORDURES POIGNÉE AVANT RÉGLABLE MISE EN GARDE Retirez le bouton et l’écrou de la poignée avant (voir la Figure 10). N’utilisez pas le taille- bordures / coupe-bordures s’il n’est pas Insérez la poignée sur l’arbre du taille-bor- dures / coupe-bordures, entre la poignée doté... -
Page 36: Utilisation Du Taille-Bordures / Coupe-Bordures
UTILISATION DU TAILLE-BORDURES / COUPE-BORDURES UTILISATION DU TAILLE- RÉGLAGE DE LA LONGUEUR BORDURES / COUPE- DE L’ARBRE- CONVERSION En agrippant la poignée arrière d’une BORDURES EN COUPE-BORDURES main, enfoncez le bouton de verrouillage Pour régler la longuer de la tige et la de la gâchette au moyen de l’autre main. -
Page 37: Taille Des Bordures
UTILISATION DU TAILLE-BORDURES / COUPE-BORDURES RALLONGE DU FIL DE COUPE Taille des bordures Pour réduire l’usage excessif du fi l et améliorer le MISE EN GARDE rendement de la coupe, suivez les étapes ci-après pour couper l’herbe et les mauvaises herbes. La lame est tranchante. -
Page 38: Remplacement Du Fi L
UTILISATION DU TAILLE-BORDURES / COUPE-BORDURES REMPLACEMENT DU FIL MISE EN GARDE Pour éviter de graves blessures, n’utilisez jamais de fi l, de corde ni de câble renforcé de métal. Ces derniers peuvent se rom- pre et constituer de dangereux Figure 29- Mise en place du couvercle de Figure 22 - Déverrouillage du couvercle de projectiles. -
Page 39: Entretien Du Taille-Bordures / Coupe-Bordures
ENTRETIEN DU TAILLE-BORDURES / COUPE-BORDURES ENTRETIEN ET NETTOYAGE MISE EN GARDE MISE EN GARDE L’utilisation de pièces non fournies par Remington pourrait Retirez la pile avant de nettoyer être à l’origine de blessures ou ou de faire l’entretien de l’appa- de dommage à... -
Page 40: Dépannage
DÉPANNAGE MISE EN GARDE : Retirez la pile de la tronçonneuse avant d’en faire l’entretien. De graves blessures, voire le décès, peuvent survenir en cas d’incendie, de choc électrique ou lors d’un contact avec le fi l de coupe en mouvement. Remarque : Pour obtenir de l’assistance, visitez www.remingtonpowertools.com. -
Page 41: Renseignements Sur La Garantie
INFORMATION SUR LA GARANTIE GARANTIE LIMITÉE DU FABRICANT POUR: La garantie limitée énoncée ci-après est accordée par Remington LLC et concerne les marchandises neuves achetées et utilisées aux États-Unis, ses possessions et territoires. Remington LLC garantit ce produit contre tout vice de matière ou de façon pendant une période de deux (2) ans à... - Page 43 NOTES/NOTAS ____________________________ _________________________________________ _________________________________________ _________________________________________ _________________________________________ _________________________________________ _________________________________________ _________________________________________ _________________________________________ _________________________________________ _________________________________________ _________________________________________ _________________________________________ _________________________________________ _________________________________________ _________________________________________ _________________________________________ _________________________________________ _________________________________________ _________________________________________ _________________________________________ _________________________________________ _________________________________________...
Need help?
Do you have a question about the RM40BST and is the answer not in the manual?
Questions and answers