Table of Contents
Advertisement
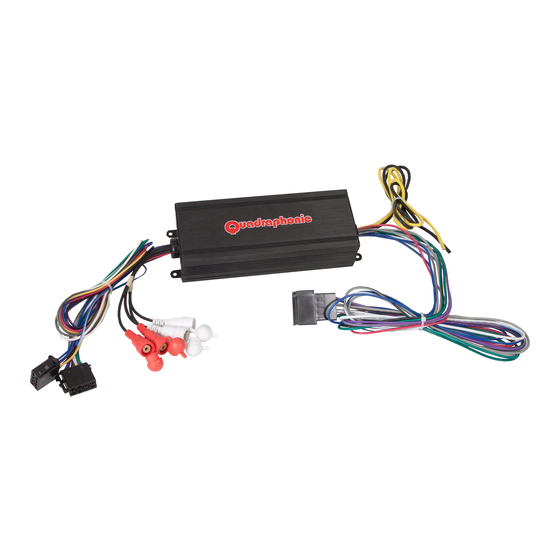
Quad 4
4-Channel Amplifier
Owner's Manual
The information enclosed in this manual is to be used as a guide
to assist in the proper use of this product. This manual does not
cover every possibility or use scenario.
Retro Manufacturing, LLC, or its subsidiaries, assume no
responsibility for any issues regarding the product's use or
misuse. Please read this manual thoroughly before use.
RETROSOUND.COM
Advertisement
Table of Contents

Related Manuals for RetroSound Quad 4


Summary of Contents for RetroSound Quad 4
- Page 1 Quad 4 4-Channel Amplifier Owner’s Manual The information enclosed in this manual is to be used as a guide to assist in the proper use of this product. This manual does not cover every possibility or use scenario. Retro Manufacturing, LLC, or its subsidiaries, assume no responsibility for any issues regarding the product’s use or...
-
Page 2: Table Of Contents
QUAD 4 Amplifier Owner’s Manual Table of Contents What’s in the Box Welcome Warnings and Precautions Power and Ground Connections Mounting the Amplifier Fuse Requirements Control Panel Layout Wiring Diagram for Direct Connection Wiring Diagram using RCA Connections Wiring Diagram for NON RetroSound Radios... -
Page 3: What's In The Box
QUAD 4 Amplifier Owner’s Manual What’s in The Box Quad 4 Amplifier 4 x amp mounting screws... -
Page 4: Welcome
QUAD 4 Amplifier Owner’s Manual Welcome Thank you for your decision to purchase a RetroSound Quad 4 amplifier. This new full-range digital “Class D” amplifier is the result of extensive engineering, testing, and solid construction. Its versatility enables compatibility with all RetroSound radios and speakers. -
Page 5: Warnings And Precautions
We strongly recommend installation by an authorized RetroSound® dealer. This owners manual only provides general installation and operation instructions. If you have any reservations about your installation skills, please contact your local audio dealer for assistance or contact our support department: support@retrosound.com... - Page 6 Warnings and Precautions (continued) INSTALLATION PRECAUTIONS NOTE: We recommend that you proceed only if you are a qualified installer, otherwise; see your Authorized RetroSound® dealer to professionally install this amplifier. Always wear protective eyewear when using tools. • Turn off all stereo and other electrical devices before you begin.
-
Page 7: Power And Ground Connections
QUAD 4 Amplifier Owner’s Manual Power and Ground connections POWER WIRING These amplifiers are designed to work within a 12 to 16 volt DC range. Before any wires are connected, the vehicles electrical system should be checked for correct voltage supply with the help of a voltmeter. - Page 8 QUAD 4 Amplifier Owner’s Manual Power and Ground connections (continued) GND (Ground) When grounding your amplifier, locate a metal area close to the amplifier that is good source of ground (preferable the floor pan). Use a short length of cable the same gauge as your power cable. Once again, investigate the area you wish to use for electrical wires, vacuum lines, and brake or fuel lines.
-
Page 9: Mounting The Amplifier
(volume) to maintain operation. For this reason the amplifier should be mounted in a location which will allow air to circulate freely. The compact size of the RetroSound® Quadraphonic amplifier allows greater flexibility in mounting. -
Page 10: Fuse Requirements
QUAD 4 Amplifier Owner’s Manual Fuse Requirements While your RetroSound® amplifier incorporates a fuse with its constant power connection lead, these do nothing to protect the vehicle from a dangerous short circuit. It is absolutely vital that the main power lead to the amplifier(s) in the system be fused within 18-inches (45cm) of... -
Page 11: Control Panel Layout
QUAD 4 Amplifier Owner’s Manual Control Panel Layout FRONT REAR FULL FULL X-OVER LEVEL LEVEL QUAD 4 INPUT SIDE (Fig. 1) POWER OUTPUT SIDE (Fig 2) 1. Front & Rear HI/FULL crossover These switches activate the built-in electronic crossover network. When set to FULL, this allows full spectrum (Bass/Mid/Treble) reproduction. -
Page 12: Wiring Diagram For Direct Connection
QUAD 4 Amplifier Owner’s Manual Wiring Diagram for Direct Connection This diagram shows you how the Quad 4 amplifier is connected directly to your RetroSound radio, using the standard plugs included. Please note that you will need to connect the constant +12V (Yellow) lead to the battery, and the ground lead (black) to the chassis or frame of the car. -
Page 13: Wiring Diagram Using Rca Connections
QUAD 4 Amplifier Owner’s Manual Wiring Diagram using RCA connections This diagram shows you how the Quad 4 amplifier is connected directly to your RetroSound radio, using the standard plugs included, while using the RCA (low level pre-amp outputs). Please note that you will need to connect the constant +12V (Yellow) lead to the battery, and the ground lead (black) to the chassis or frame of the car. -
Page 14: Wiring Diagram For Non Retrosound Radios
QUAD 4 Amplifier Owner’s Manual Wiring Diagram for NON Retrosound radios This diagram shows you how the Quad 4 amplifier is connected directly to your NON RetroSound radio, using the standard plugs included. We recommend using the RCA (low level pre-amp outputs). -
Page 15: Level And Hpf/Full Control Adjustments
QUAD 4 Amplifier Owner’s Manual Level and HPF/ FULL Control Adjustments FRONT REAR FULL FULL X-OVER LEVEL LEVEL QUAD 4 INPUT SIDE PANEL INPUT LEVEL (Gain) Adjustment: This control allows you to match the input level of the amplifier to the output level of your head unit. -
Page 16: Troubleshooting
QUAD 4 Amplifier Owner’s Manual Troubleshooting Problem Solution Power LED not ON With a Volt Ohm Meter (VOM) check: • +12 Volt power terminal (should read +12 to +16VDC). • Remote turn-on terminal (should read +12 to +16VDC). • Ground Terminal. - Page 17 QUAD 4 Amplifier Owner’s Manual Specifications for Quad 4 amplifier Quad 4 Specs 4 Ohms Power (Watts) 45 x 4 Peak Music Power (Watts) 55 x 4 THD @ RMS Power <0.2% Frequency Response 10Hz-40kHz S/N Ratio (EIA Rated) >90dB Input Sensitivity 250mV-6.0 volts...
-
Page 18: Warranty
If your product does not work properly because of defects in materials and workmanship RetroSound, a division of Retro Manufacturing, LLC (collectively referred to as "the warrantor") will, for the length of the period indicated in the chart below, which starts with the date of original purchase ("warranty period"), at its option either (a) repair your... - Page 19 Quad 4 4-Channel Amplifier Owner’s Manual Retro Manufacturing, LLC 7390 Eastgate Road, Suite 140 Henderson, Nevada 89011 Phone: 702-483-2222 Fax: 702-483-2229 retrosound.com...
Need help?
Do you have a question about the Quad 4 and is the answer not in the manual?
Questions and answers