Table of Contents
Advertisement
Quick Links
Advertisement
Table of Contents

Related Manuals for RetroSound Quadraphonic


Summary of Contents for RetroSound Quadraphonic
- Page 1 Quadraphonic 4-Channel Amplifier USER’S MANUAL MODERN SOUND FOR YOUR CLASSIC...
-
Page 2: Table Of Contents
What’s in the Box ........3 Precautions ........4 Mounting the Amplifier ......6 Power and Ground Connections ....... 7 Wiring - RetroSound® Radios | Direct ....8 Wiring - RetroSound® Radios | RCA ....9 Wiring - Other Radios ......10 Controls ........... 11 Troubleshooting ........ -
Page 3: Welcome
Welcome Thank you for purchasing a RetroSound Quadraphonic ® 4-channel amplifier. General Features • 4-channel amplifier • Full-range Class D digital circuitry • 45-watt RMS x 4 channels full-range @ 4 ohms • Built-in high pass filter • Advanced circuitry and thermal protection •... -
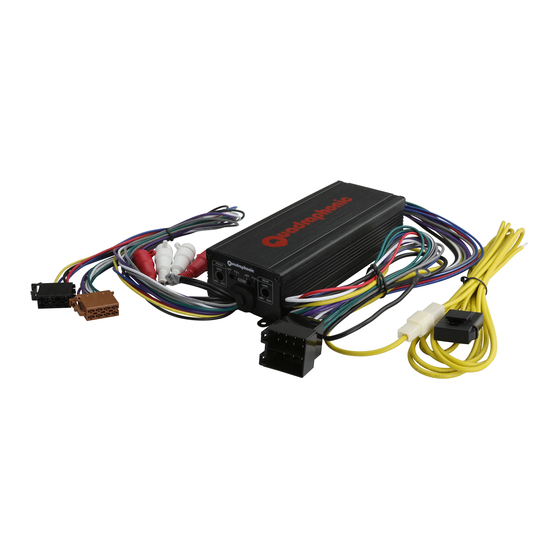
Page 4: What's In The Box
What’s in the box The items shown below are packaged with your Quadra- phonic amplifier. Quadraphonic Amplifier Metal Screw (x4) help.retromanufacturing.com... -
Page 5: Precautions
Precautions PLEASE OBSERVE THESE PRECAUTIONS WHEN INSTALLING AND USING THIS UNIT: This user’s manual does not cover all possible installation scenarios. Please be sure to follow the instructions carefully while attempting instal- lation. If you feel you cannot install this unit yourself, consult with a local car audio professional. - Page 6 Precautions • This unit is not designed for a marine environment. Please do not use the unit where it will be exposed to moisture or excessive dust. Expo- sure to moisture will damage the unit and void your warranty. • Use caution when routing wires to prevent them from being caught in the vehicle’s chassis.
-
Page 7: Mounting The Amplifier
1” clearance from all sides interference. for proper airflow The compact size of the RetroSound® Quadraphonic amplifier enables considerable installation flexibility. For example, the amplifier may be placed behind the dash or under the seats. It is best to mount the amplifier in a location that allows air to freely circulate around it and allows access to the end panel controls for adjustments. -
Page 8: Power And Ground Connections
Power and Ground Connections Electrical System Test The Quadraphonic amplifier is designed to work within a range of 12 volts to 14.4 volts DC. Before connecting any wiring, use a multi-meter to test the vehicle’s electrical system for adequate power supply. First, check the voltage at the battery with the ignition in the off position. -
Page 9: Wiring - Retrosound® Radios | Direct
Wiring: RetroSound Radio® | Direct Connection Connect the Quadraphonic amplifier directly to your RetroSound® radio by connecting the power connector (black) and speaker connector (brown) from the amplifier to the Main Harness. Next, connect the black GROUND lead to a suitable grounding point and the yellow CONSTANT lead to the vehicle’s battery (see page 6). -
Page 10: Wiring - Retrosound® Radios | Rca
CONSTANT lead to the vehicle’s battery (see page 6). Connect the front & rear speakers to the output side of the amplifier using the Speaker Harness supplied with your RetroSound Radio. Refer to the Installation and Assembly Manual for instructions on how to connect the Power Harness. -
Page 11: Wiring: Other Radios
Wiring: Other Radios Connect the RCA cables from the radio to the Quadraphonic amplifier, or cut and remove the speaker connector (brown) from the input side of the amplifier and connect the leads directly. Cut and remove the power connector (black) from the input side of the Quadraphonic and connect the leads to the output source. -
Page 12: Controls
Controls A. Front and Rear HPF/FULL Electronic Filter These switches activate the built-in electronic filter. When set to HPF (High Pass Filter), the filter limits bass frequencies, sending only those frequencies above 100Hz to the speakers. This is useful in a system in which a separate subwoofer is used to reproduce bass frequencies. -
Page 13: Troubleshooting
Troubleshooting Problem Solution • Check to ensure that the yellow constant wire has 12 to 14.4 volts. Power LED does not turn on • Check to ensure that the blue/white amplifier turn-on lead has 12 volts. • Advanced protection circuitry is engaged due to high internal temperature of the amplifier. -
Page 14: Specifications
Specifications Amplifier Amplifier Output Power ........45 Watts x 4 channels RMS @ 4 ohms Peak Output ..............55 watts x 4 channels Signal to Noise Ratio ................>90dB Input Sensitivity ..............200 mV-6.0 volts Frequency Response ..............28Hz-28KHz Total Harmonic Distortion ........<0.2% @ 45 watts x 4 RMS Filters Filters High Pass Filter/Slope ............... -
Page 15: Warranty
ITEM ITEM WARRANTY WARRANTY QUADRAPHONIC One (1) Year During the "Parts" warranty period, there will be no charge for parts. You must mail in your unit during the warranty period at your expense. This warranty only applies to products purchased directly from Retro Manufacturing or an authorized dealer. This warranty is extended only to the original purchaser of a new product that was not sold "as is."... - Page 16 7470 Commercial Way | Henderson, NV 89011 help.retromanufacturing.com MODERN SOUND FOR YOUR CLASSIC Published: 02/17/2023 | ©2023 Retro Manufacturing, LLC www.retromanufacturing.co m...
Need help?
Do you have a question about the Quadraphonic and is the answer not in the manual?
Questions and answers